Lab 2 - Create an NGINX Web Server in SCloudStack
Introduction
In this lab, we will step by step deploy an NGINX web server on SCloudStack and using it to expose a simple website to public users. The system diagram look like below image:
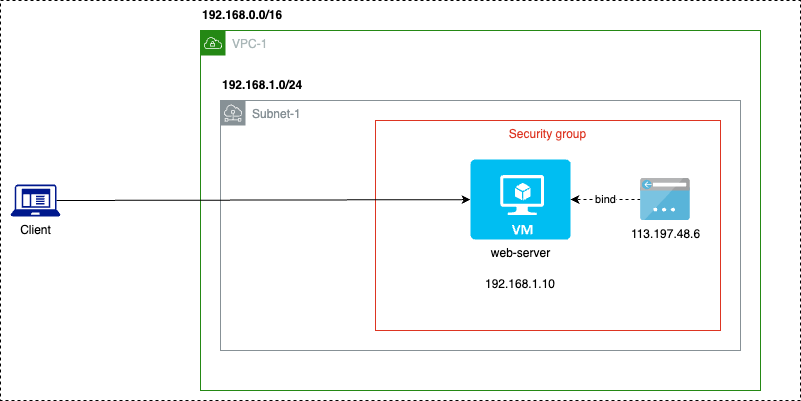
Following services will be used in this labs:
- Network: VPC, Subnet, External IP, Security Group
- Compute: VM
- Storage: Cloud Disk
Prerequisite
- An account with Tenant Administrator role.
- Your tenant need to be in Active status.
Please contact your System Administrator to get your credential.
Guidelines
Before start, you need to access the SCloudStack console dashboard, if you don’t know how to do that, visit Lab 1: Getting Started with SCloudStack Console.
1. Create your first VPC
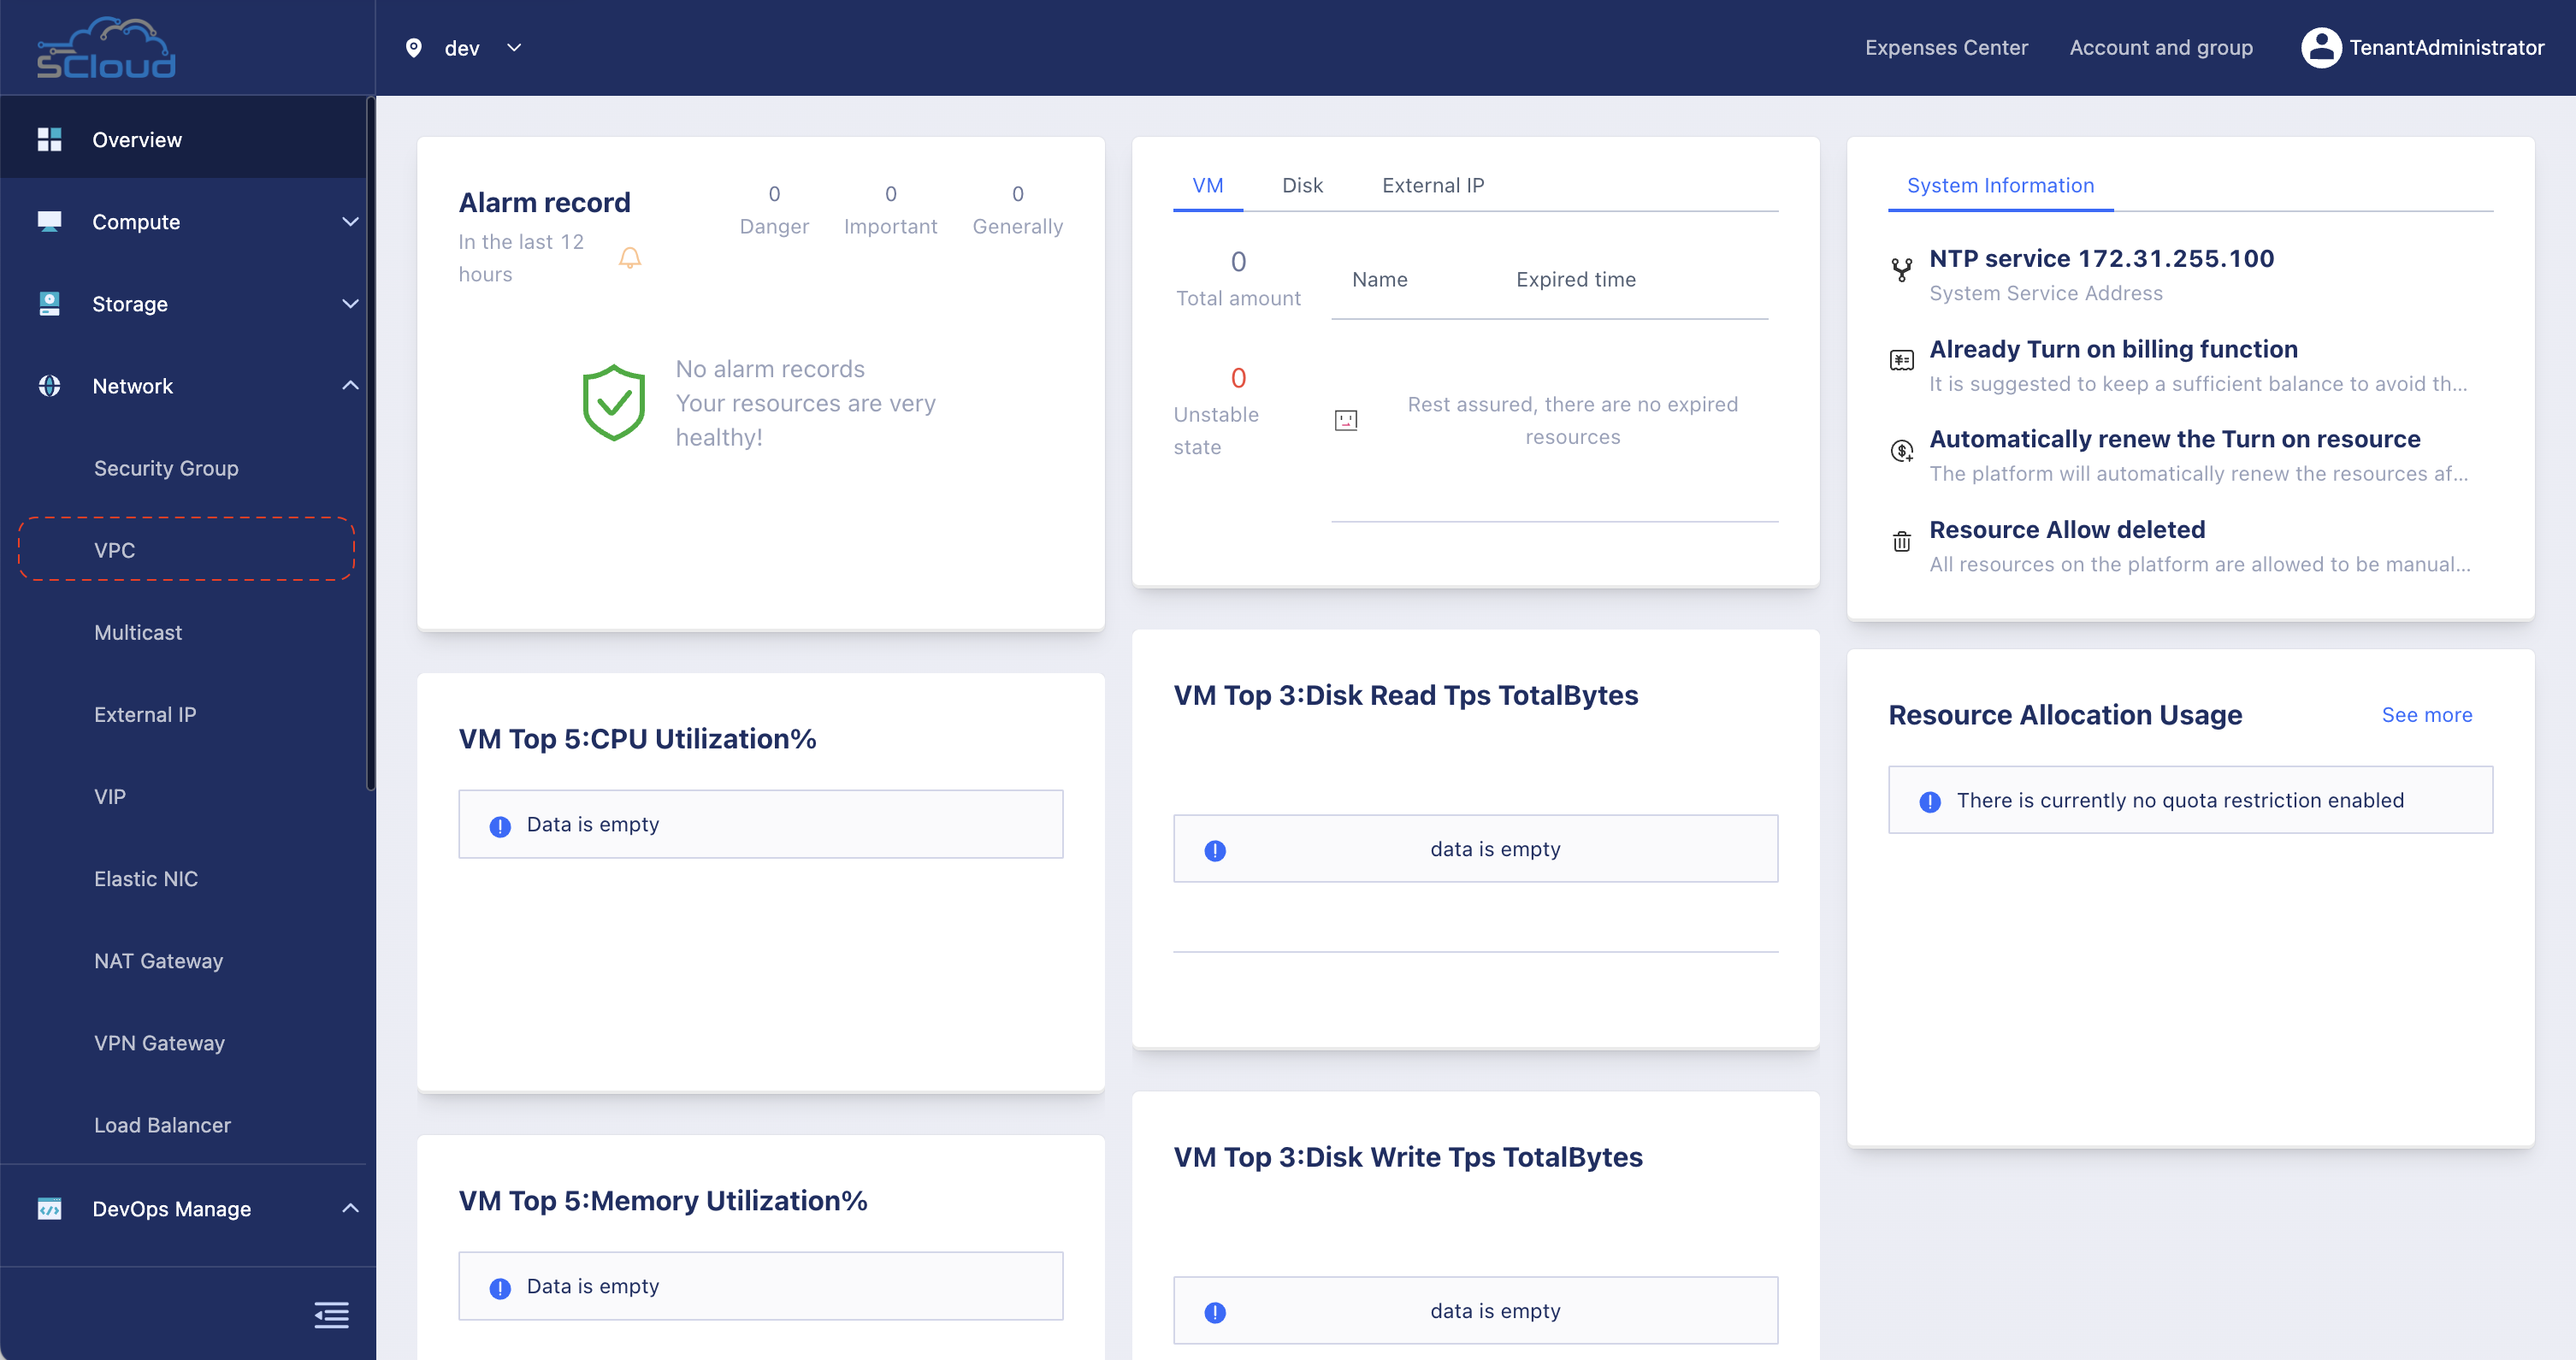
Step 1: From the Tenant Admin dashboard, open the left-side bar and click in VPC menu under Network group.
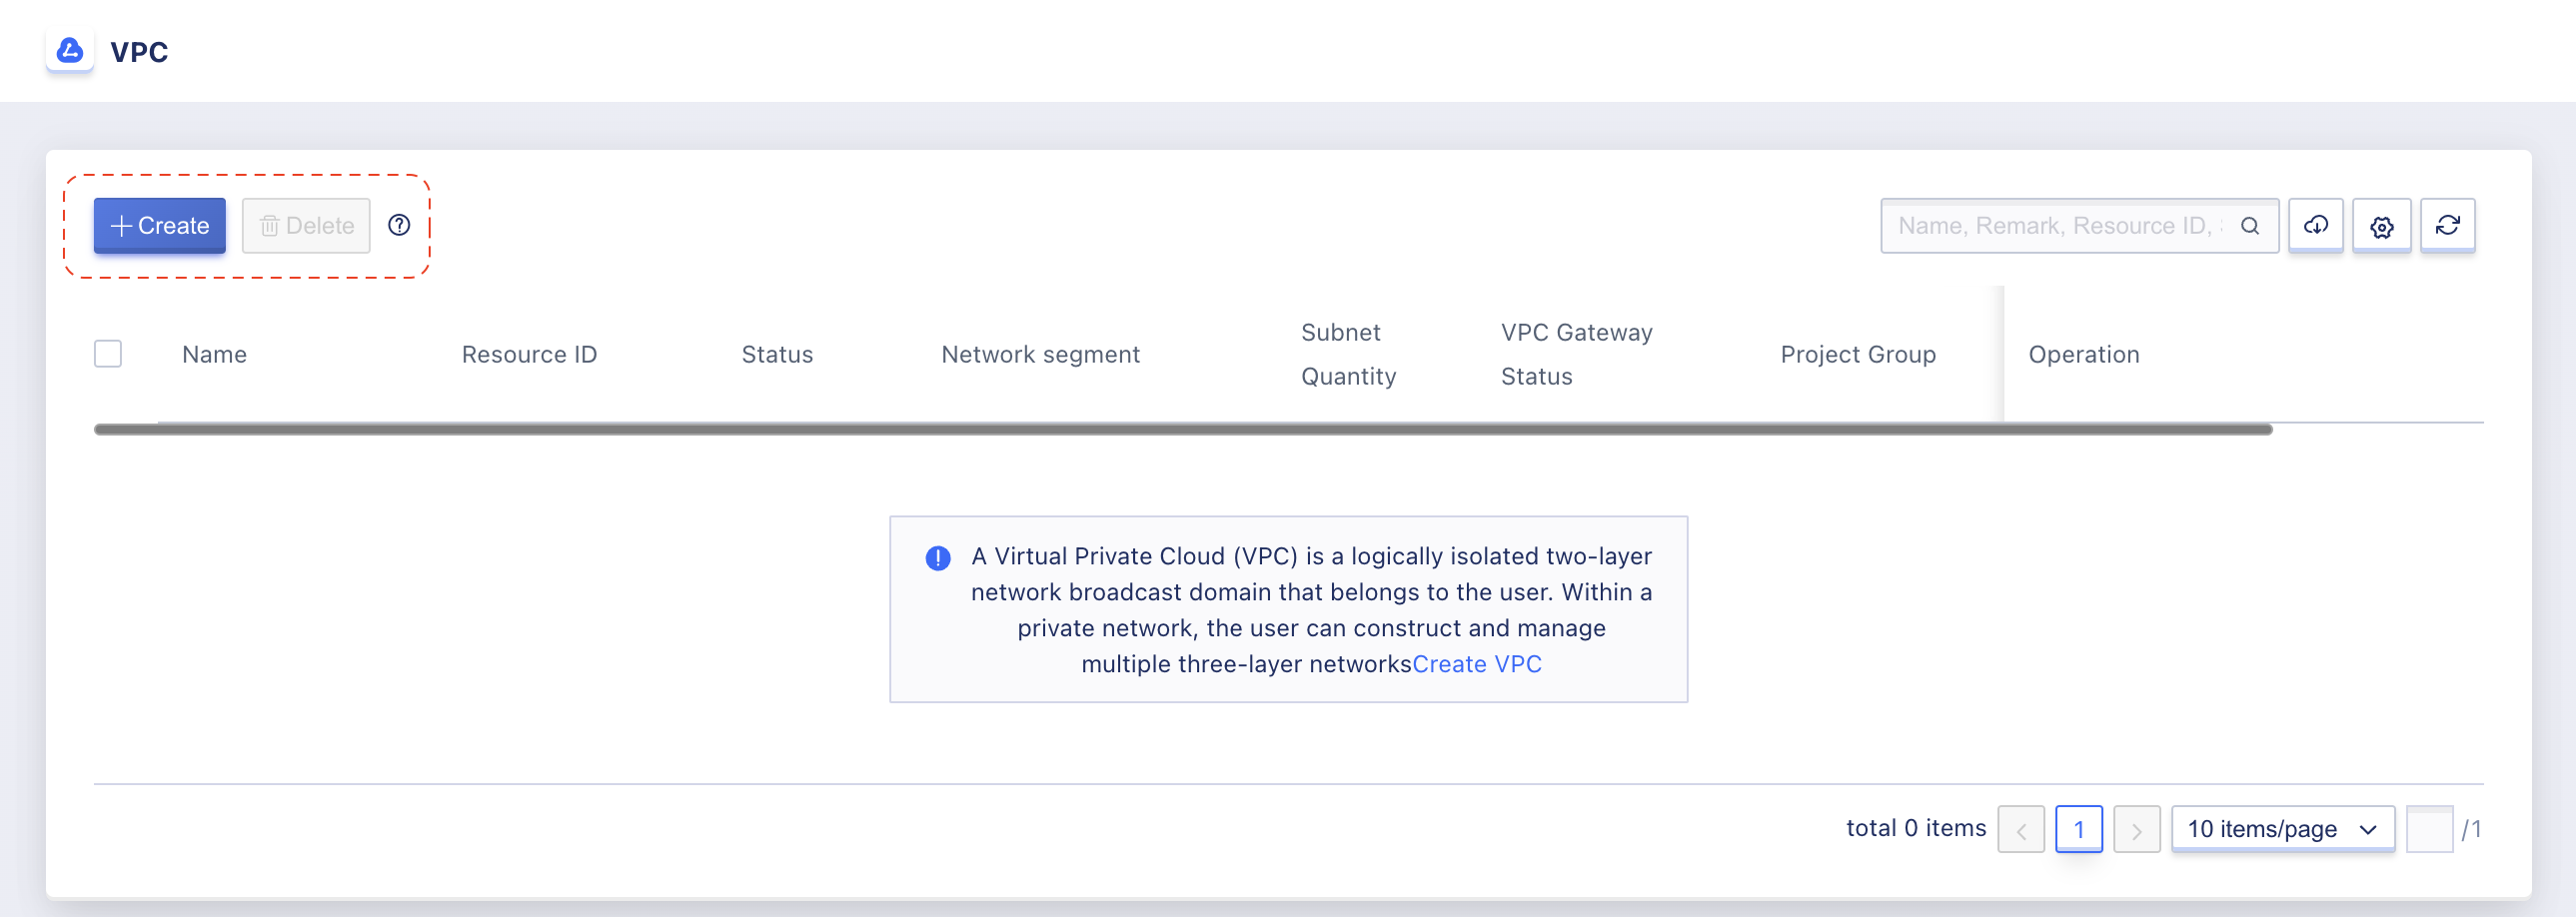
Step 2: Click Create to open the creation form.
Step 3: Enter VPC information as below image:
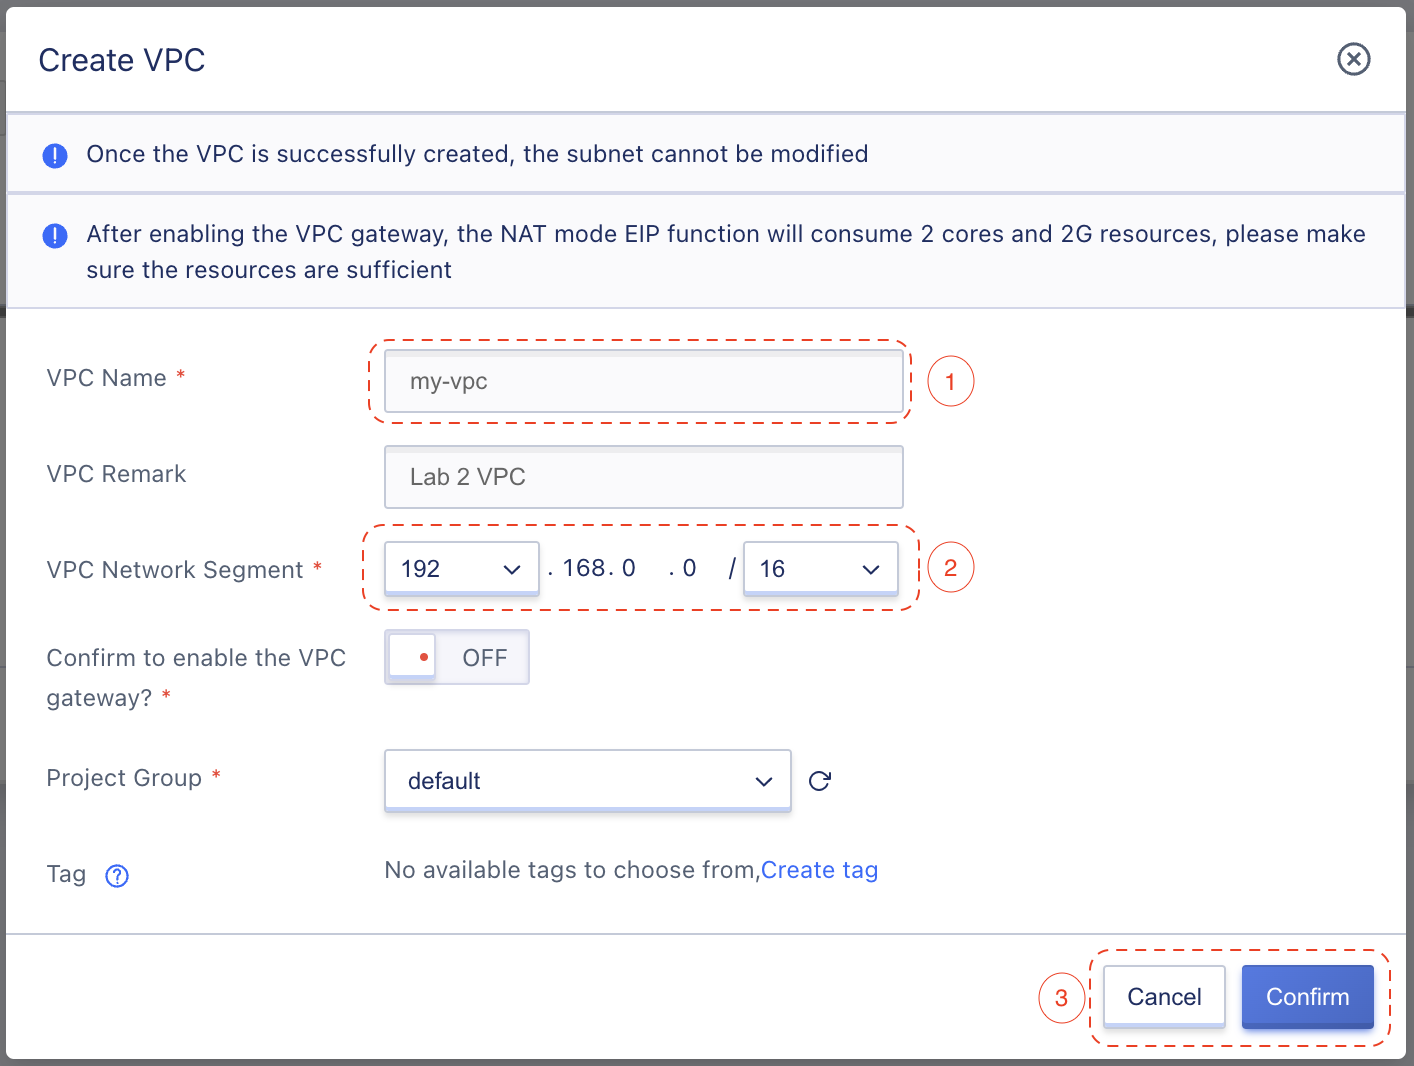
- VPC Name: my-vpc
- VPC Remark: Lab 2 VPC
- VPC Network Segment:
192.168.0.0/16
Leave other fields as default value and click Confirm to create VPC.
Step 4: Ensure that VPC created in the VPC list.
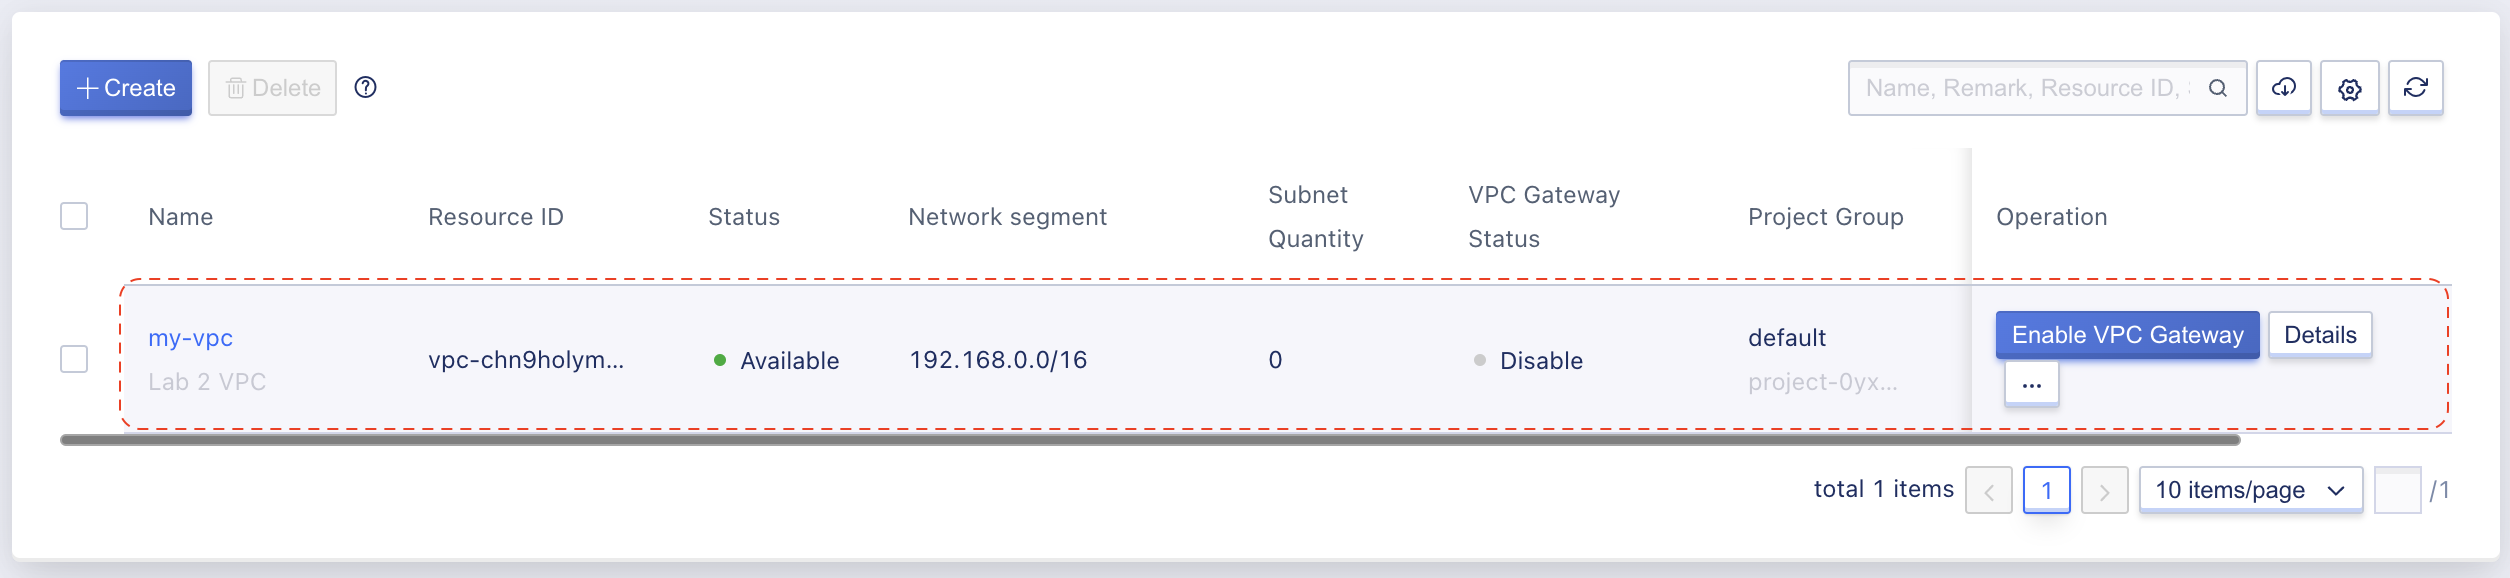
2. Create your first Subnet
Step 1: From VPC list screen in above screen (step 4), click in VPC name to navigate to VPC detail page.
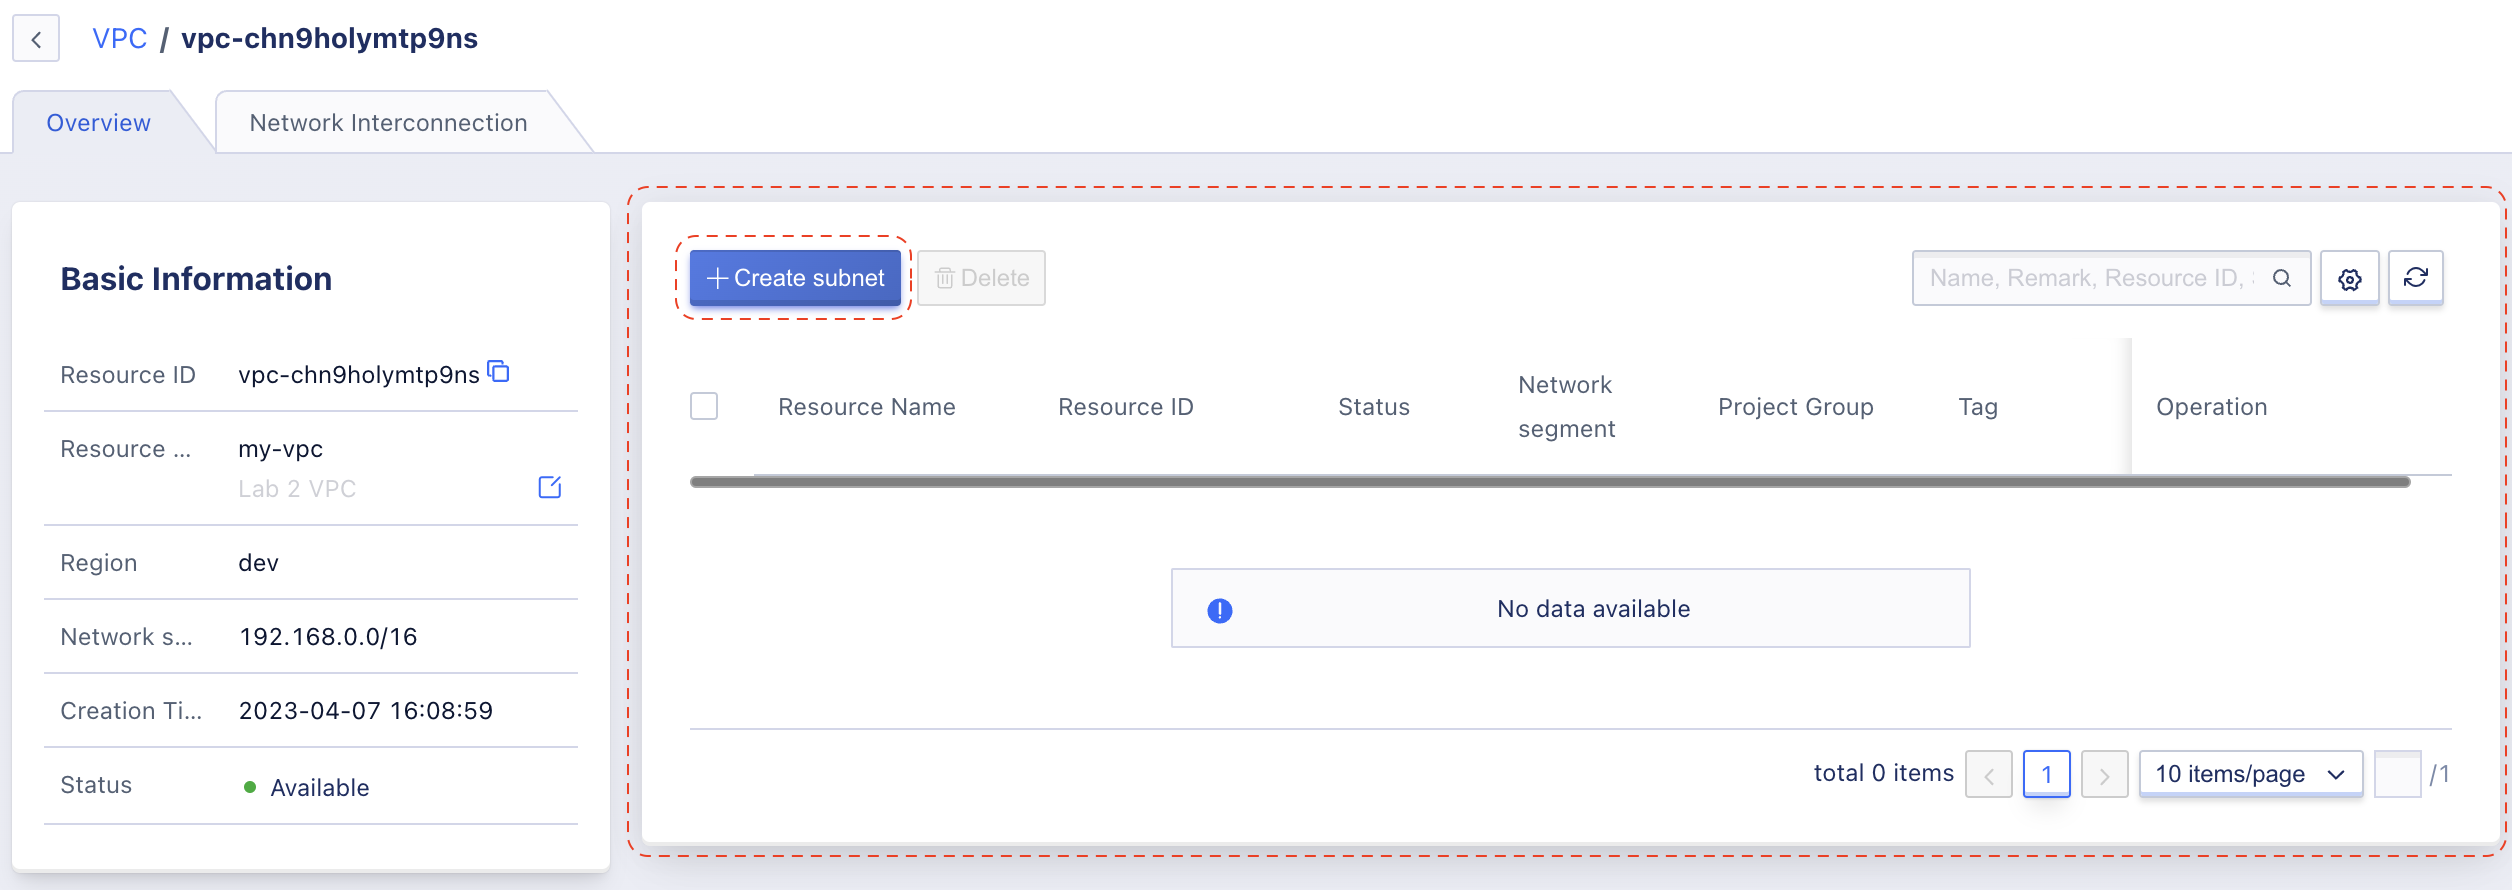
In the VPC detail page, the panel on the right-hand side is the Subnet management area. Click in the Create button to open Subnet creation form of current VPC.
Step 2: Enter Subnet information as below image:
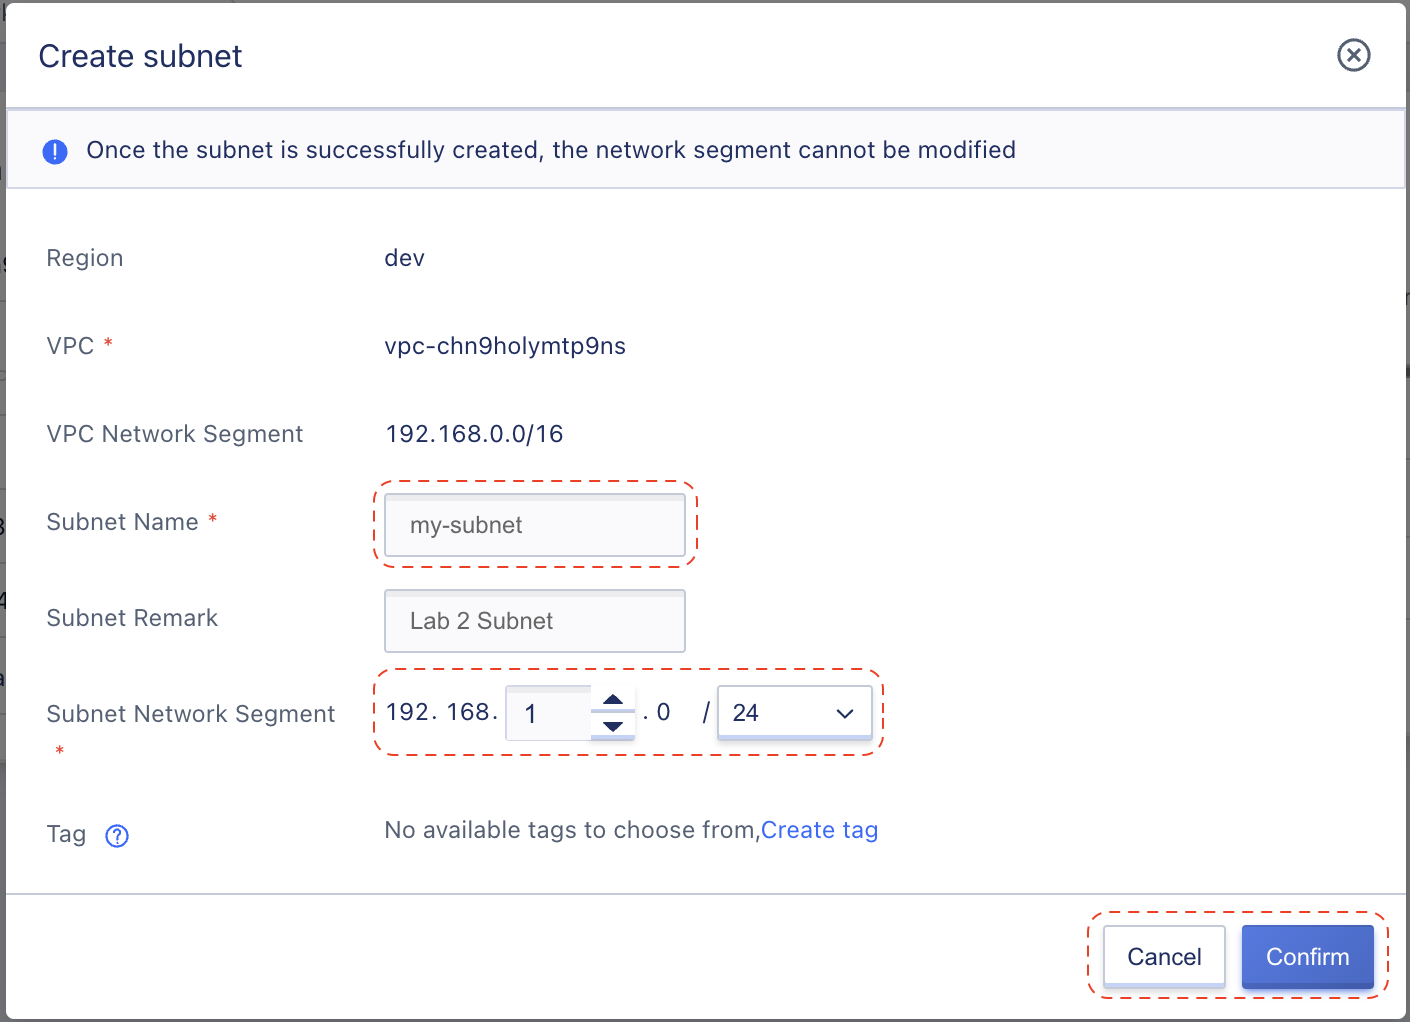
- Subnet Name: my-subnet
- Subnet Remark: Lab 2 Subnet
- Subnet Network Segment:
192.168.1.0/24
Leave other fields as default value and click Confirm to create Subnet.
Step 3: Ensure that Subnet available in the Subnet list.
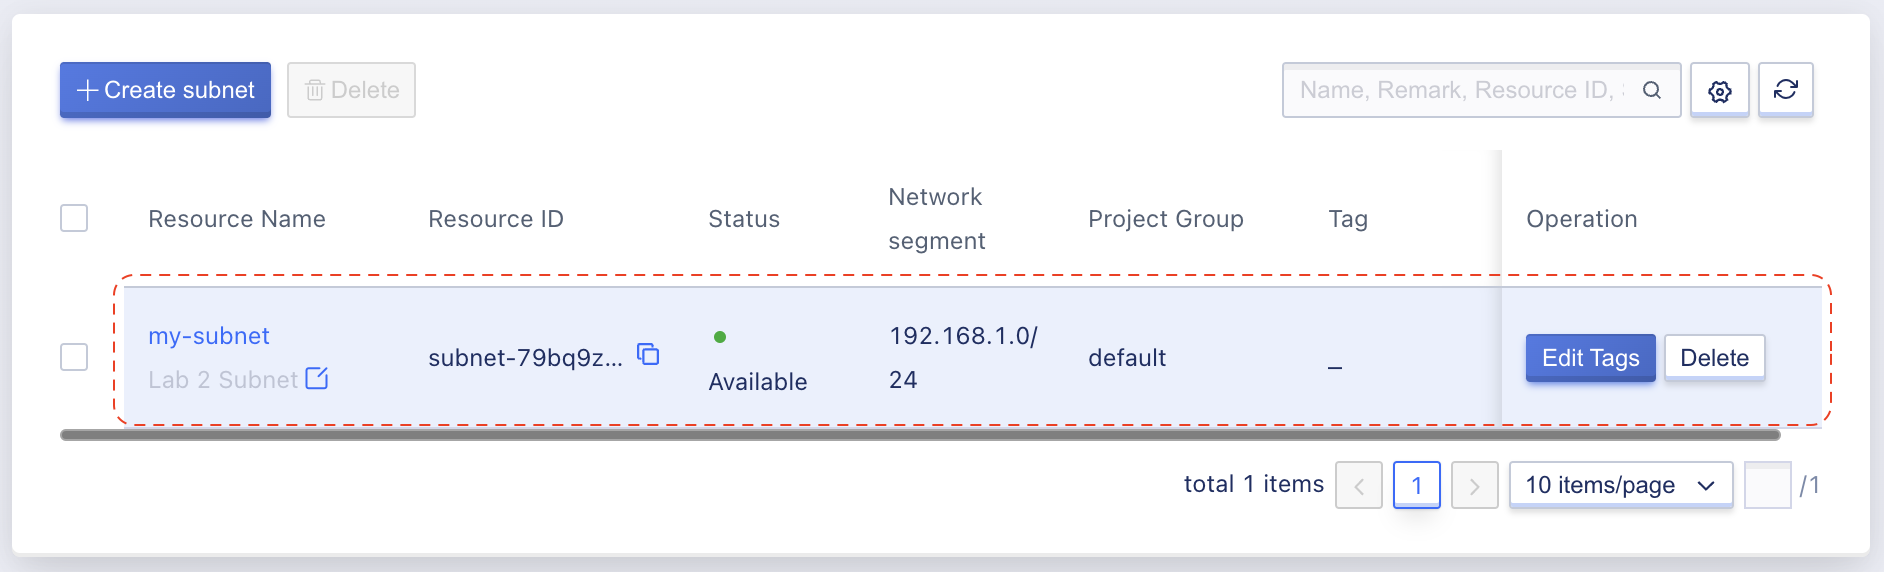
3. Create your first VM
So far, we already set up the fundamental network of this lab with a VPC (192.168.0.0/16) and a Subnet (192.168.1.0/24). Next, lets create our first compute resource (VM) to use as a web-server.
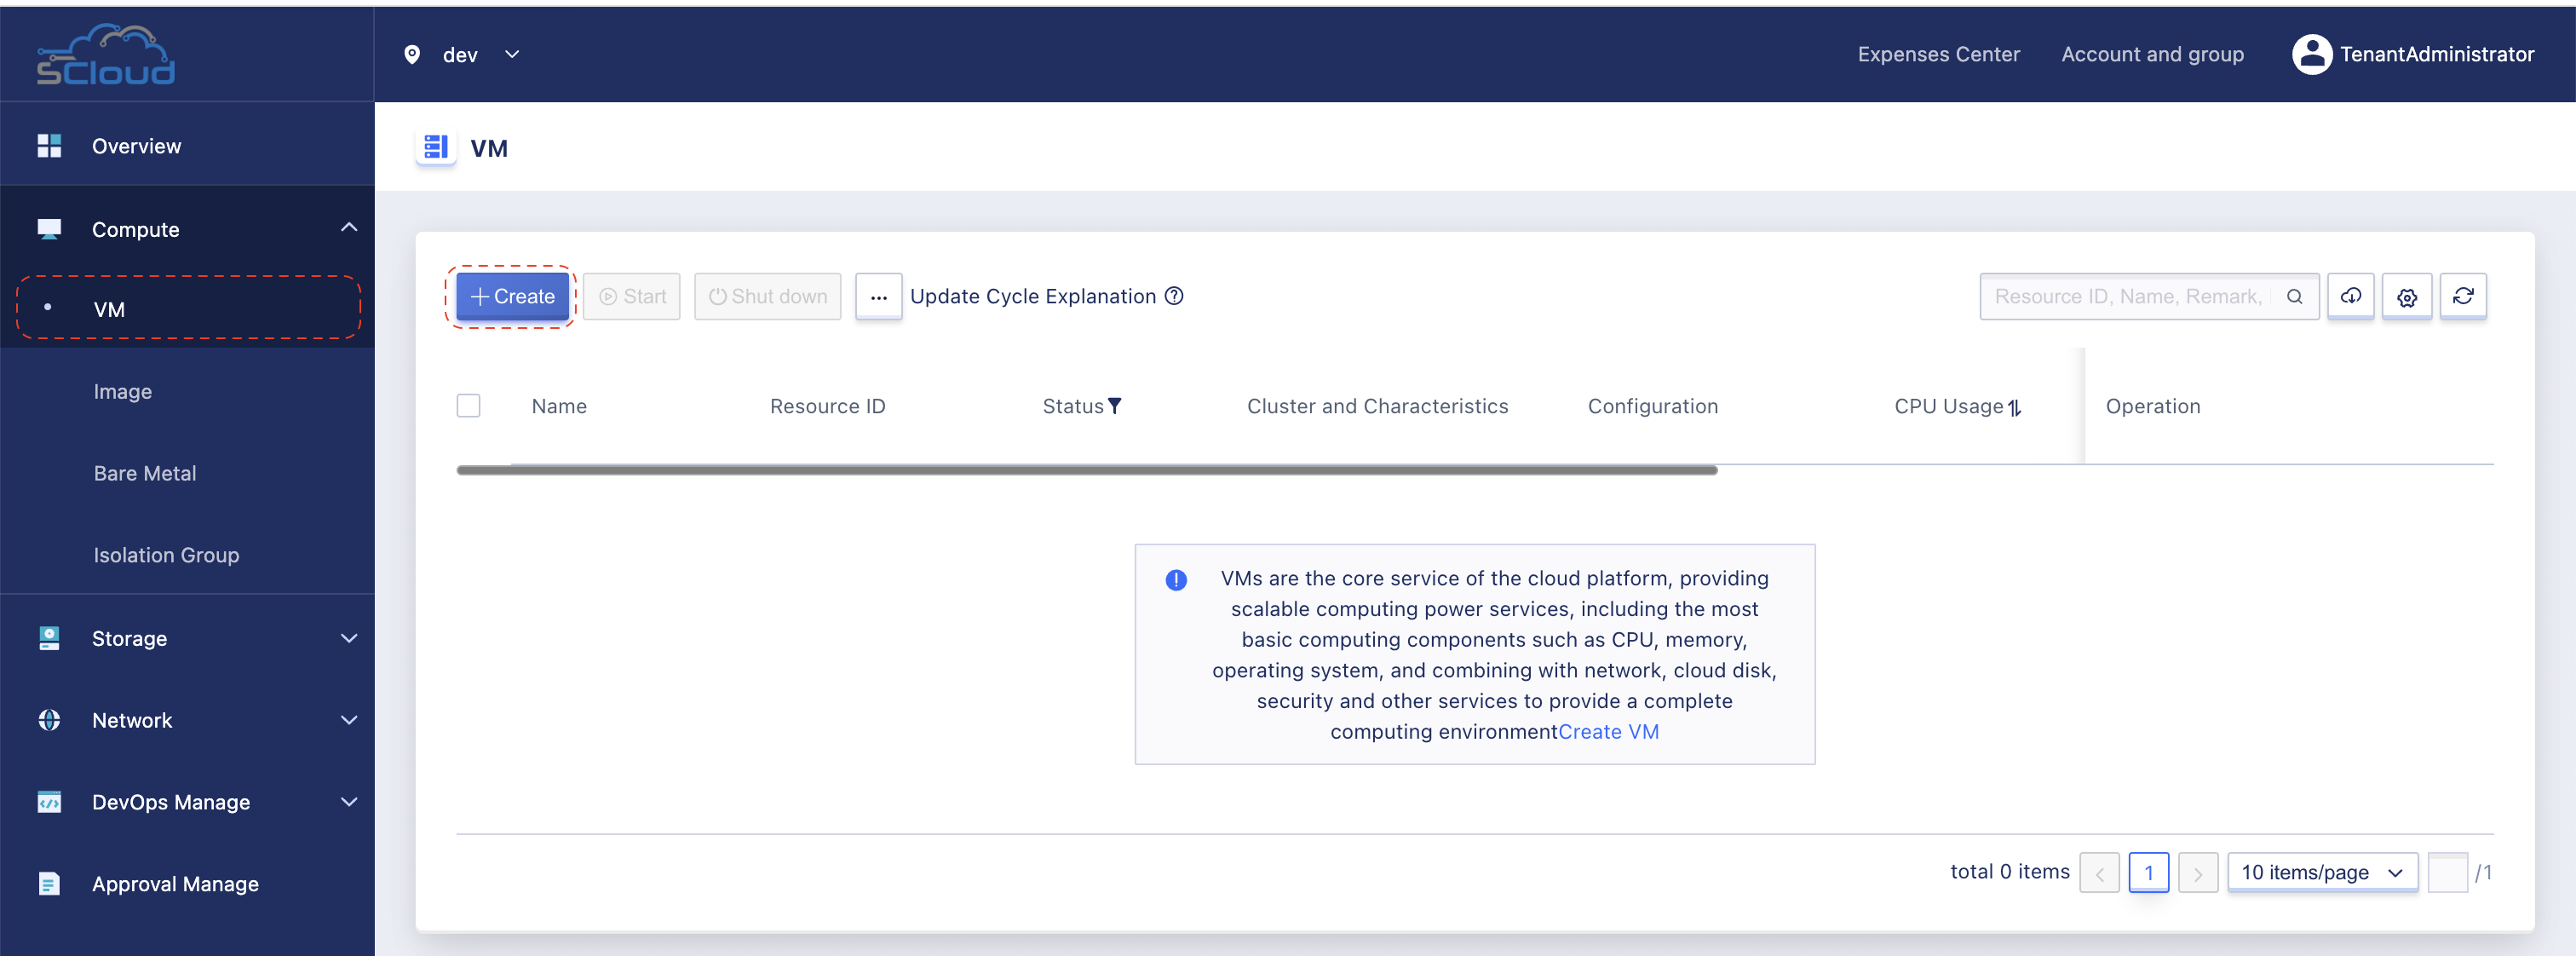
Step 1: Go to side-bar menu, click in VM item under Compute group.
Step 2: In the VM creation page, enter information as the following images:
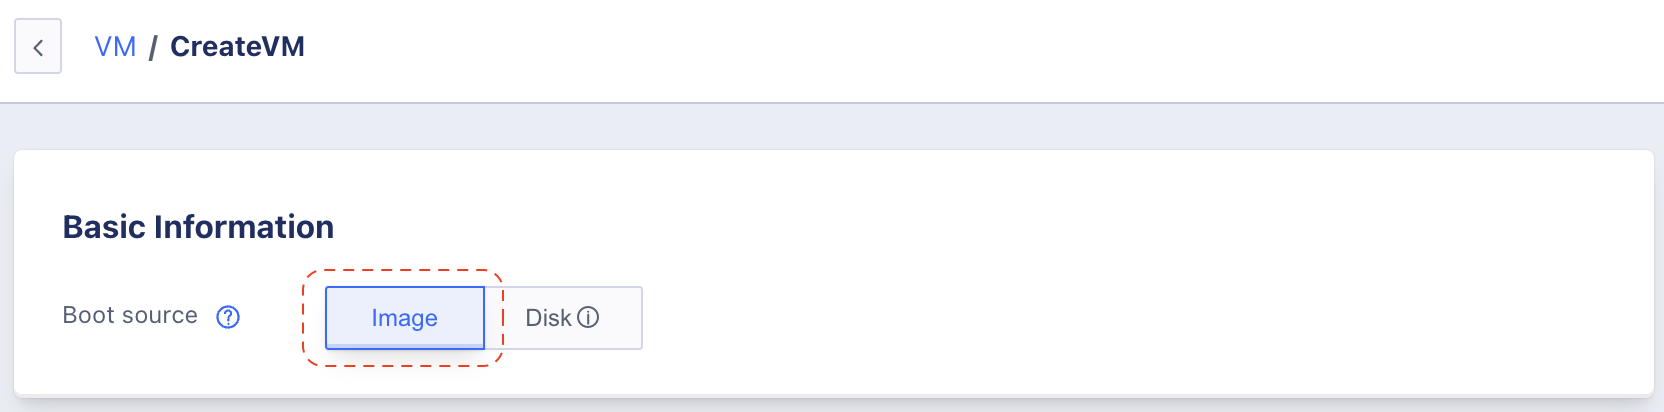
Basic Information:
- Boot source: Image

Basic Settings:
- Cluster: leave as default value.
- Image: select Debian 10.12 as OS image.
- Specifications: 1C2G (1 vCore CPU, 2GB Ram).
- Disk: leave as default value (1 40GB system disk, 1 10GB data disk).
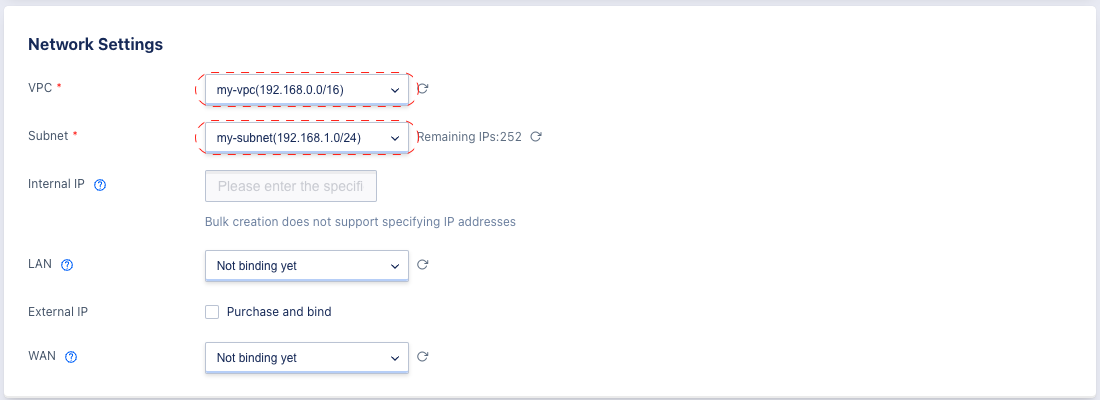
Network Settings:
- VPC: my-vpc.
- Subnet: my-subnet.
- Leave other fields as default value.
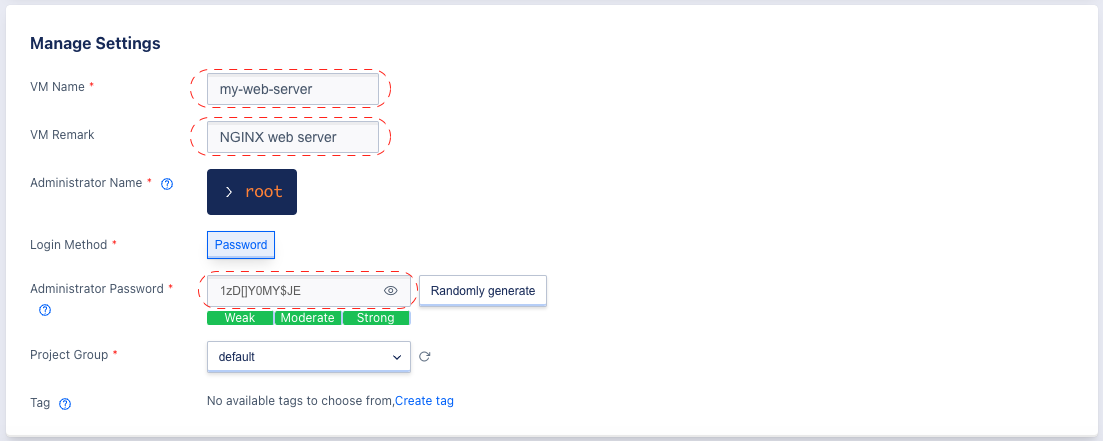
Manage Settings:
- VM Name: my-web-server
- VM Remark: NGINX web server
- Login Method: Password
- Administrator Password: click Randomly Generate to get a random password or set your own desired password (note the password somewhere, we will need it in the next step).
Step 3: Click Buy Now in the top-right panel to create your VM, for now ignore the charge here, we will explain it in the finance related labs.
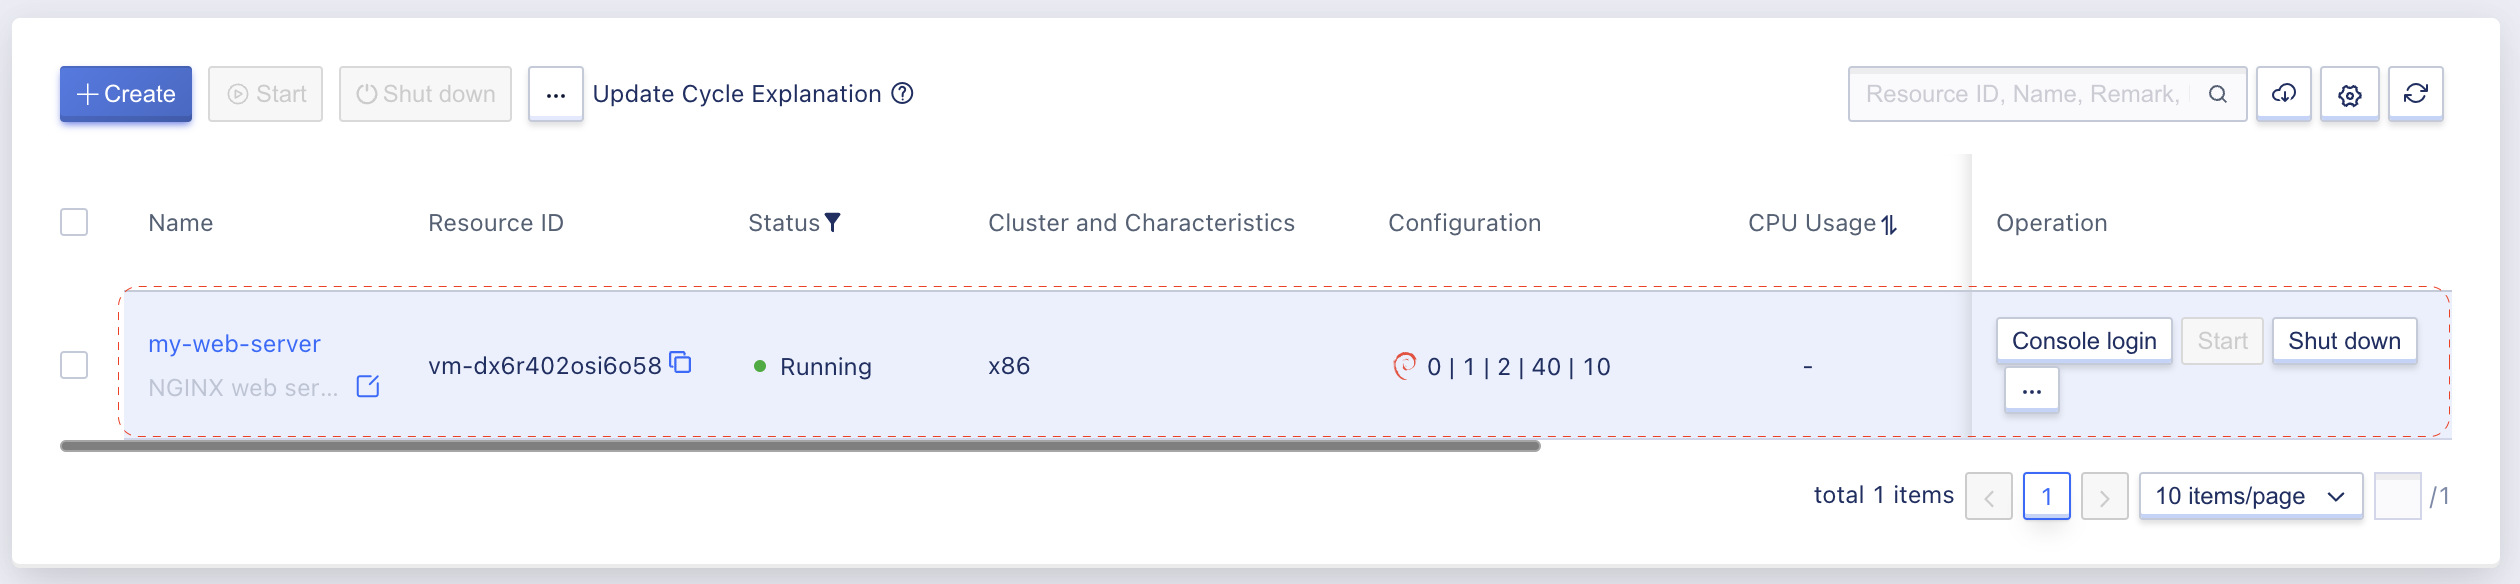
Step 4: Ensure that your VM created and in running state, it just take ~5 seconds to create and start your Debian VM.
4. SSH to your VM
Congrats, you’re successfully created a VM that runs Debian OS, but we need more, let get inside the VM and install the web server so that we can host our website there.
To SSH to our VM from client side, VM need a public IP address, lets do it.
Step 1: Go to side-bar menu, click in External IP item under Network group.
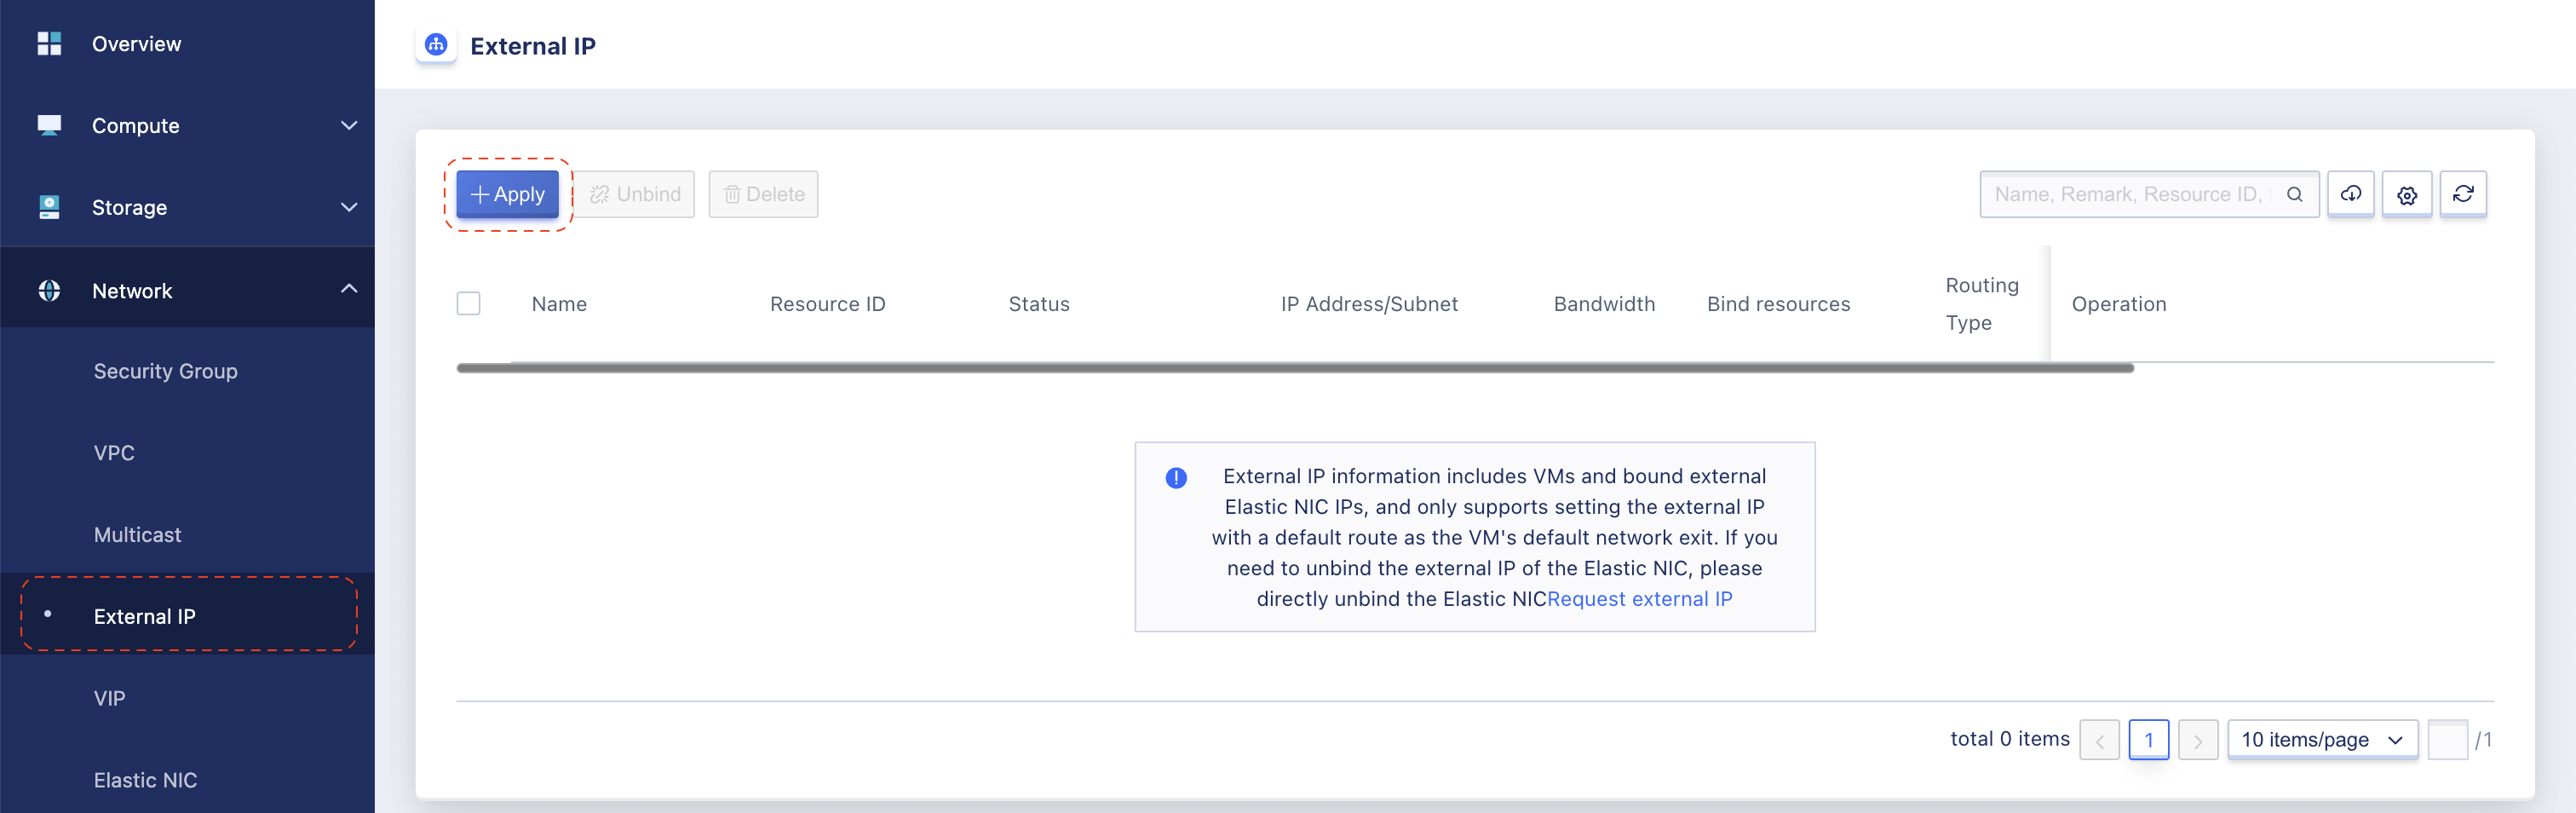
Click Apply to open EIP creation form.
Step 2: Enter EIP information as below image:
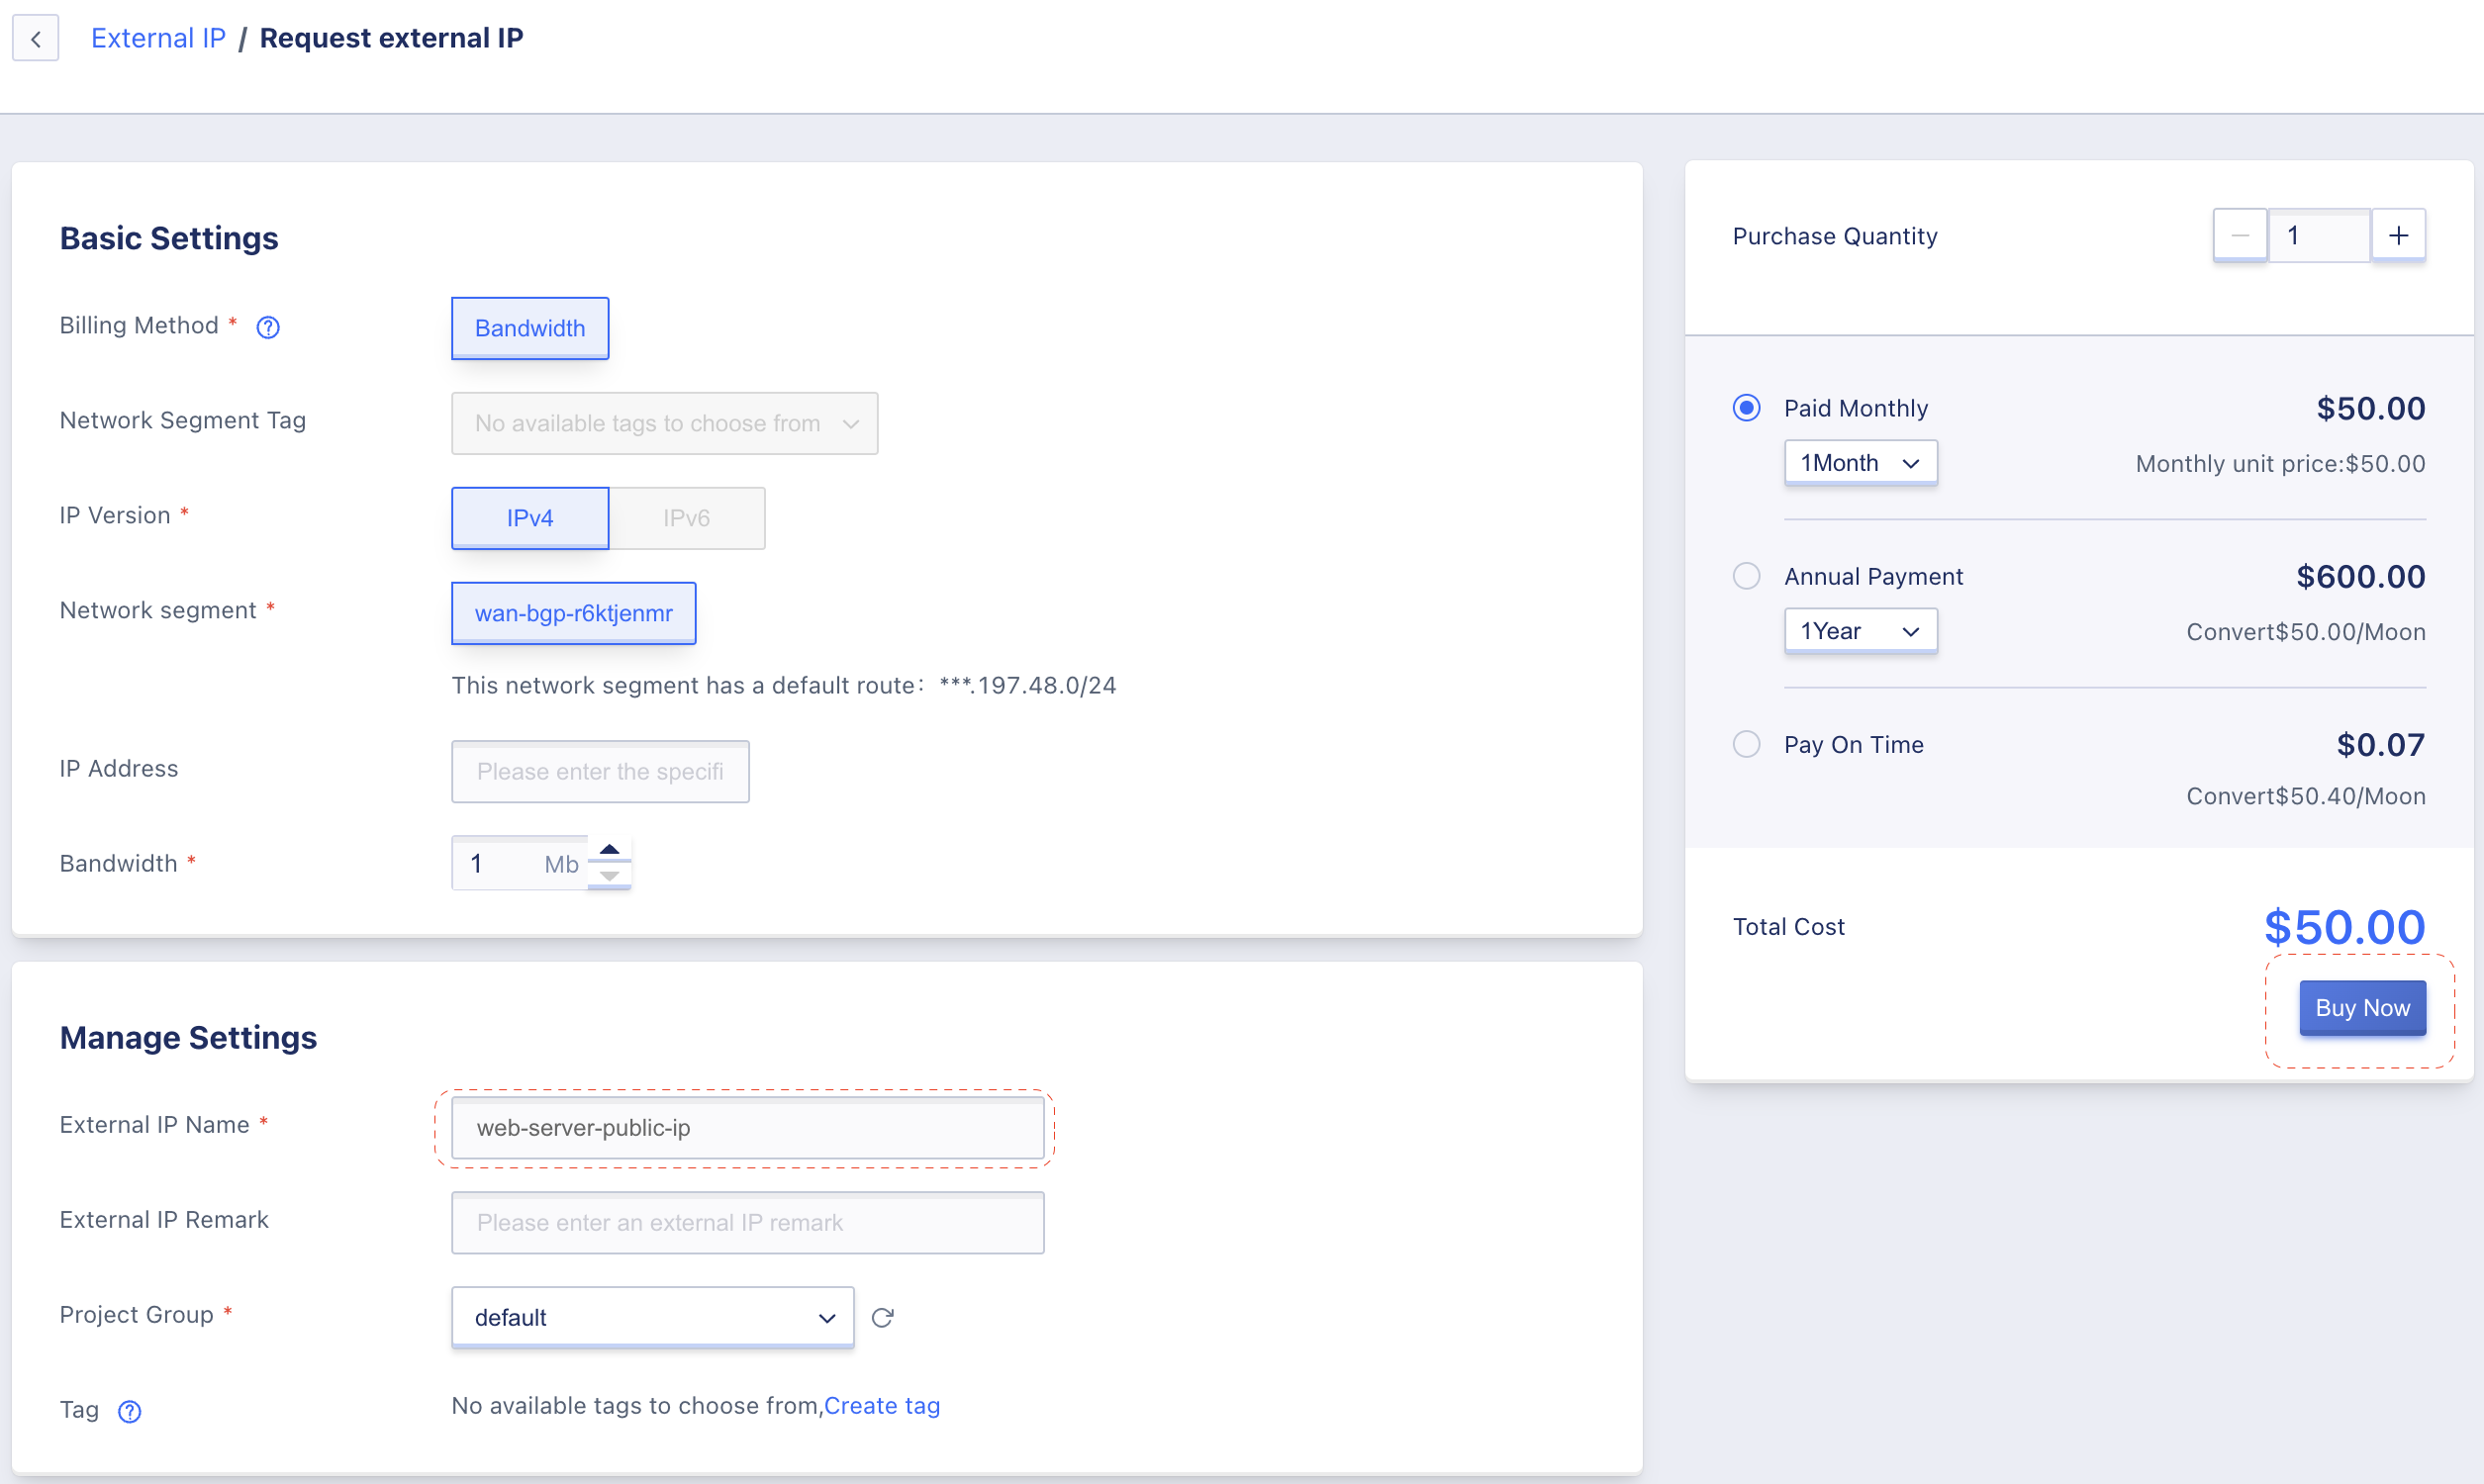
Basic Settings:
- Billing Method: Bandwidth
- IP Version: IPv4
- Network segment: leave as default value.
- Bandwidth: 1MB
Manage Settings:
- External IP Name: web-server-public-ip
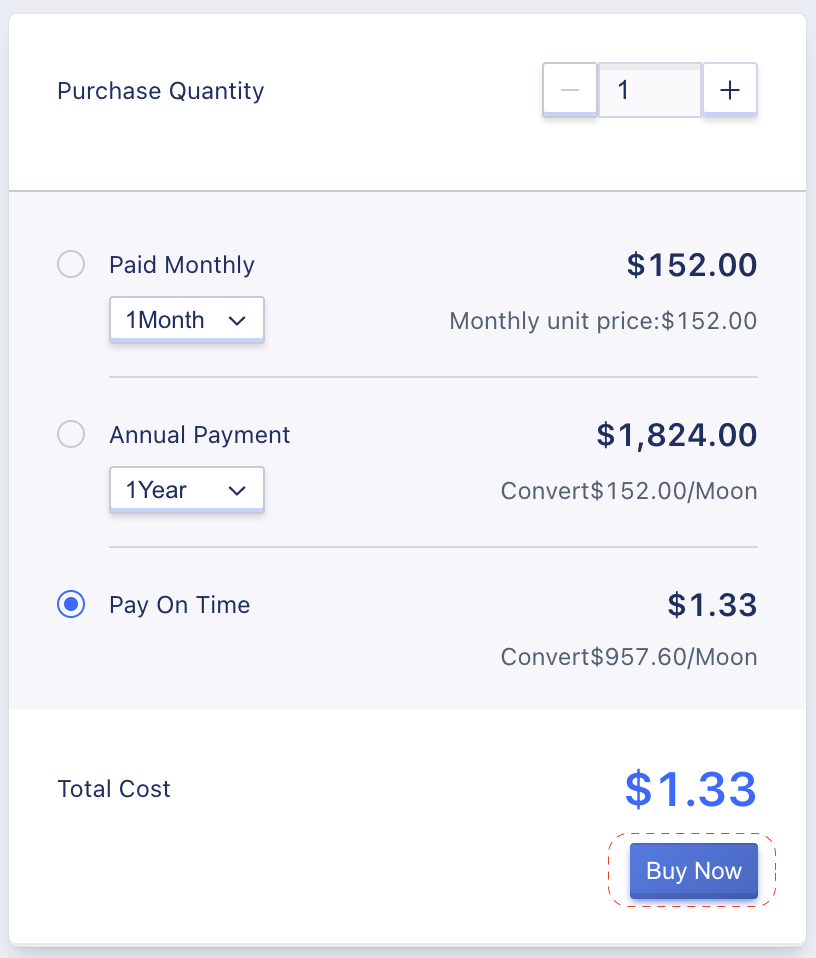
Step 3: Click Buy Now in the top-right panel to create your EIP, for now ignore the charge here, we will explain it in the finance related labs.
Step 4: Ensure that your EIP created and in Not Bound state in the External IP list.
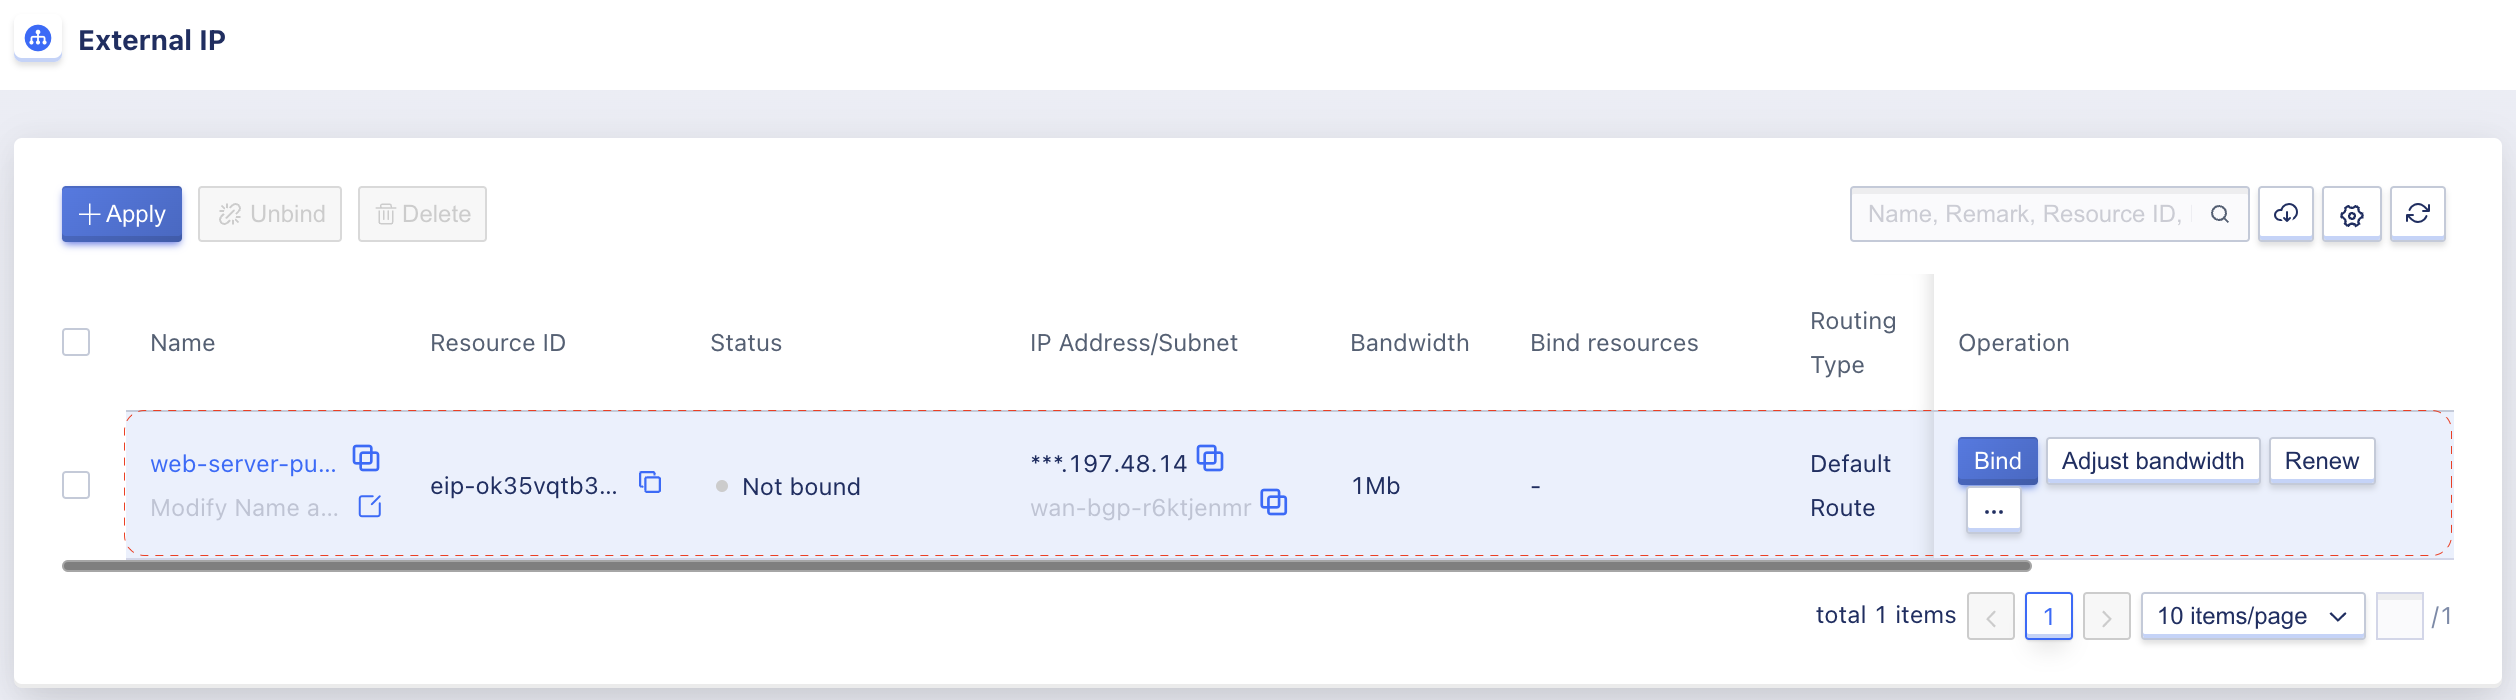
Step 5: From the External IP list page, click Bind button to bind the created public IP address to our web server VM.
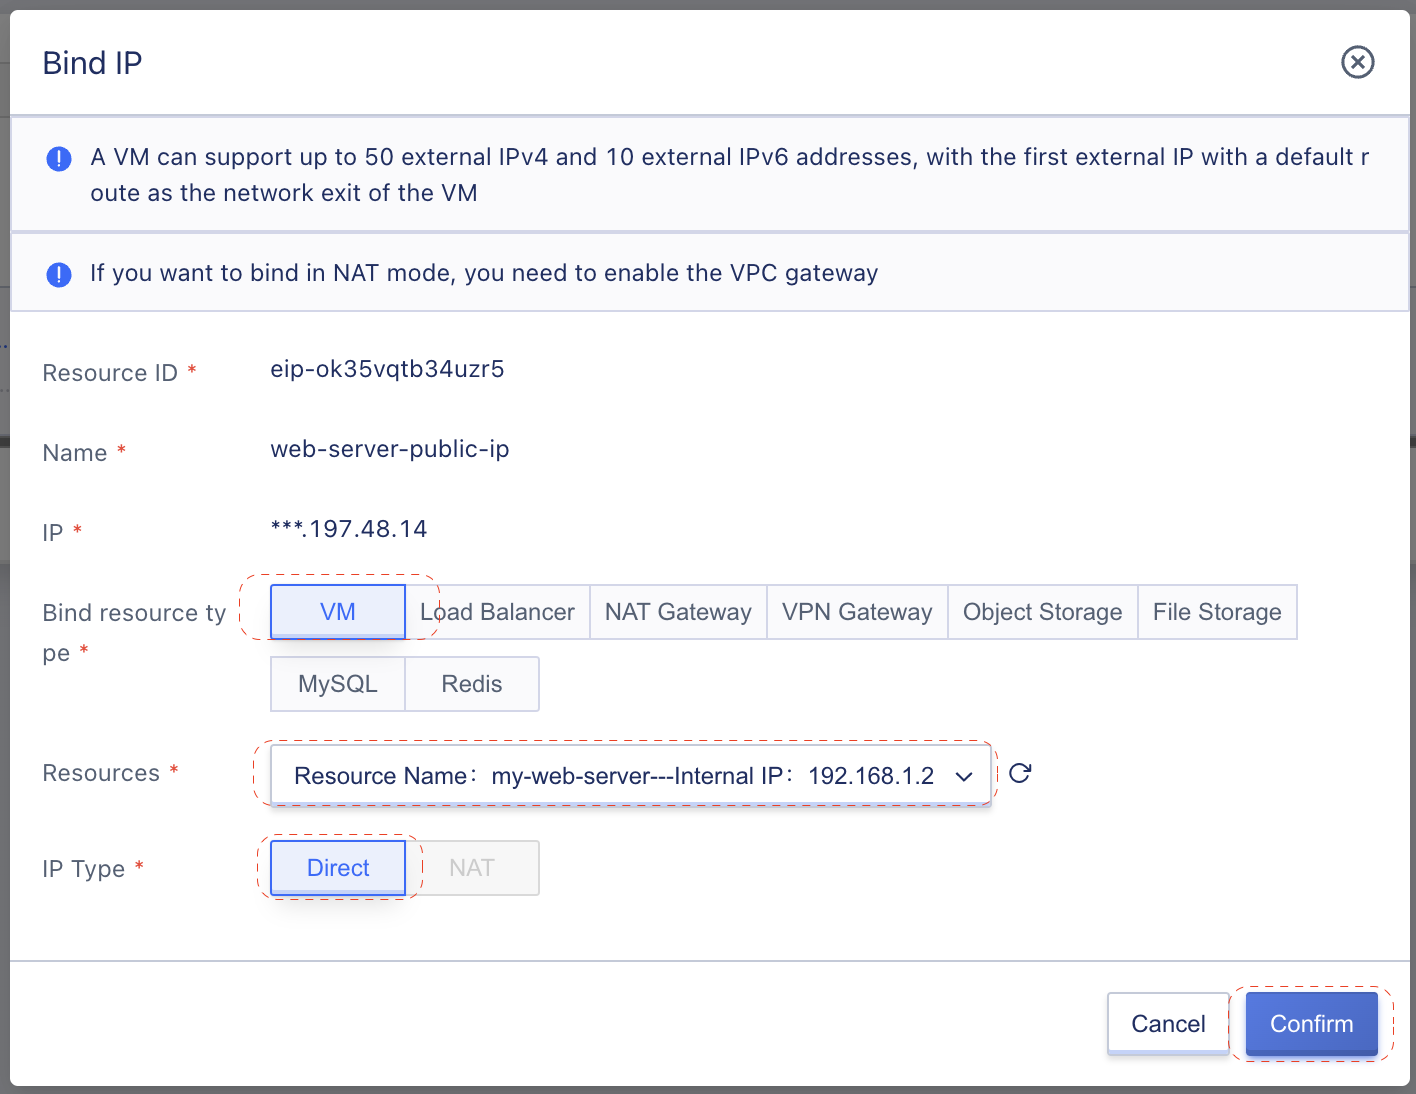
- Bind resource type: VM
- Resource: select your VM (by name)
- IP Type: Direct
After enter all required information as above image, click Confirm to bind the public IP.
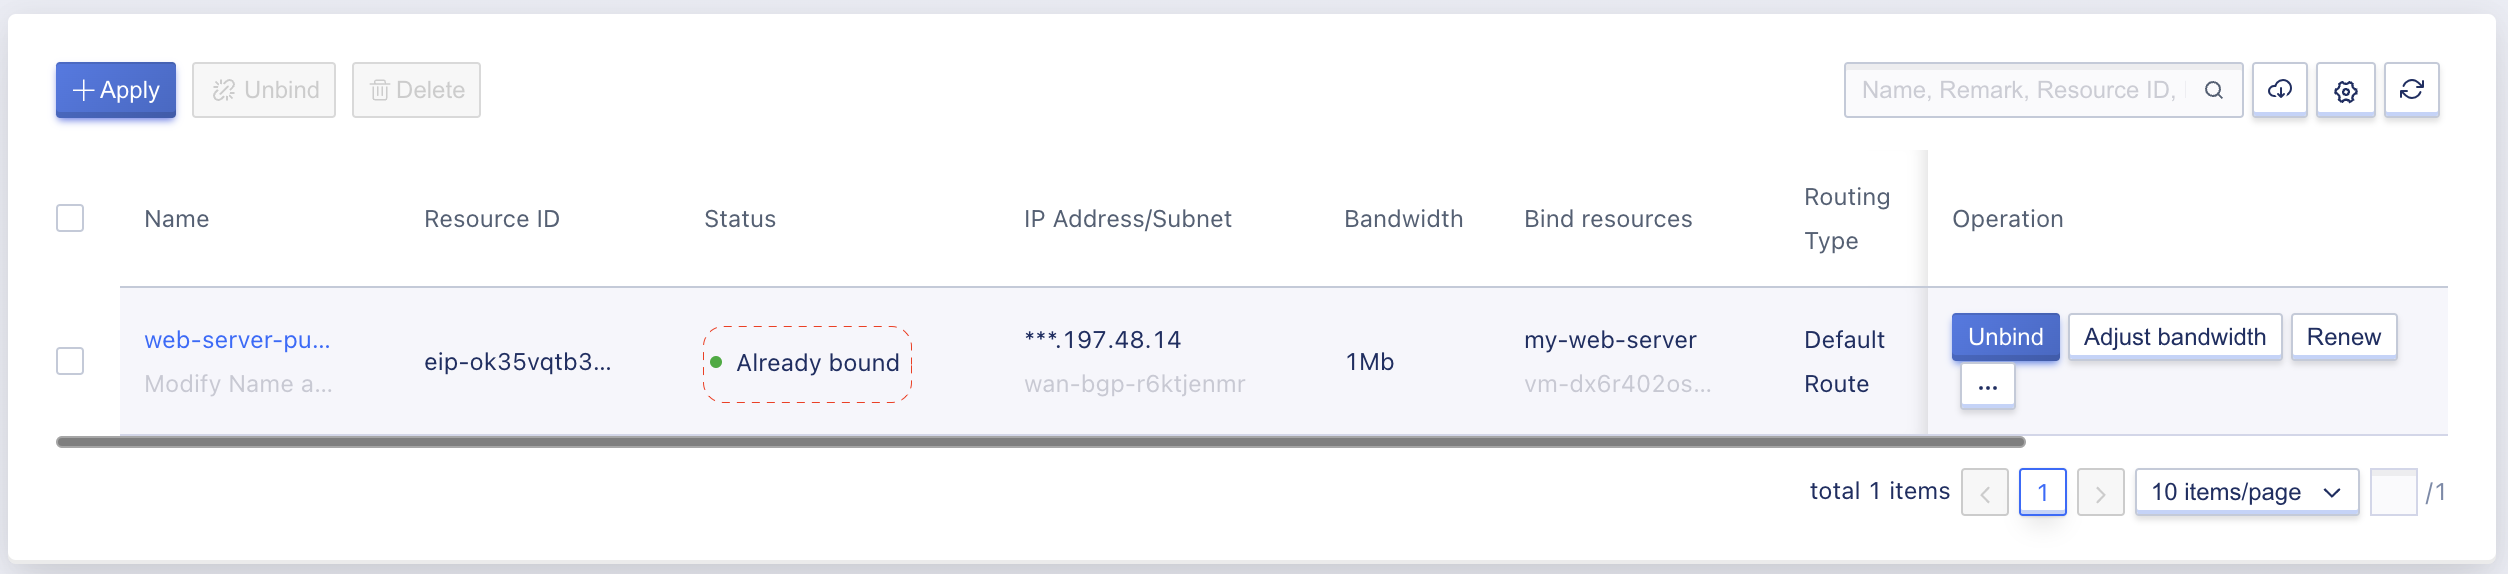
Step 6: Ensure that the IP is successfully bind and status is Already bound in the EIP listing page.
Step 7: Navigate to VM detail page from VM listing page (click VM’s name), and open Network tab. You can see the public IP information display here.

Step 8: Open your terminal in laptop/PC and SSH to VM as below:
localhost ~ % ssh root@***.197.48.14
The authenticity of host '***.197.48.14 (***.197.48.14)' can't be established.
ED25519 key fingerprint is SHA256:AfQxbb4KHvQc0HqmGzKDHk4GxYRfweeWOwQa/+coPz0.
This host key is known by the following other names/addresses:
    ~/.ssh/known_hosts:6: ***.197.48.4
    ~/.ssh/known_hosts:10: ***.197.48.7
    ~/.ssh/known_hosts:11: ***.197.48.9
    ~/.ssh/known_hosts:12: ***.197.48.10
Are you sure you want to continue connecting (yes/no/[fingerprint])? yes
Warning: Permanently added '***.197.48.14' (ED25519) to the list of known hosts.
root@***.197.48.14's password:
Linux localhost 4.19.0-21-amd64 #1 SMP Debian 4.19.249-2 (2022-06-30) x86_64

The programs included with the Debian GNU/Linux system are free software;
the exact distribution terms for each program are described in the
individual files in /usr/share/doc/*/copyright.

Debian GNU/Linux comes with ABSOLUTELY NO WARRANTY, to the extent
permitted by applicable law.
Last login: Wed Jul 20 08:01:58 2022
root@localhost:~#
Congrats, you’re successfully SSH to your VM using predefined credential.
5. Install web server
Step 1: SSH to your VM follow the above step.
localhost ~ % ssh root@***.197.48.14
Step 2: Install NGINX web server on Debian VM.
root@localhost:~# apt update

root@localhost:~# apt install curl gnupg2 ca-certificates lsb-release

root@localhost:~# apt install nginx -y
Step 3: Verify NGINX service
root@localhost:~# systemctl status nginx
● nginx.service - A high performance web server and a reverse proxy server
   Loaded: loaded (/lib/systemd/system/nginx.service; enabled; vendor preset: enabled)
   Active: active (running) since Fri 2023-04-07 06:51:54 EDT; 49s ago
     Docs: man:nginx(8)
 Main PID: 1883 (nginx)
    Tasks: 2 (limit: 2223)
   Memory: 8.0M
   CGroup: /system.slice/nginx.service
           ├─1883 nginx: master process /usr/sbin/nginx -g daemon on; master_process on;
           └─1884 nginx: worker process
Step 4: Pull our static website source code to NGINX web server.
# Navigate to www folder
root@localhost:~# cd /var/www

# Remove default html
root@localhost:/var/www# rm -rf html/

# Pull our website source code from public repo
root@localhost:/var/www# git clone https://github.com/SCLOUD-PTE-LTD/html-template.git html
Cloning into 'html'...
remote: Enumerating objects: 24, done.
remote: Counting objects: 100% (24/24), done.
remote: Compressing objects: 100% (17/17), done.
remote: Total 24 (delta 4), reused 20 (delta 3), pack-reused 0
Unpacking objects: 100% (24/24), done.
Notes: if git not yet available in your VM, install it using this command: apt install git -y.
6. Access the website via public IP
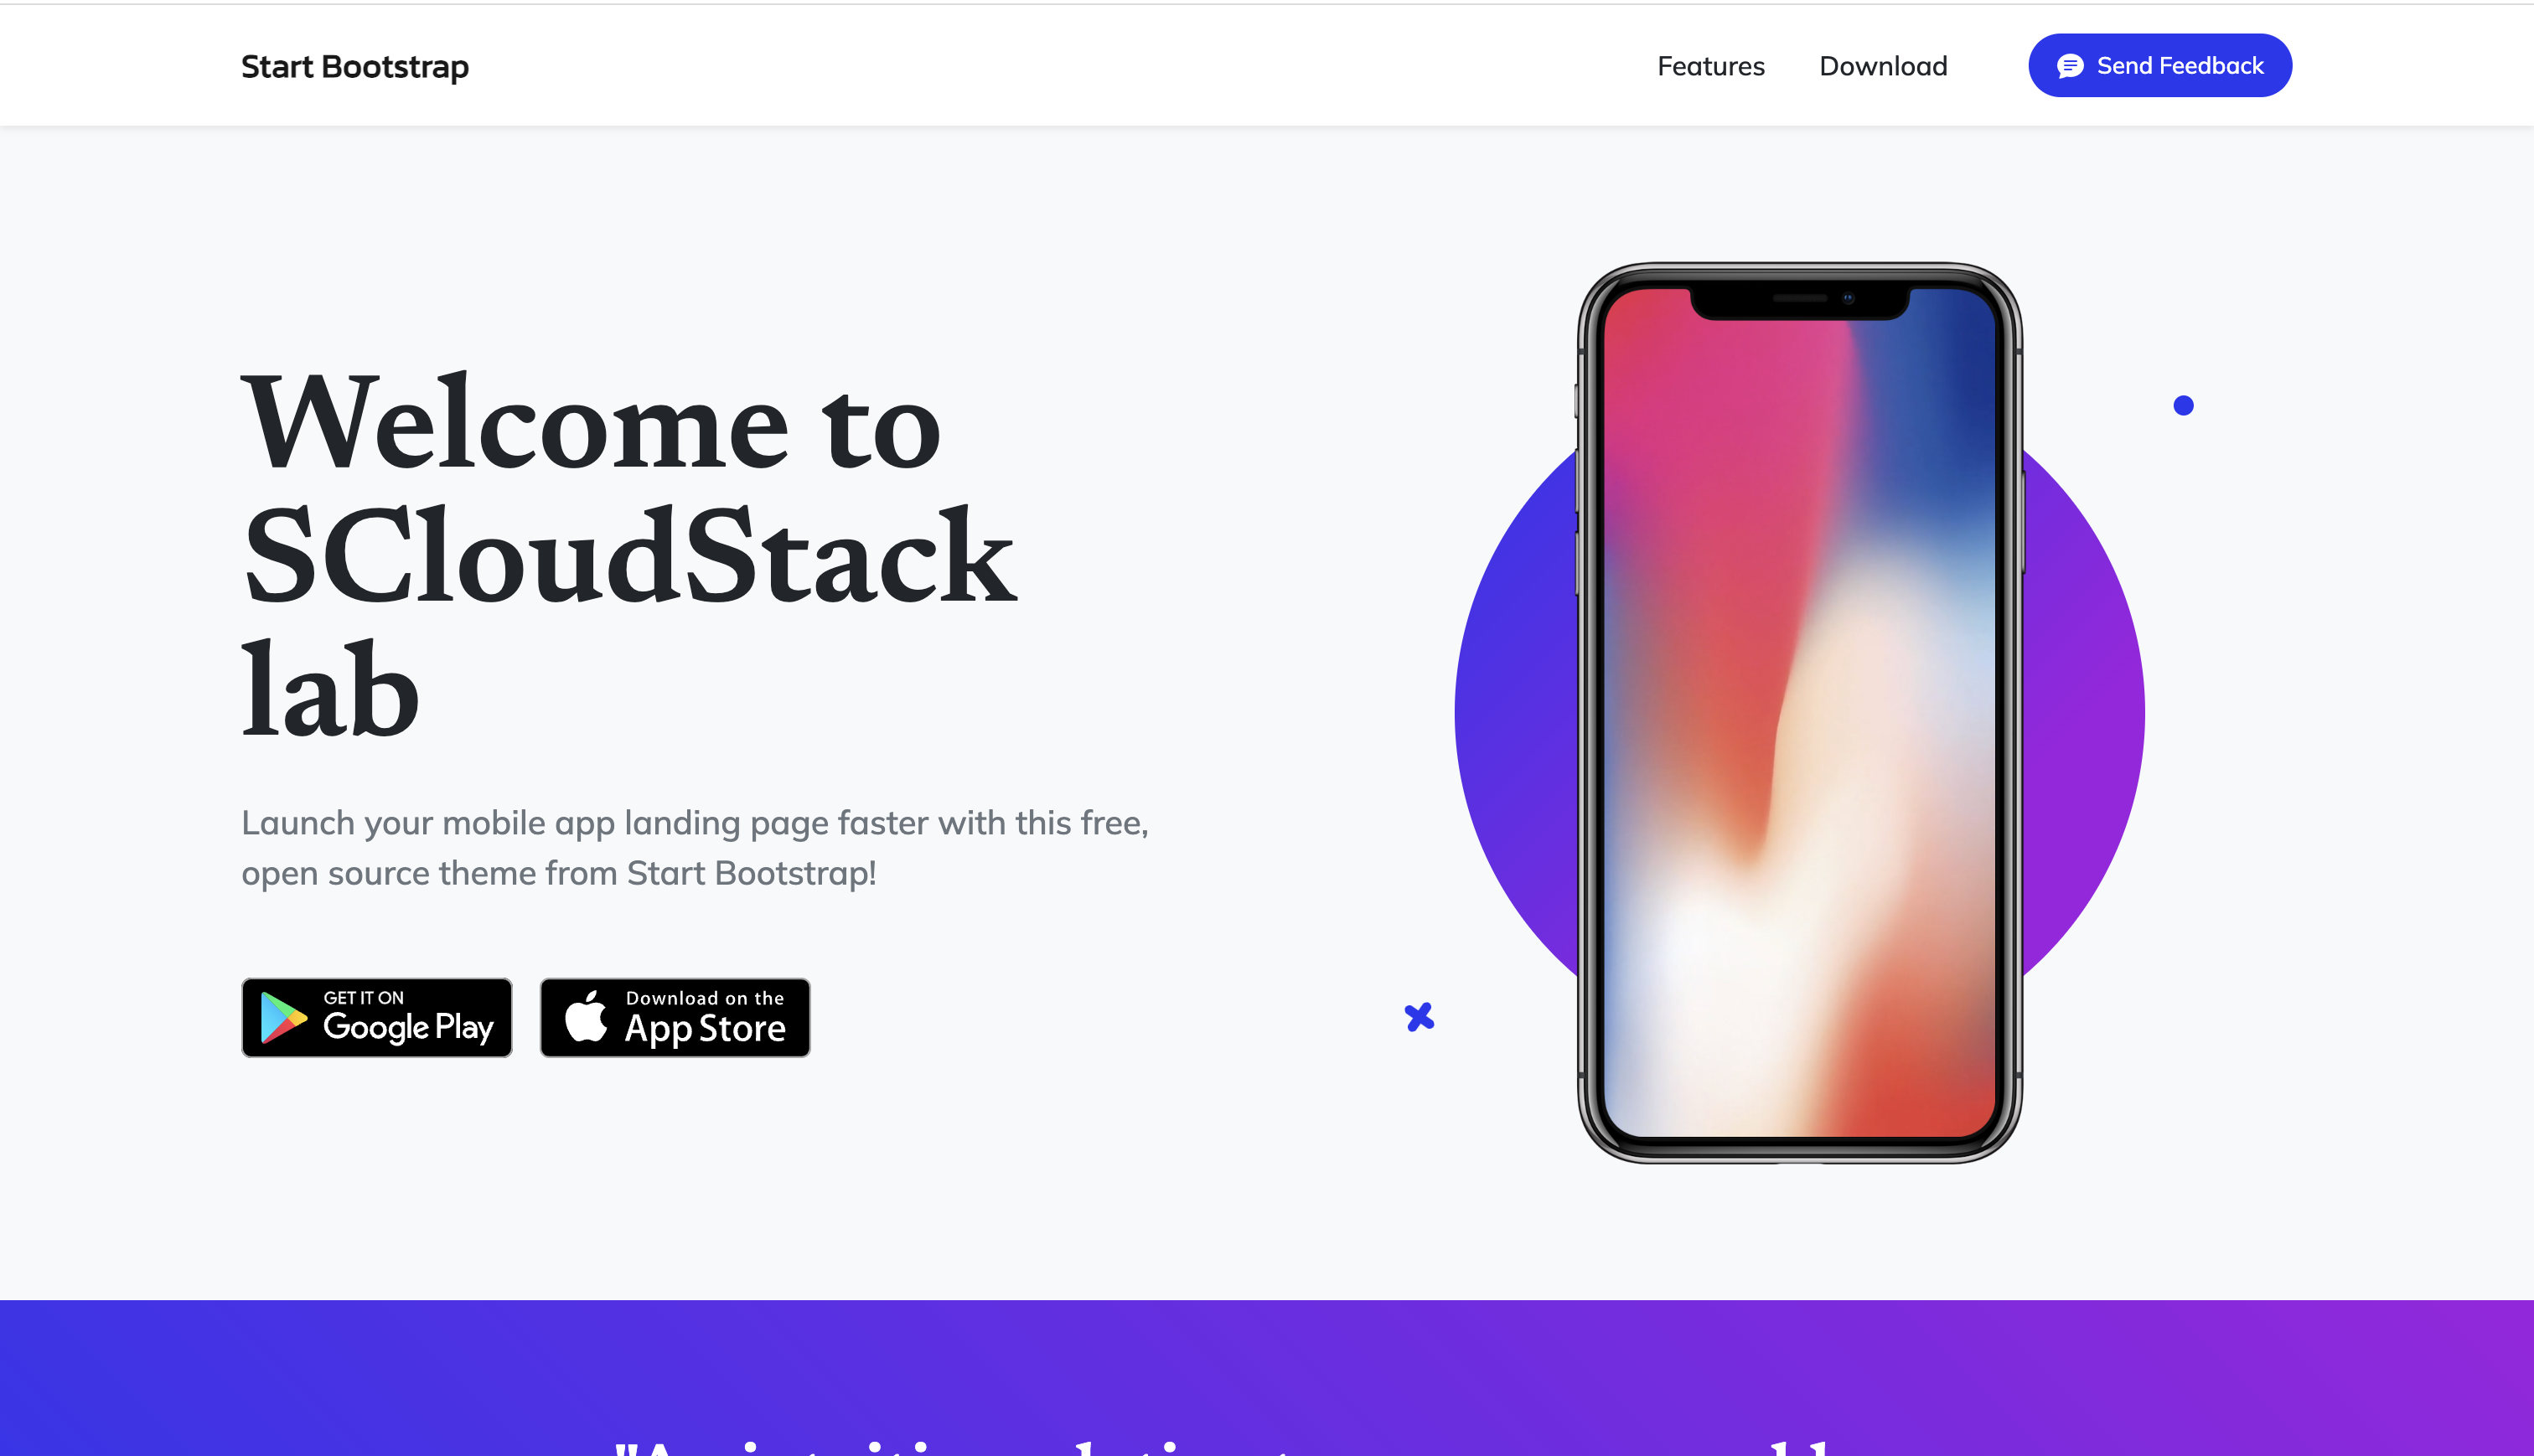
Step 1: Navigate to VM detail page from VM listing page (click VM’s name), and open Network tab. You can see the public IP information display here.
Step 2: Copy the public IP address and use it to access your website via browser. If you’re correctly follow all steps above, the below screen will be displayed.
7. Control the network access using Security Group
Step 1: Go to side-bar menu, click in Security Group item under Network group.
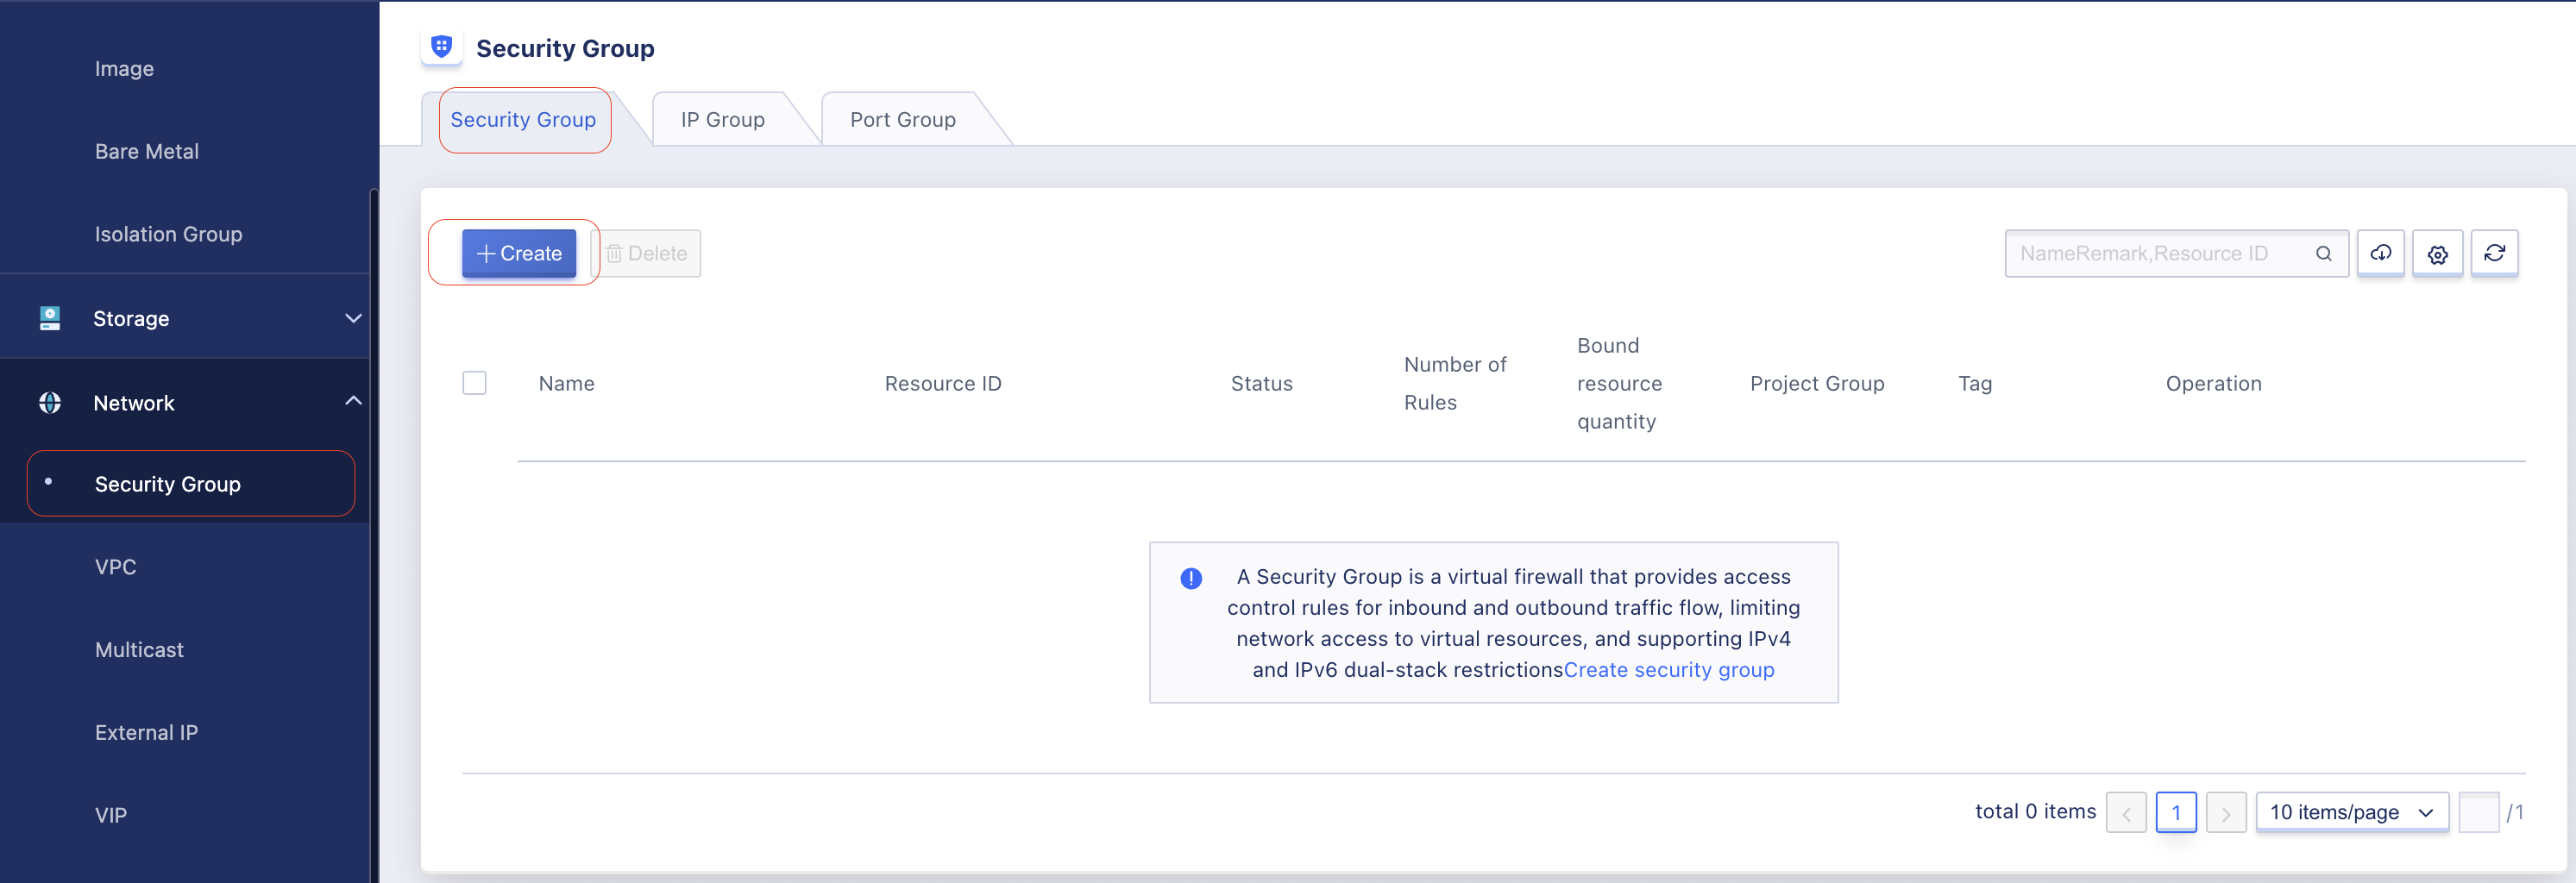
Select Security Group tab and click Create.
Step 2: Enter SG information as below image.
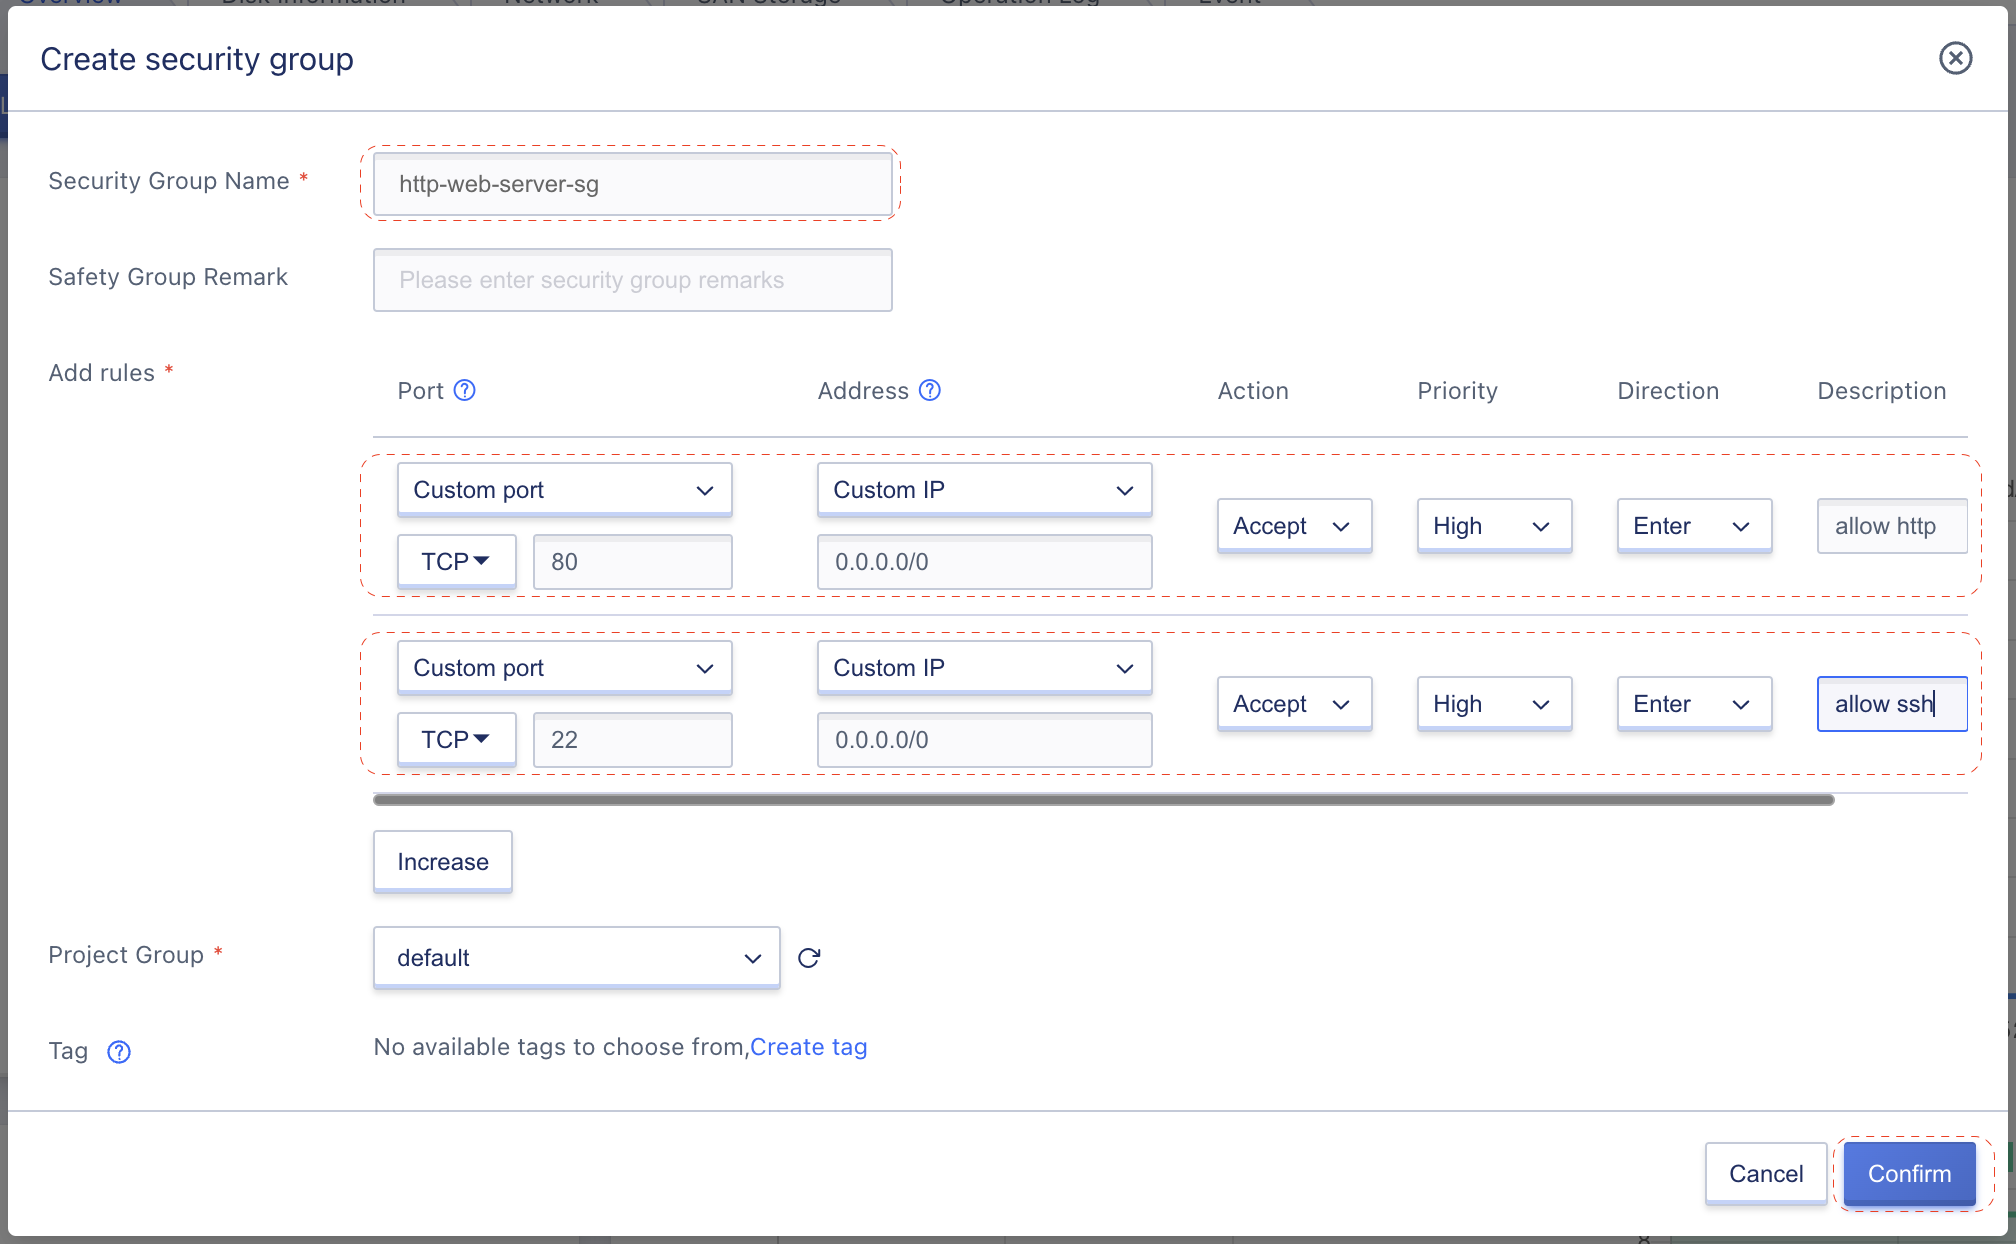
- Security Group name: http-web-server-sg
- Rules:
| Port | Address | Action | Priority | Direction | Description |
|---|---|---|---|---|---|
| TCP 80 | 0.0.0.0/0 | Accept | High | Enter | Allow HTTP |
| TCP 22 | 0.0.0.0/0 | Accept | High | Enter | Allow SSH |
Leave other fields as default value and click Confirm to create the Security Group.
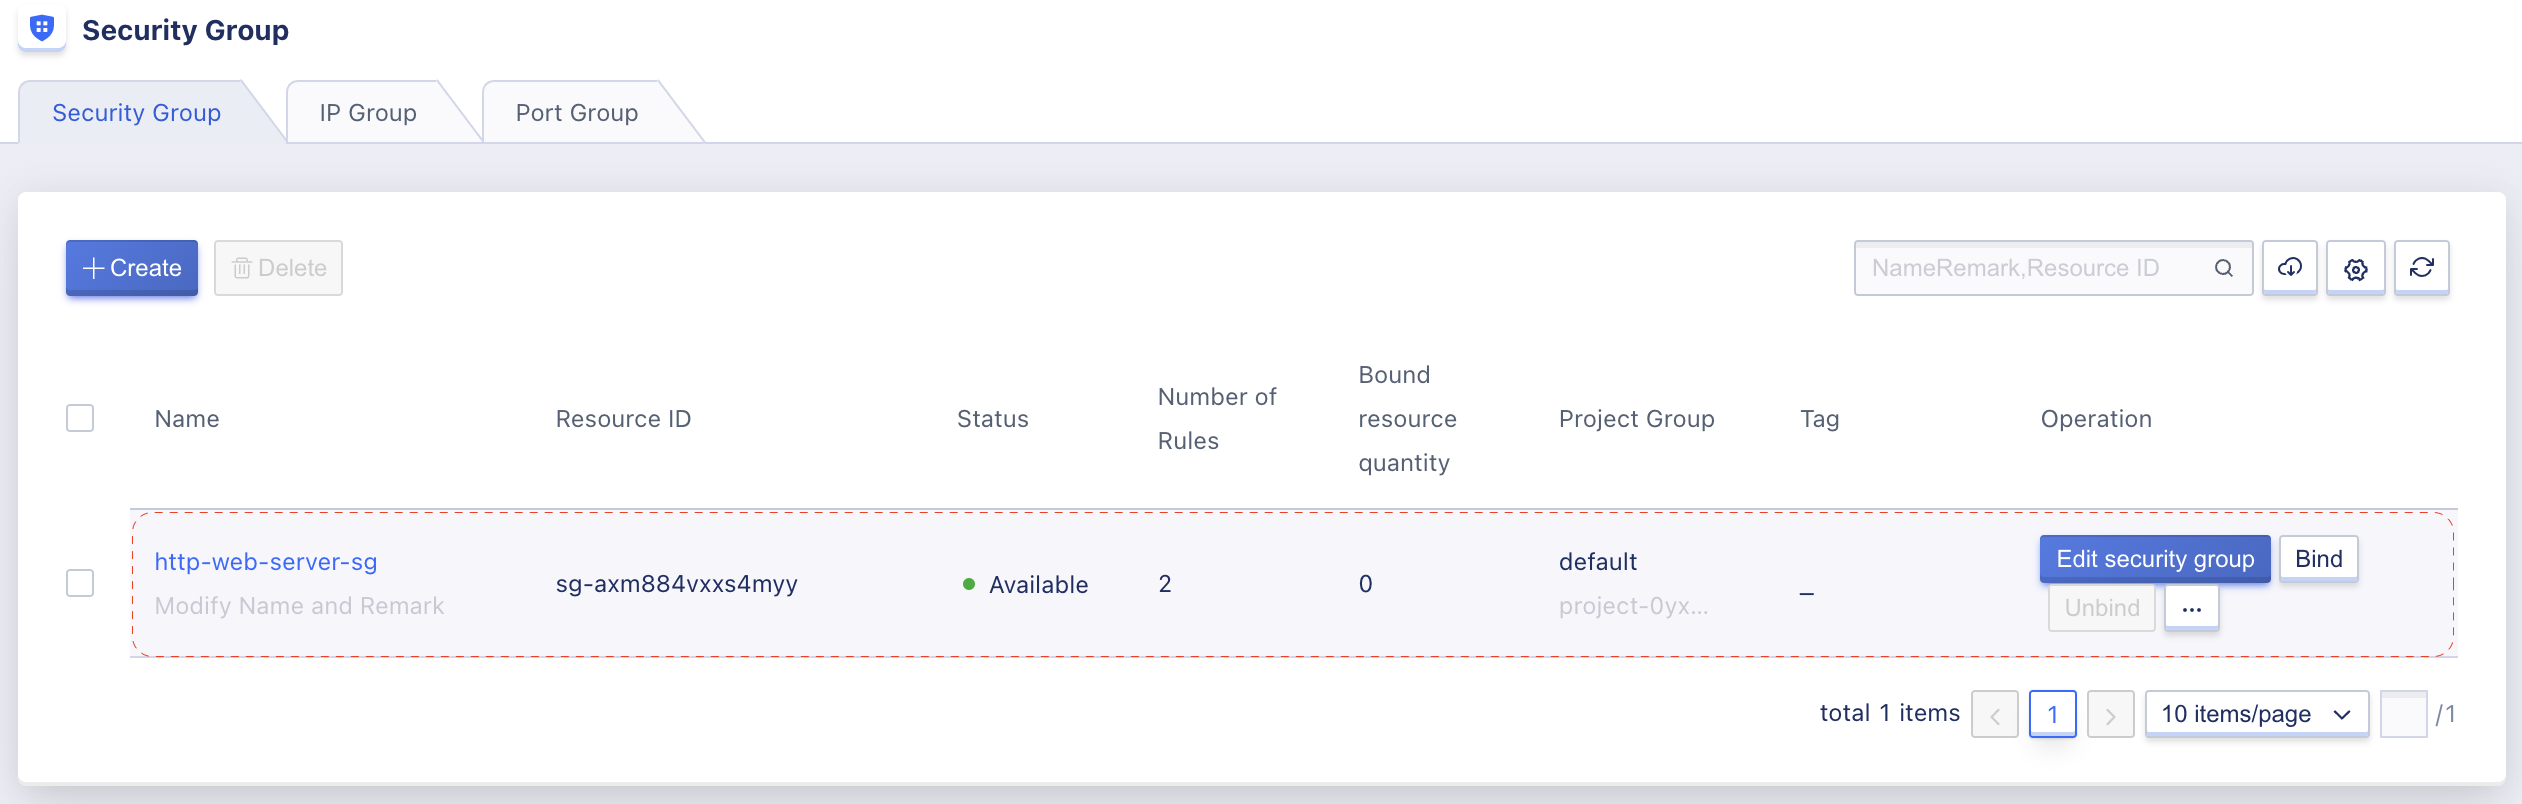
Step 3: Ensure Security Group created in the Security Group listing page and click Bind to bind one to our VM.
Step 4: Enter information as below image.
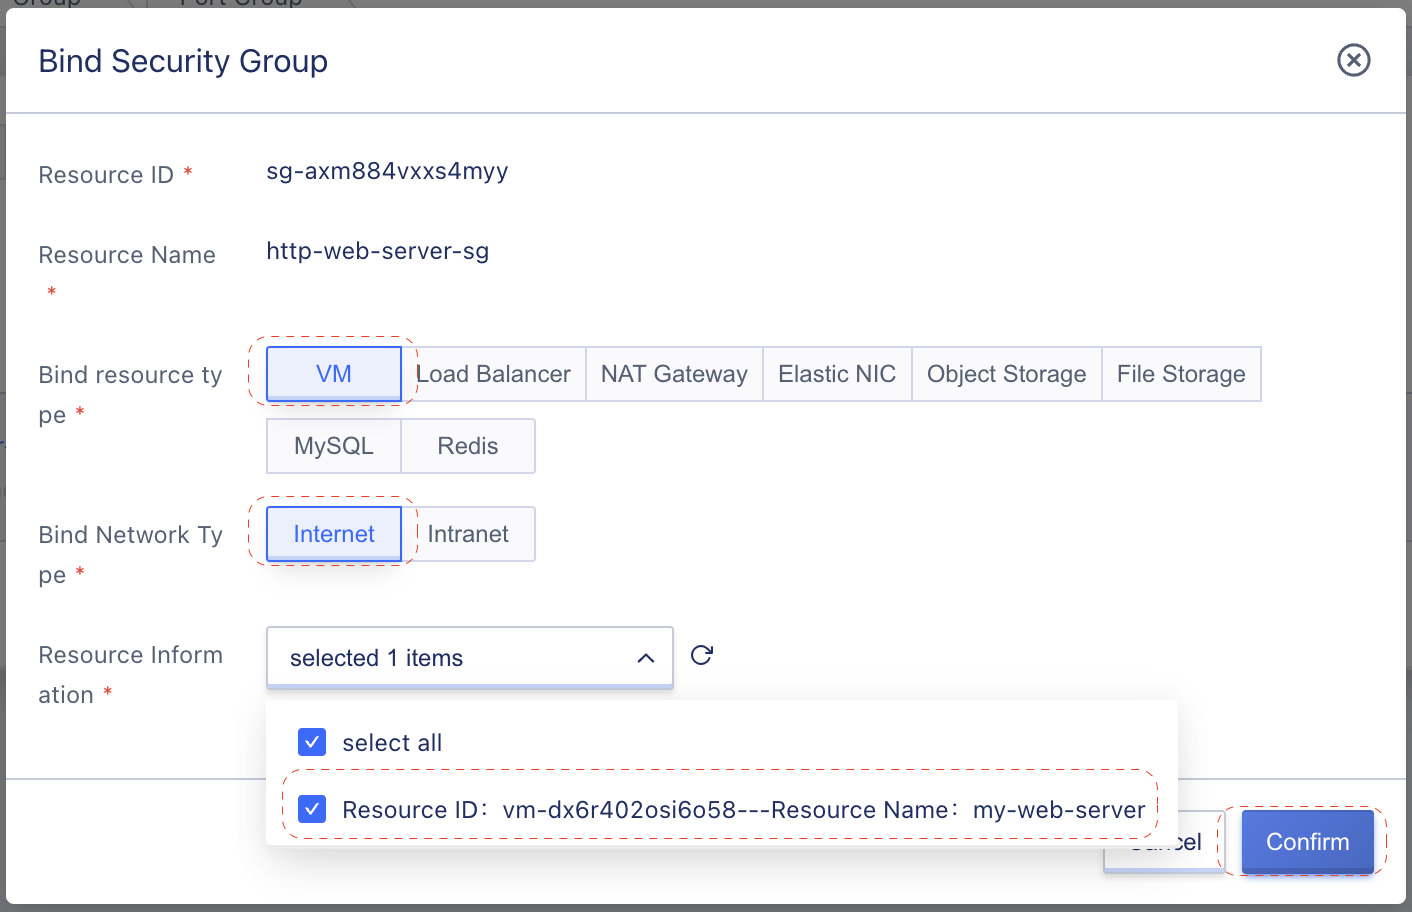
- Bind source type: VM
- Bind network type: Internet
- Resource Information: my-web-server
Click Confirm to process the binding action.
Congrats, you already complete one important action to secure your web sever from public internet attack.
You can verify again that the SSH and public access via port 80 still work, but nothing else (example: ping will be rejected).
Conclusion
In this lab, we learned following topics:
- How to create a VPC?
- How to create a Subnet?
- How to create a Debian OS VM and SSH to it?
- How to request a public IP address using EIP service and bind it to VM.
- How to secure in-bound/out-bound traffic of a VM using Security Group.
Check out below documents for more information about SCloudStack services: