Lab 6 - Use Load Balancer to distribute traffic across VM in your Auto Scaling
Introduction
In this lab, we will combining auto scaling with load balancer and health check mechanisms to achieve the following target:
- When business demand increases, computing resources (VMs) are automatically increased to ensure computing resources.
- When business demand decreases, computing resources are automatically reduced to save costs.
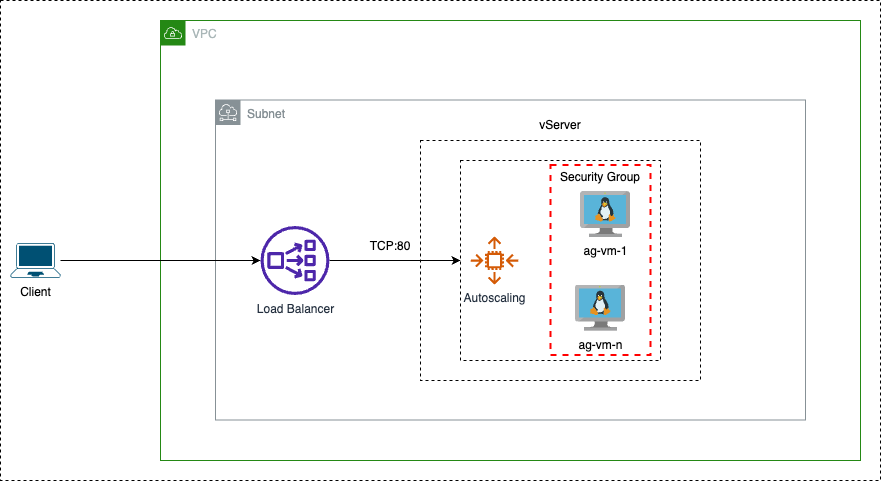
Following services will be used in this labs:
- Network: VPC, Subnet, Security Group, External IP, Load Balancer
- DevOps Manage: Resource Template, Auto Scaling
- Compute: VM, Image
- Storage: Cloud Disk
Prerequisite
- An account with Tenant Administrator role.
- Your tenant need to be in Active status.
Please contact your System Administrator to get your credential.
Guidelines
Before start, you need to access the SCloudStack console dashboard, if you don’t know how to do that, visit Lab 1: Getting Started with SCloudStack Console.
1. Create your VPC
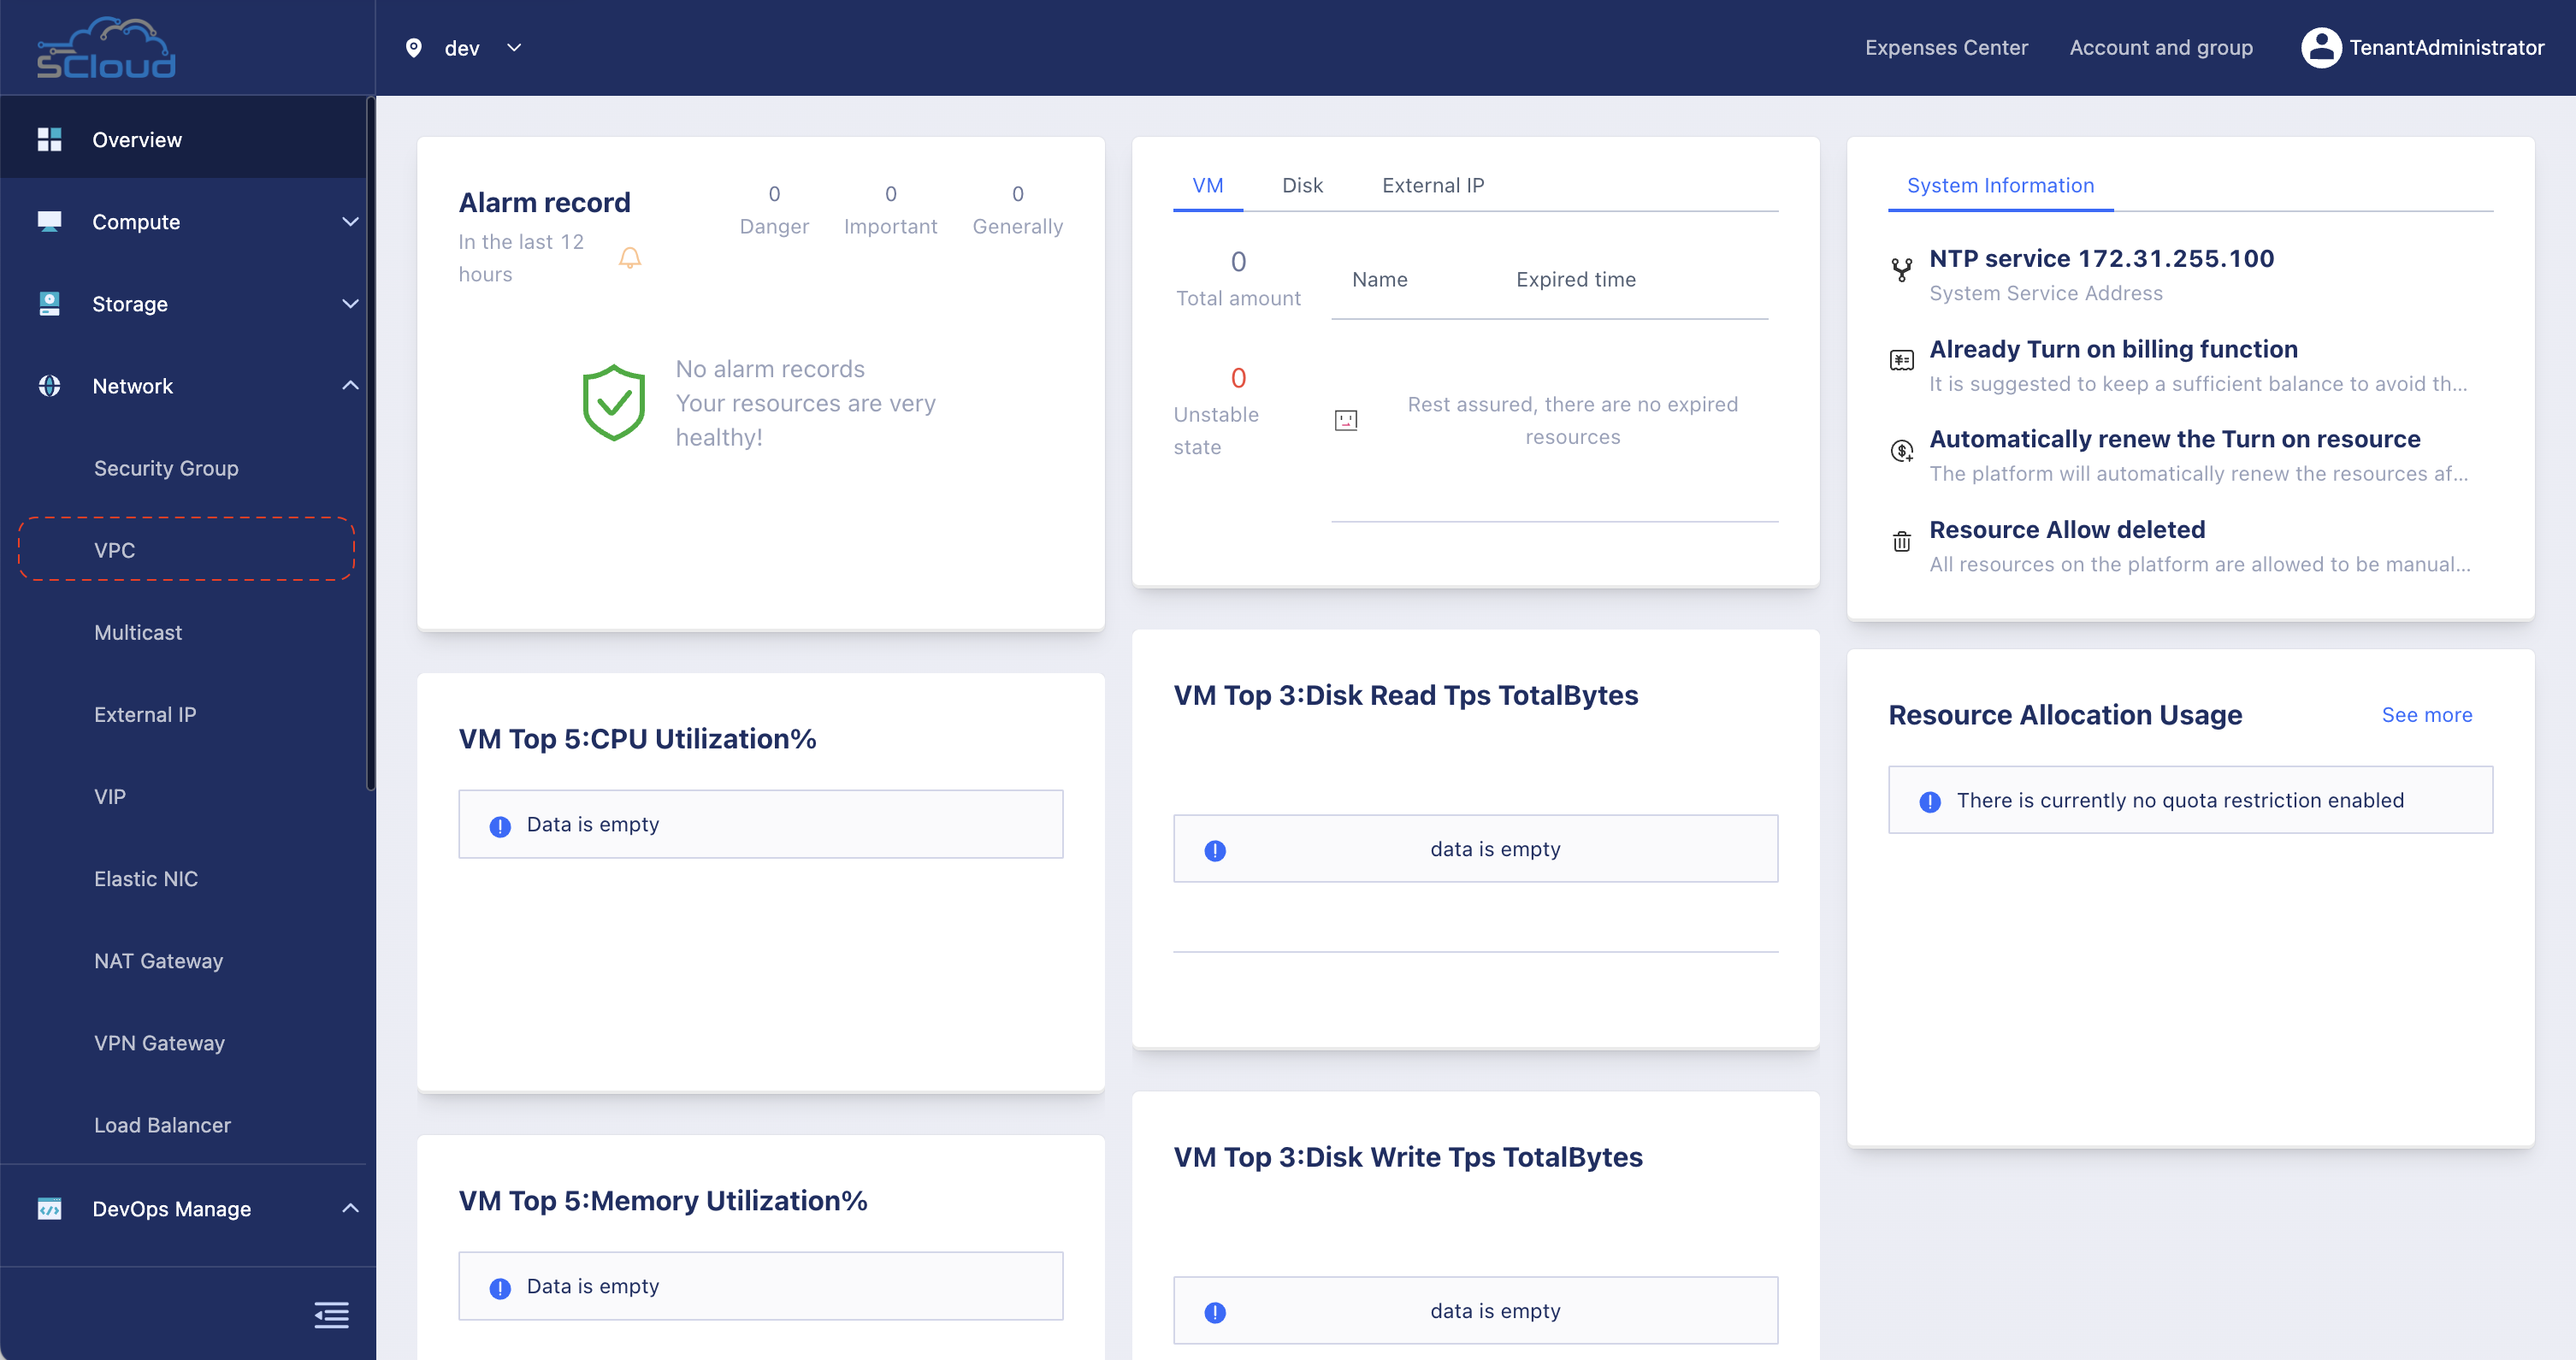
Step 1: From the Tenant Admin dashboard, open the left-side bar and click in VPC menu under Network group.
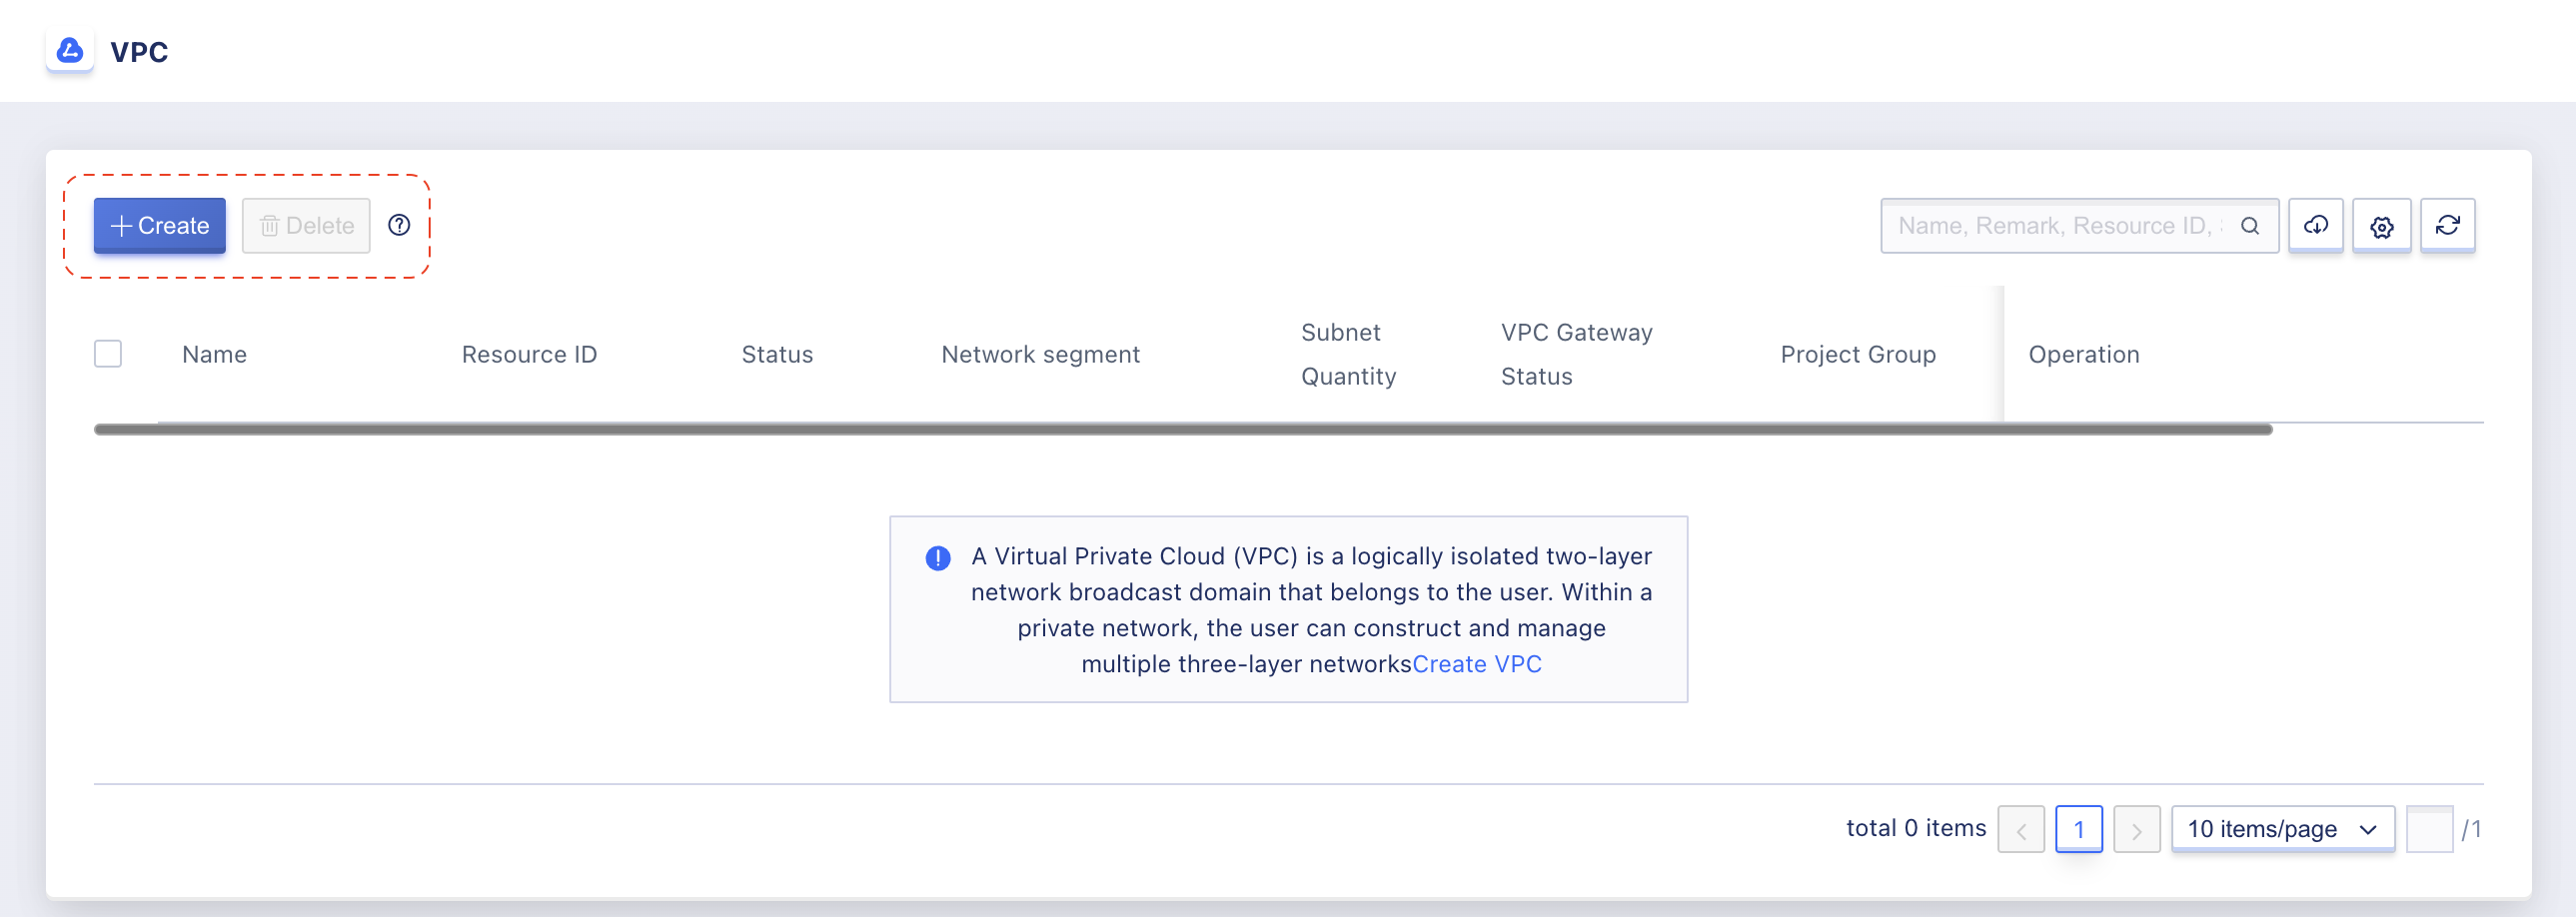
Step 2: Click Create to open the creation form.
Step 3: Enter VPC information as below image:
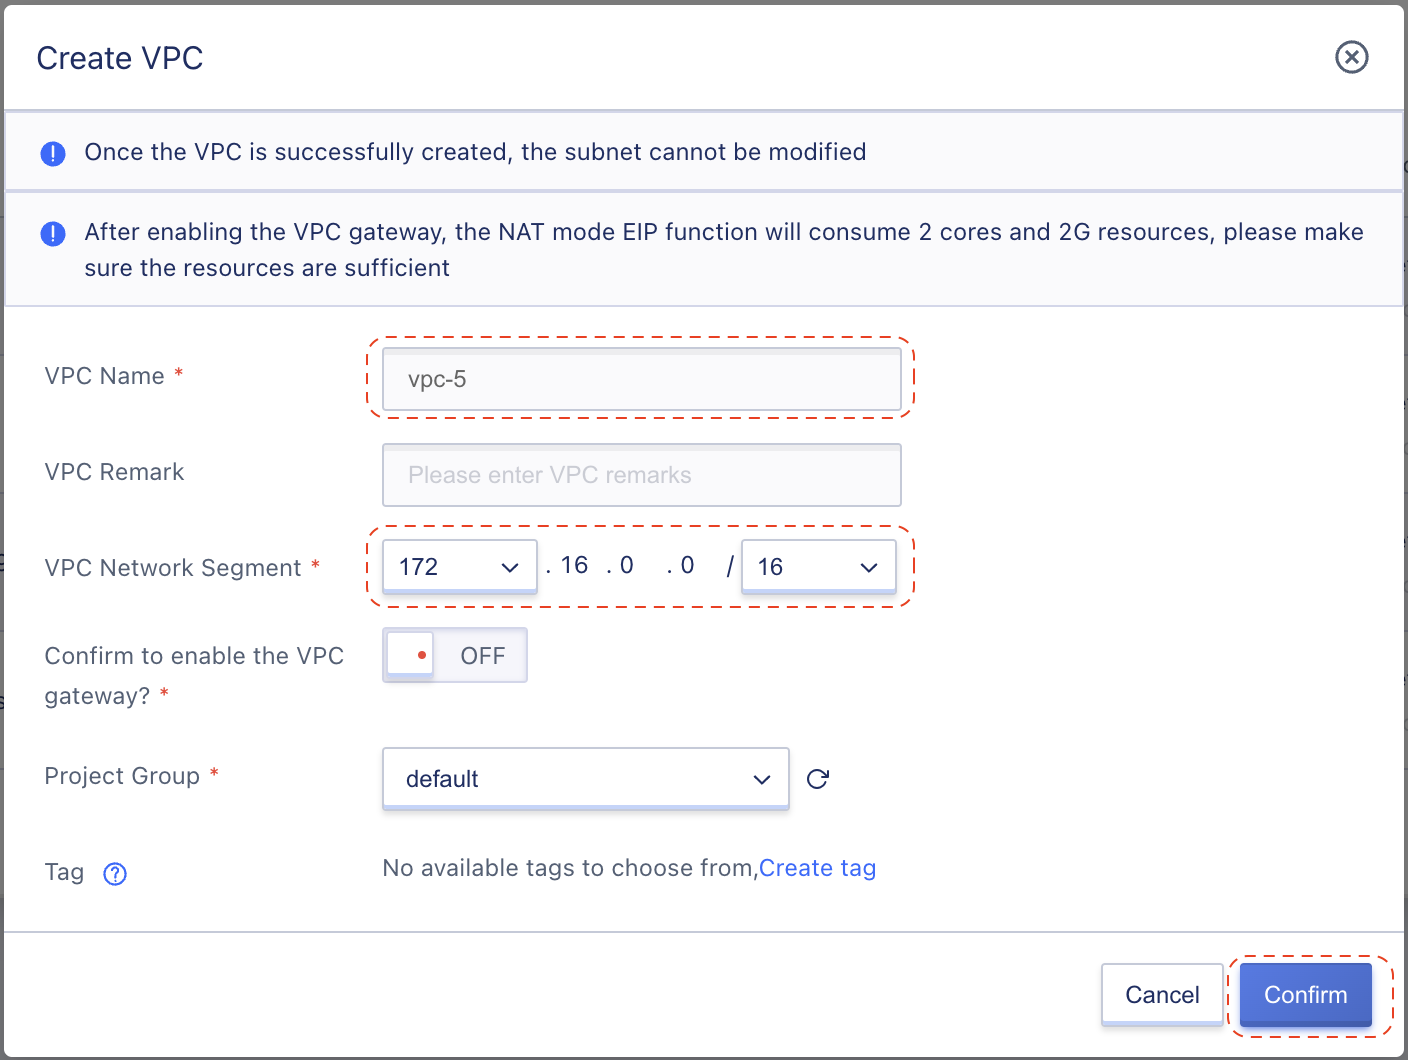
- VPC Name: vpc-5
- VPC Network Segment:
172.16.0.0/16
Leave other fields as default value and click Confirm to create VPC.
Step 4: Ensure that VPC created in the VPC list.
2. Create your Subnet
Step 1: From VPC list screen in above screen (step 4), click in VPC name to navigate to VPC detail page.
In the VPC detail page, the panel on the right-hand side is the Subnet management area. Click in the Create button to open Subnet creation form of current VPC.
Step 2: Enter Subnet information as below image:
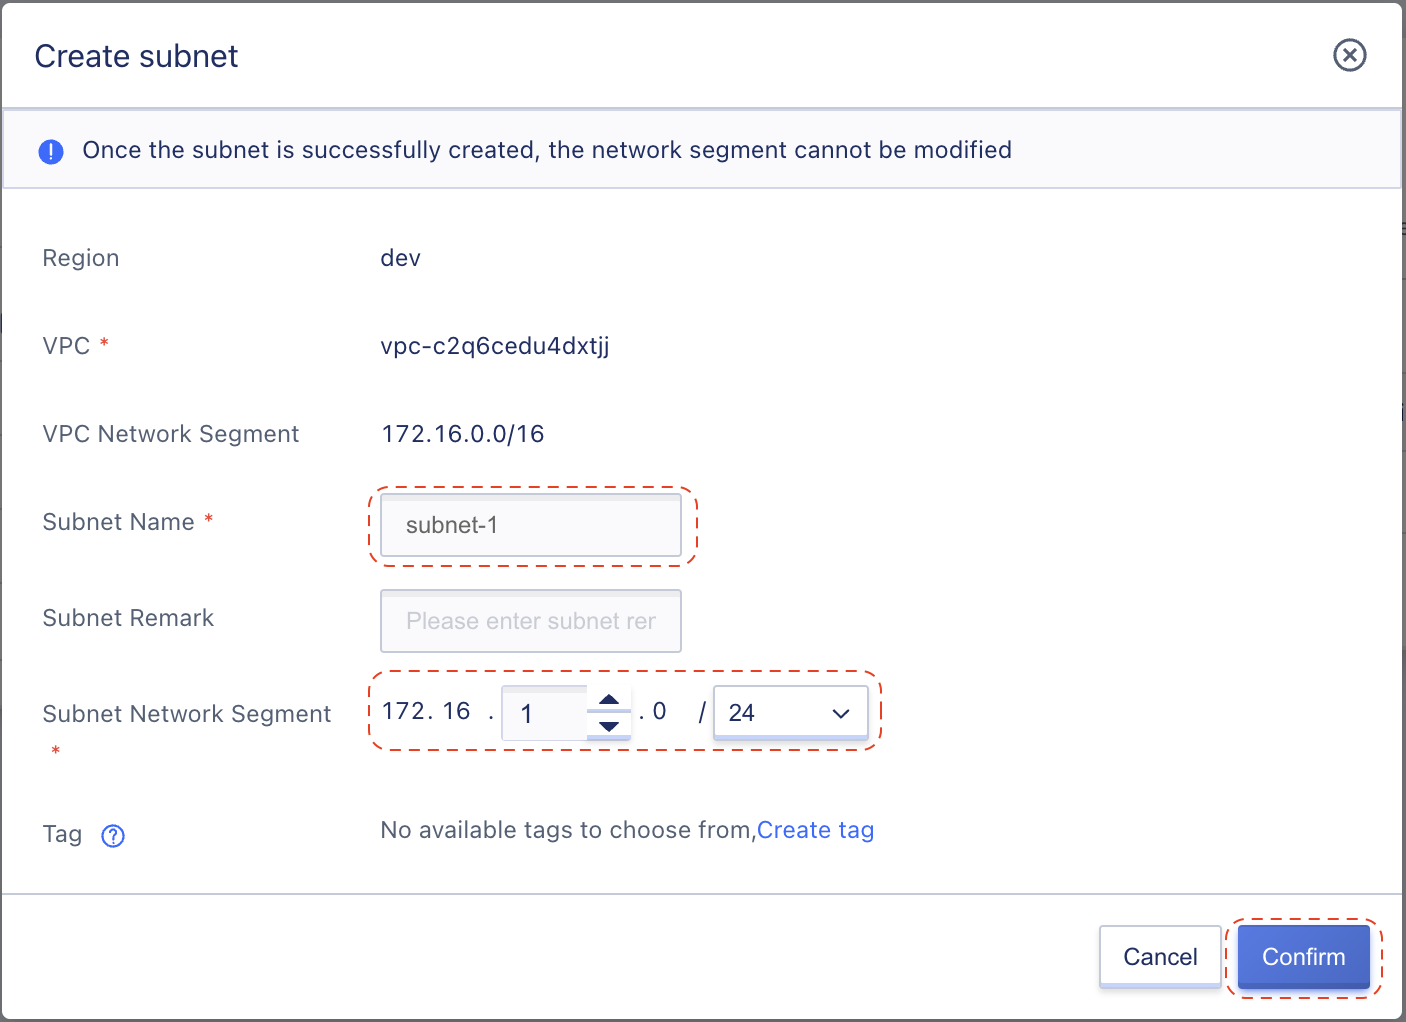
- Subnet Name: subnet-1
- Subnet Network Segment:
172.16.1.0/24
Leave other fields as default value and click Confirm to create Subnet.
Step 4: Ensure that subnet available in the Subnet list.
3. Request your public IP address
Step 1: Go to side-bar menu, click in External IP item under Network group.
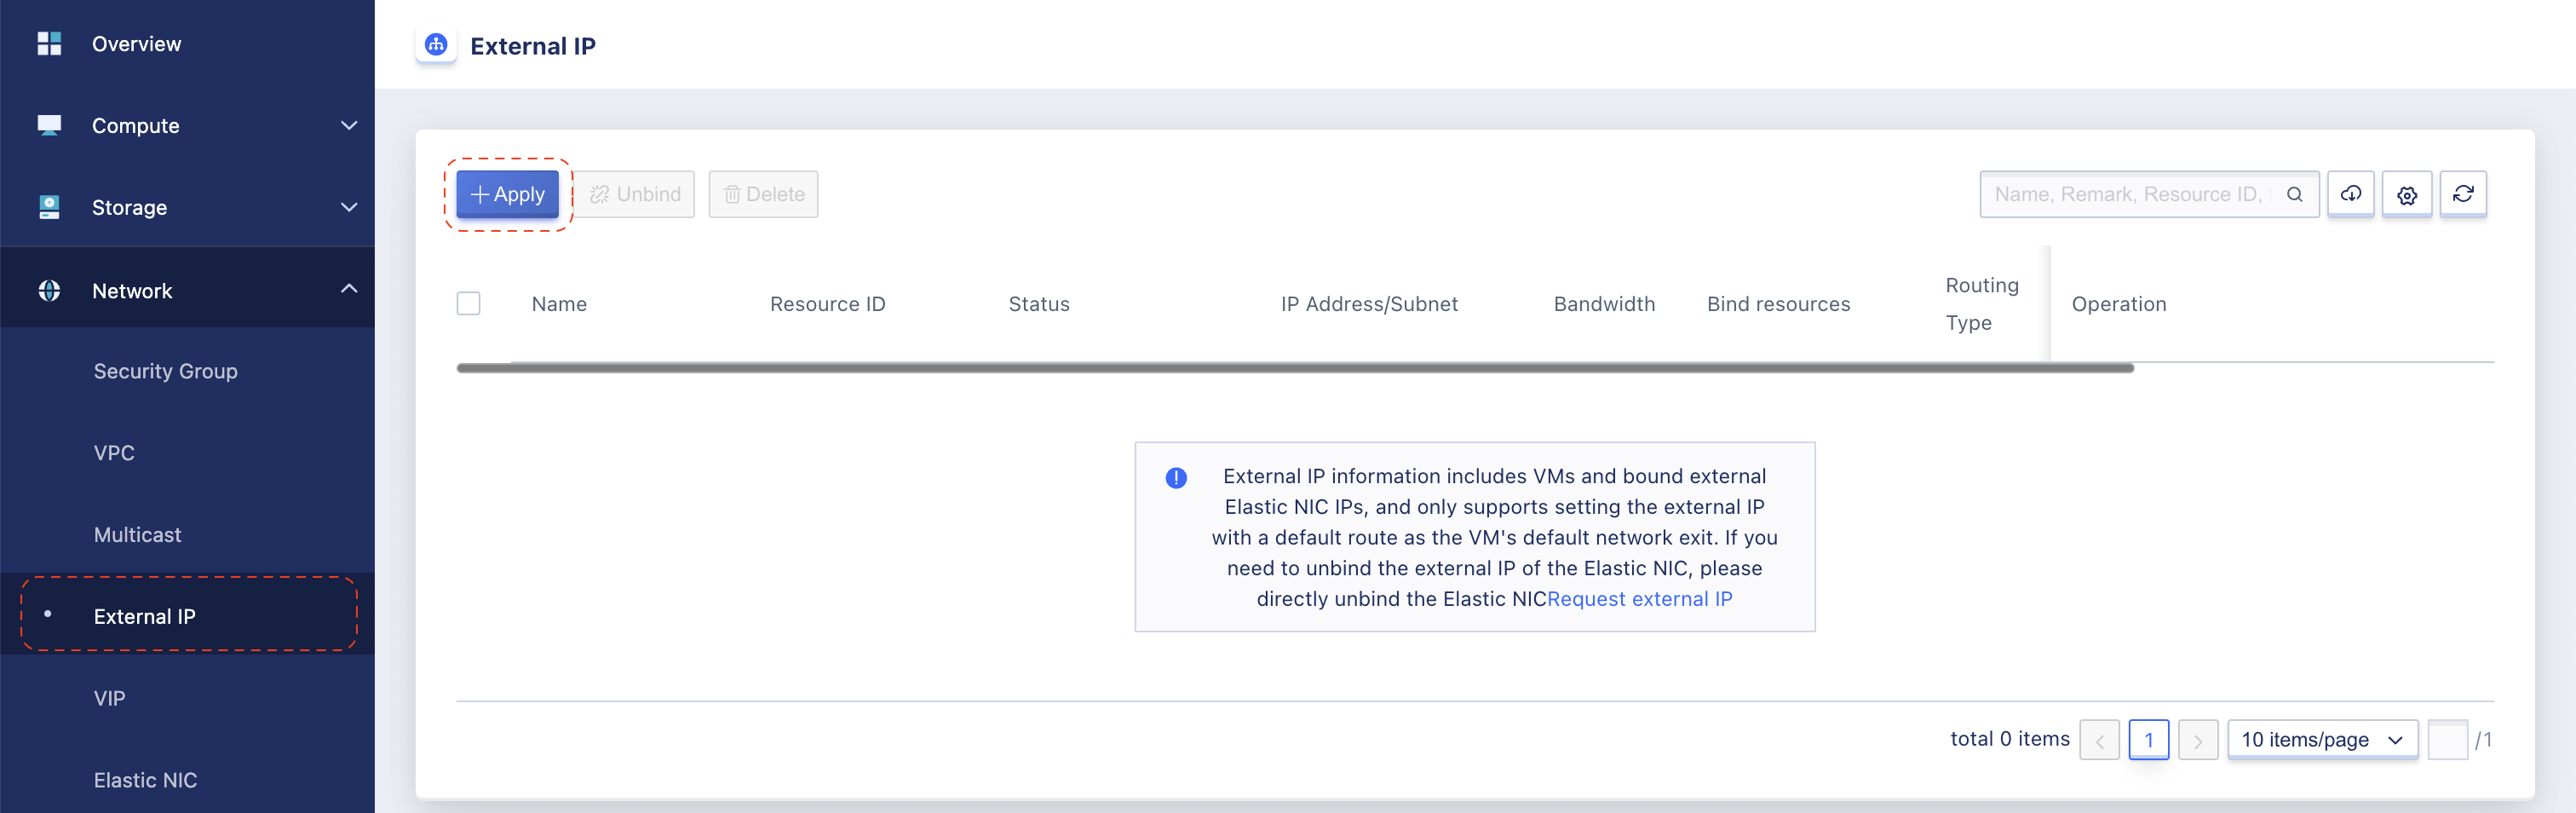
Click Apply to open EIP creation form.
Step 2: Enter EIP information as below image:
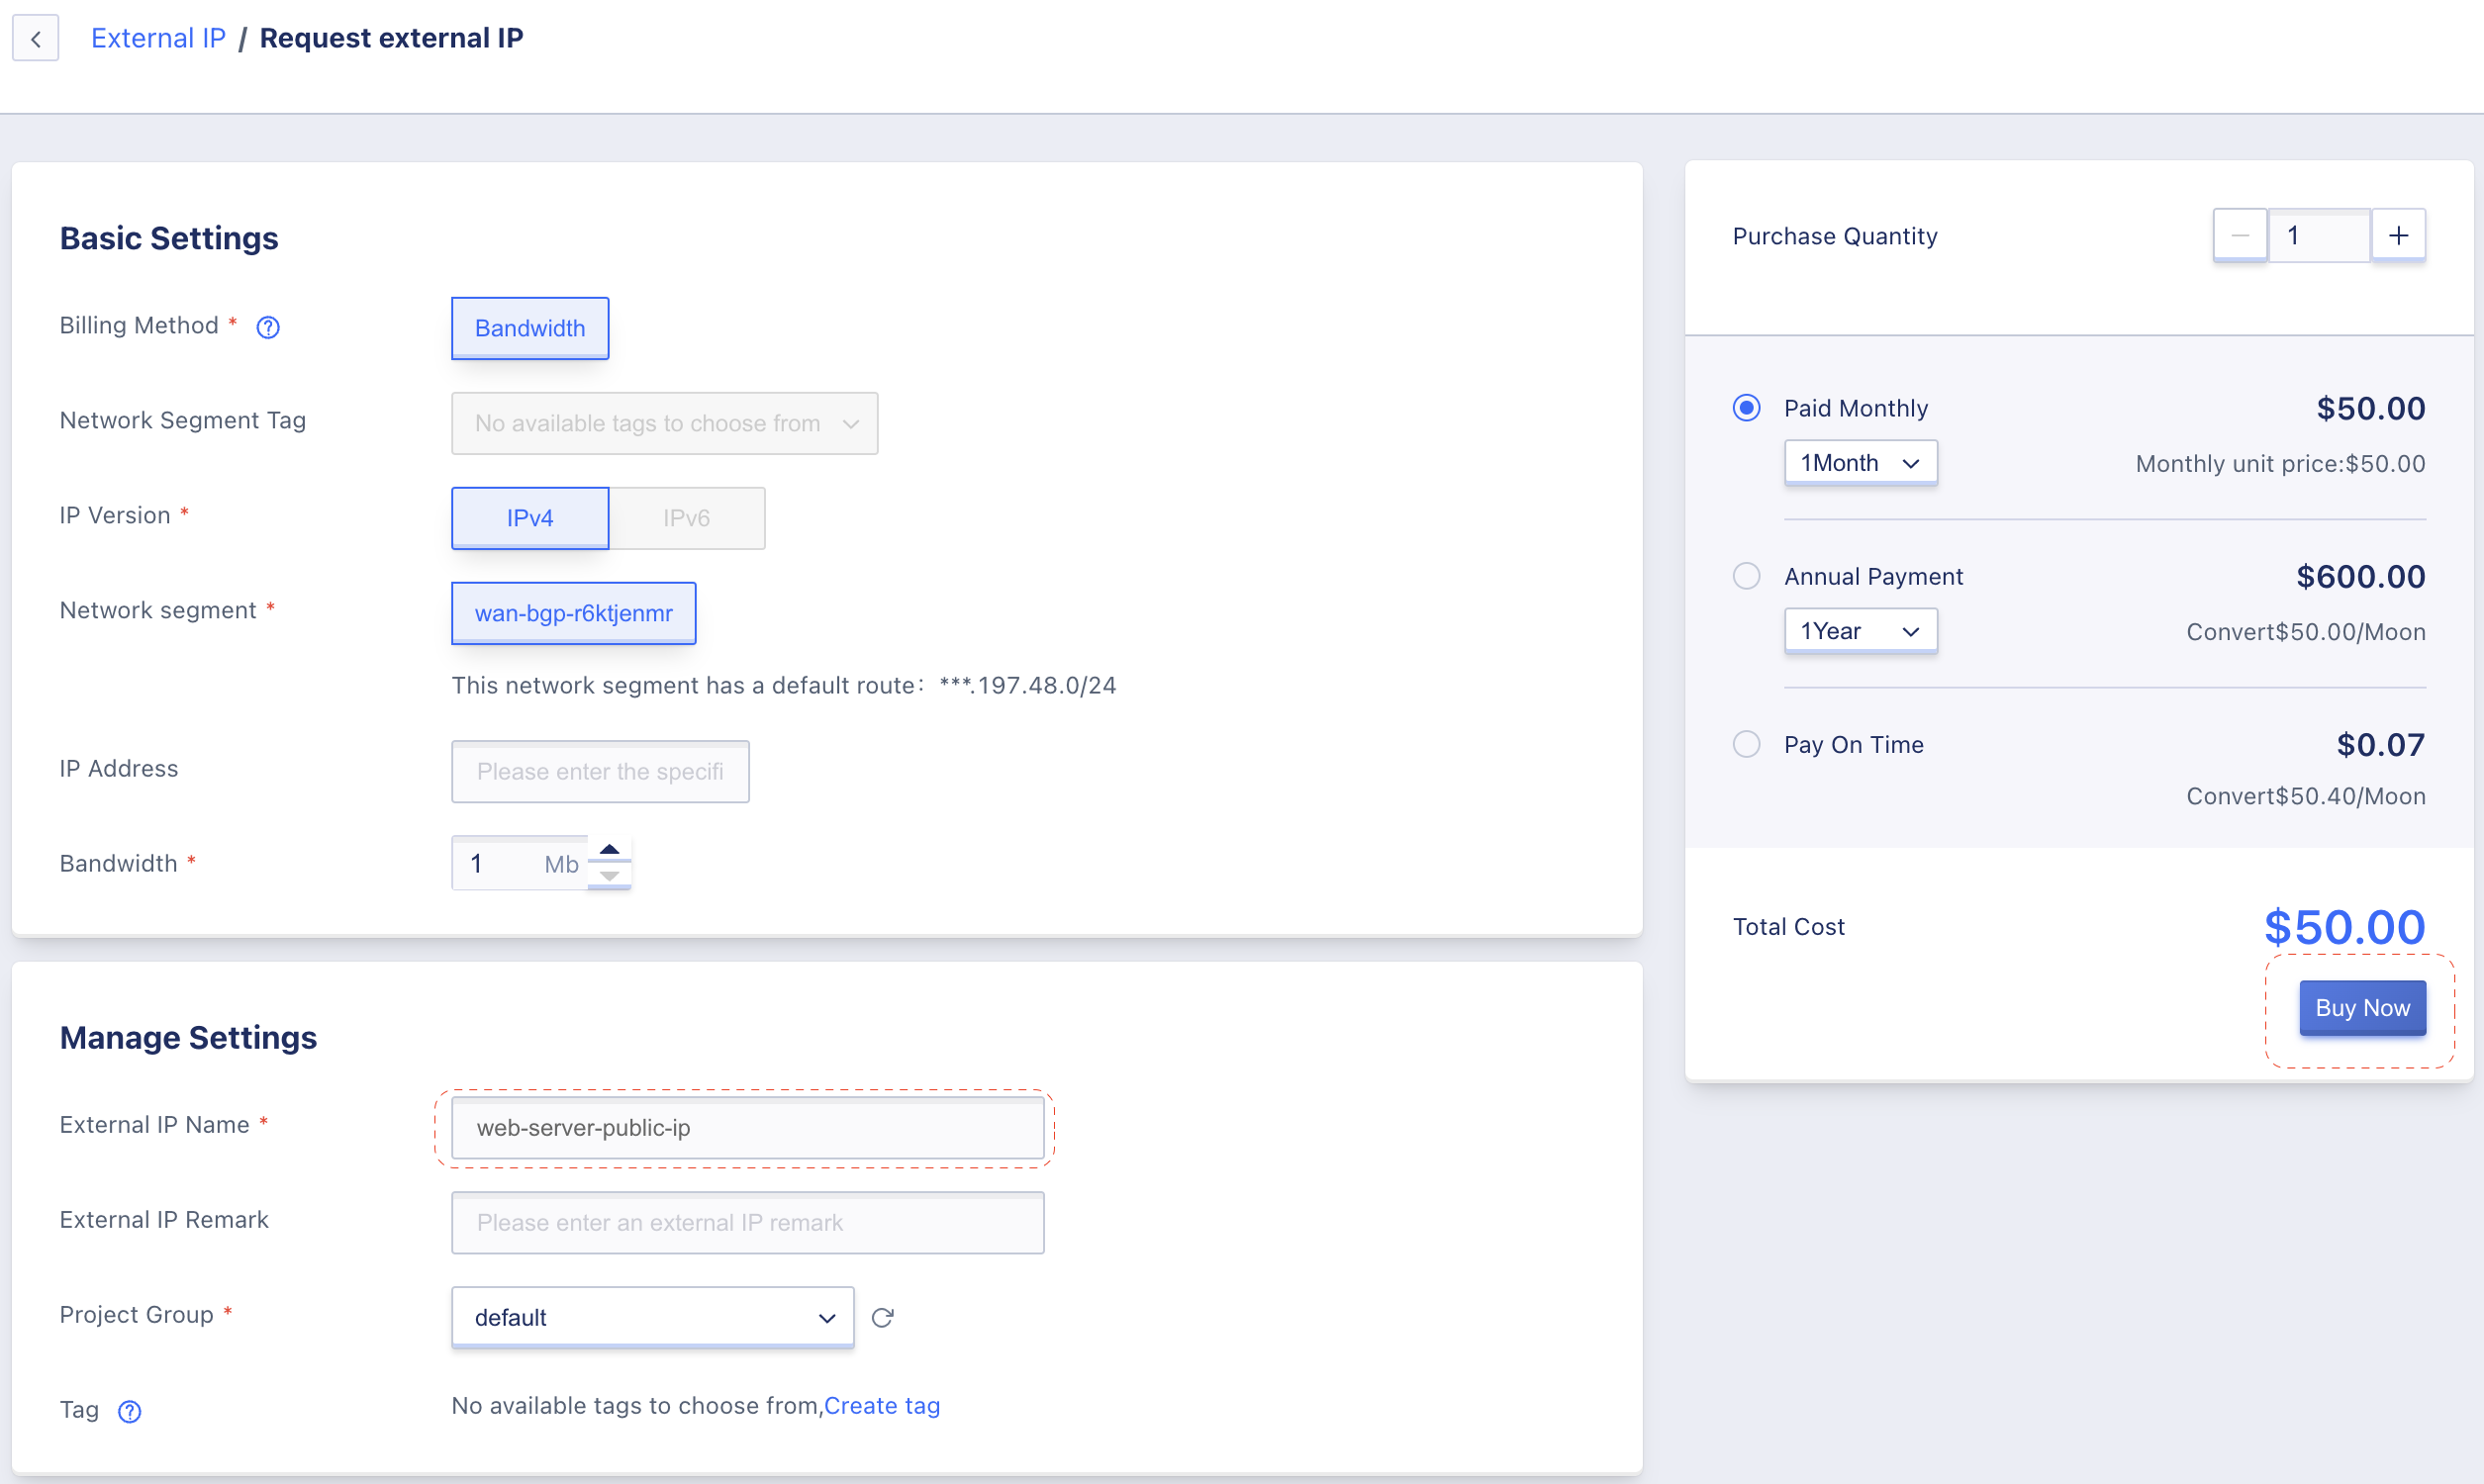
Basic Settings:
- Billing Method: Bandwidth
- IP Version: IPv4
- Network segment: leave as default value.
- Bandwidth: 1MB
Manage Settings:
- External IP Name: web-server-public-ip
Step 3: Click Buy Now in the top-right panel to create your EIP, for now ignore the charge here, we will explain it in the finance related labs.
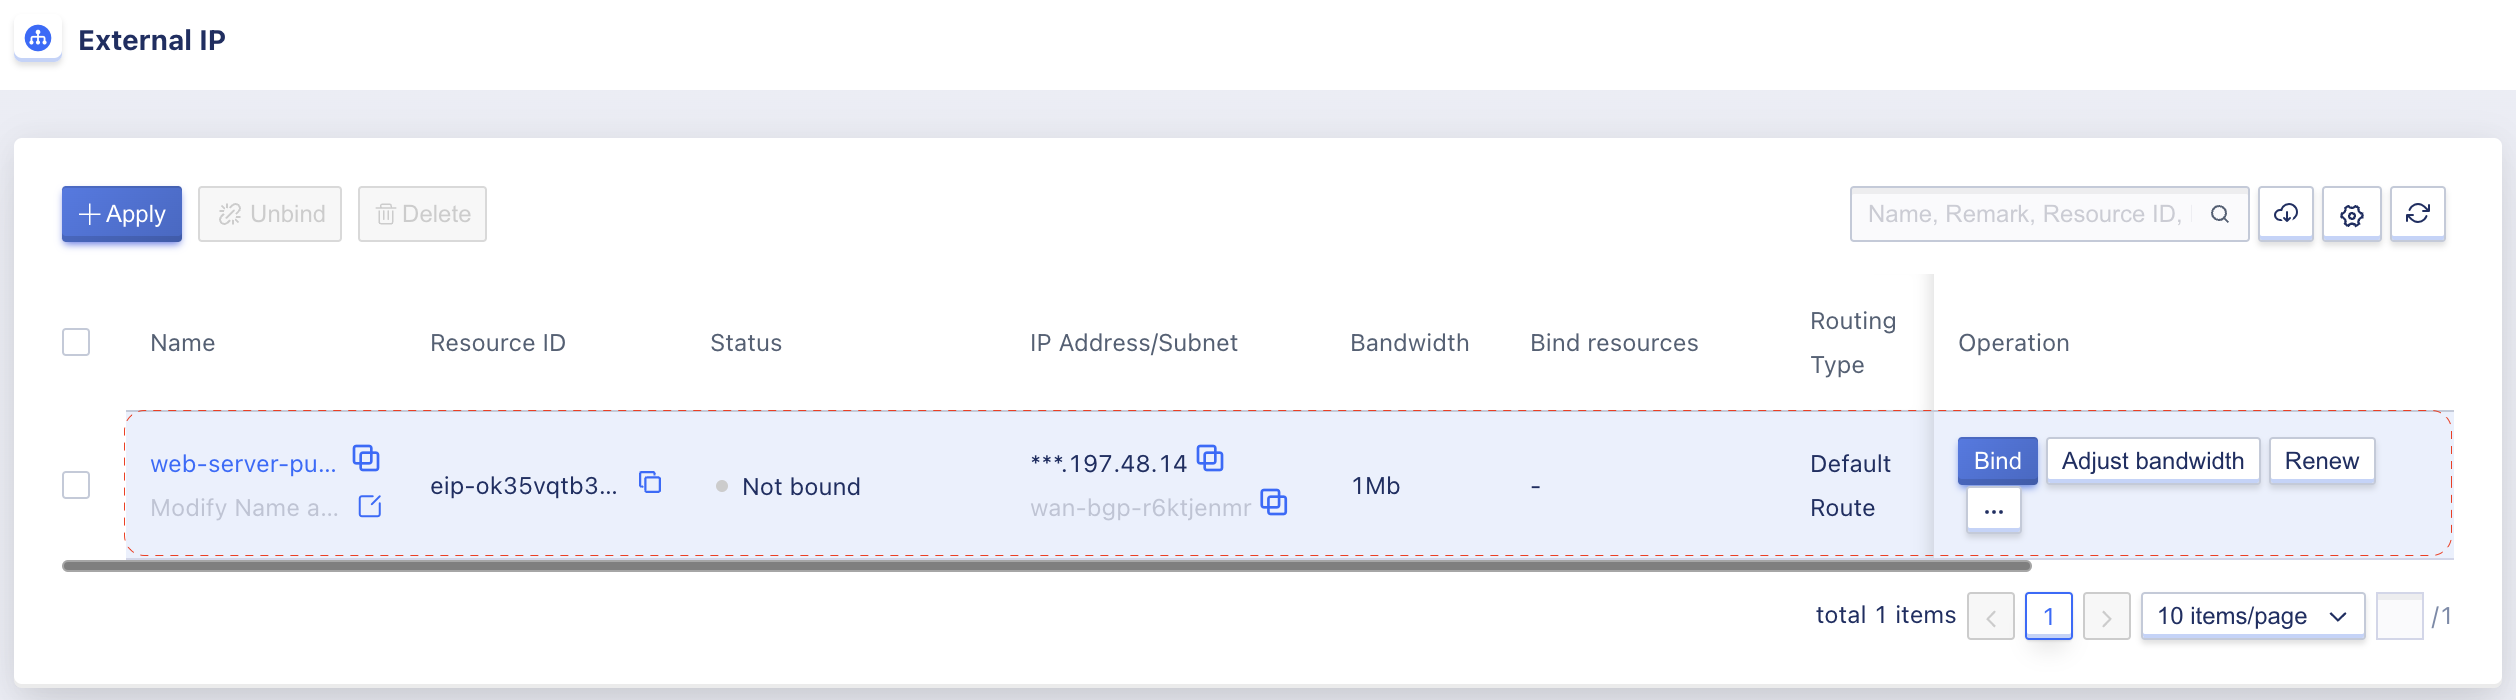
Step 4: Ensure that your EIP created and in Not Bound state in the External IP list.
4. Create Network Security Group
Step 1: Go to side-bar menu, click in Security Group item under Network group.
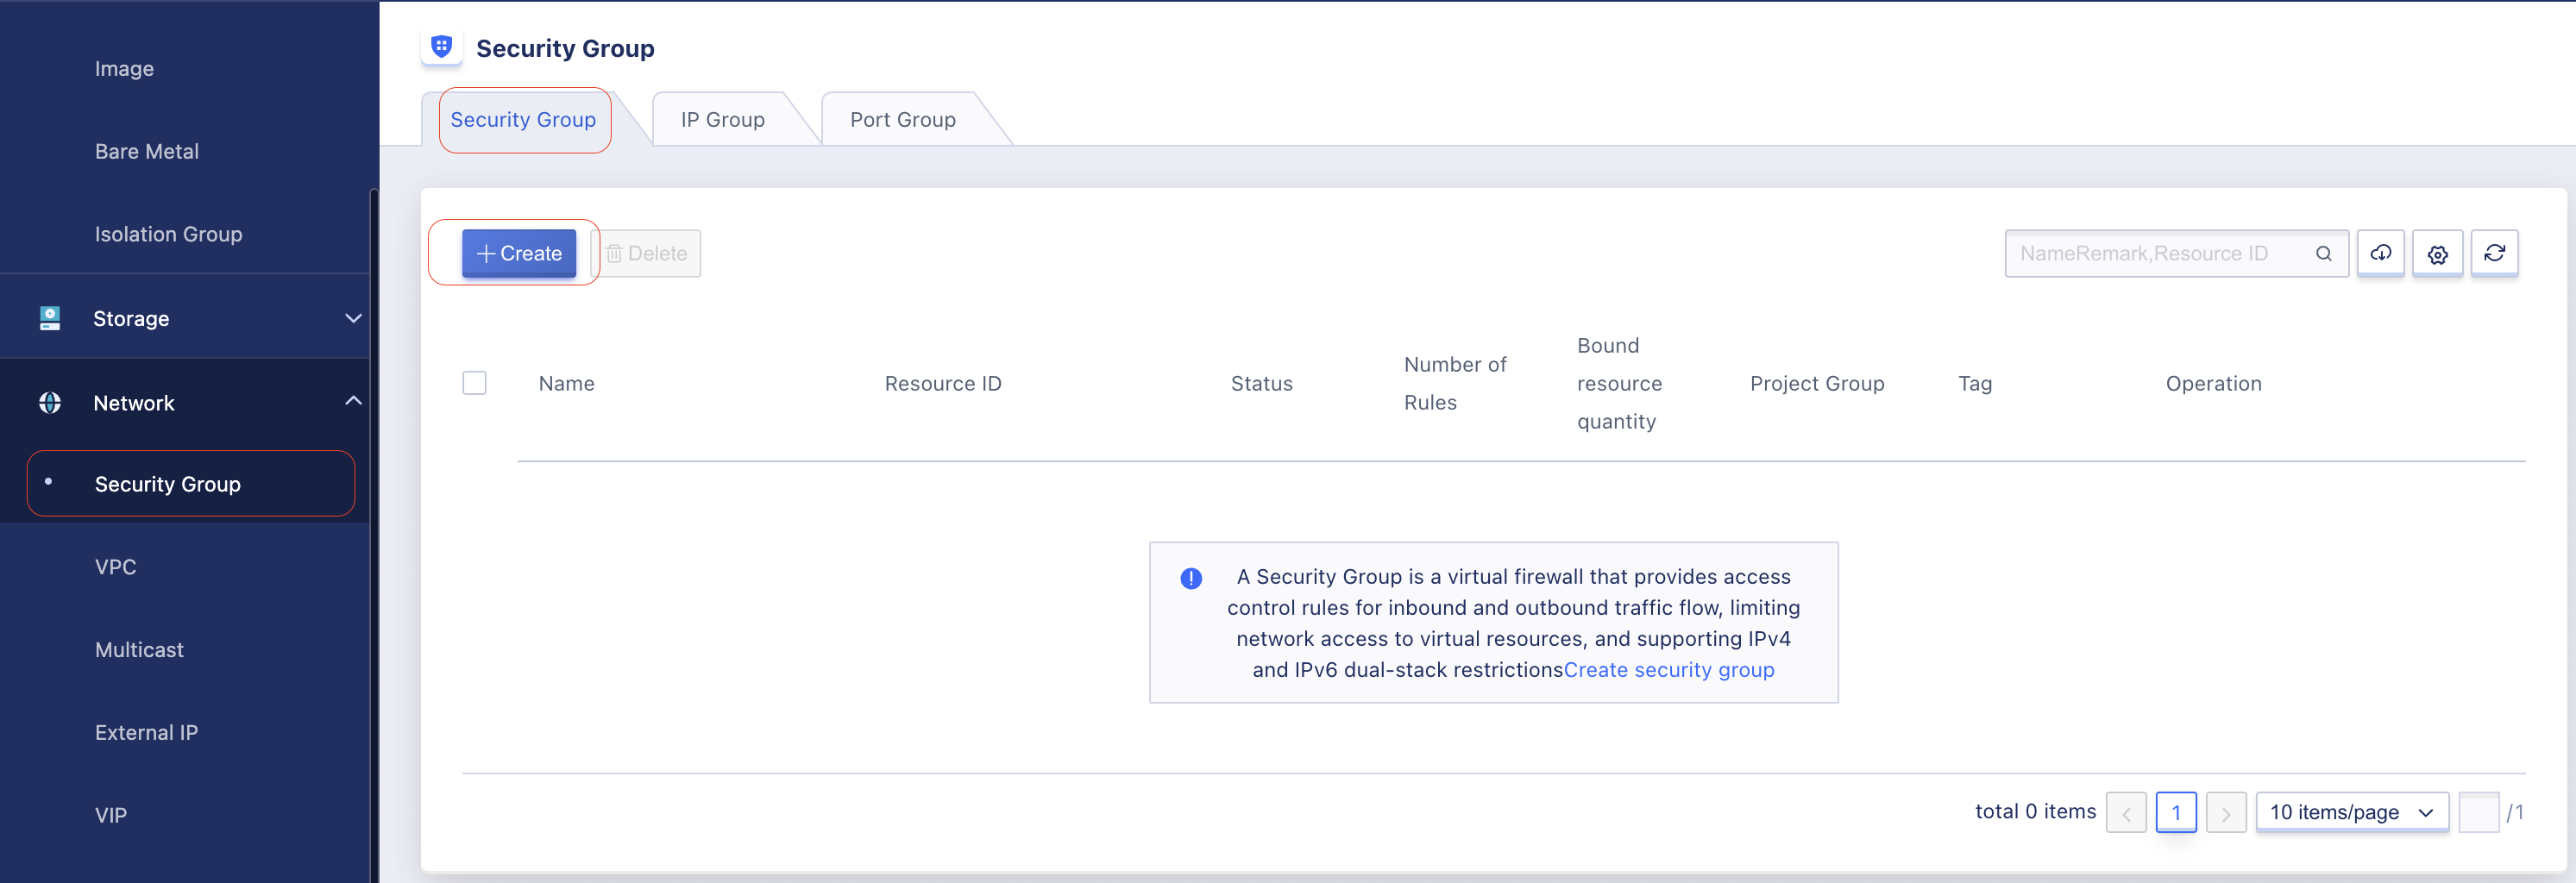
Select Security Group tab and click Create.
Step 2: Enter SG information as below image.
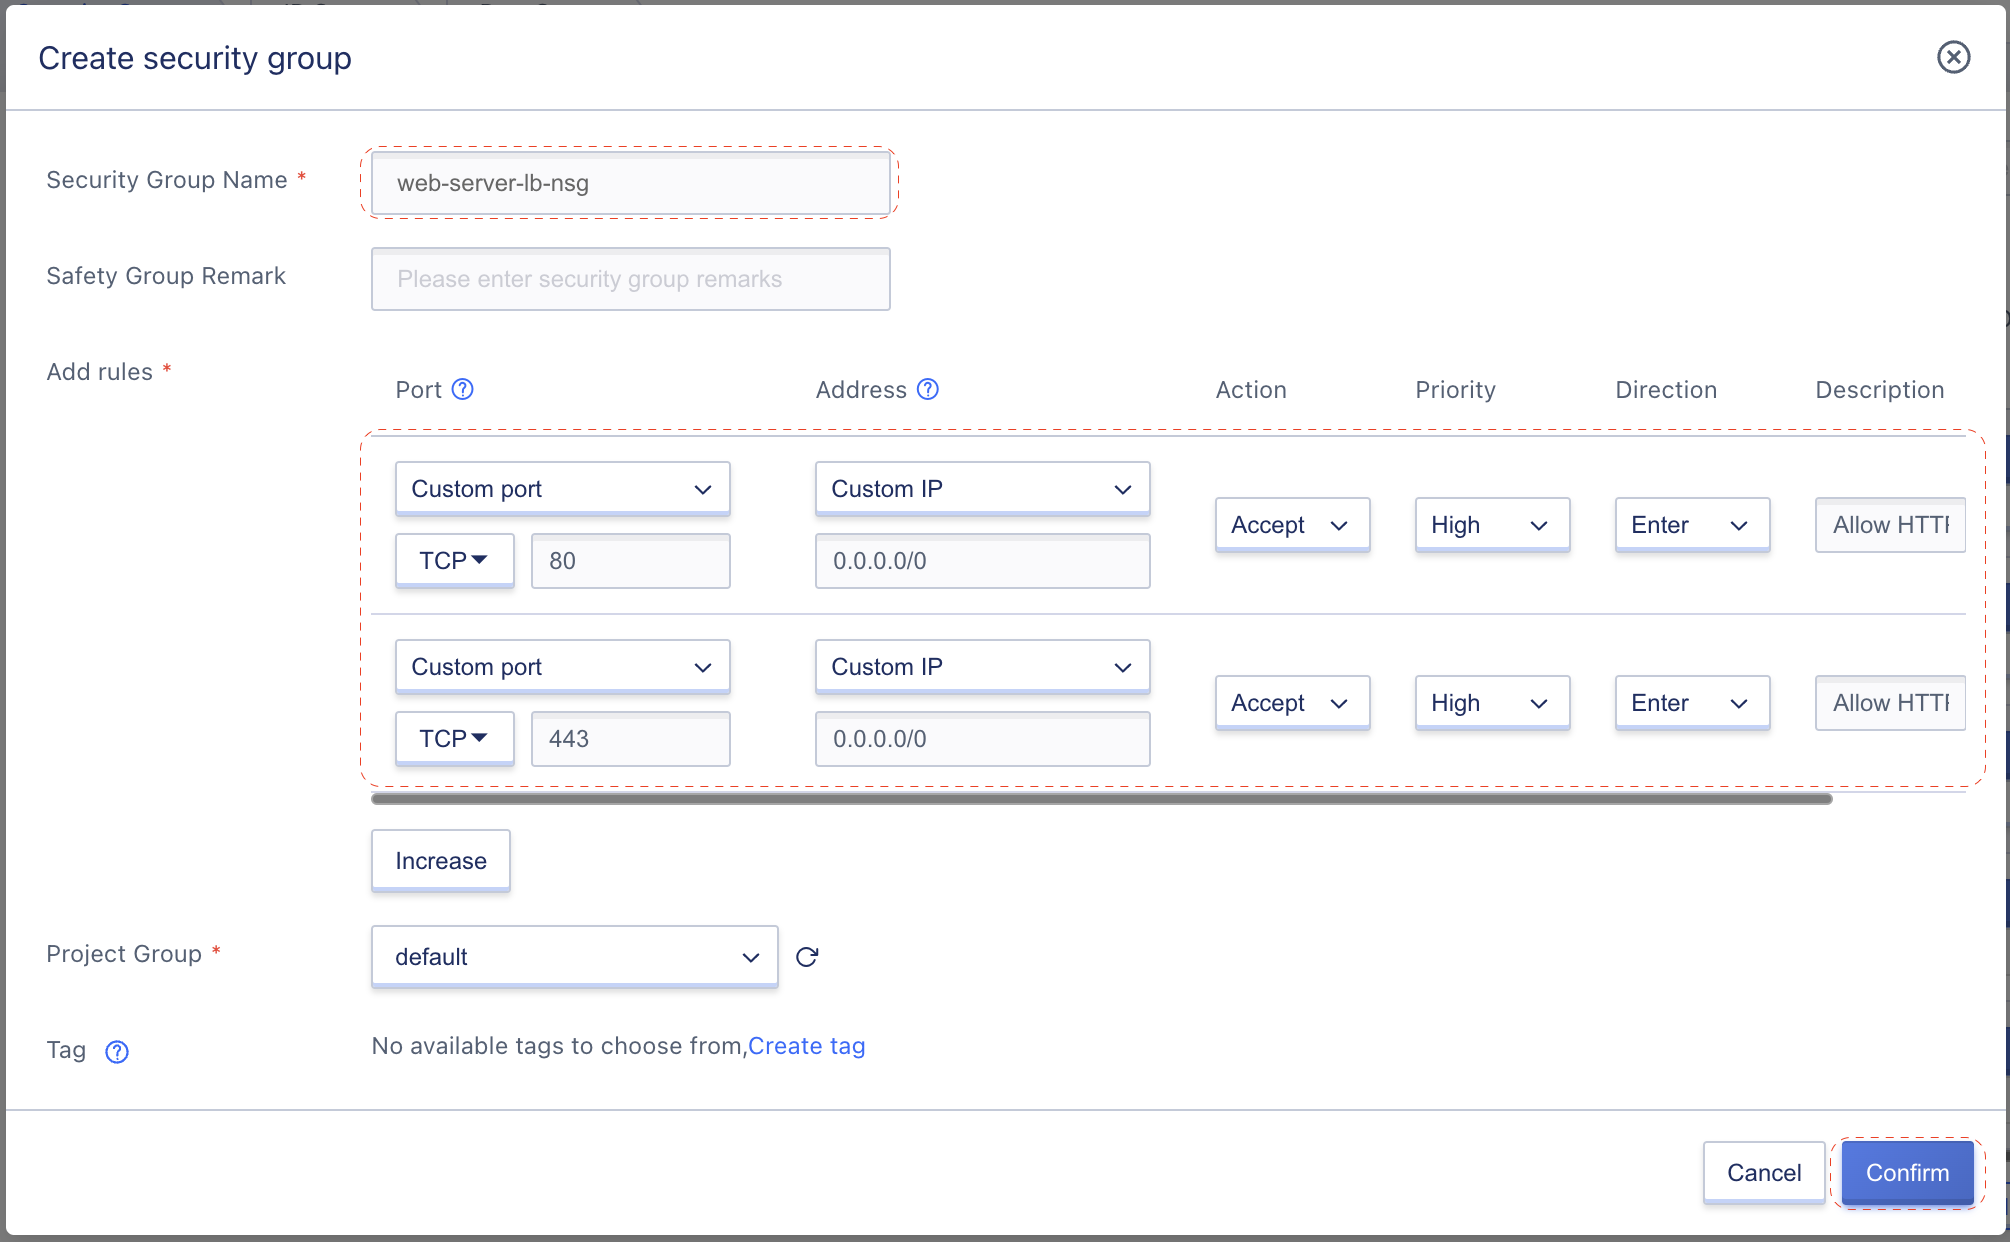
- Security Group name: web-server-lb-nsg
- Rules:
| Port | Address | Action | Priority | Direction | Description |
|---|---|---|---|---|---|
| TCP 80 | 0.0.0.0/0 | Accept | High | Enter | Allow HTTP traffics |
| TCP 443 | 0.0.0.0/0 | Accept | High | Enter | Allow HTTPS traffics |
Leave other fields as default value and click Confirm to create the Security Group.
Step 3: Ensure web-server-lb-nsg security group created & available in the security group listing page.
5. Create your Debian VM
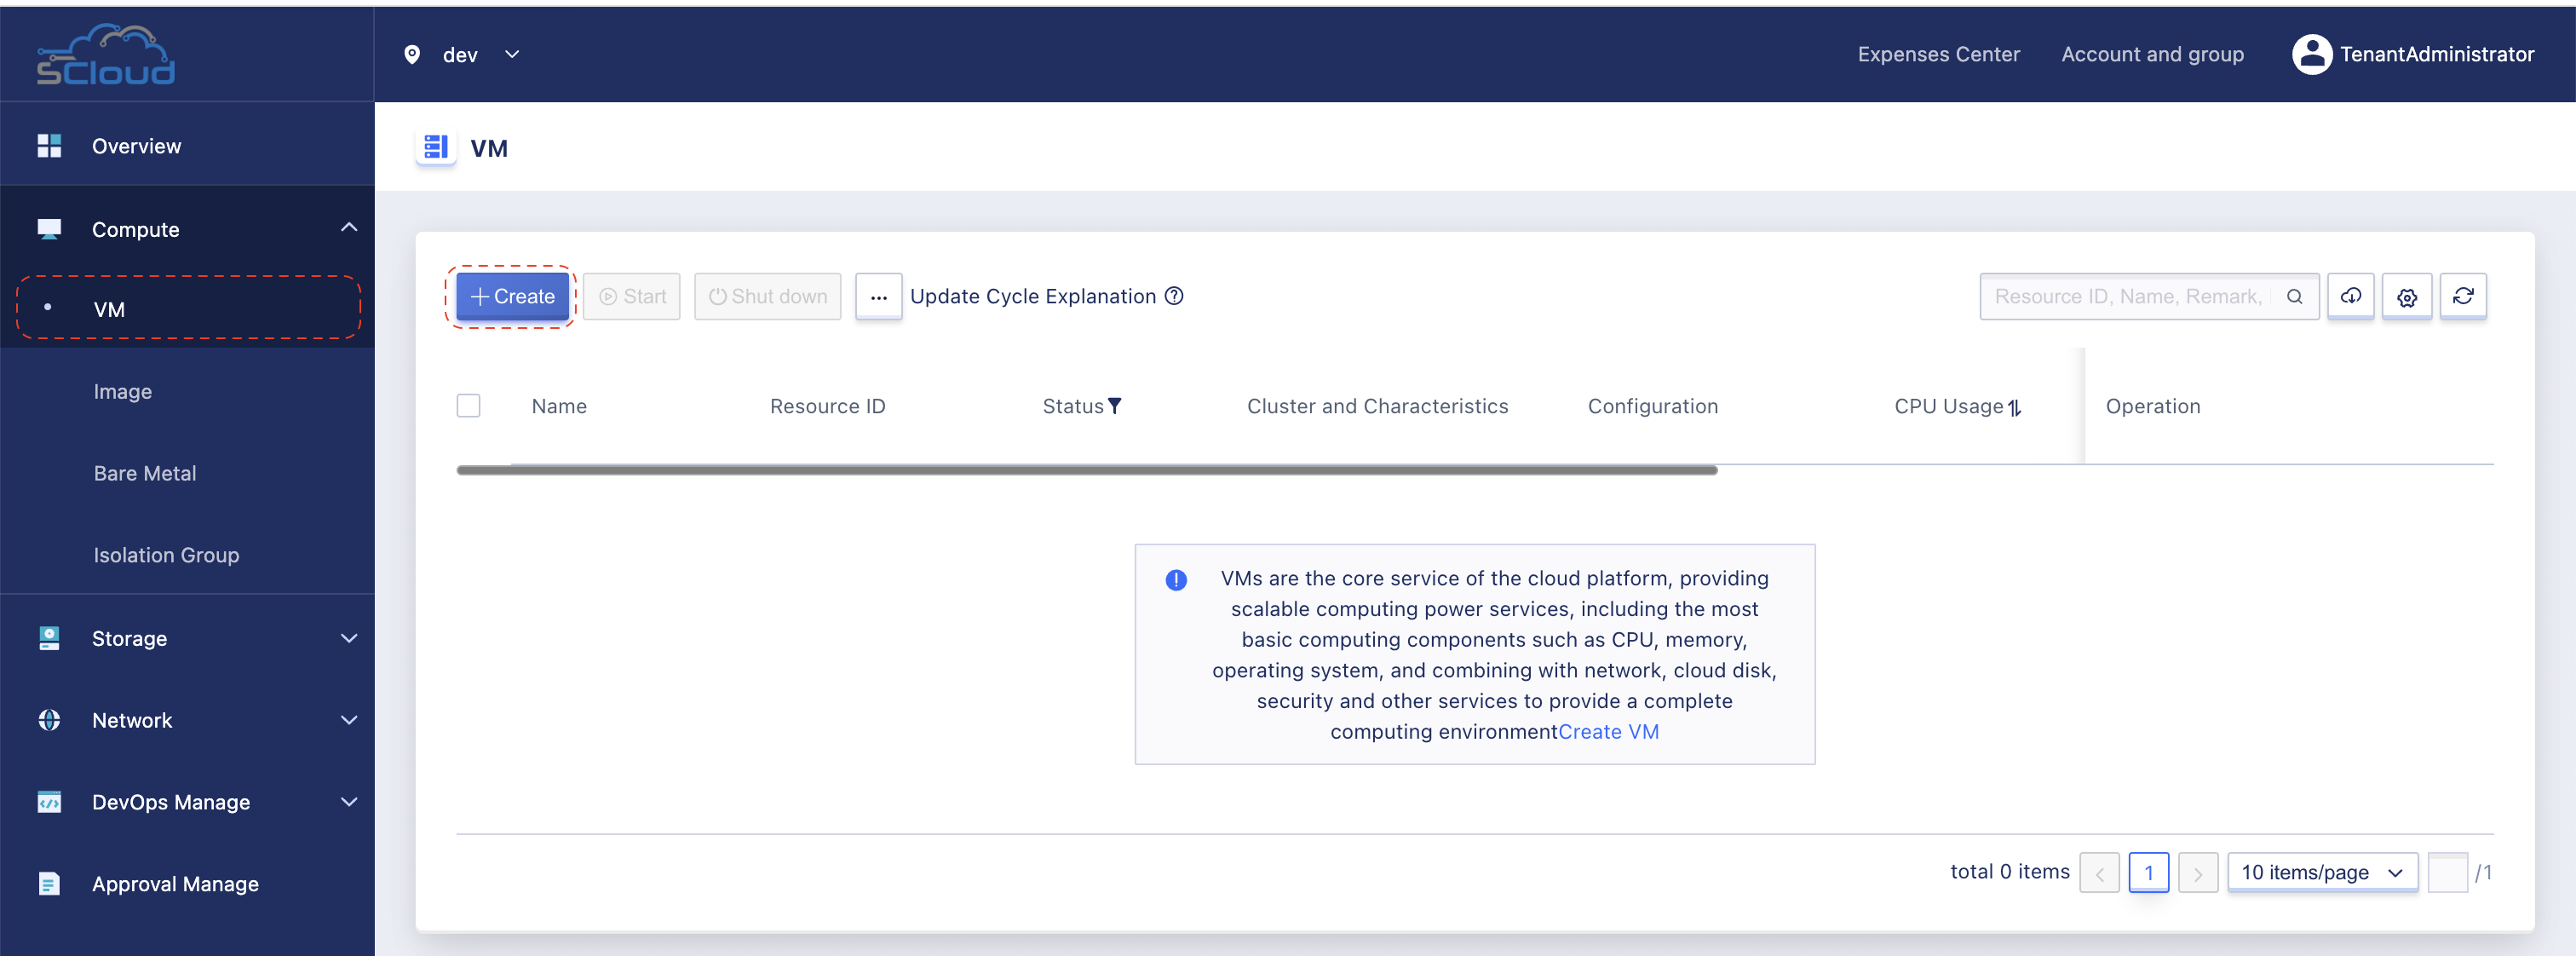
Step 1: Go to side-bar menu, click in VM item under Compute group.
Step 2: In the VM creation page, enter information as the following images:
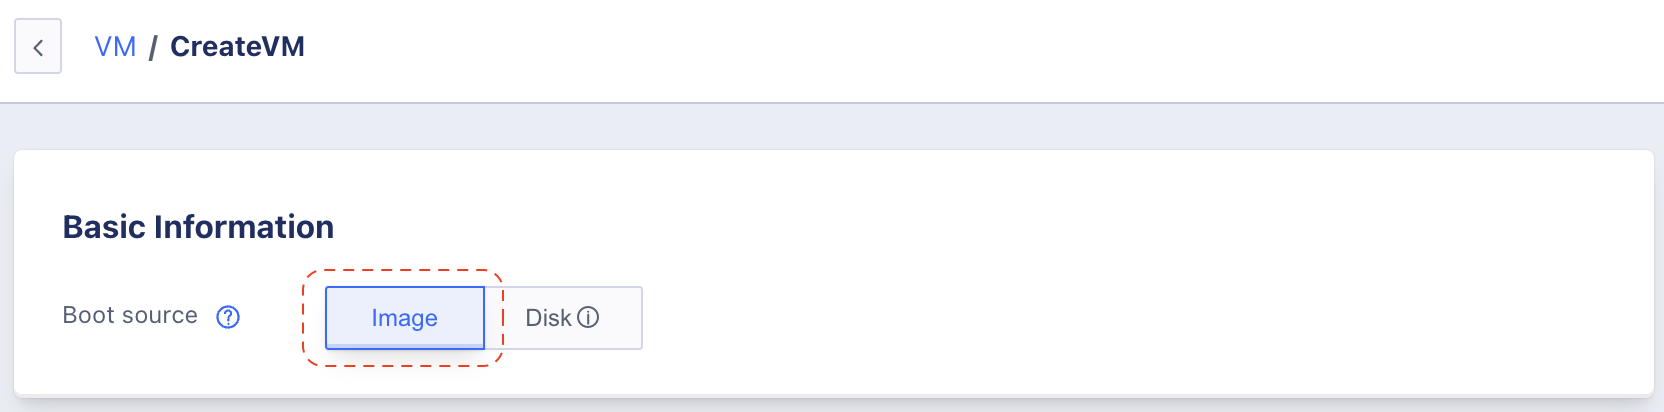
Basic Information:
- Boot source: Image

Basic Settings:
- Cluster: leave as default value.
- Image: select Debian 10.12 as OS image.
- Specifications: 1C2G (1 vCore CPU, 2GB Ram).
- Disk: leave as default value (1 40GB system disk, 1 10GB data disk).
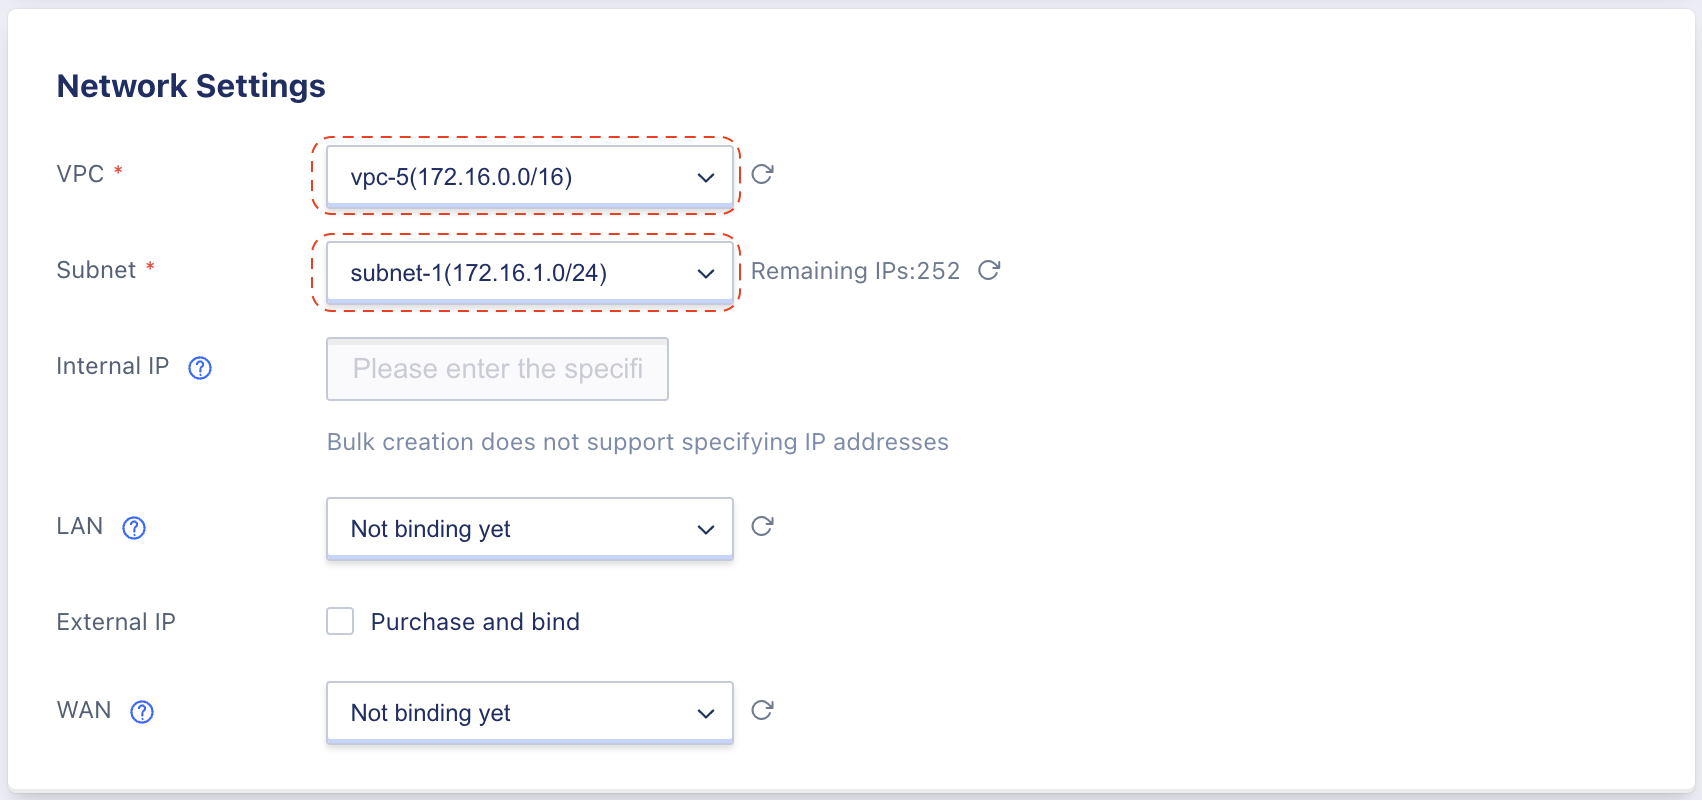
Network Settings:
- VPC: vpc-5
- Subnet: subnet-1
- Leave other fields as default value.
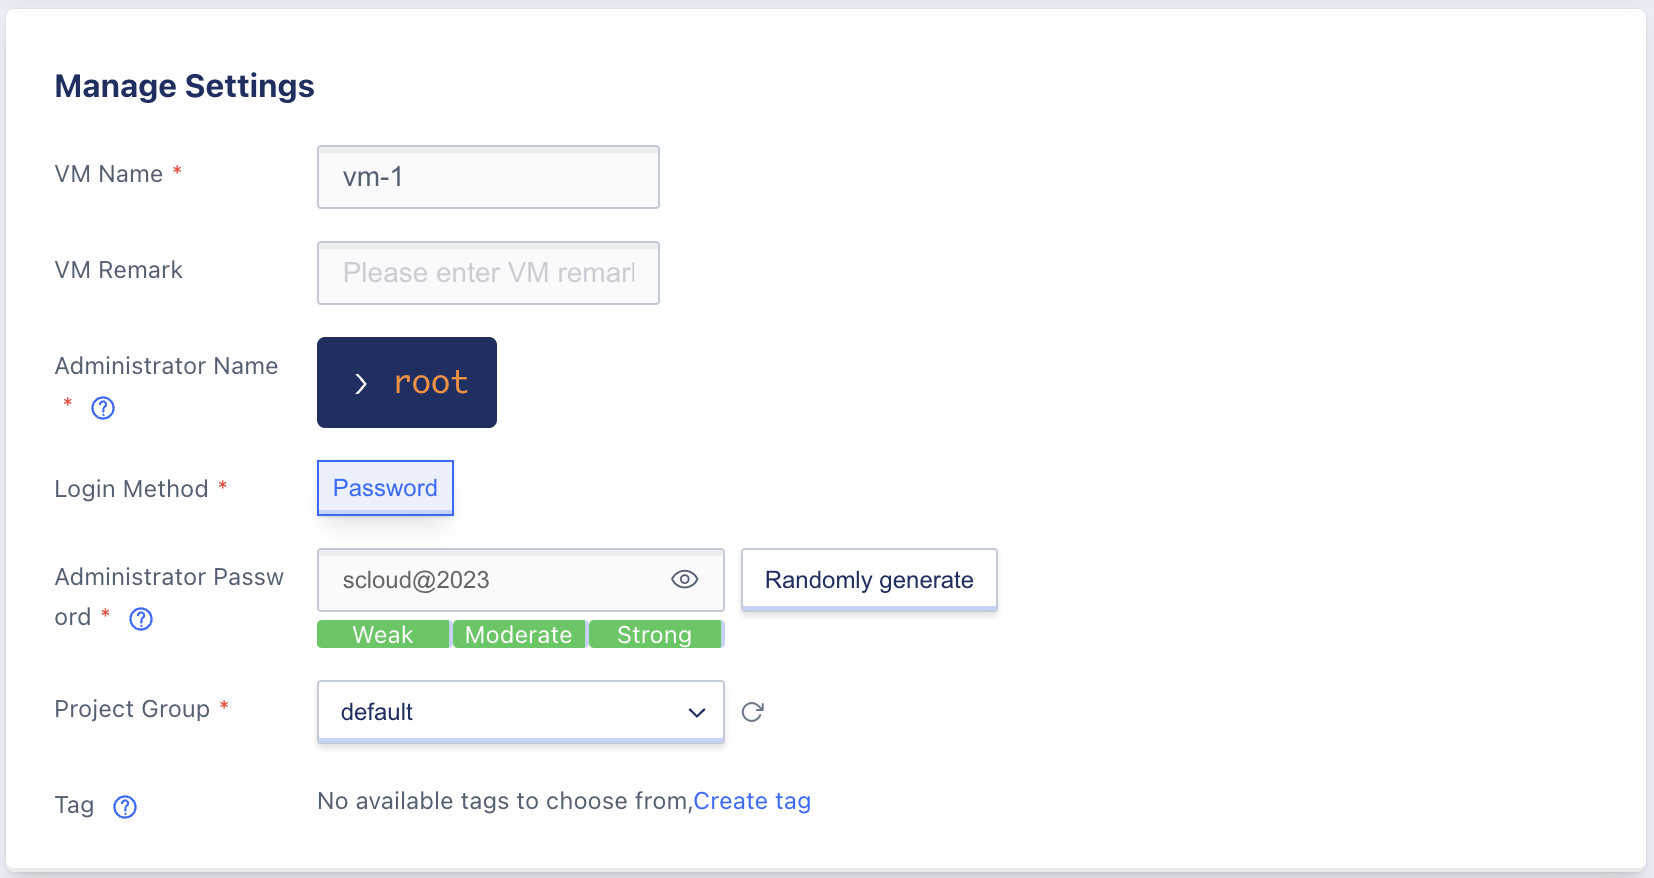
Manage Settings:
- VM Name: vm-1
- Login Method: Password
- Administrator Password: click Randomly Generate to get a random password or set your own desired password (note the password somewhere, we will need it in the next step).
Step 3: Click Buy Now in the top-right panel to create your VM.
Step 4: Ensure vm-1 available in the VM list and in the Running state.
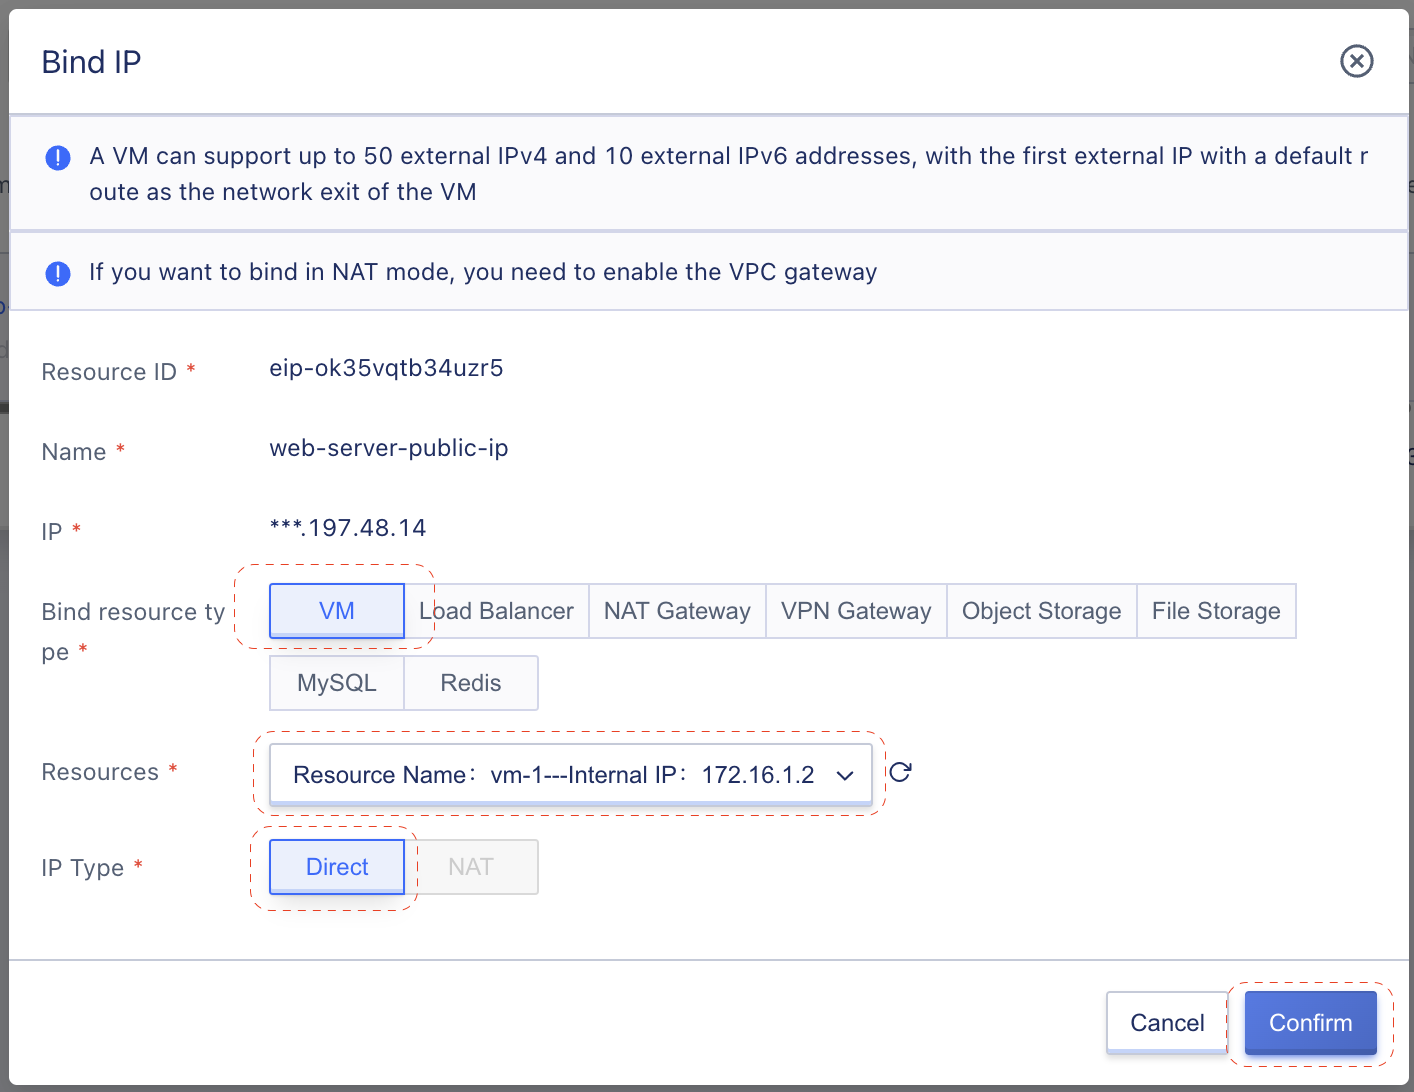
Step 5: Bind the public IP address to vm-1
Go to side-bar menu, click in External IP item under Network group. From the EIP listing page, find your web-server-public-ip EIP and click Bind button.
Enter information as below and click Confirm to bind the public IP address to vm-1.
6. Install Web Server
Step 1: SSH to your VM follow the above step.
localhost ~ % ssh root@***.197.48.14
***.197.48.14is the public IP address that you just bind to your VM.
Step 2: Install NGINX web server on Debian VM.
root@localhost:~# apt update

root@localhost:~# apt install curl gnupg2 ca-certificates lsb-release

root@localhost:~# apt install nginx -y
Step 3: Verify NGINX service
root@localhost:~# systemctl status nginx
● nginx.service - A high performance web server and a reverse proxy server
   Loaded: loaded (/lib/systemd/system/nginx.service; enabled; vendor preset: enabled)
   Active: active (running) since Fri 2023-04-07 06:51:54 EDT; 49s ago
     Docs: man:nginx(8)
 Main PID: 1883 (nginx)
    Tasks: 2 (limit: 2223)
   Memory: 8.0M
   CGroup: /system.slice/nginx.service
           ├─1883 nginx: master process /usr/sbin/nginx -g daemon on; master_process on;
           └─1884 nginx: worker process
Step 4: Install stress tool, we will use it later to impose high CPU load situation.
root@localhost:~# apt install stress
root@localhost:~# stress --help
'stress' imposes certain types of compute stress on your system
Usage: stress [OPTION [ARG]] ...
 -?, --help         show this help statement
     --version      show version statement
 -v, --verbose      be verbose
 -q, --quiet        be quiet
 -n, --dry-run      show what would have been done
 -t, --timeout N    timeout after N seconds
     --backoff N    wait factor of N microseconds before work starts
 -c, --cpu N        spawn N workers spinning on sqrt()
 -i, --io N         spawn N workers spinning on sync()
 -m, --vm N         spawn N workers spinning on malloc()/free()
     --vm-bytes B   malloc B bytes per vm worker (default is 256MB)
     --vm-stride B  touch a byte every B bytes (default is 4096)
     --vm-hang N    sleep N secs before free (default none, 0 is inf)
     --vm-keep      redirty memory instead of freeing and reallocating
 -d, --hdd N        spawn N workers spinning on write()/unlink()
     --hdd-bytes B  write B bytes per hdd worker (default is 1GB)

Example: stress --cpu 8 --io 4 --vm 2 --vm-bytes 128M --timeout 10s
Step 5: Navigate to External IP listing, find web-server-public-ip and unbind the public IP address from our VM by click Unbind button.
By far, we already install NGINX web server that listening on port 80 to our VM, we also install stress tool to impose high CPU load, next let create the custom image based on that VM, it will be used later to create VM Template and Auto Scaling.
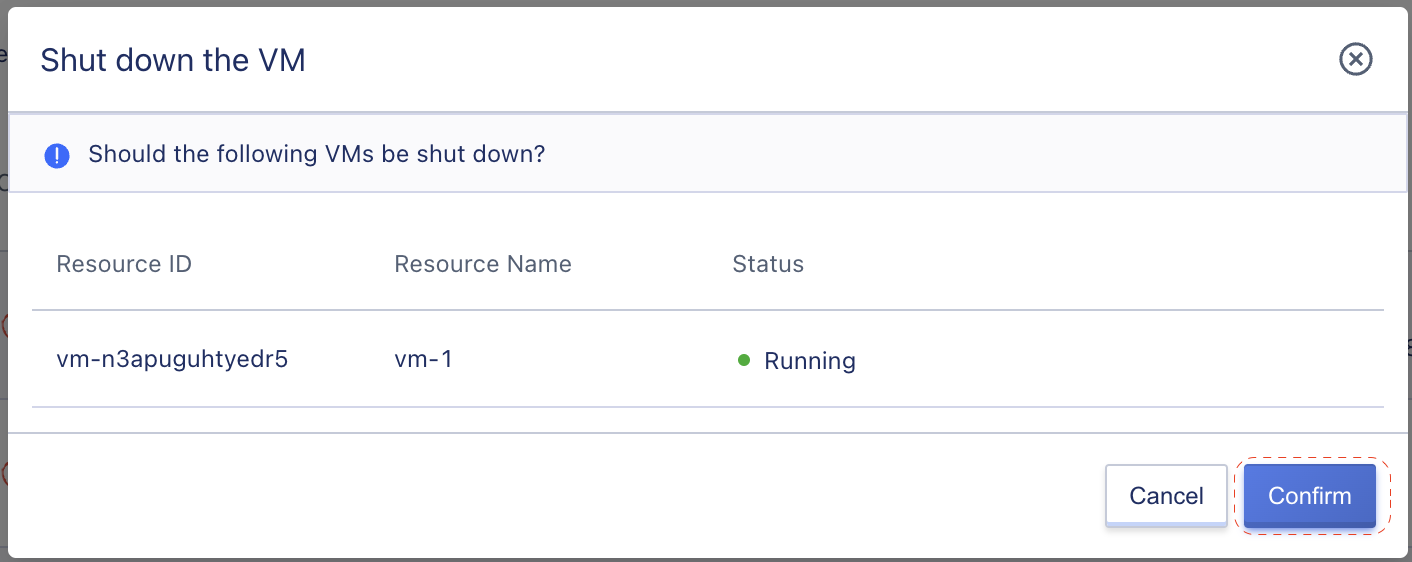
7. Create custom VM image
Step 1: to create custom image base on VM, we need first shutdown it. Go to VM listing page, find vm-1 and click Shutdown button.
Step 2: go to VM detail page by click in VM name, and create new image follow below actions.
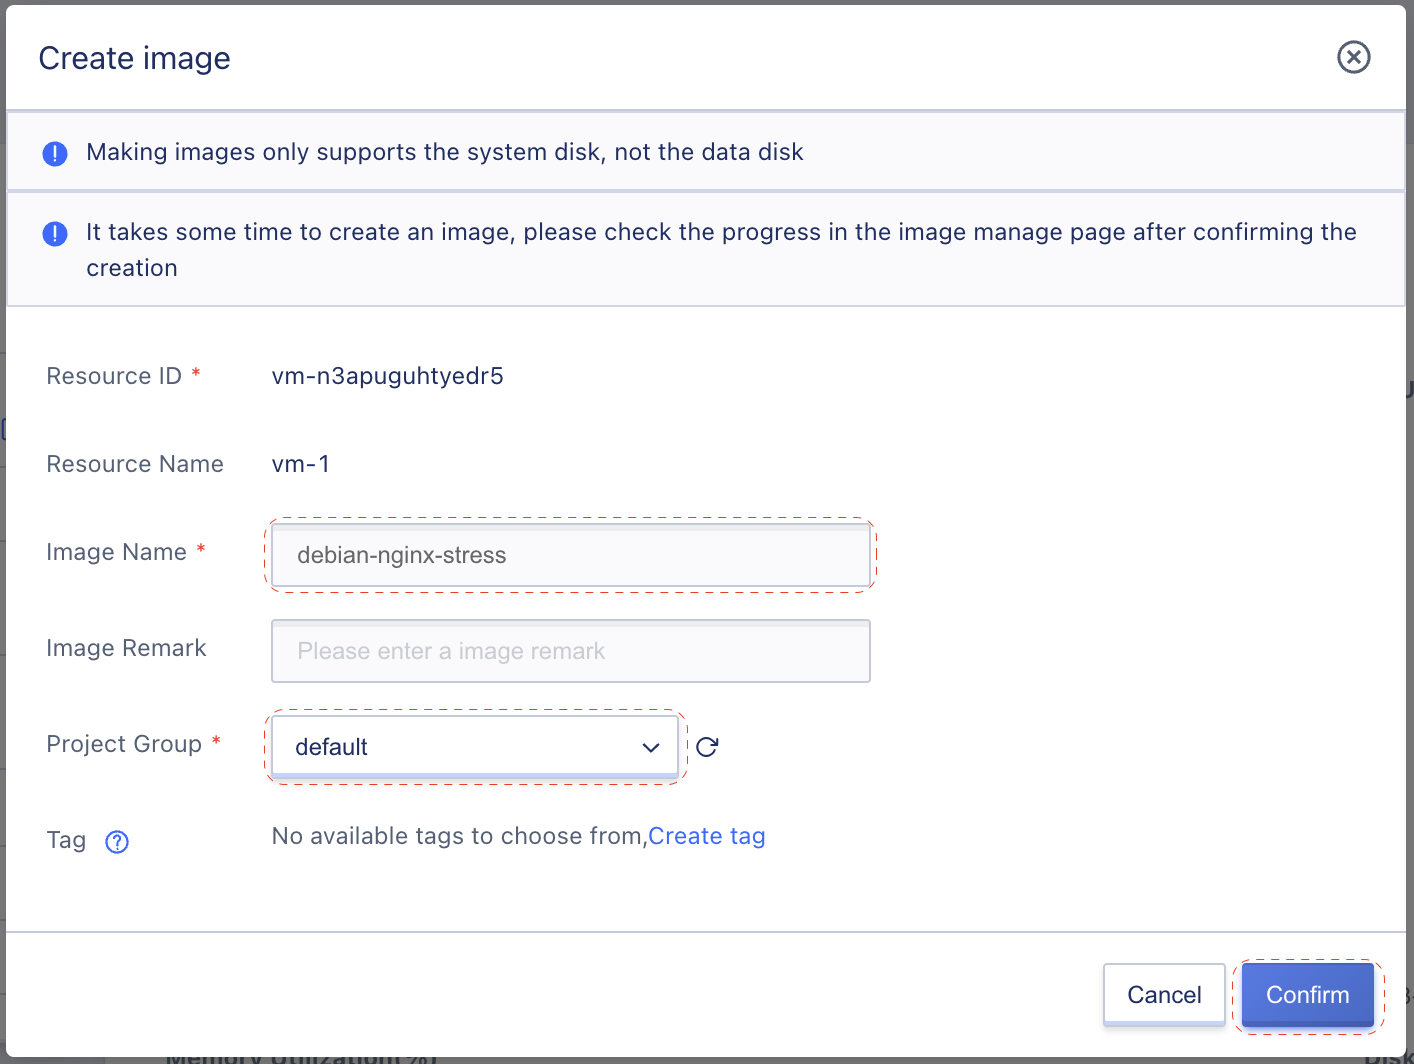
- Image Name: debian-nginx-stress
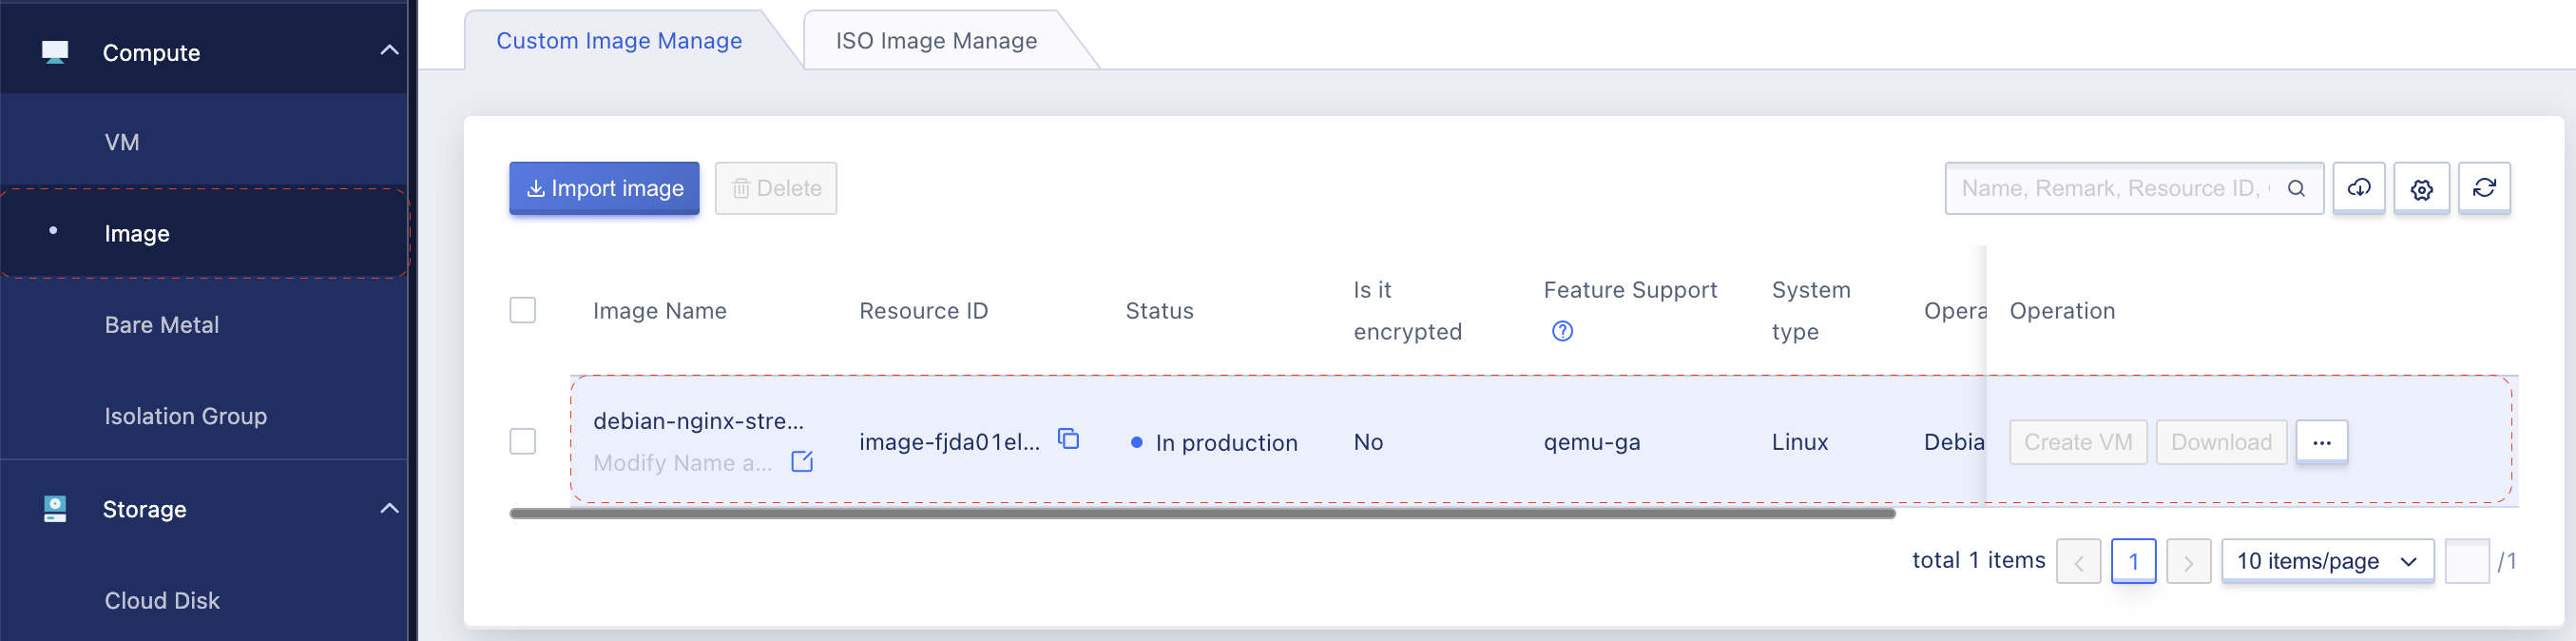
After click Confirm, new image will be created, it will take a while for image creation before status change to Available (2 - 3 mins depend on image size).
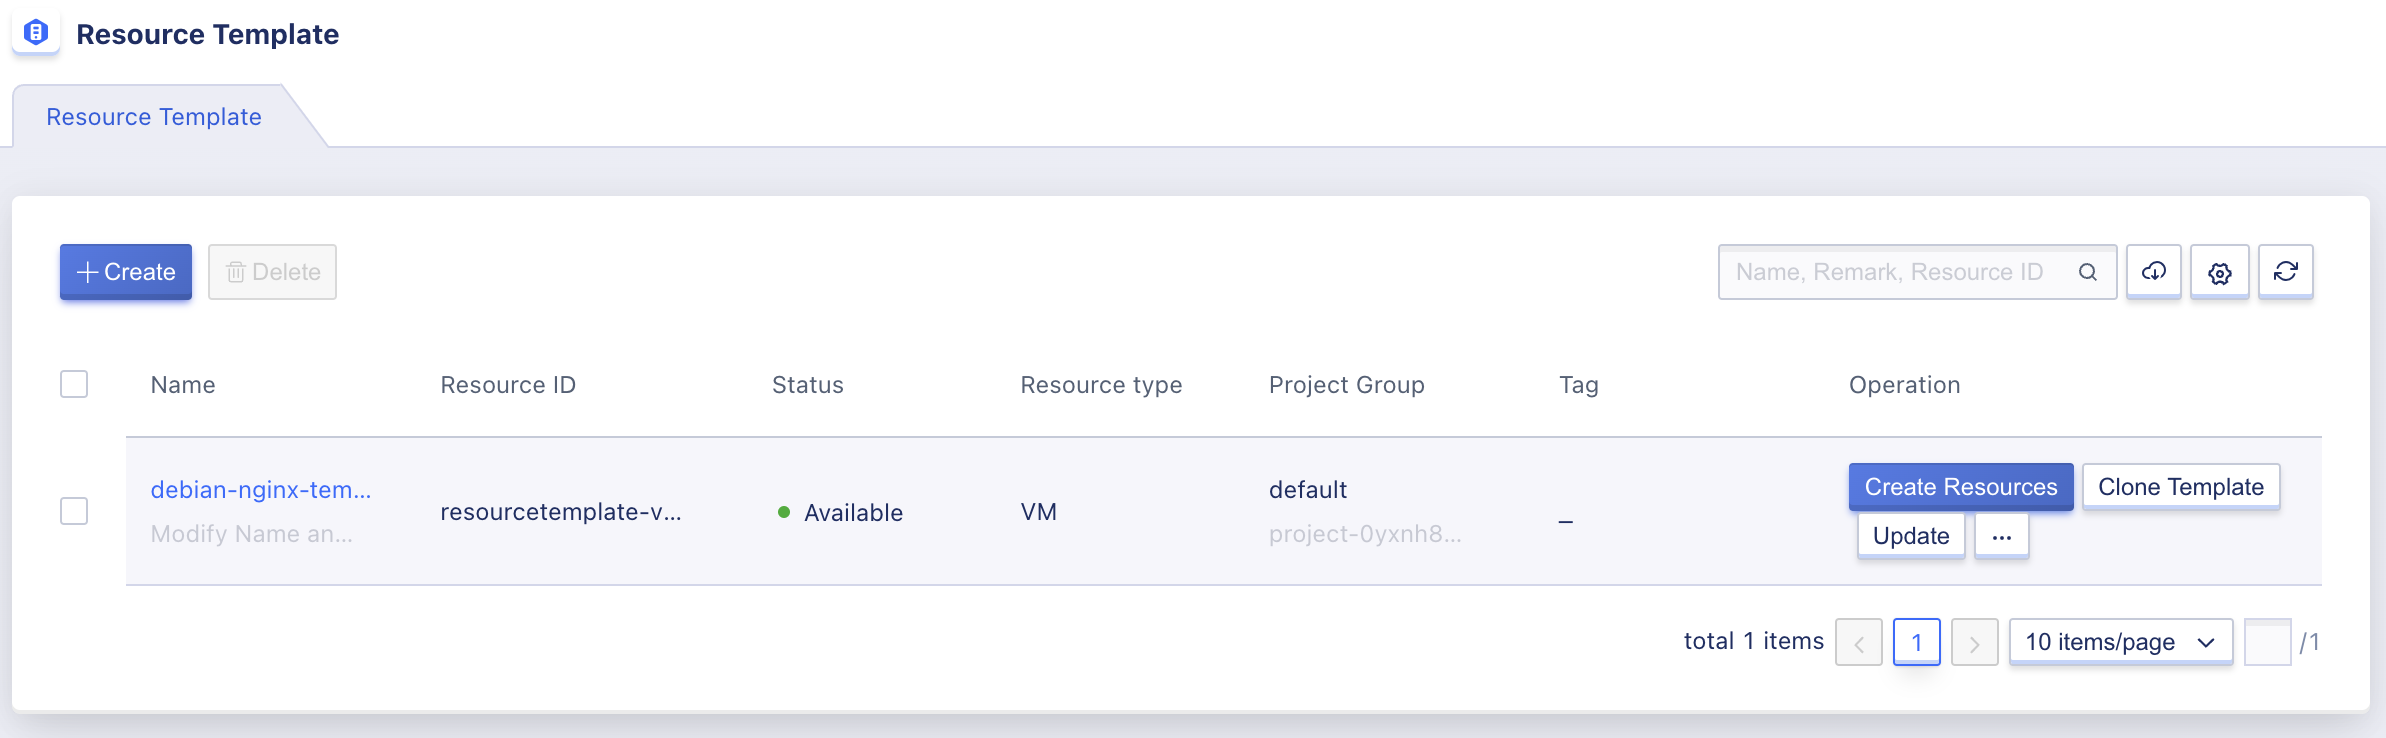
8. Create VM Resource Template
Step 1: Go to side-bar menu, click in Resource Template item under DevOps Manage group.
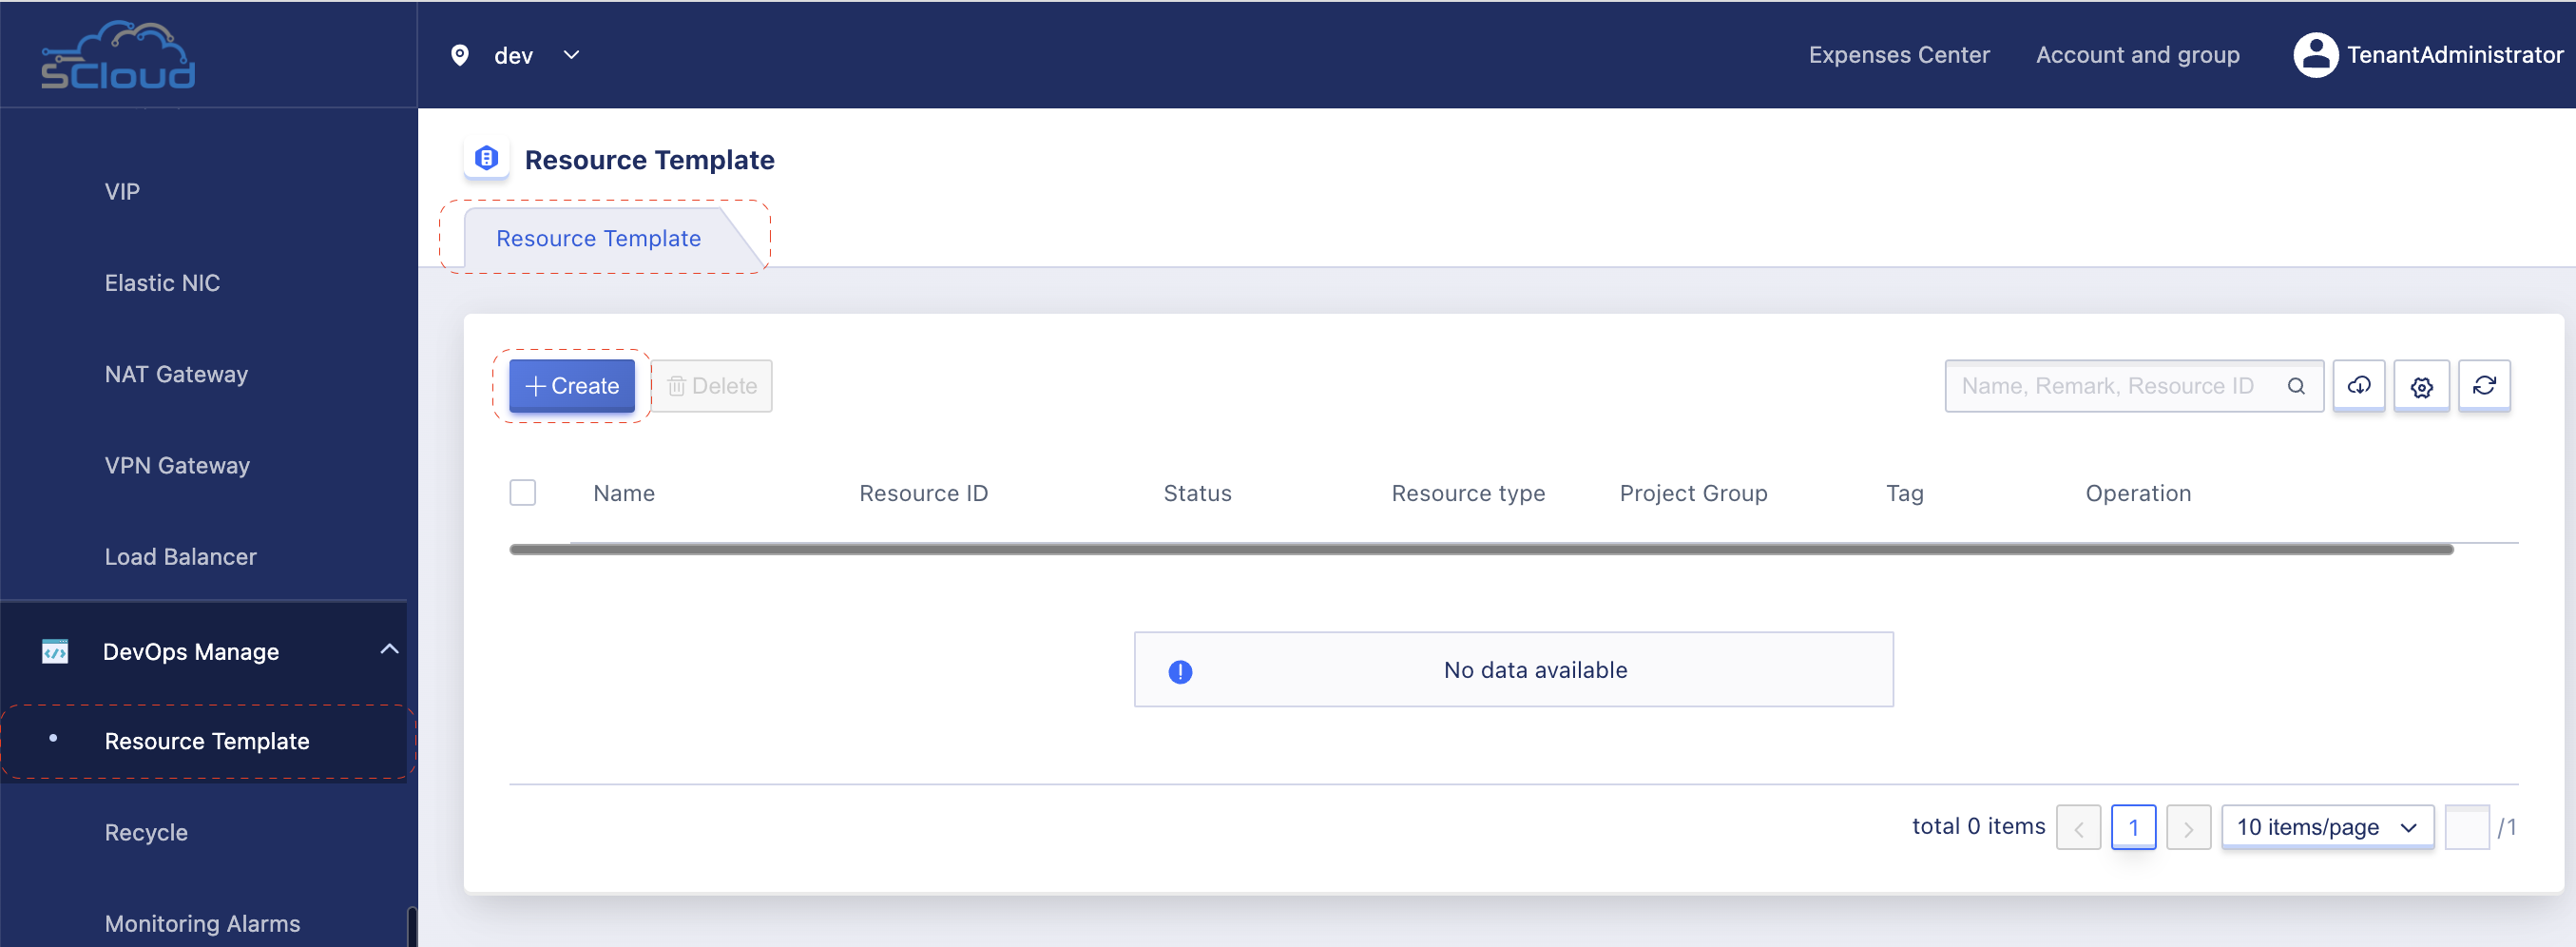
Step 2: Click Create button, then select VM and enter following information.
Basic Information:
- Boot source: Image
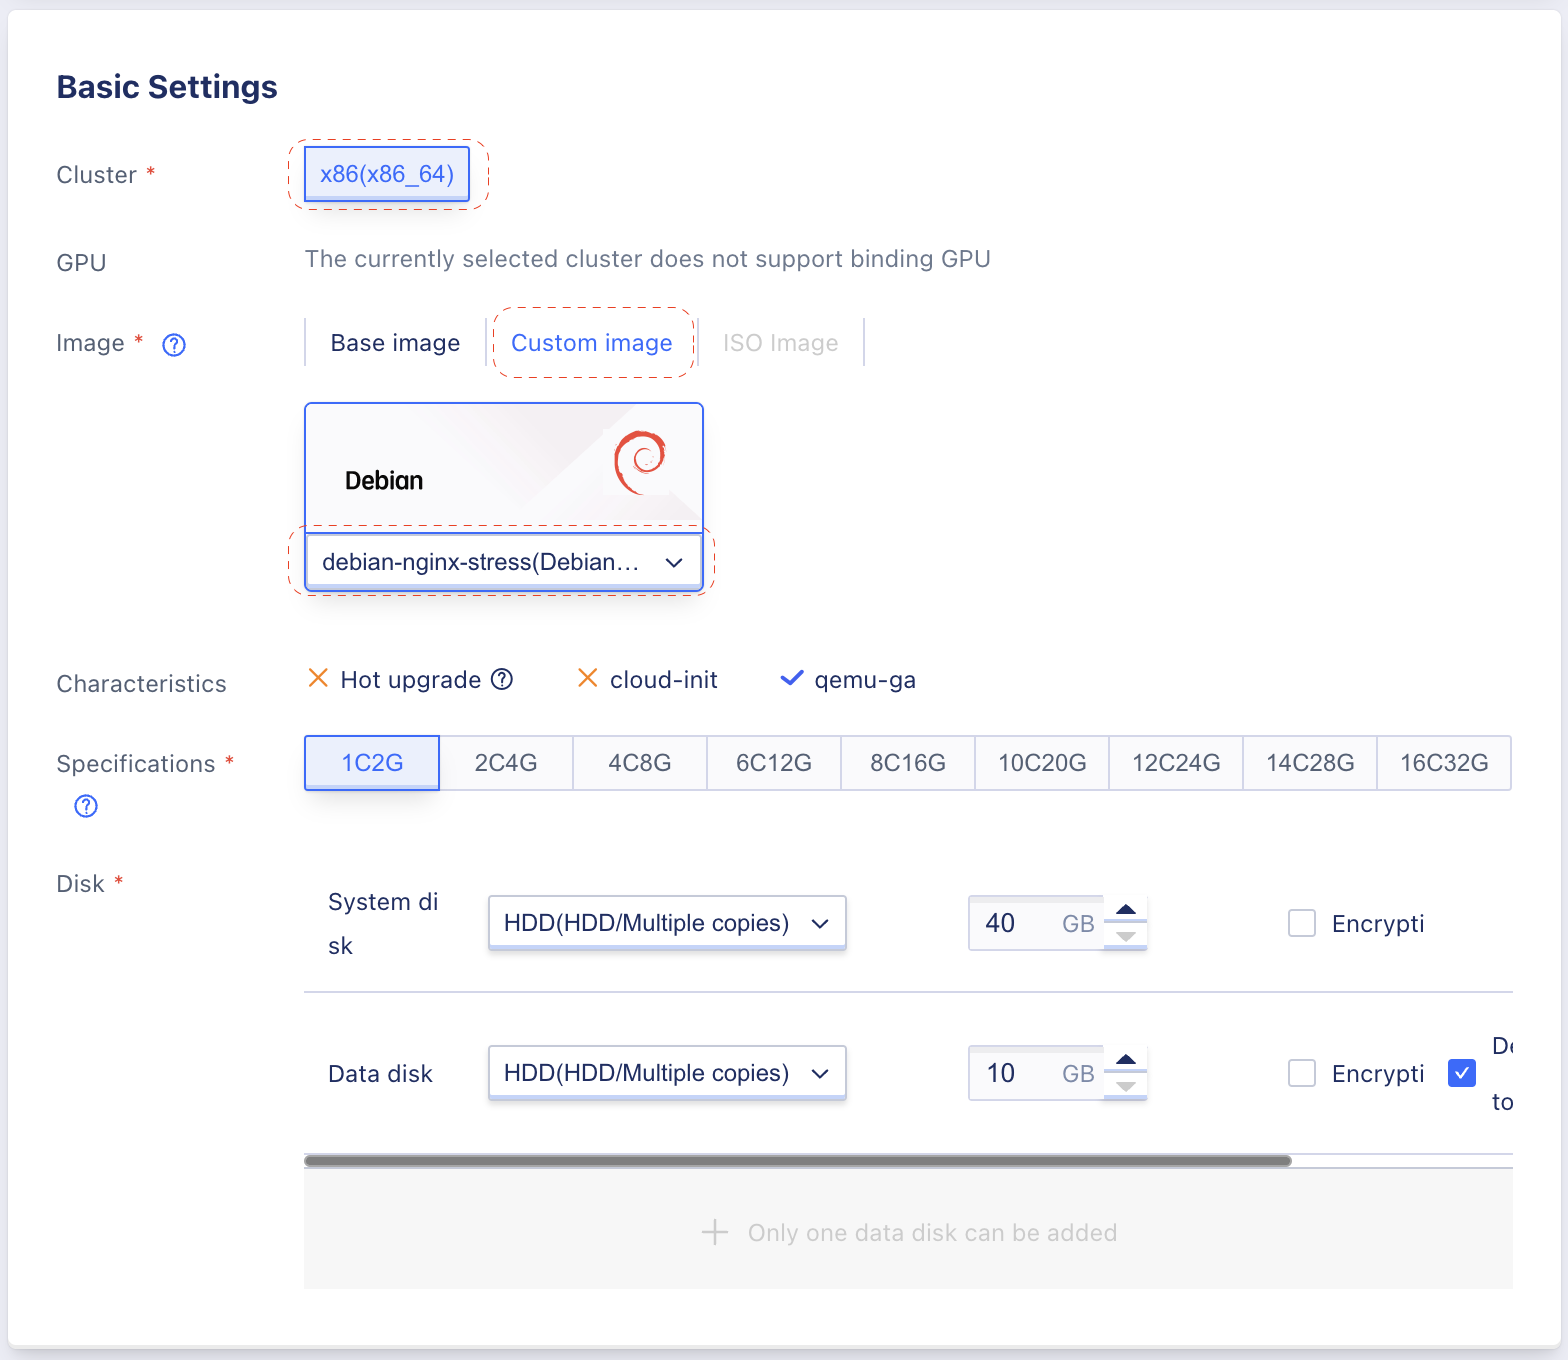
Basic Settings:
- Cluster: leave as default value.
- Image: Select our custom image
debian-nginx-stressunderCustom imagetab - Specifications: 1C2G (1 vCore CPU, 2GB Ram).
- Disk: leave as default value (1 40GB system disk, 1 10GB data disk).
Network Settings:
- VPC: vpc-5
- Subnet: subnet-1
- Leave other fields as default value.

Manage Settings:
- VM Name: debian-nginx-template
- Login Method: Password
- Administrator Password:
scloud@2023 - Leave other fields as default values
Step 3: Click Buy Now in the top-right panel to create your VM template.
Step 4: Ensure that your VM template created and status is Available.
9. Create Auto Scaling
Step 1: Go to side-bar menu, click in Auto Scaling item under DevOps Manage group.
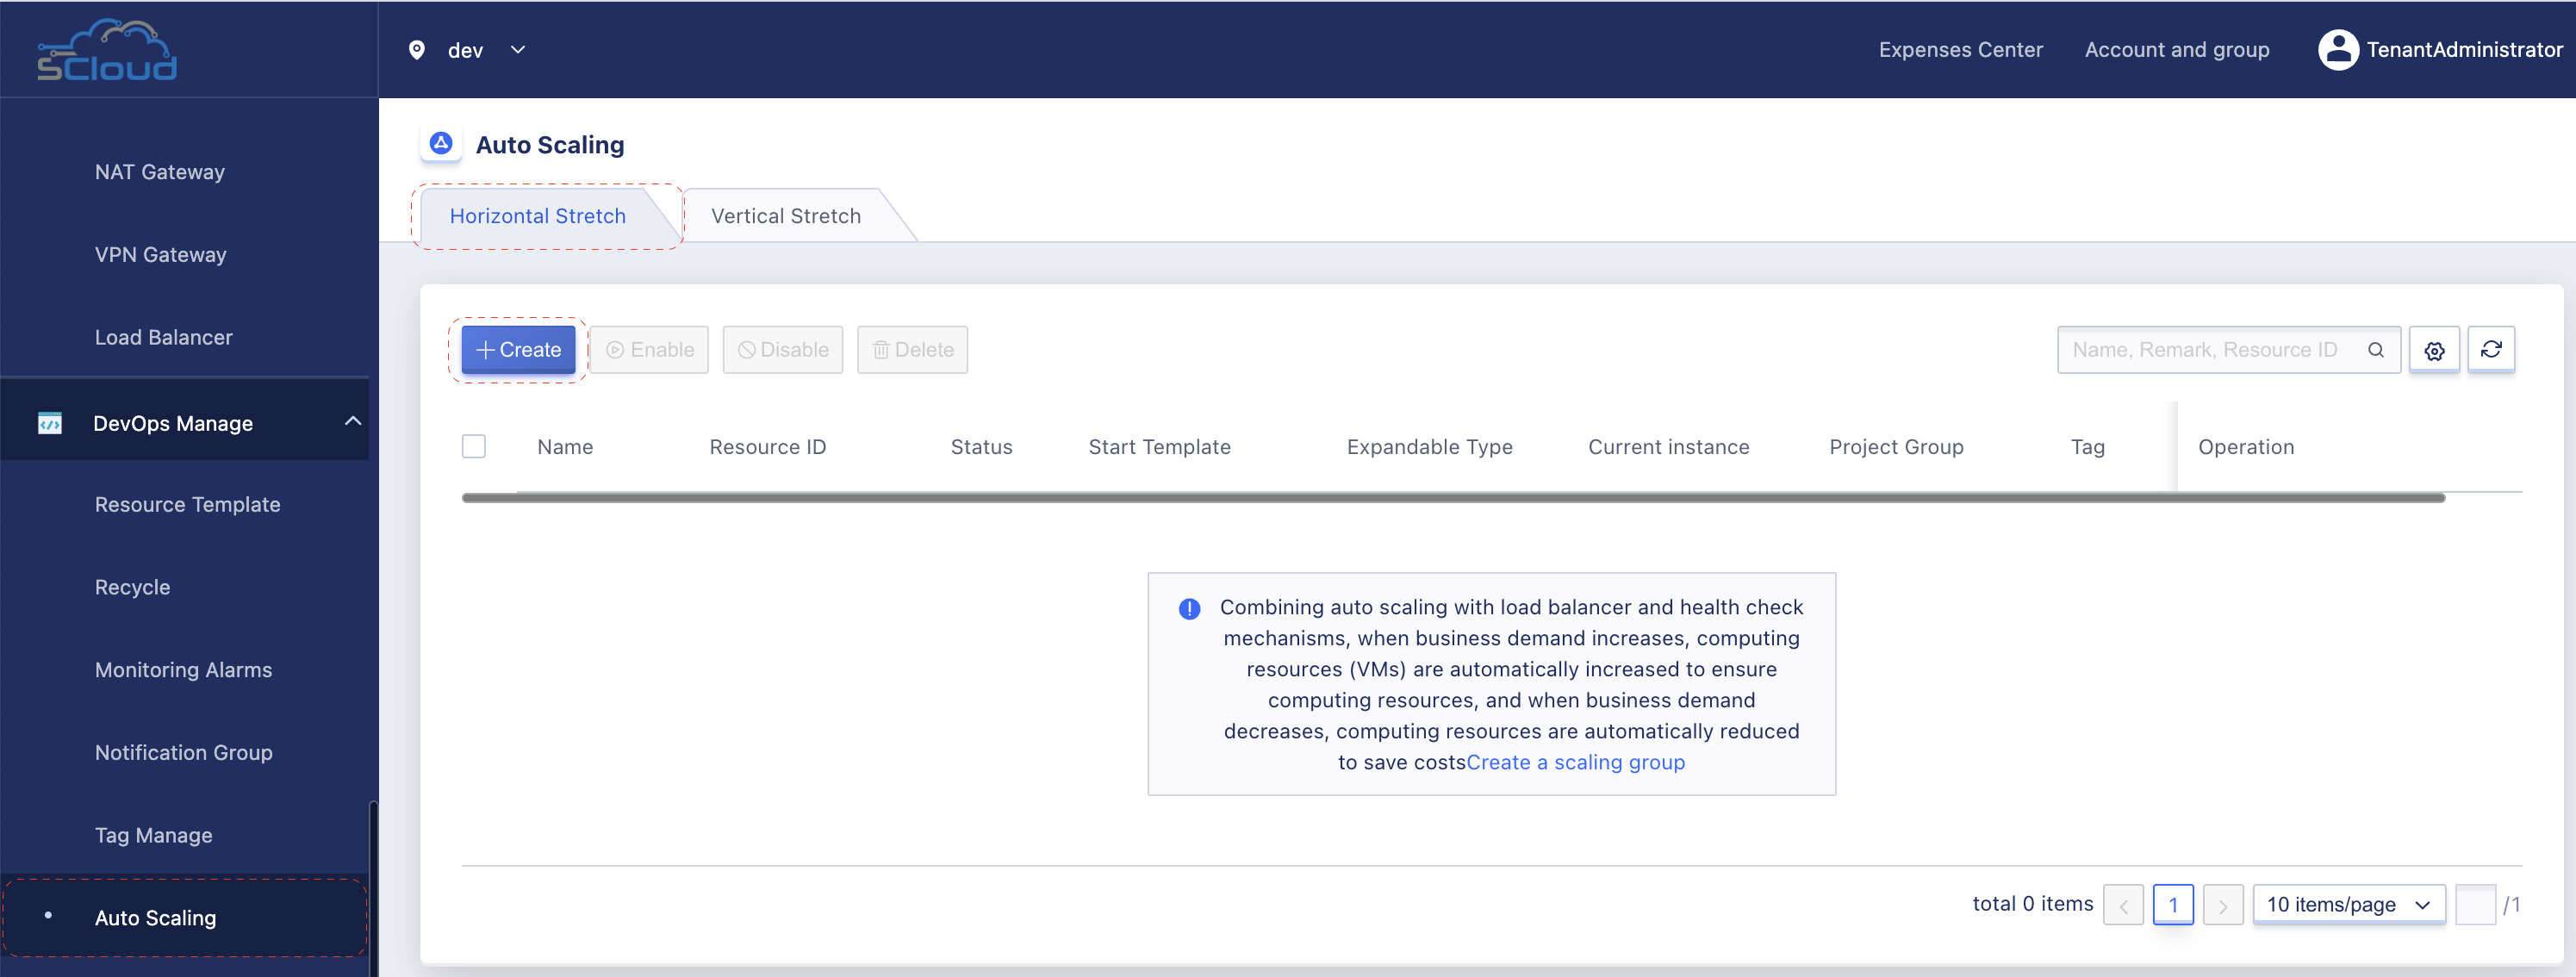
Step 2: Select Horizontal Stretch tab, click Create button and enter following information.
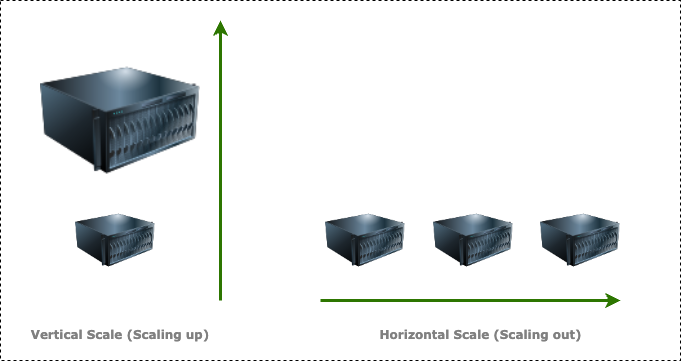
Horizontal scaling means that you scale by adding more machines into your pool of resources whereas Vertical scaling means that you scale by adding more power (CPU, RAM) to an existing machine.
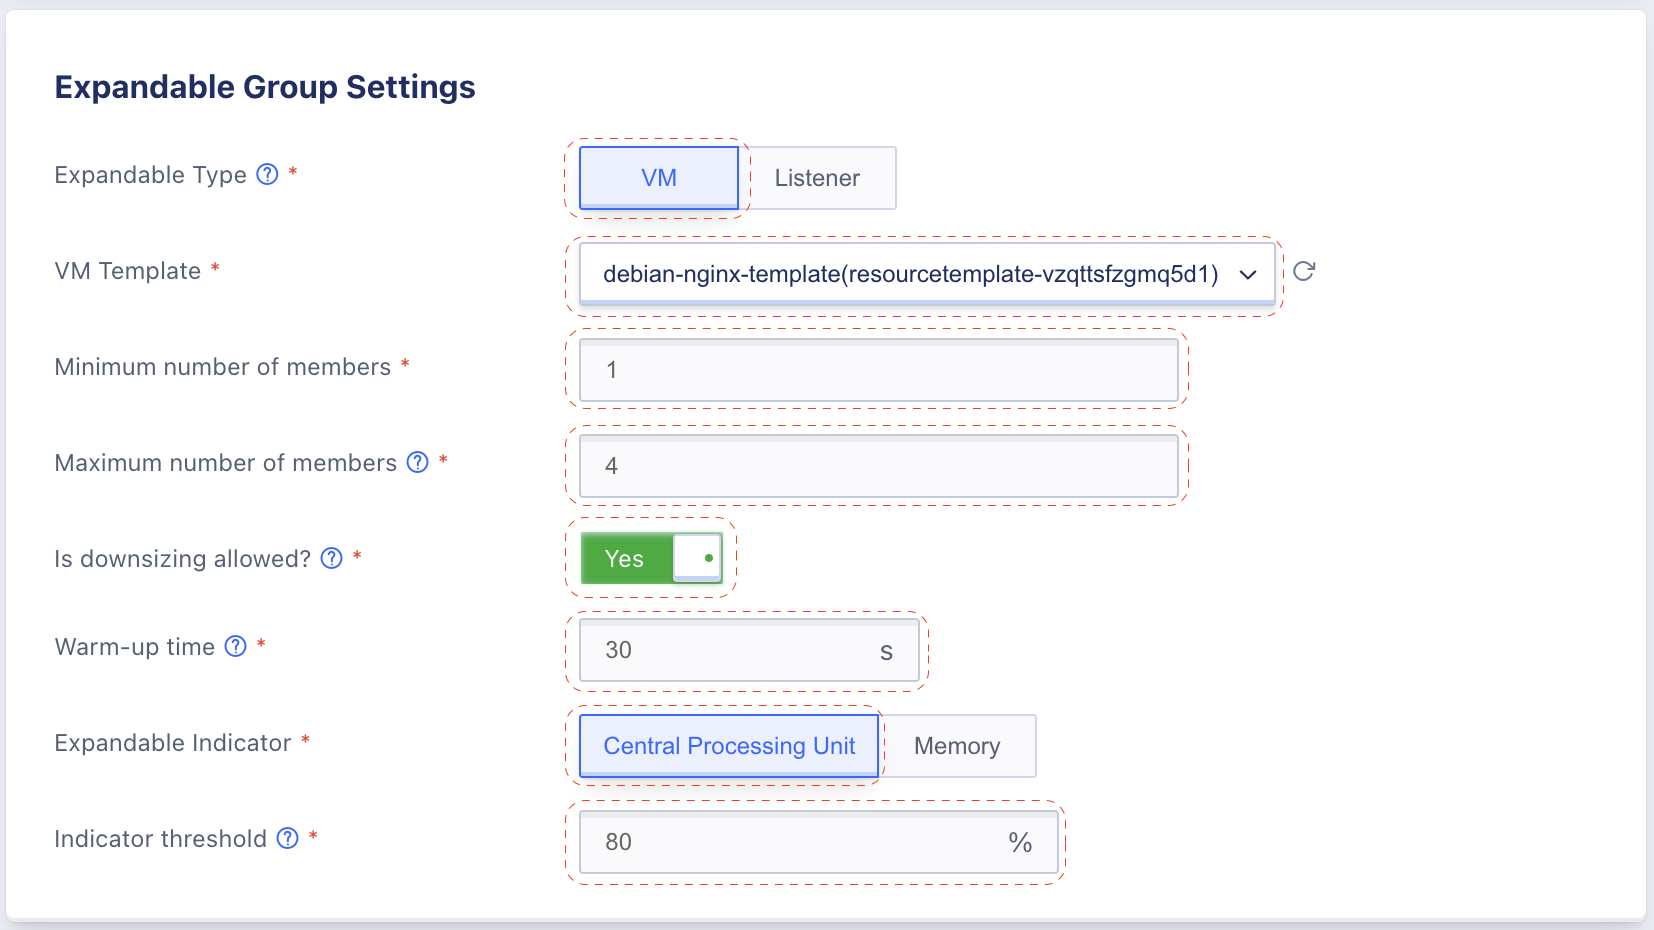
| Field | Value | Description |
|---|---|---|
| Expandable Type | VM | The scaling object of the VM type is the VM in the auto scaling, and the scaling object of the listener type is the service node in the listener |
| VM Template | debian-nginx-template | |
| Minimum number of members | 1 VM | |
| Maximum number of members | 4 VM | If you want to achieve a fixed number of results, you can set the maximum and minimum number of members to be the same |
| Is downsizing allowed | Yes | When scaling down, a SIGTERM signal will be sent to the business process inside the VM, and the VM will be closed and deleted after waiting for a maximum of 90 seconds, and the business process can use this mechanism to gracefully shut down |
| Warm-up time | 30s | After the VM is created, it will preheat for a period of time, and it will join the load balancer after the preheating is finished |
| Expandable Indicator | Central Processing Unit | |
| Indicator threshold | 80% | The threshold of the indicator is the average value |
Step 3: Click Buy Now in the top-right panel to create your auto scaling.
Step 4: Ensure your auto scaling created and status is Available.
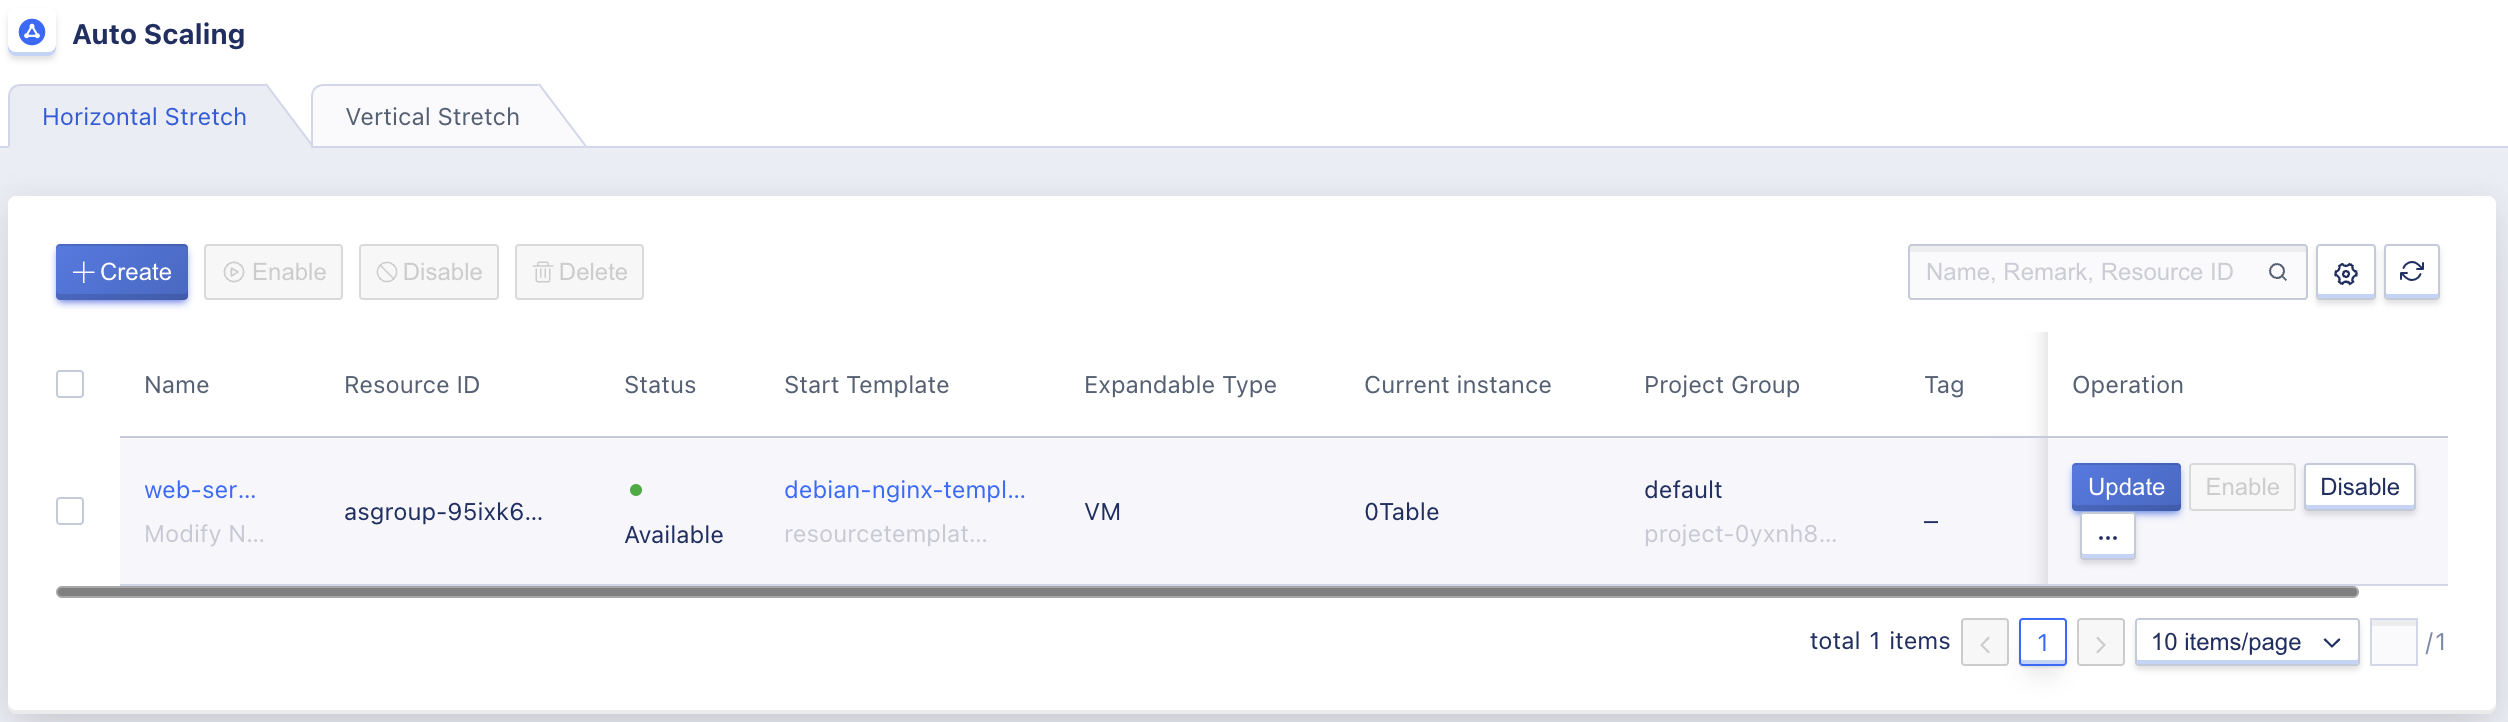
Step 5: Navigate to VM listing page, you will notice a VM named with asgroup- prefix. This VM is created & managed by our auto scaling as we set Minimum number of members to 1 VM, auto scaling will ensure that the number of Running VM always matched its settings.

Notes: as we create VM from custom image for the first time, it will take a while to sync the image between repository, going forward, it will be start up quickly as normal.
10. Create an internet facing load balancer
Step 1: Go to side-bar menu, click in Load Balancer item under Network group.
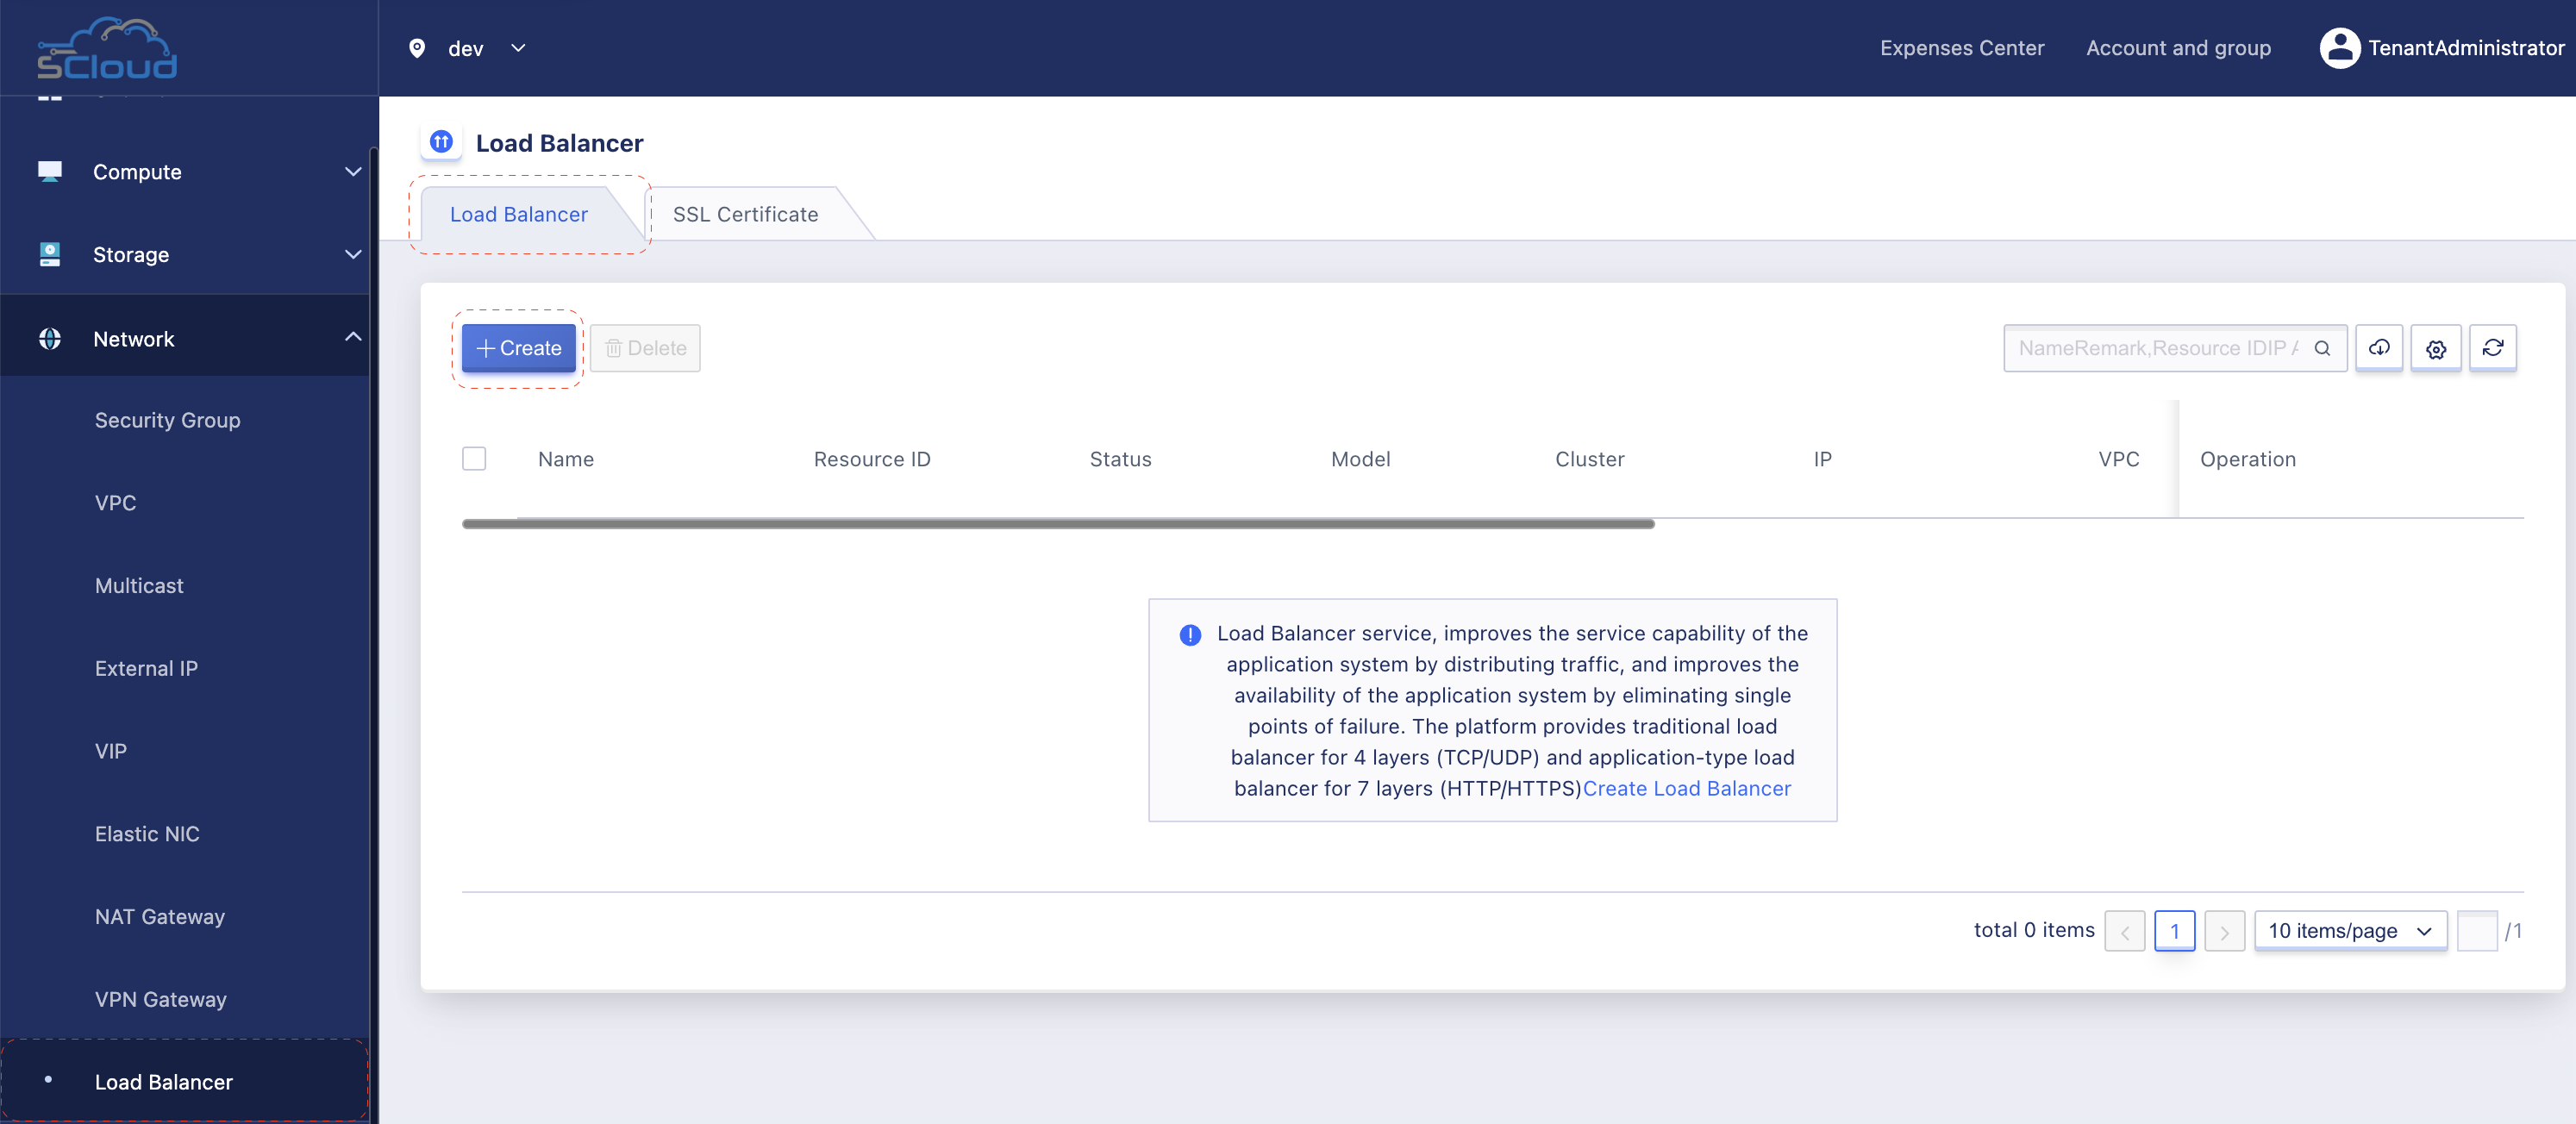
Step 2: Click Create button and enter following information.
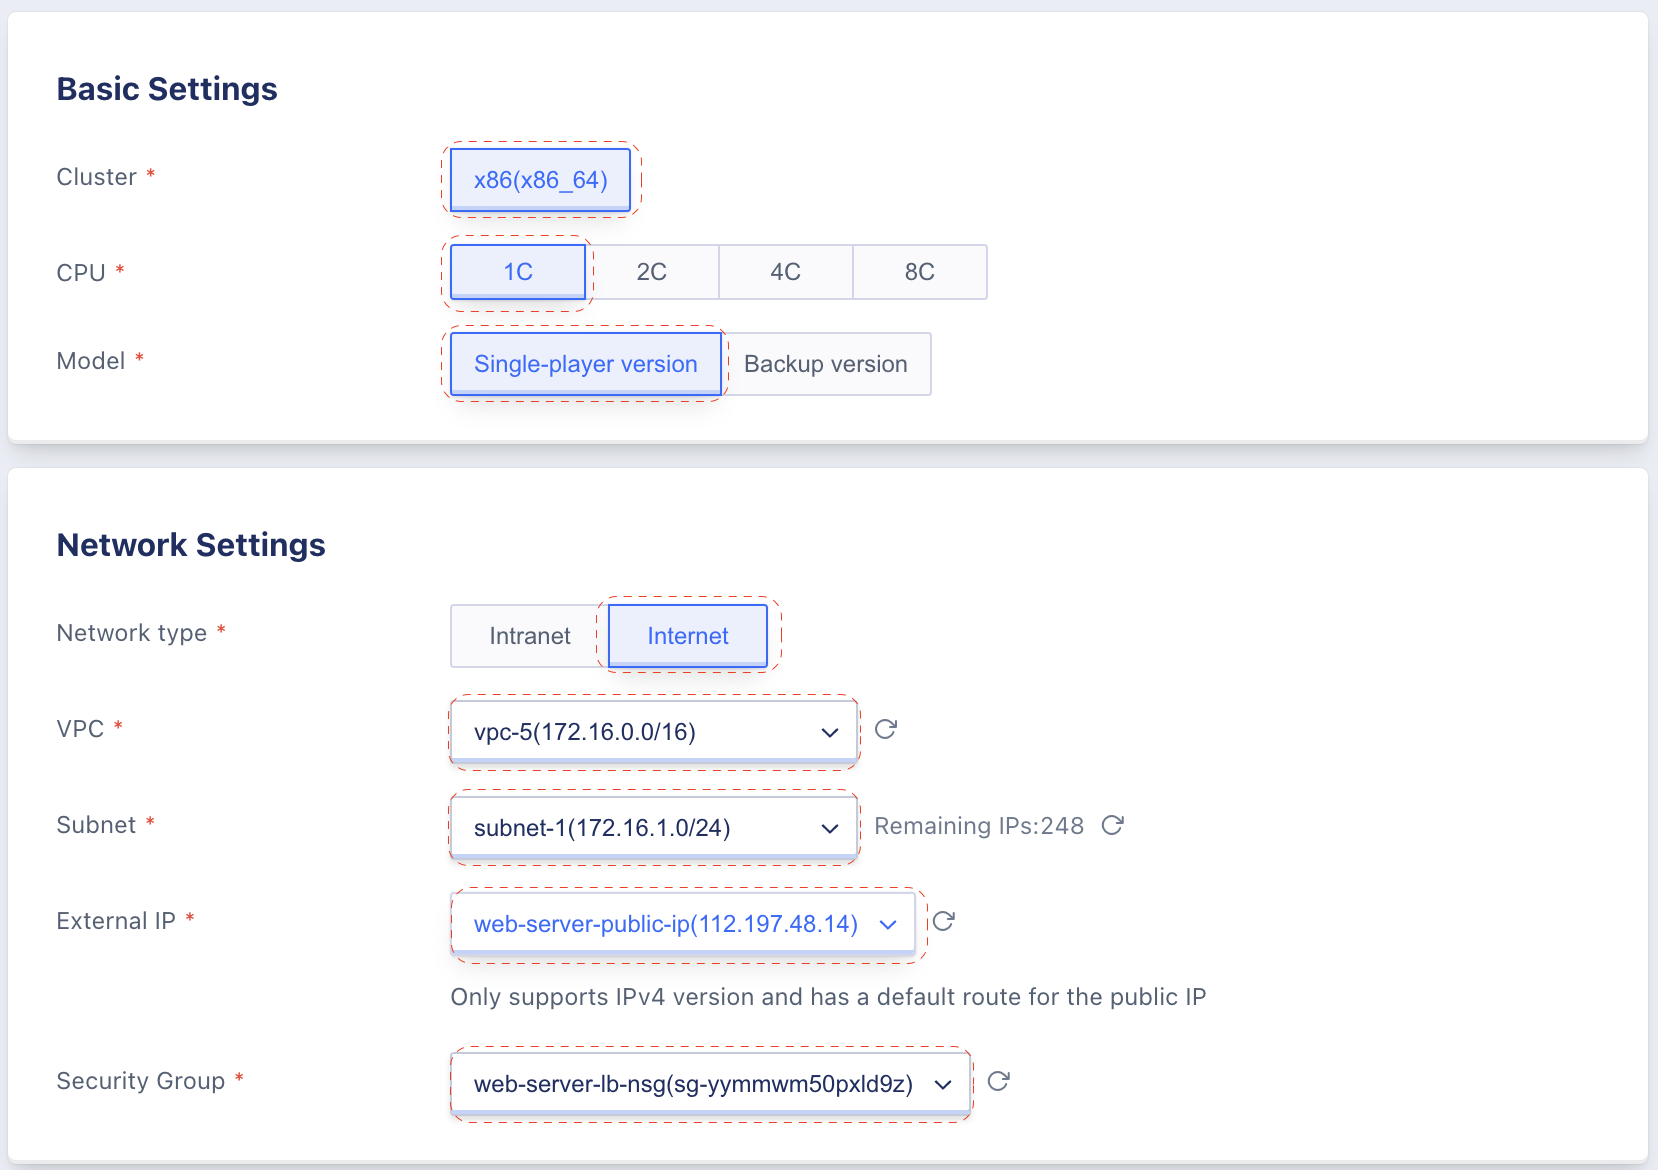
Basic Settings
- Cluster: default value
- CPU: 1C (1 core)
- Model: Single-player version
Network Settings
- Network type: Internet
- VPC:
vpc-5 - Subnet:
subnet-1 - External IP:
web-server-public-ip - Security Group:
web-server-lb-nsg
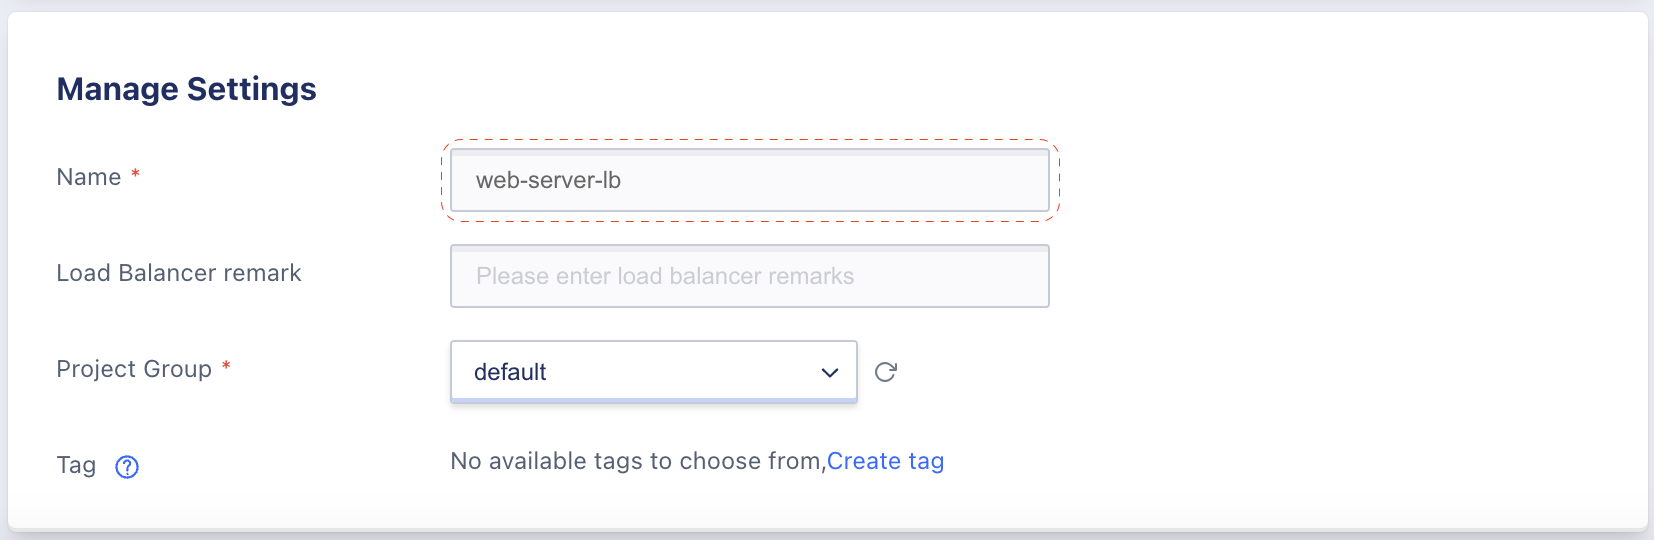
Manage Settings
- Name: web-server-lb
- Project Group: default
Step 3: Click Buy Now in the top-right panel to create your internet facing load balancer.
Step 4: Ensure that your load balancer created and status is Running.
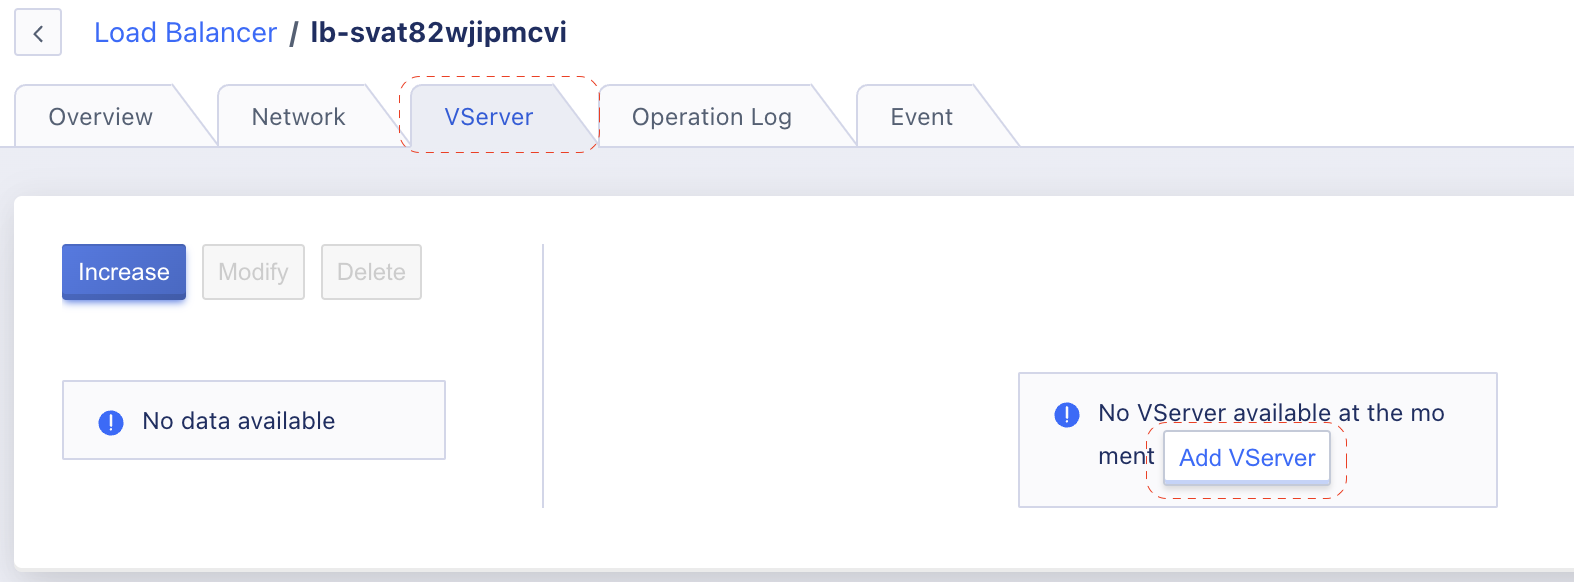
Step 5: Navigate to load balancer detail page, select tab VServer and click Add VServer create new VServer instance.
Step 6: Enter VServer information as below and click Confirm.
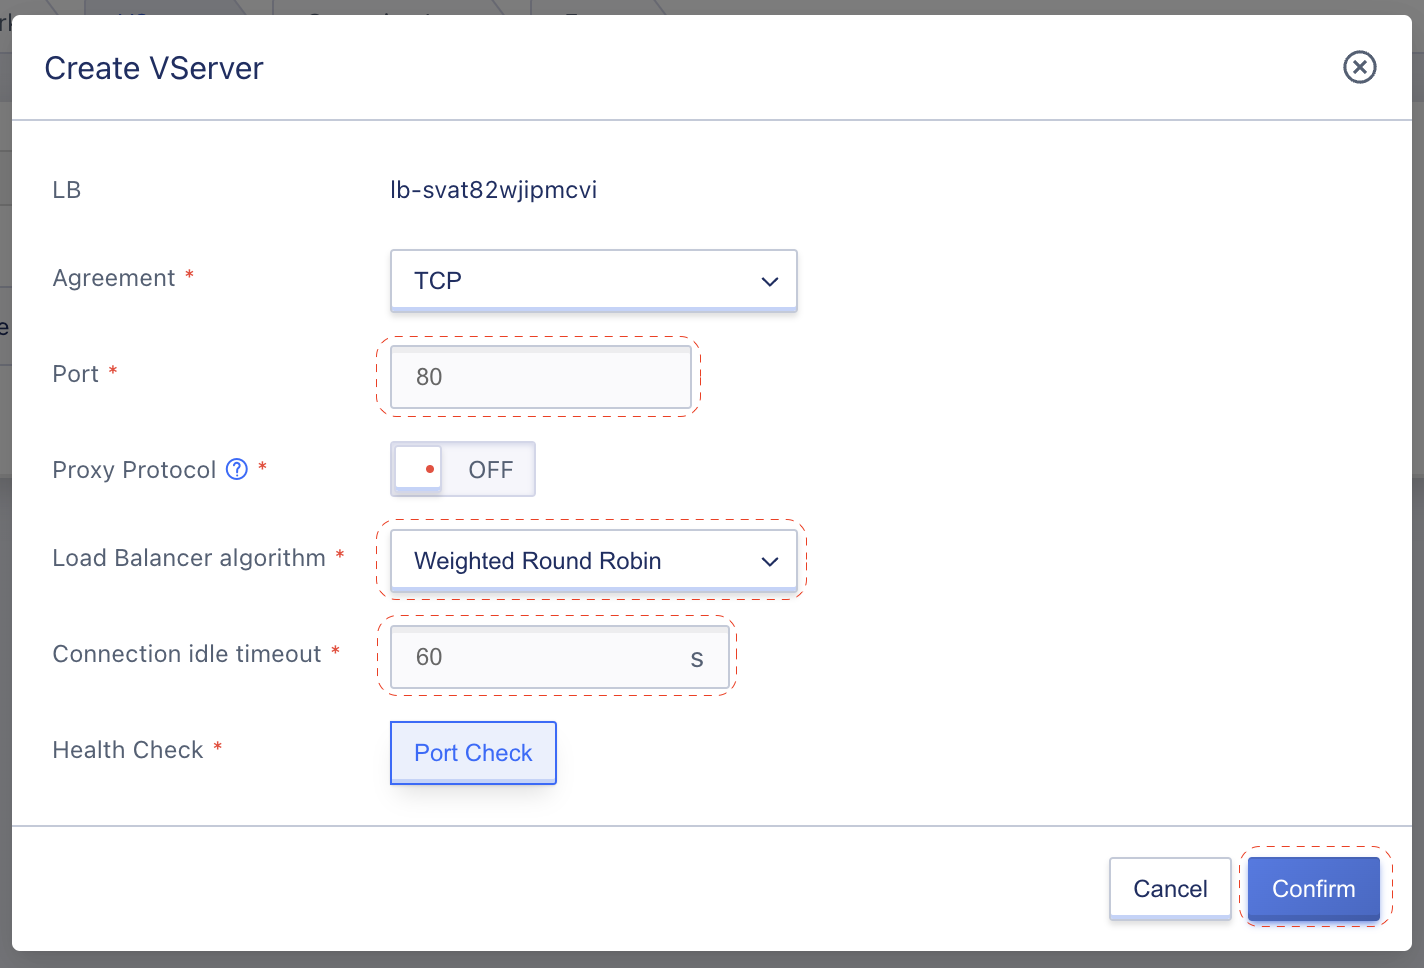
- Agreement: TCP
- Port: 80
- Proxy Protocol: Off
- Load Balancer Algorithm: Weighted Round Robin
- Connection idle timeout: 60
- Health Check: Port Check
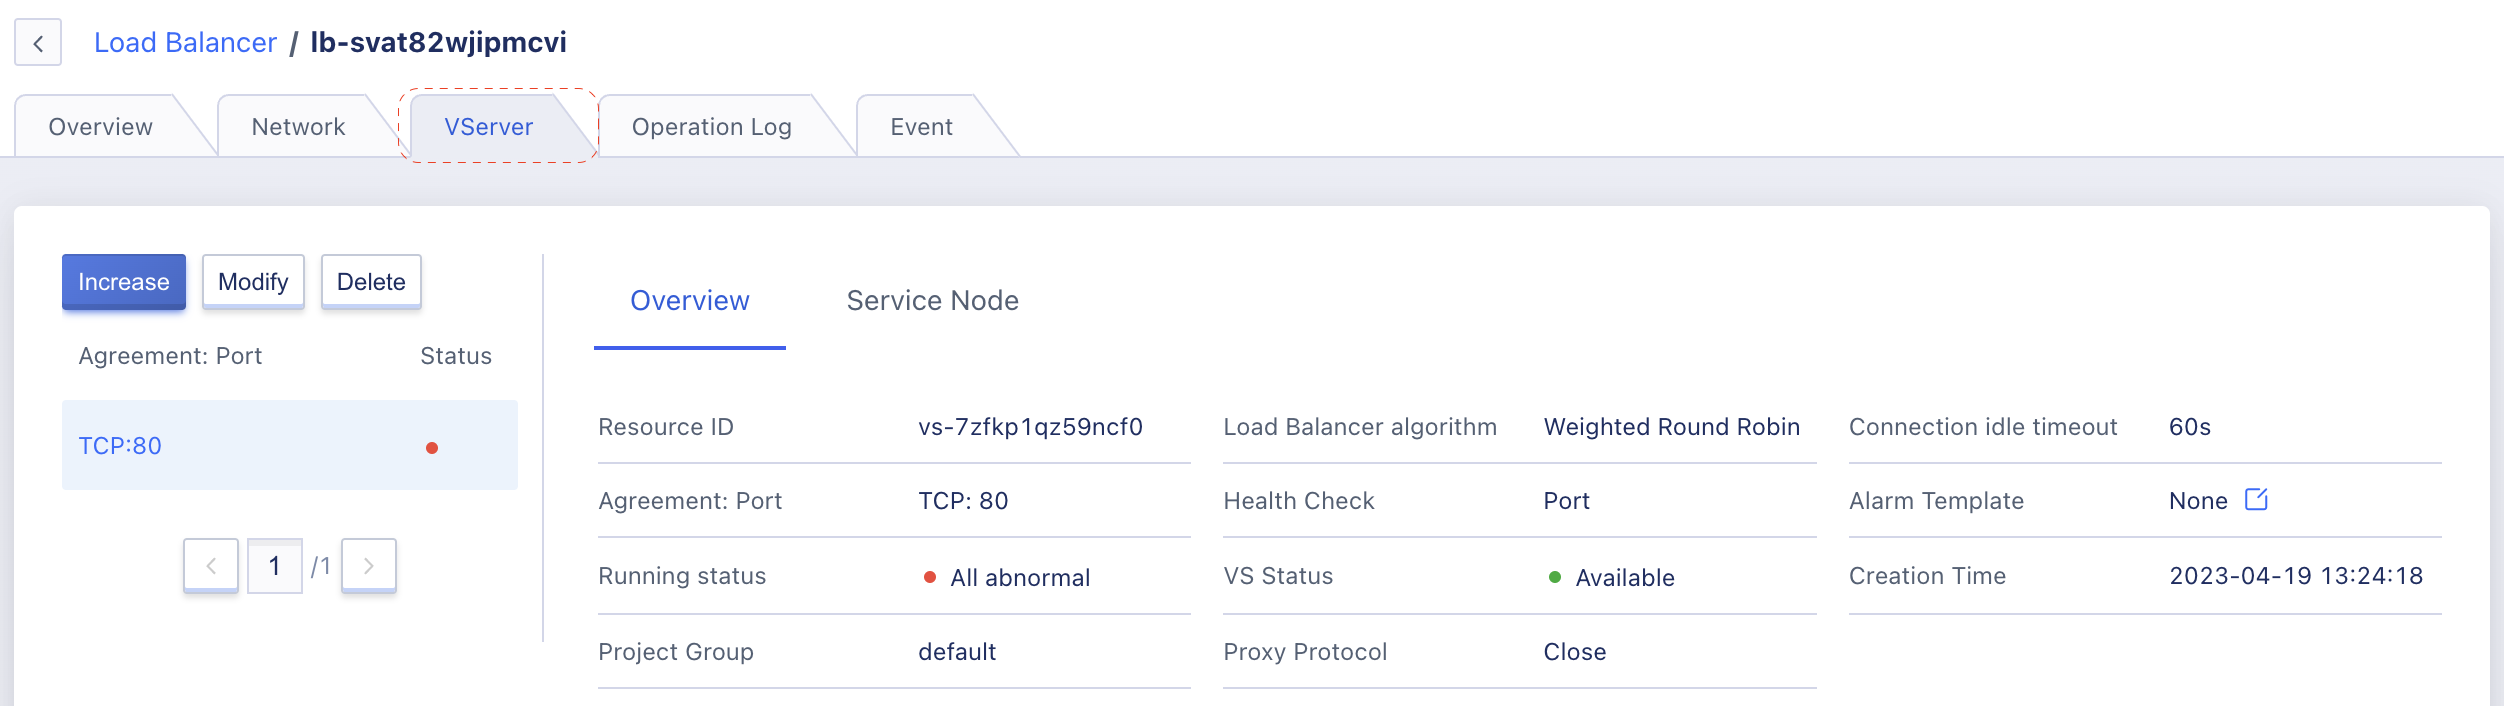
Step 7: VServer created and in Available status.
11. Bind auto scaling to load balancer
Step 1: Go to side-bar menu, click in Auto Scaling item under DevOps Manage group.
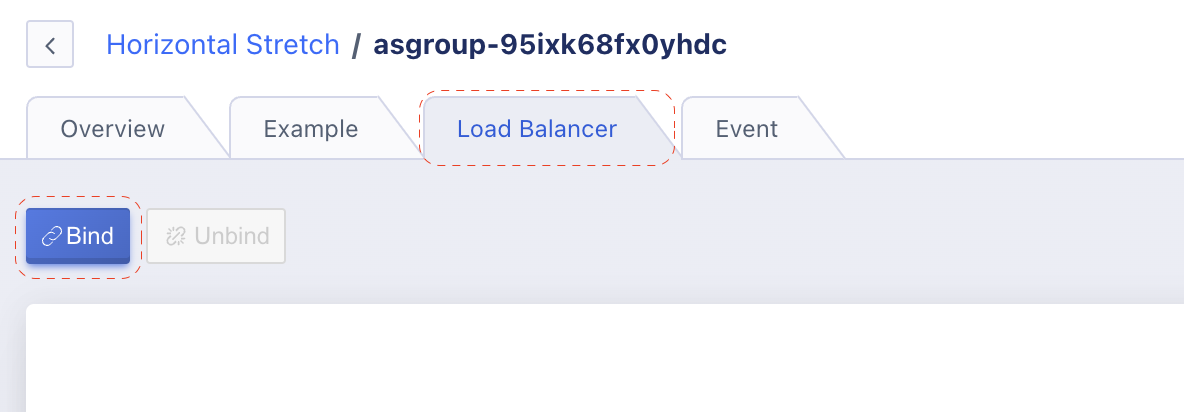
Step 2: Go to Auto Scaling detail & select Load Balancer tab and click Bind.
Notes: After binding the load balancer, all instances in the auto scaling will automatically join the VServer as service nodes
Step 3: Enter information as below and click Confirm
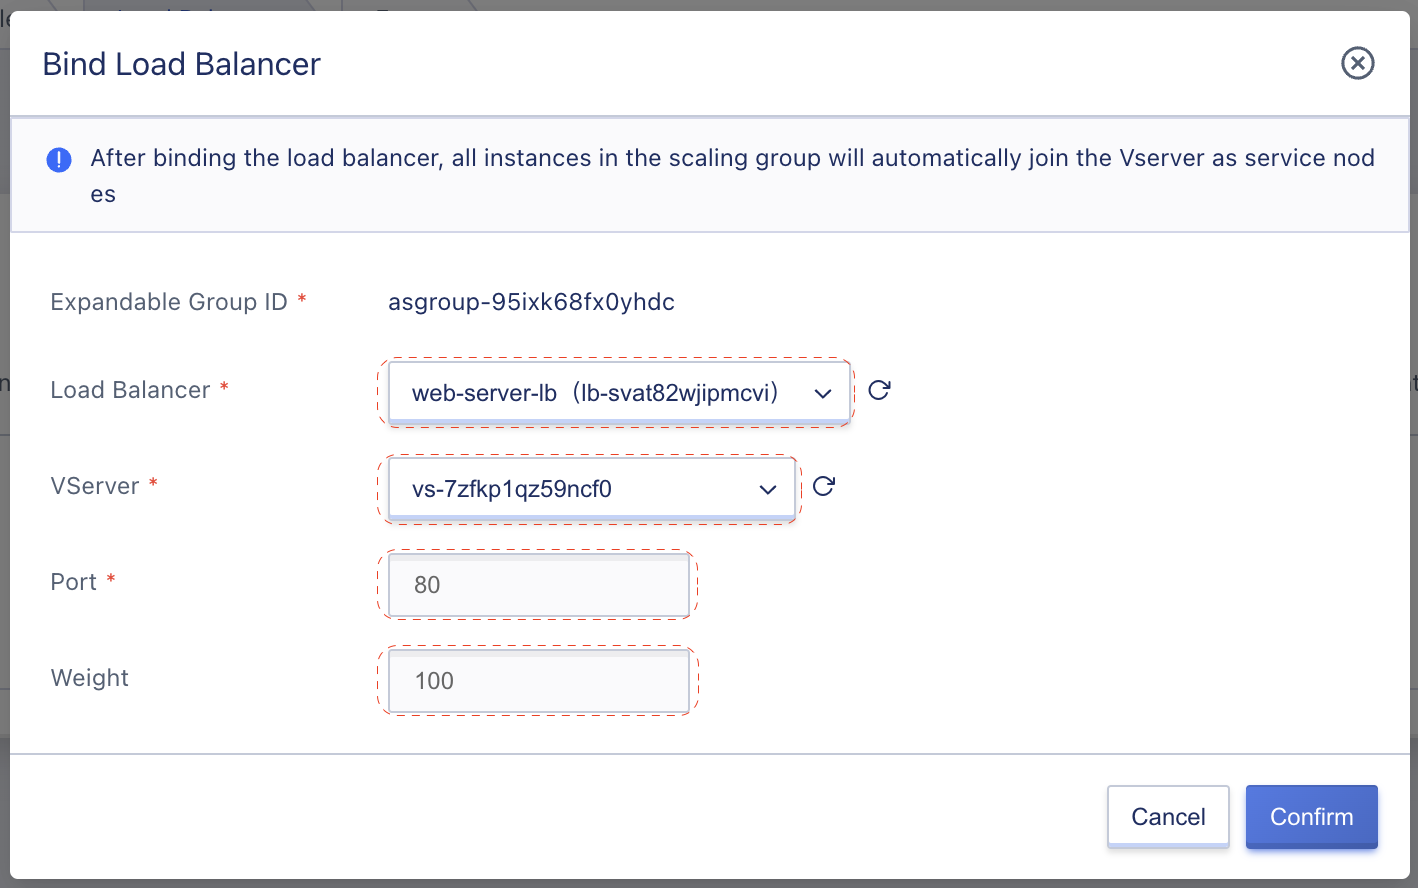
- Load Balancer: web-server-lb
- VServer: leave as default (auto select VServer from above LB)
- Port: 80
- Weight: 100
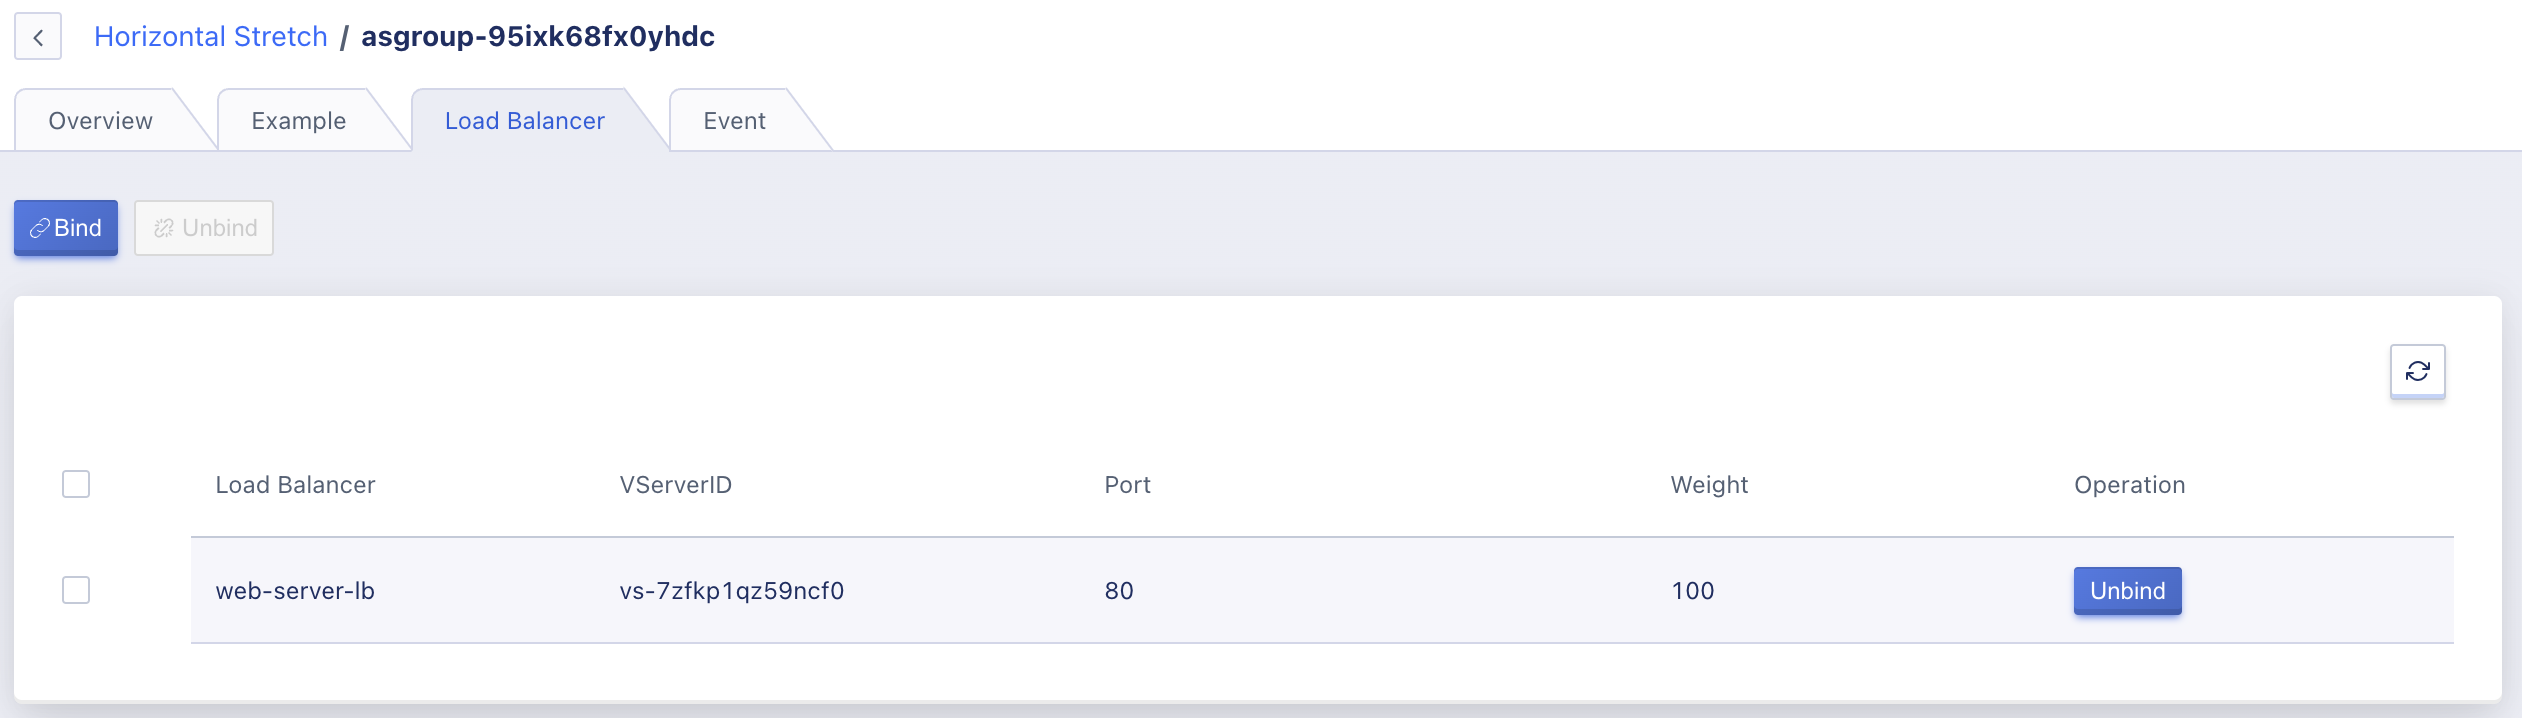
Step 4: Ensure the binding operation success as below.
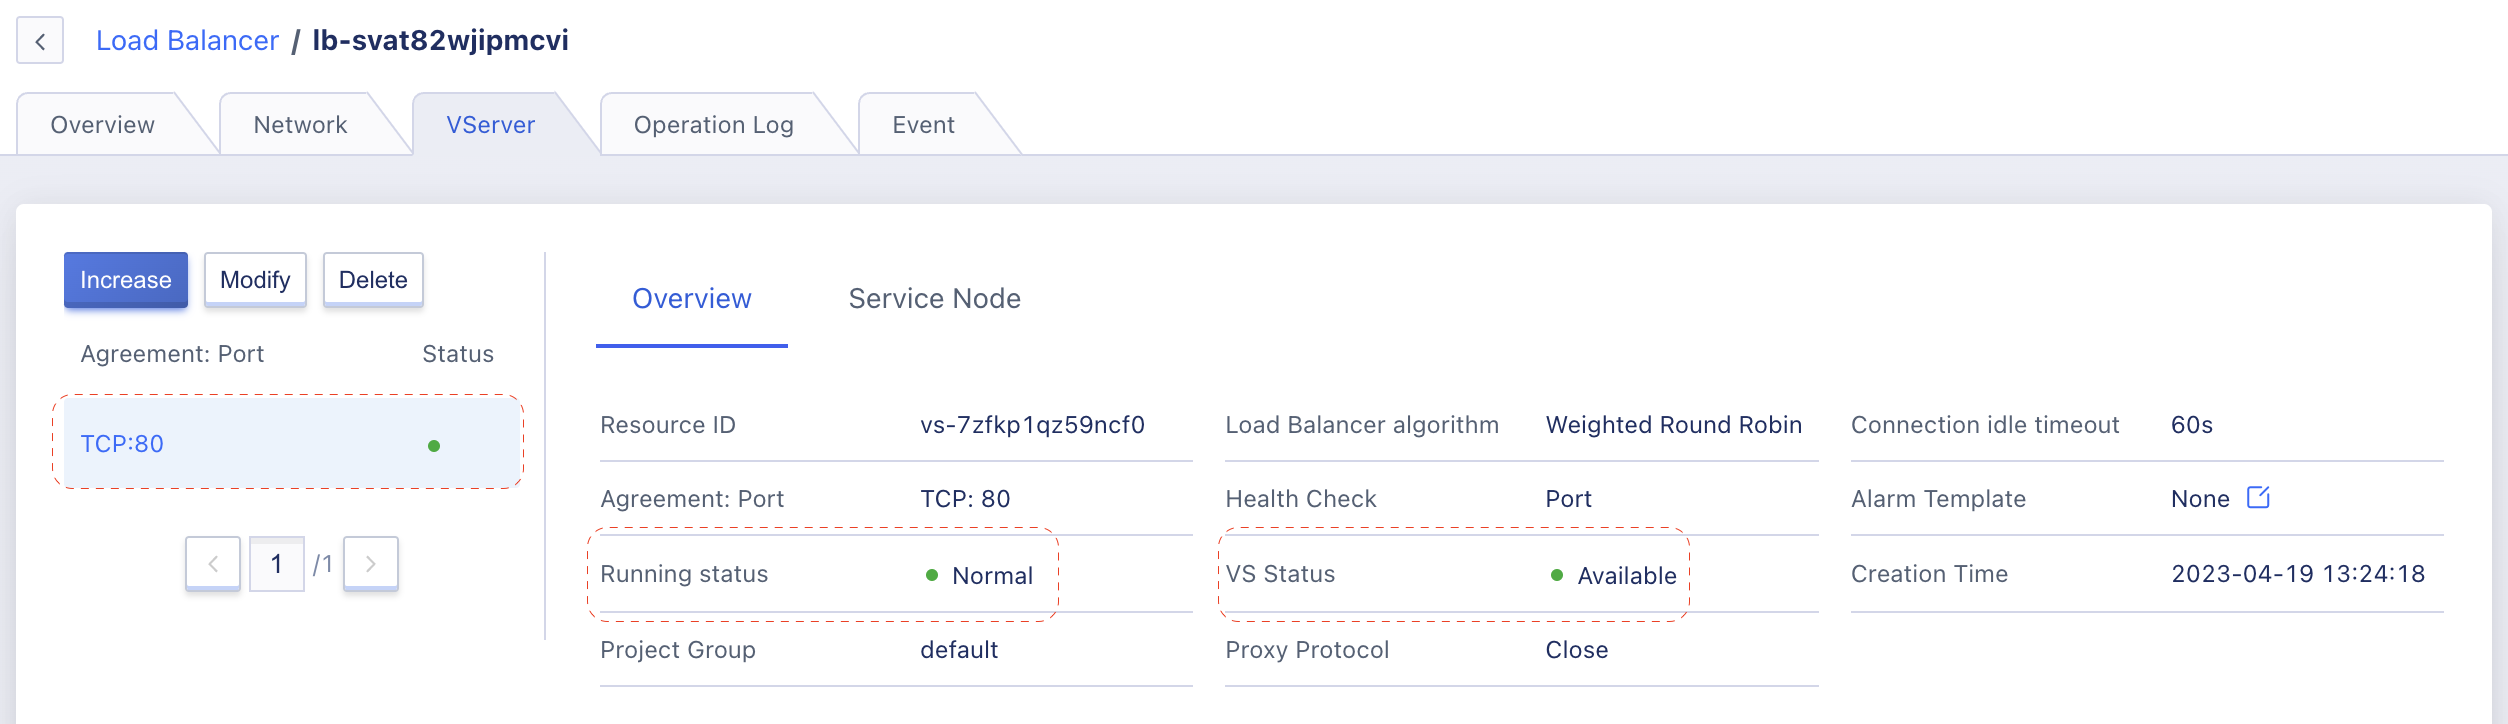
Step 5: Navigate back to web-server-lb detail page and select VServer tab.
VServer now in Normal running state.
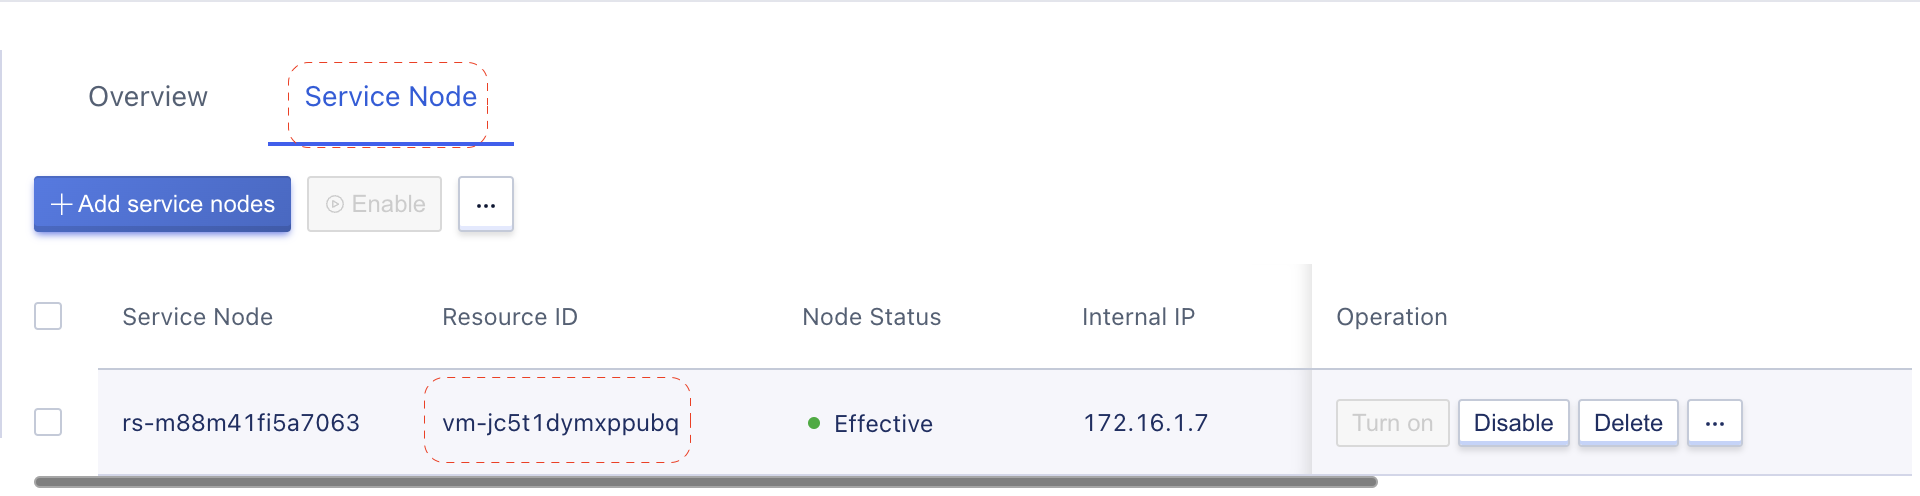
VM in Auto Scaling joined as service node automatically (in the future, if more VM created in our Auto Scaling, it will join as service node as well).
Step 6: Access web server via Load Balancer public IP. Navigate to Load Balancer listing, find web-server-lb and copy its public IP address.
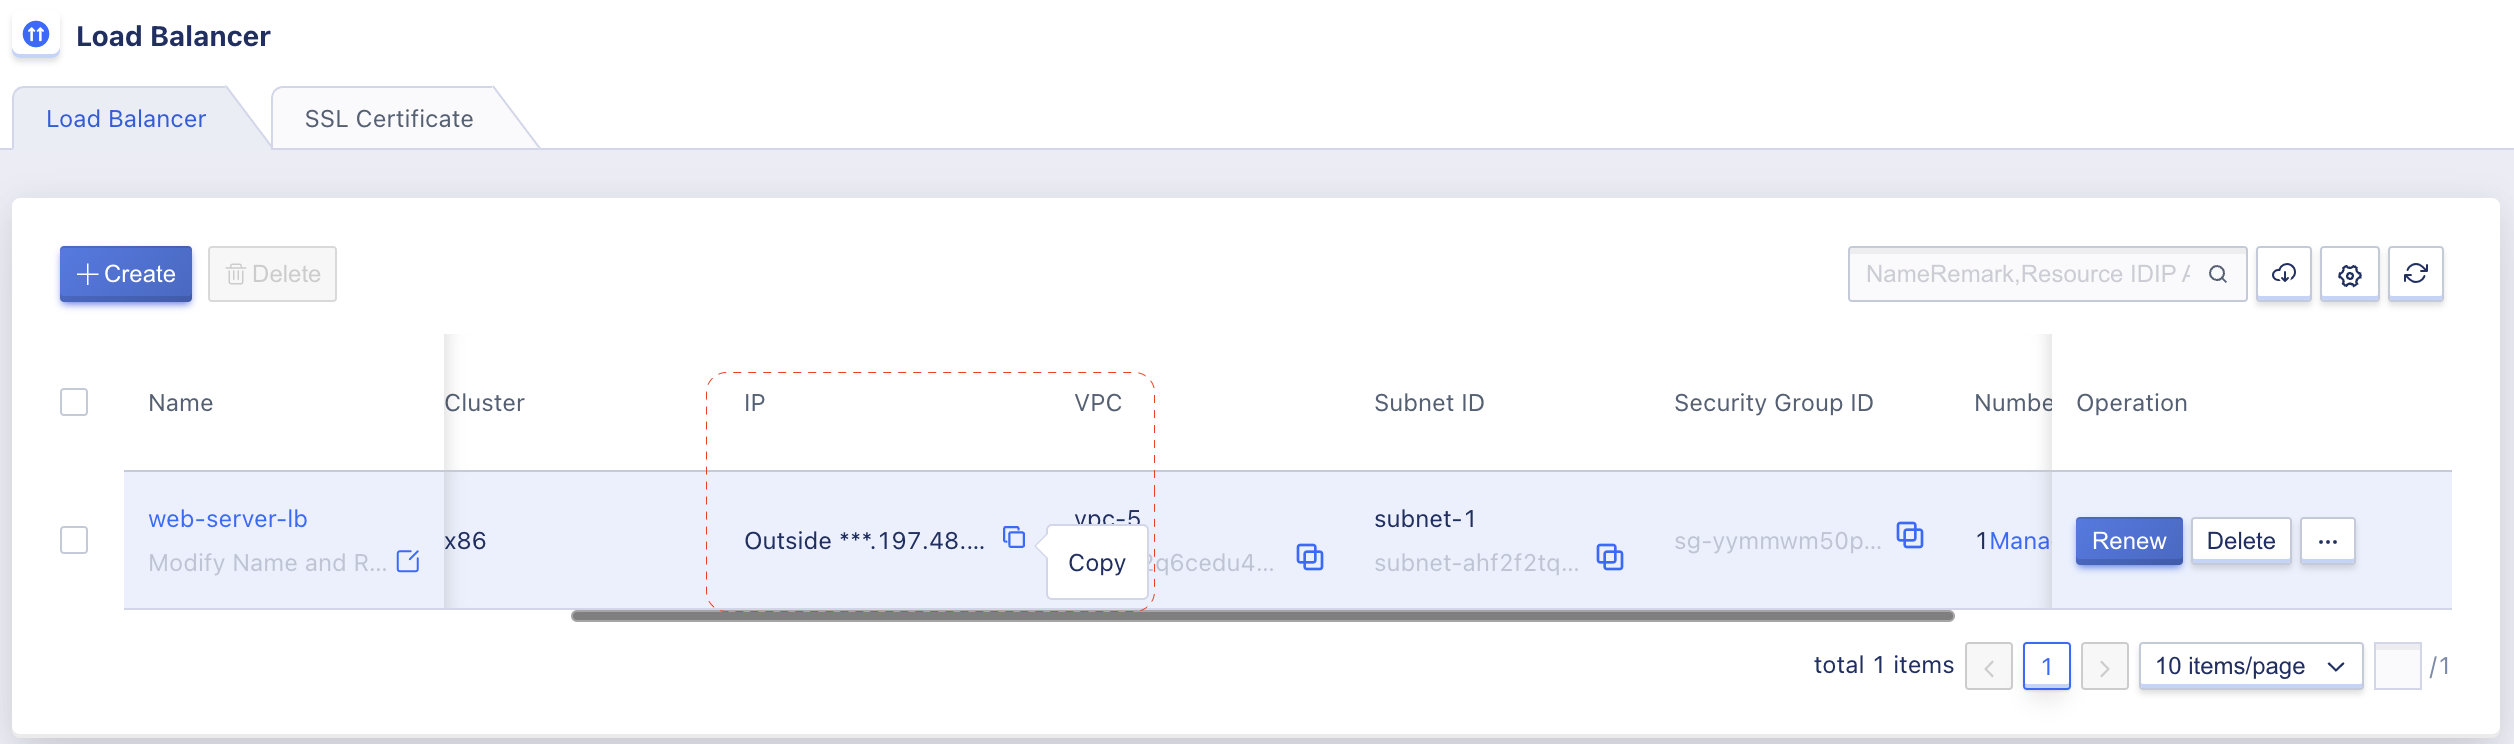
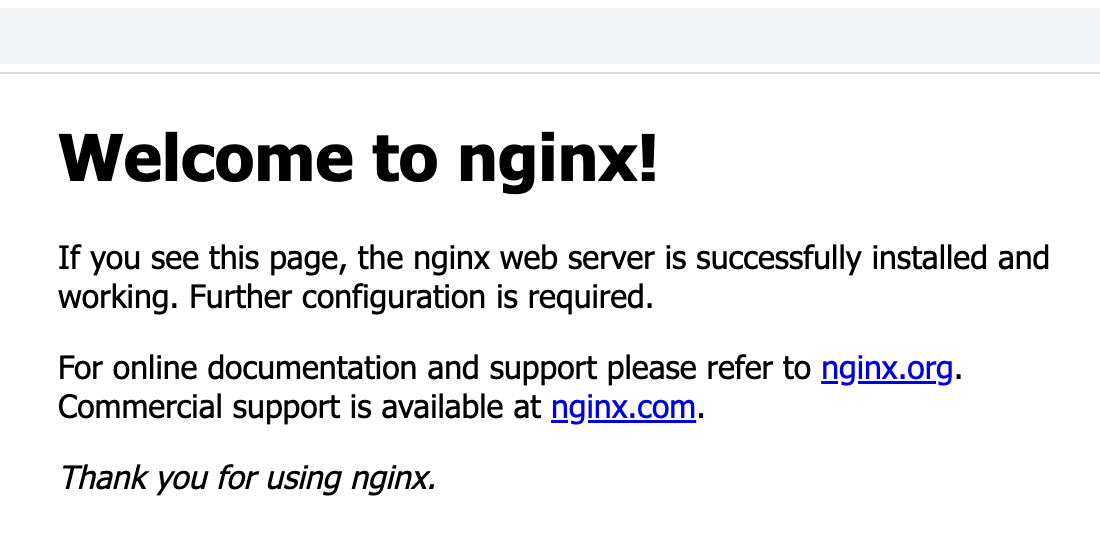
Open your desired browser and enter the public IP address. You should be able to see the welcome page as below.
12. Impose high CPU load situation
In this step, let SSH to Auto Scaling’s VM and impose high CPU load situation with stress tool.
Step 1: Navigate to VM listing page, find the auto auto scaling VM (asgroup-), and SSH to this VM using Console login.
root@localhost:~# stress --cpu 85
stress: info: [1402] dispatching hogs: 85 cpu, 0 io, 0 vm, 0 hhd
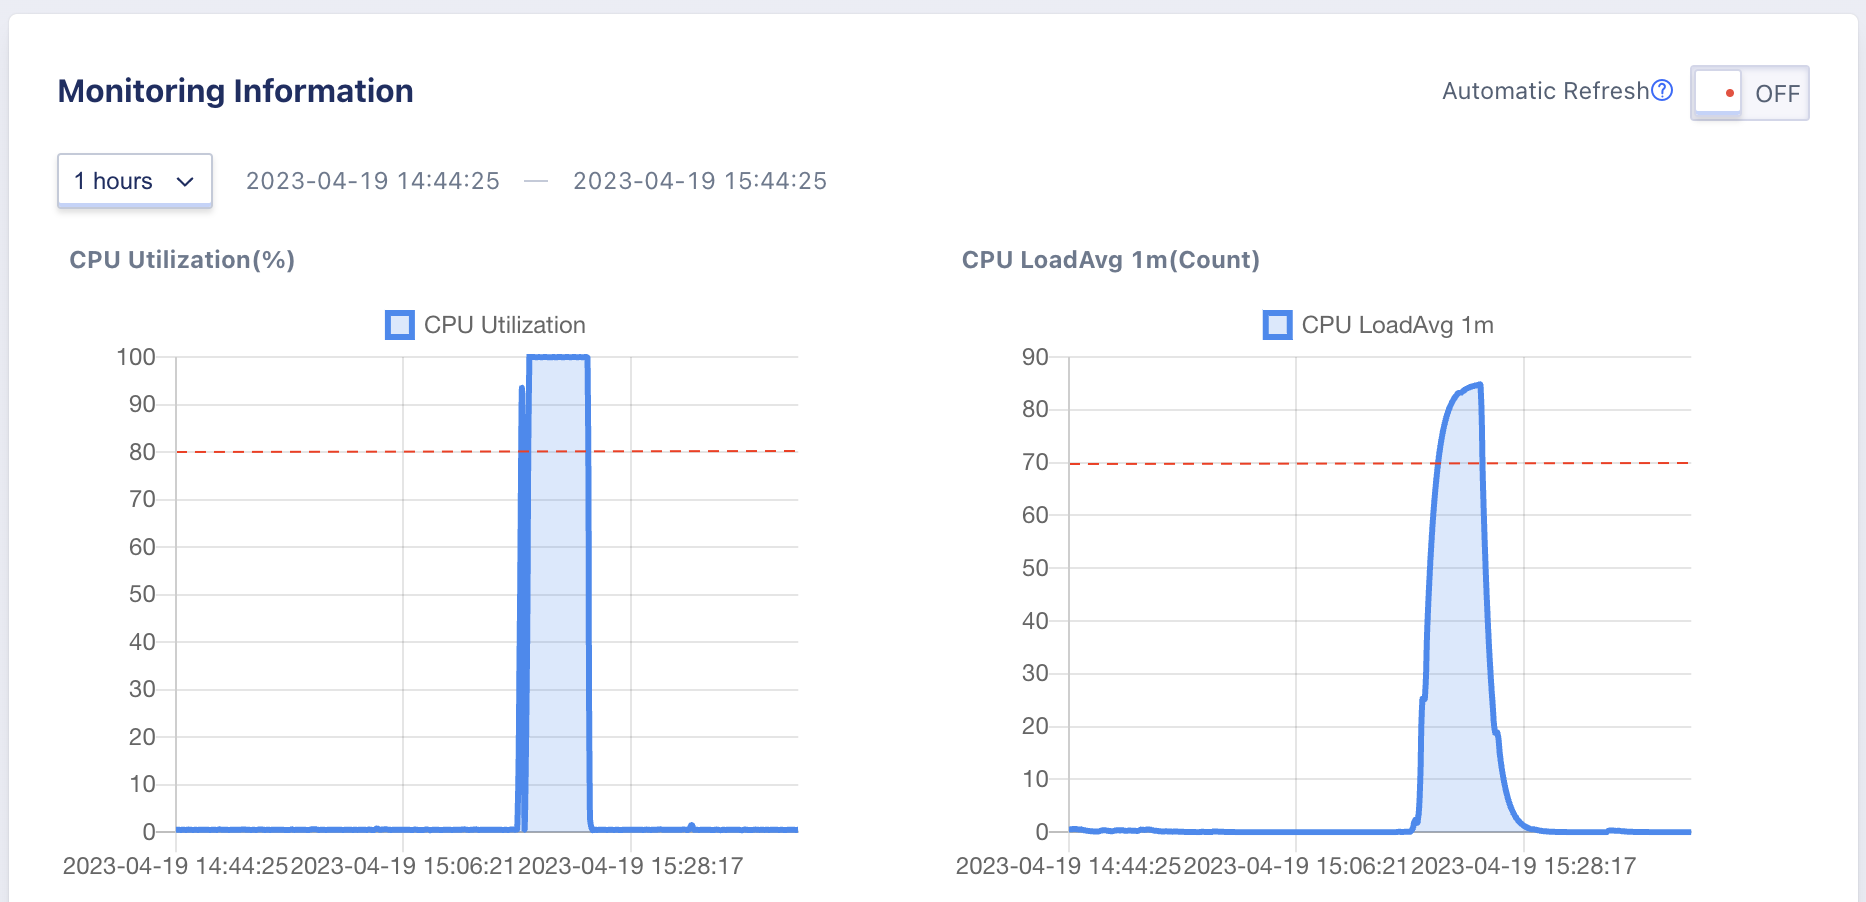
Step 2: Waiting for a while, you can see the CPU utilization of the VM increase to 100% as below image.
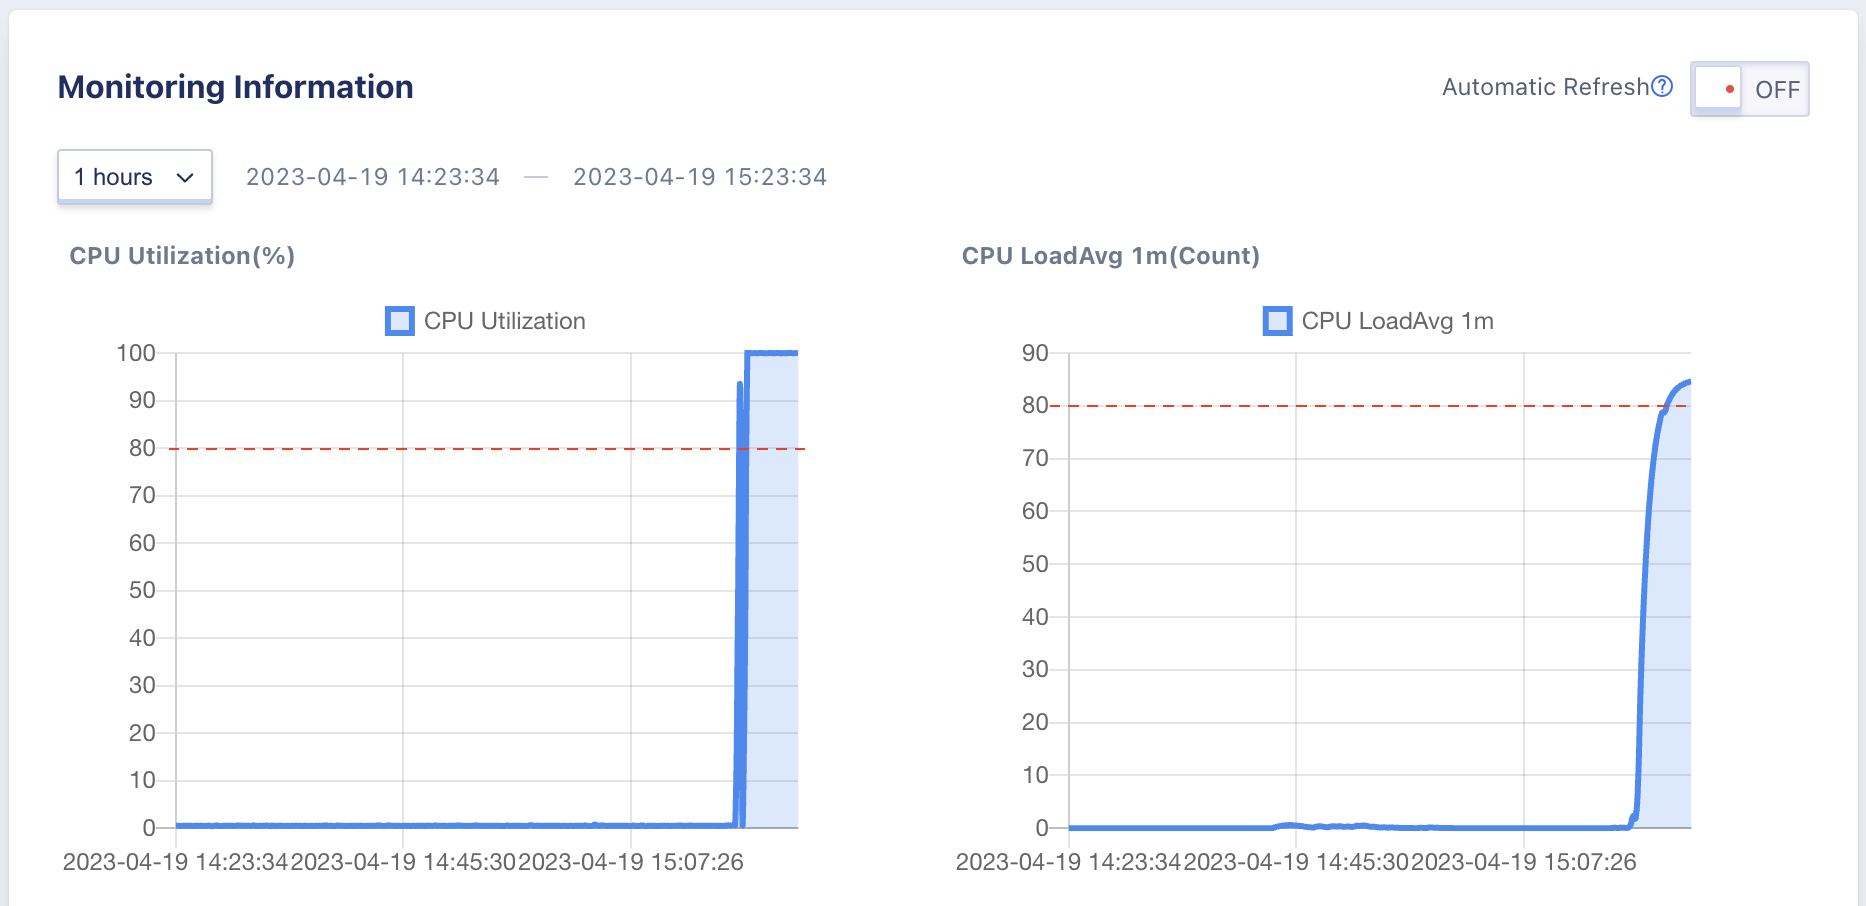
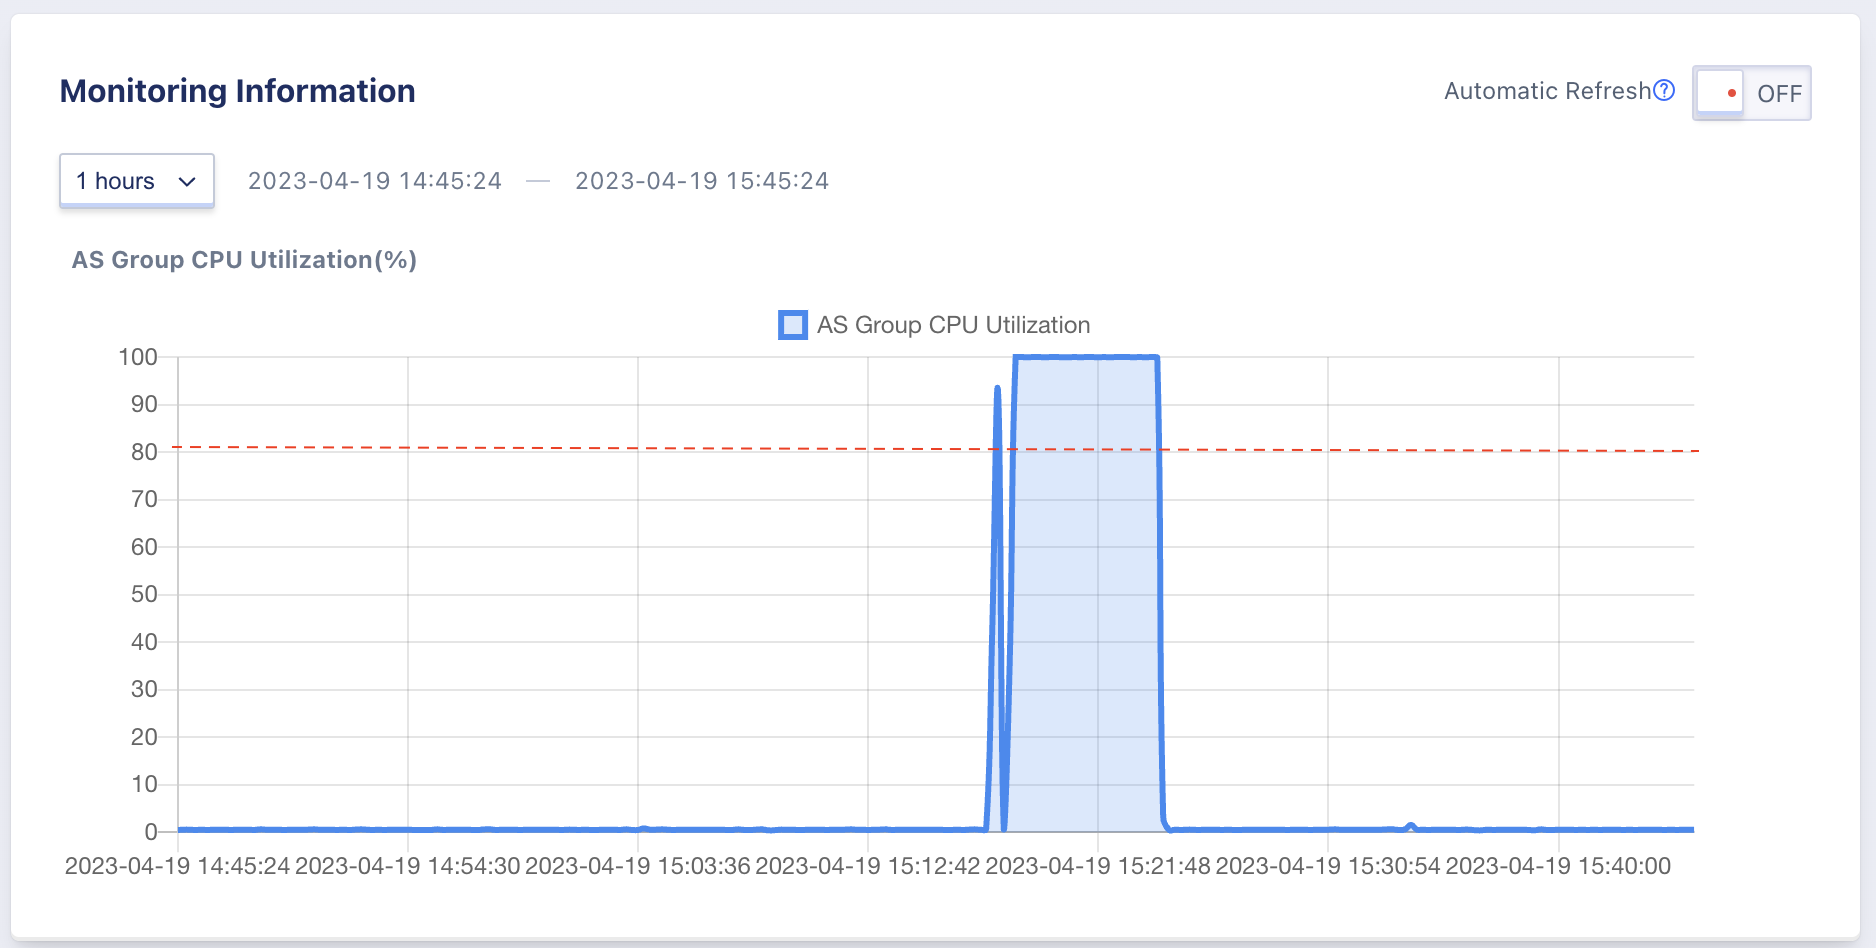
You can also monitor the CPU Utilization of the auto scaling in the auto scaling detail page
The Dashed red-line is added by author, this not available in the console UI.
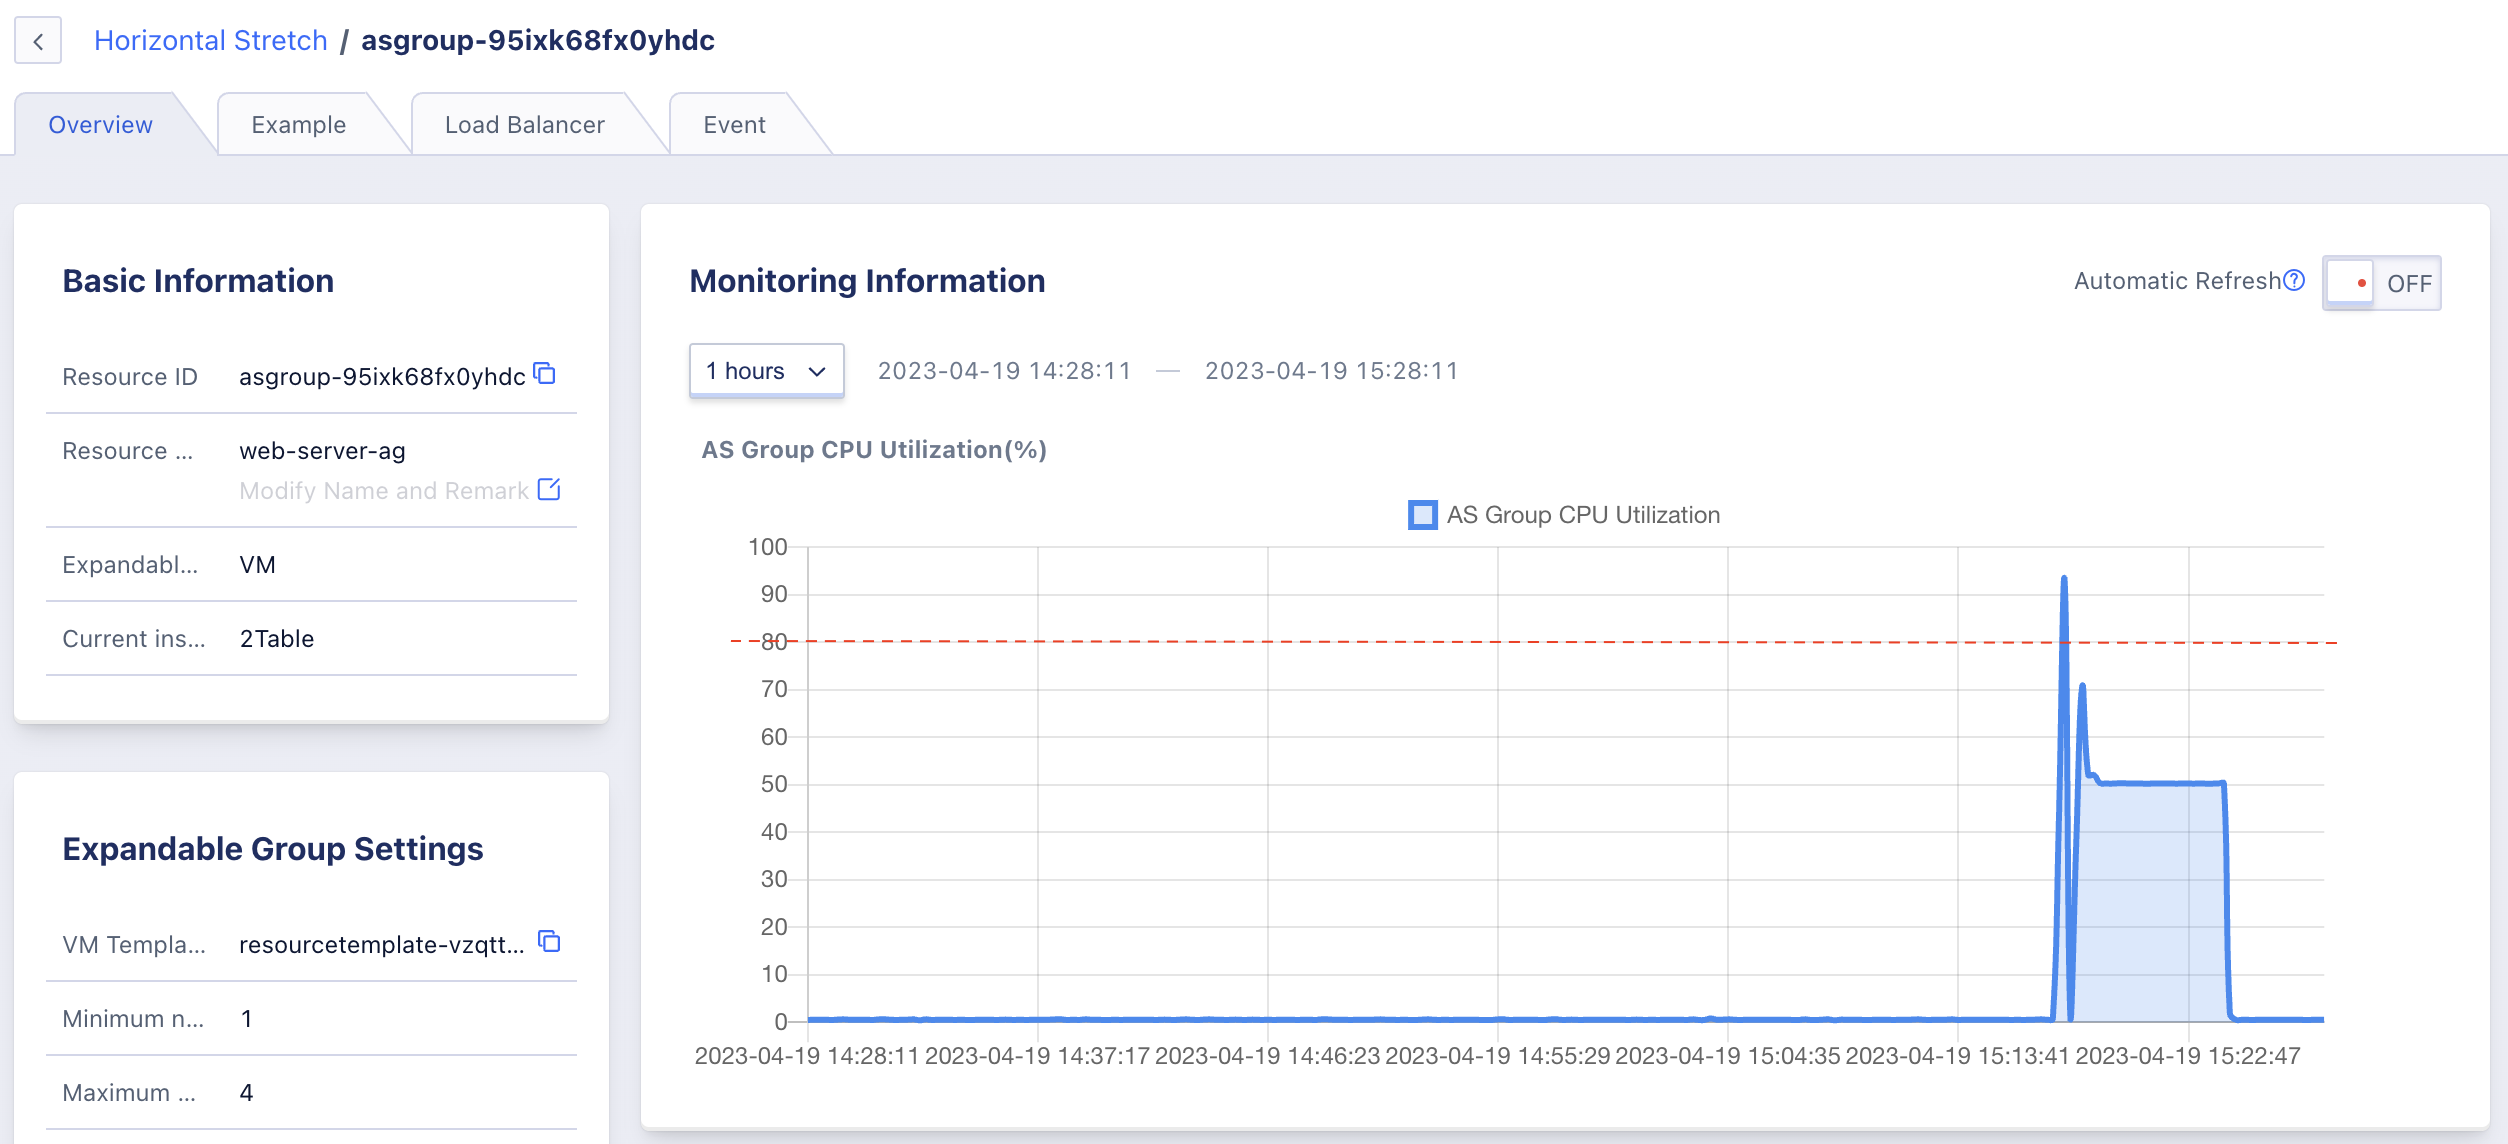
As we configured our Auto Scaling to trigger at 80% of CPU Utilization, you will shortly noticed that a new VM will be auto create by Auto Scaling.

And the new VM will automatically join the load balancer as a service node to handle the traffic.
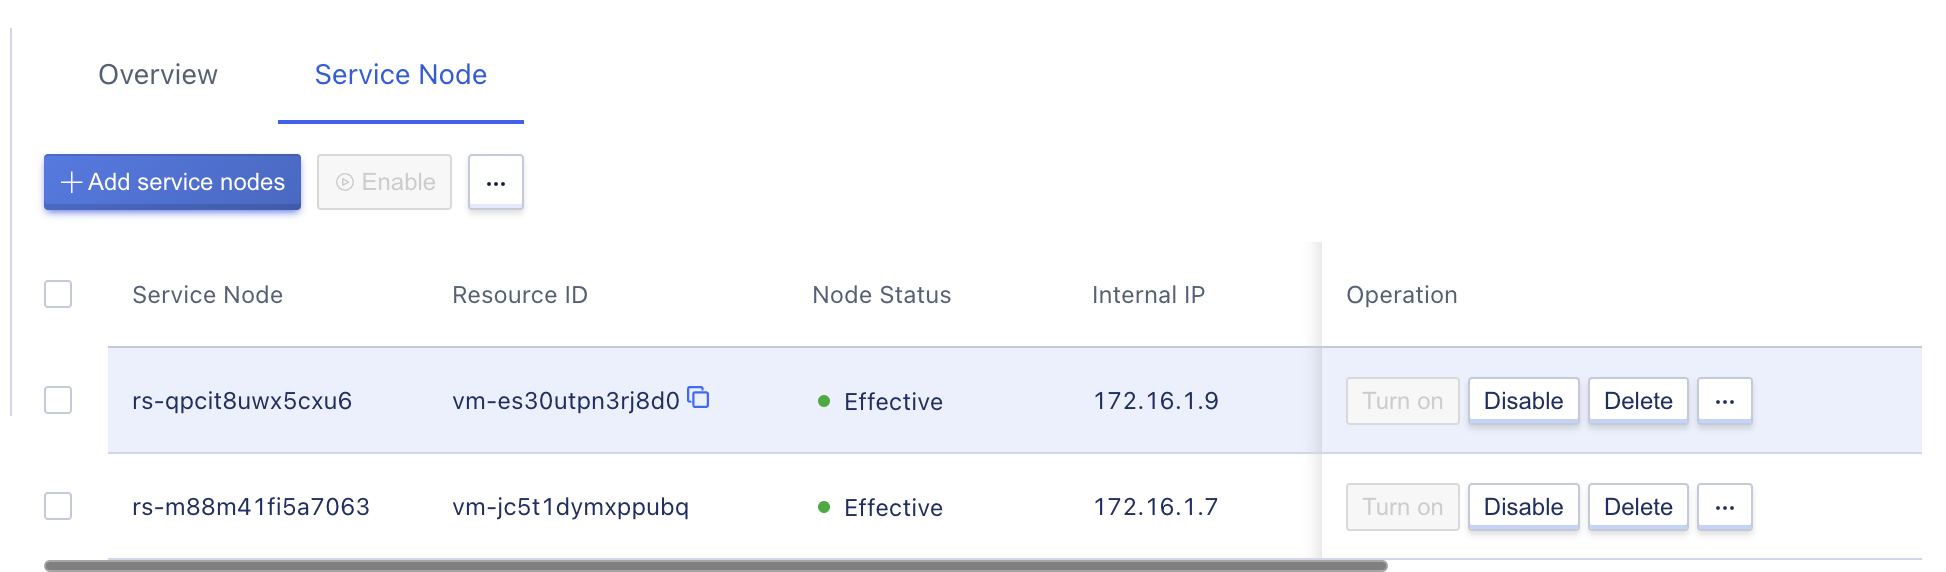
13. Impose low CPU load situation
In the above step, we used stress tool to impose the high CPU load. Lets stop the stress tool in the Console login by press Ctrl + C, after a while you will noticed the CPU Utilization go downs as below charts.
You will also notice that, 1 VM will be removed by the auto scaling and only 1 VM available to handle the traffic from load balancer.
Conclusion
Congrats, so far we already learned how to build a high availability web server using load balancer and auto scaling.
If you want to learn more on these topics, check out below documents: