Lab 3 - VPC, Subnet & Security Group
Introduction
In this lab, we will deep-dive in to VPC and Subnet management in SCloudStack. First, we will create a VPC and 3 Subnet in that VPC, then we will create Debian VM in each Subnet and use Security Group to allow/deny traffics to/from a specific VM.
Following services will be used in this labs:
- Network: VPC, Subnet, Security Group
- Compute: VM
- Storage: Cloud Disk
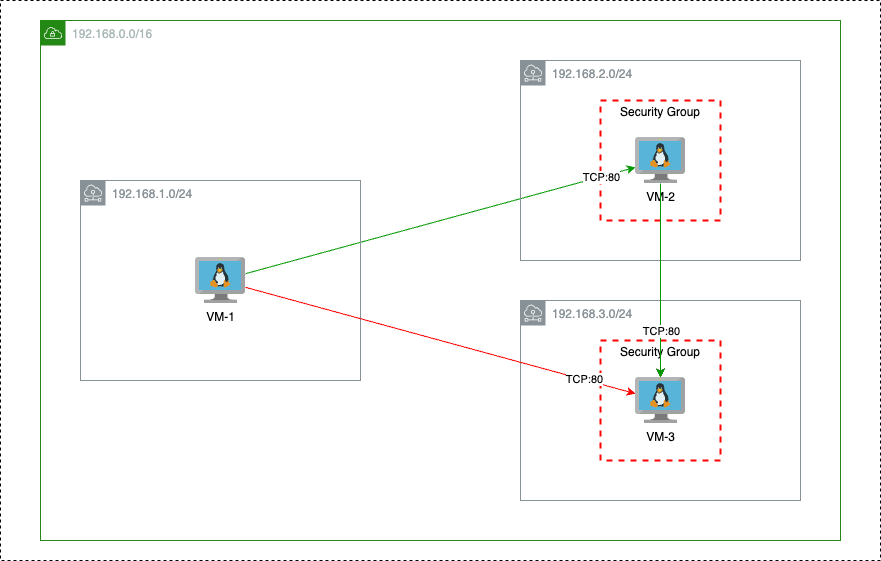
Imagine that we have a simple system architecture as above diagram, VM1 is web-app, VM2 is web-api and VM3 has database running on that.
We want to allow connection from VM1 -> VM2 and VM2 -> VM3 but not the direct connection from VM1 -> VM3, as web-app are not allowed to query database directly.
Prerequisite
- An account with Tenant Administrator role.
- Your tenant need to be in Active status.
Please contact your System Administrator to get your credential.
Guidelines
Before start, you need to access the SCloudStack console dashboard, if you don’t know how to do that, visit Lab 1: Getting Started with SCloudStack Console.
1. Create your VPC
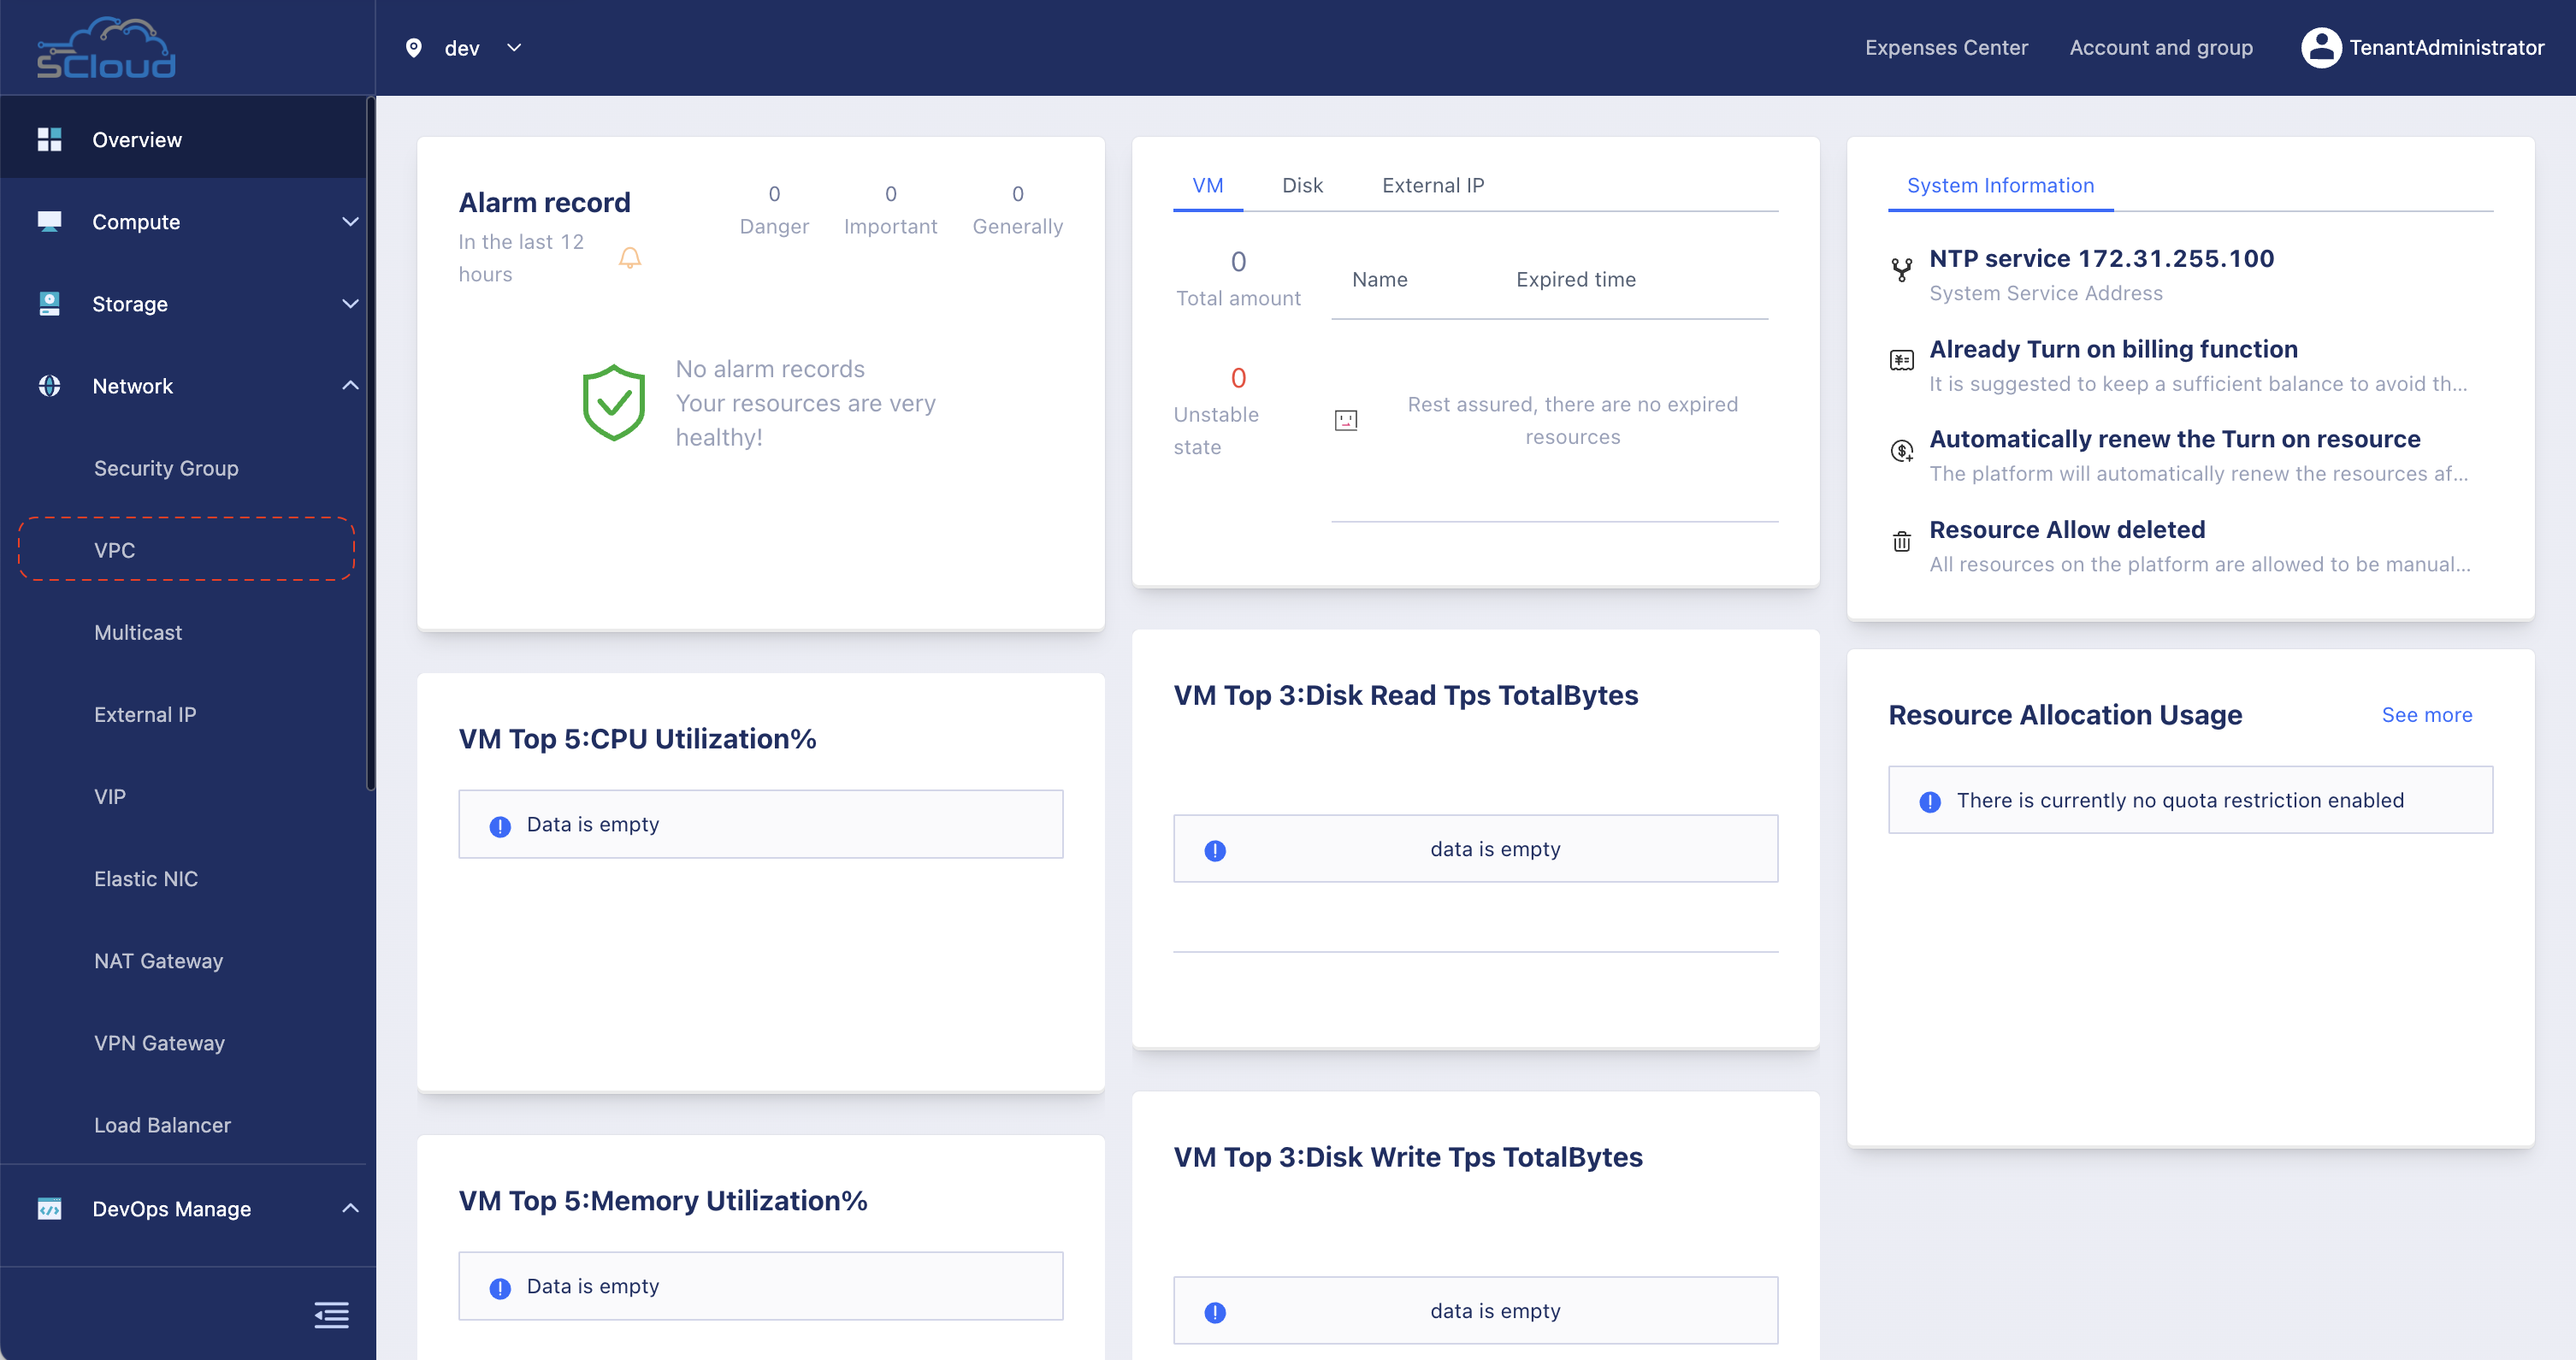
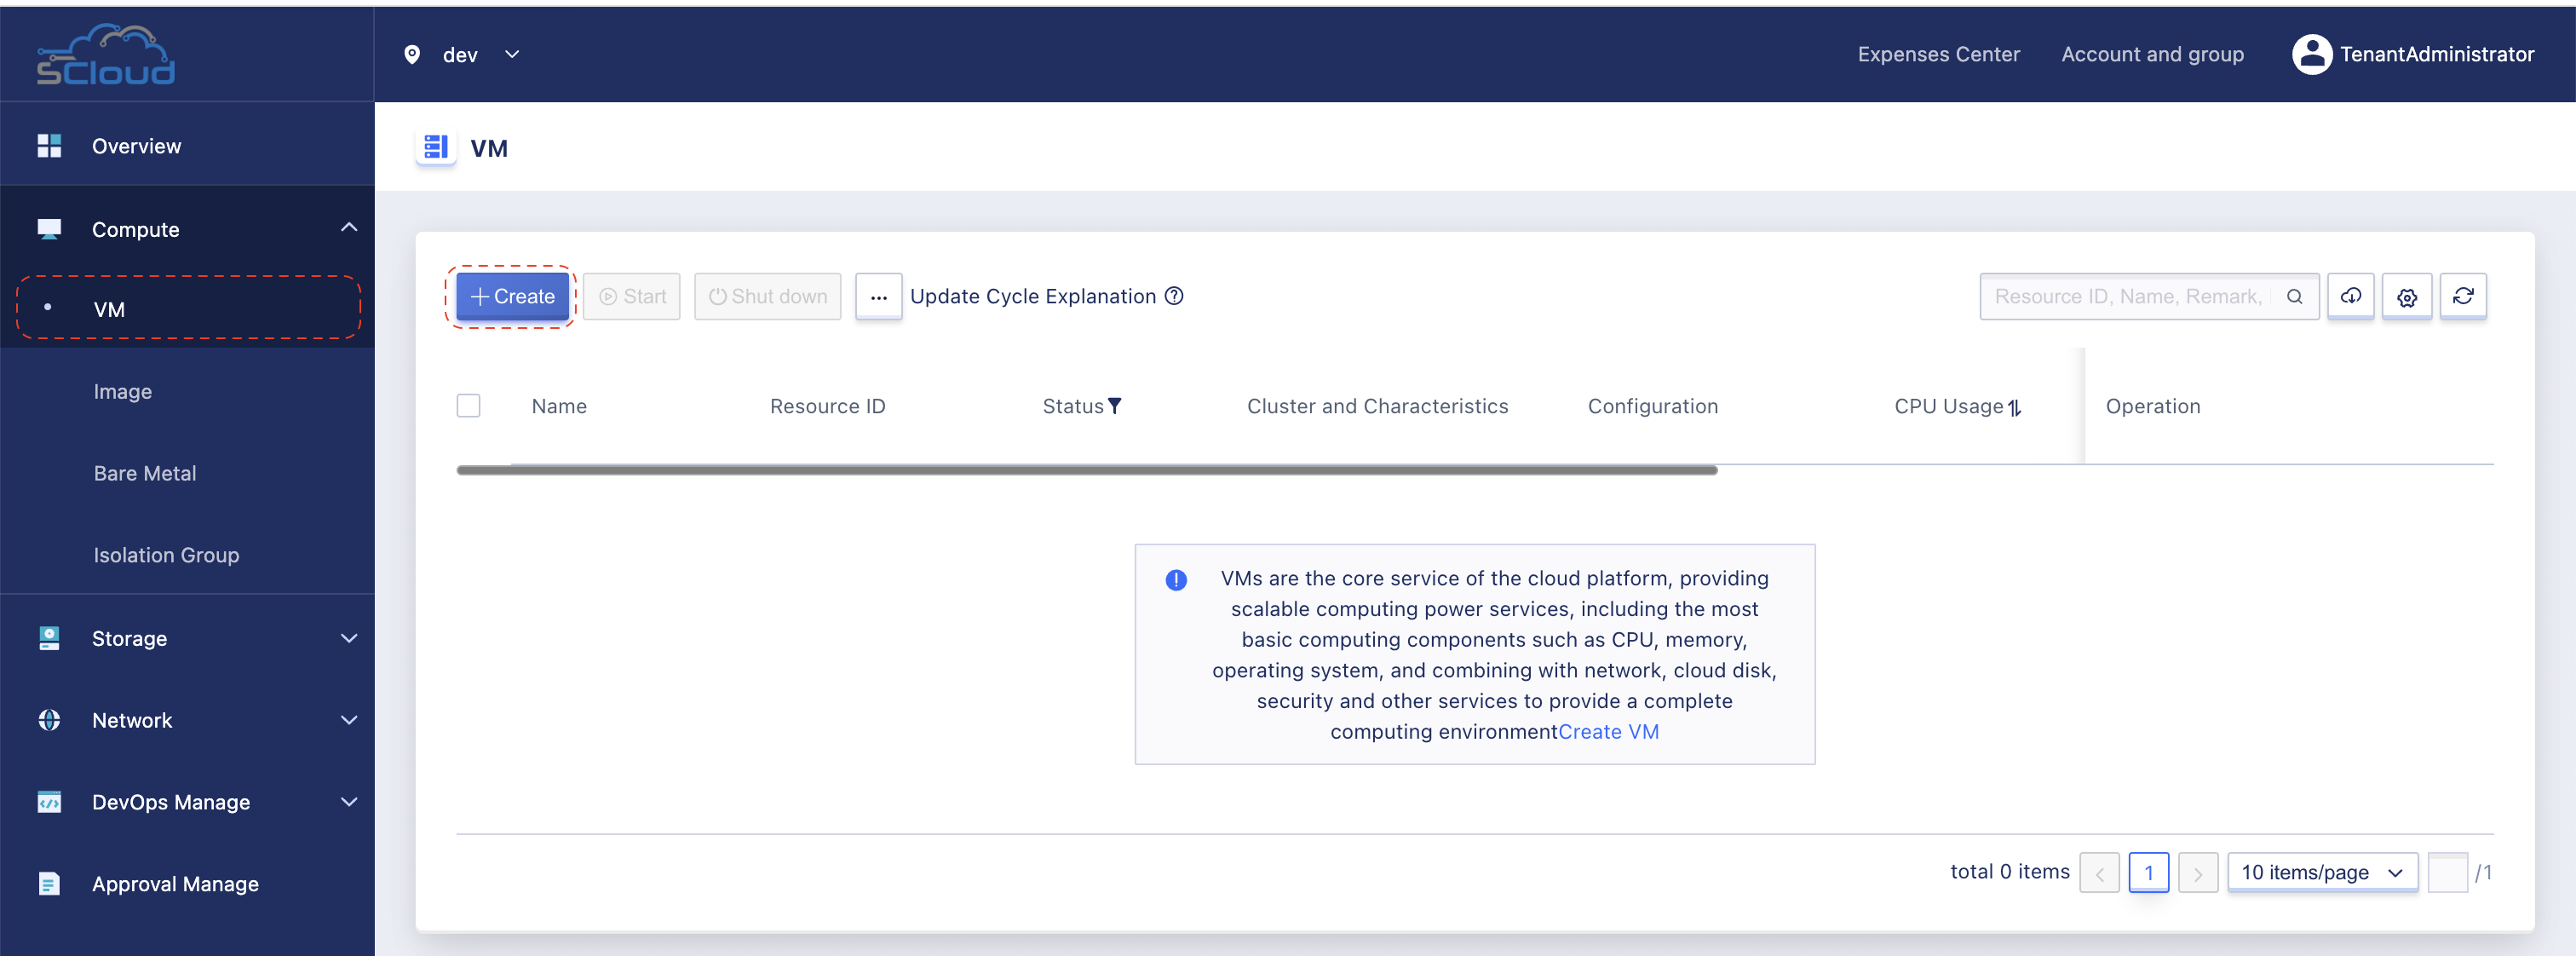
Step 1: From the Tenant Admin dashboard, open the left-side bar and click in VPC menu under Network group.
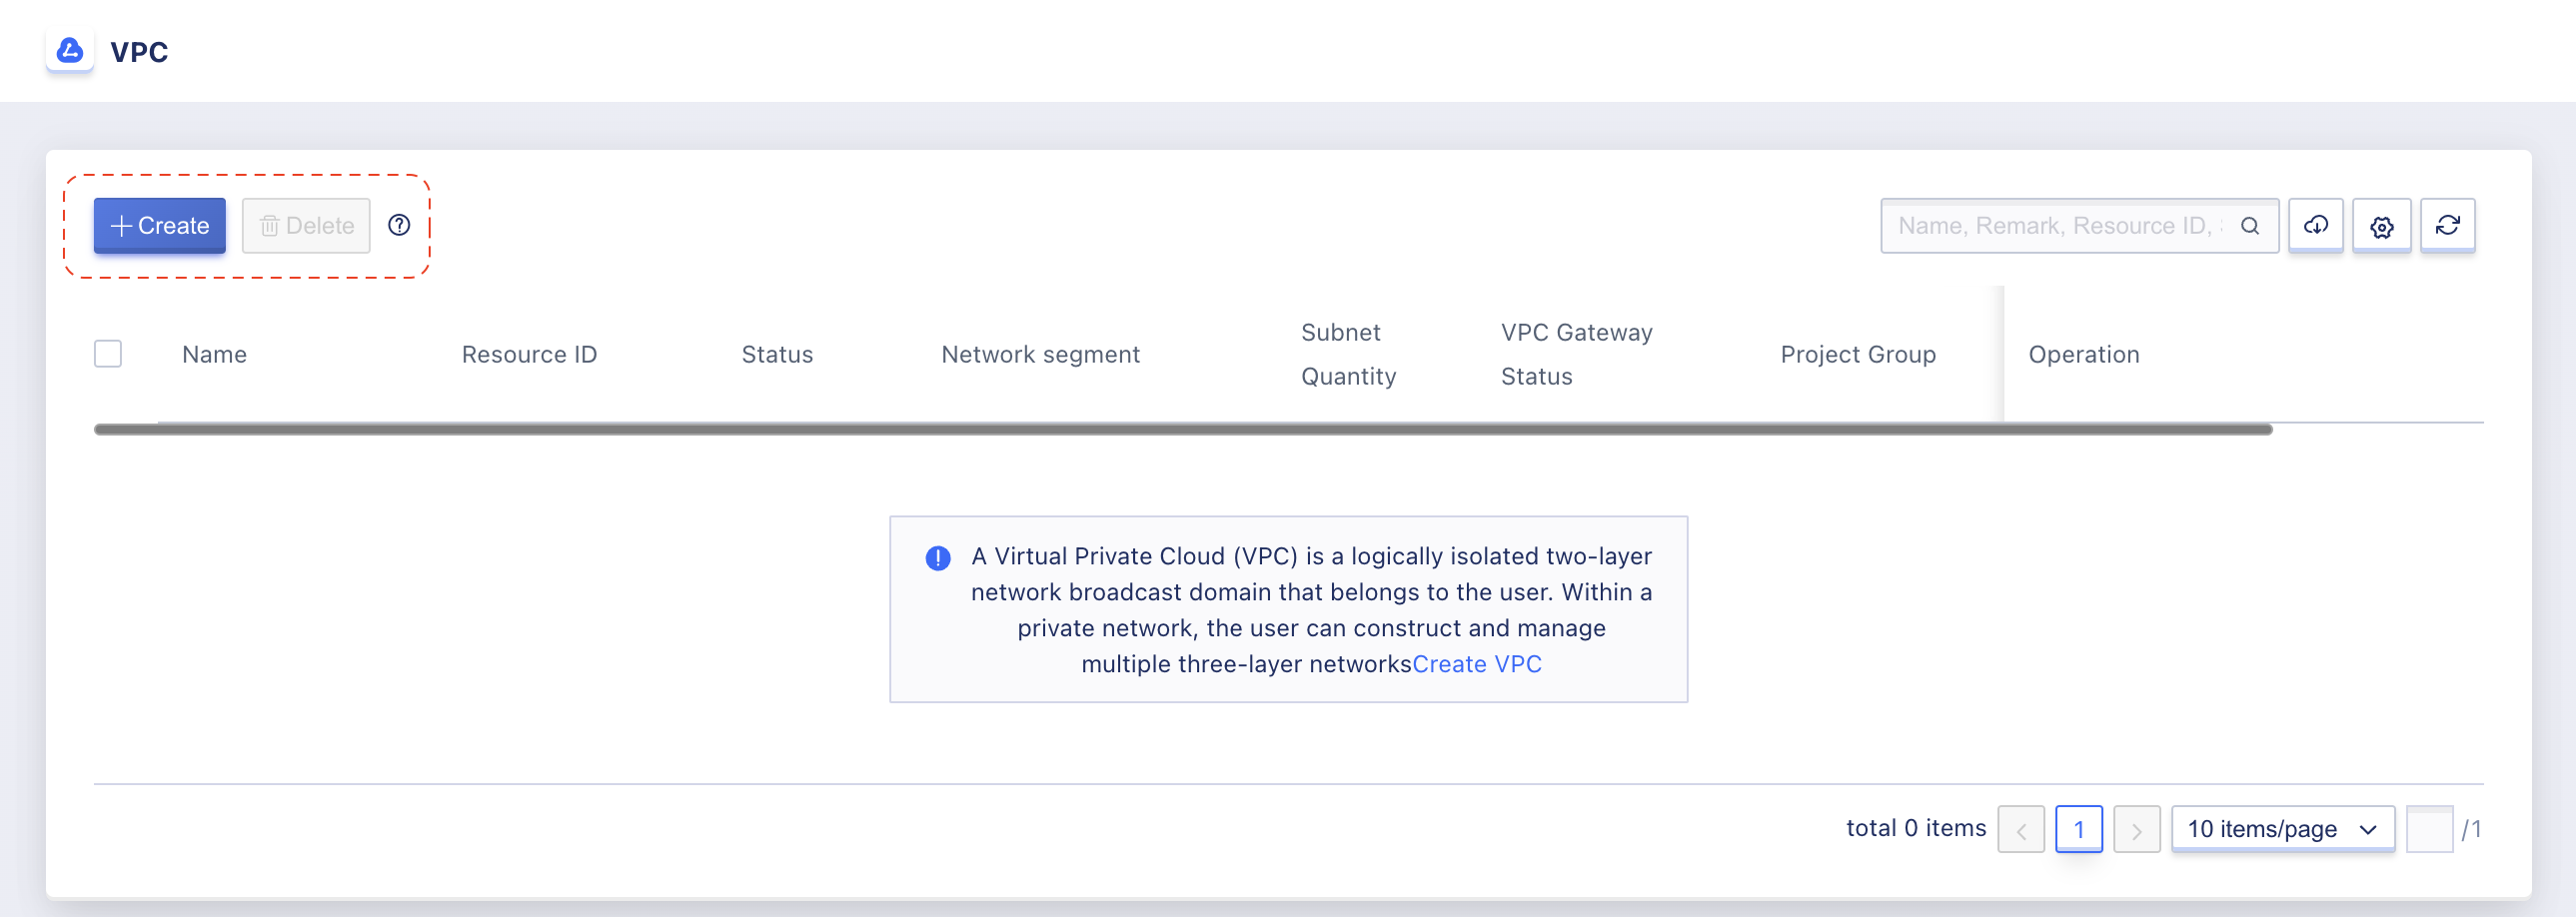
Step 2: Click Create to open the creation form.
Step 3: Enter VPC information as below image:
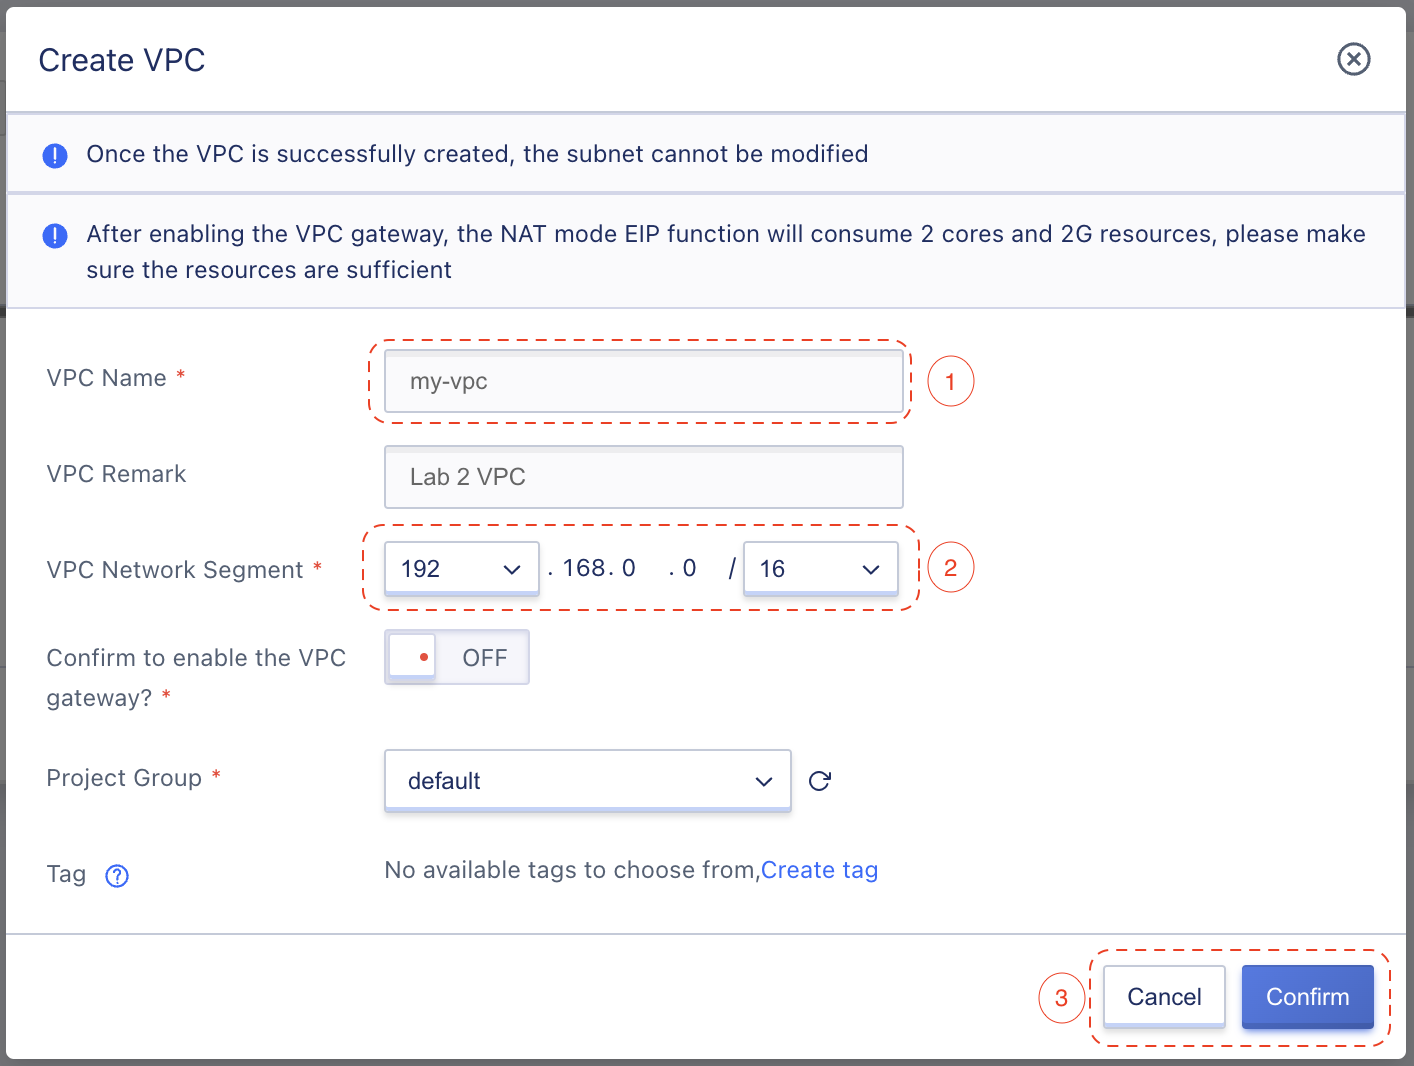
- VPC Name: my-vpc
- VPC Network Segment:
192.168.0.0/16
Leave other fields as default value and click Confirm to create VPC.
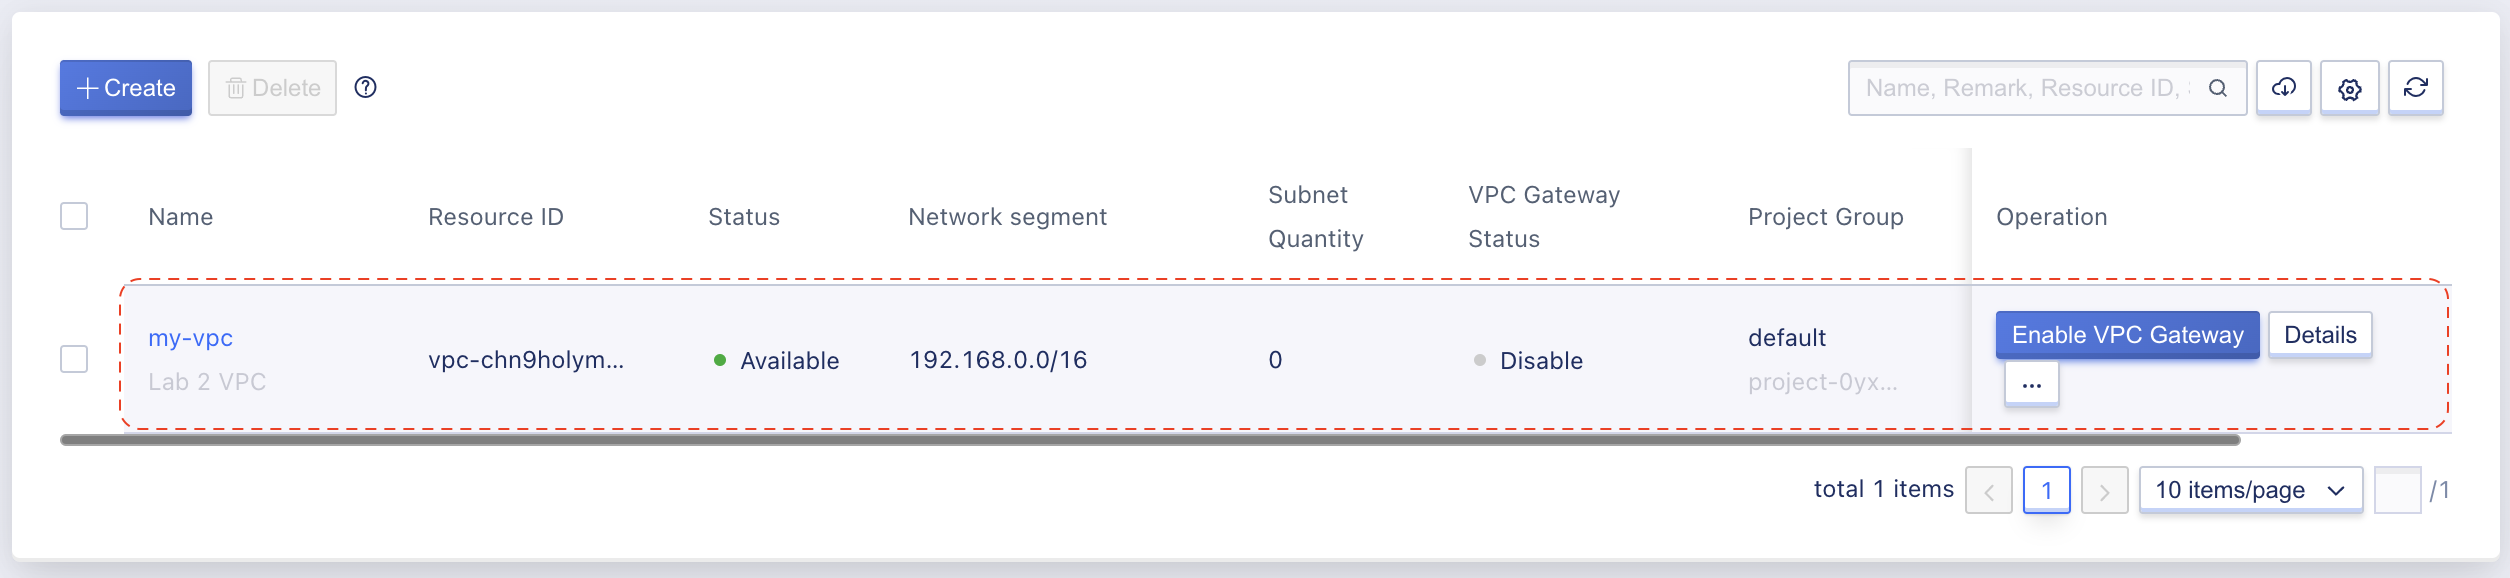
Step 4: Ensure that VPC created in the VPC list.
2. Create your Subnet
Step 1: From VPC list screen in above screen (step 4), click in VPC name to navigate to VPC detail page.
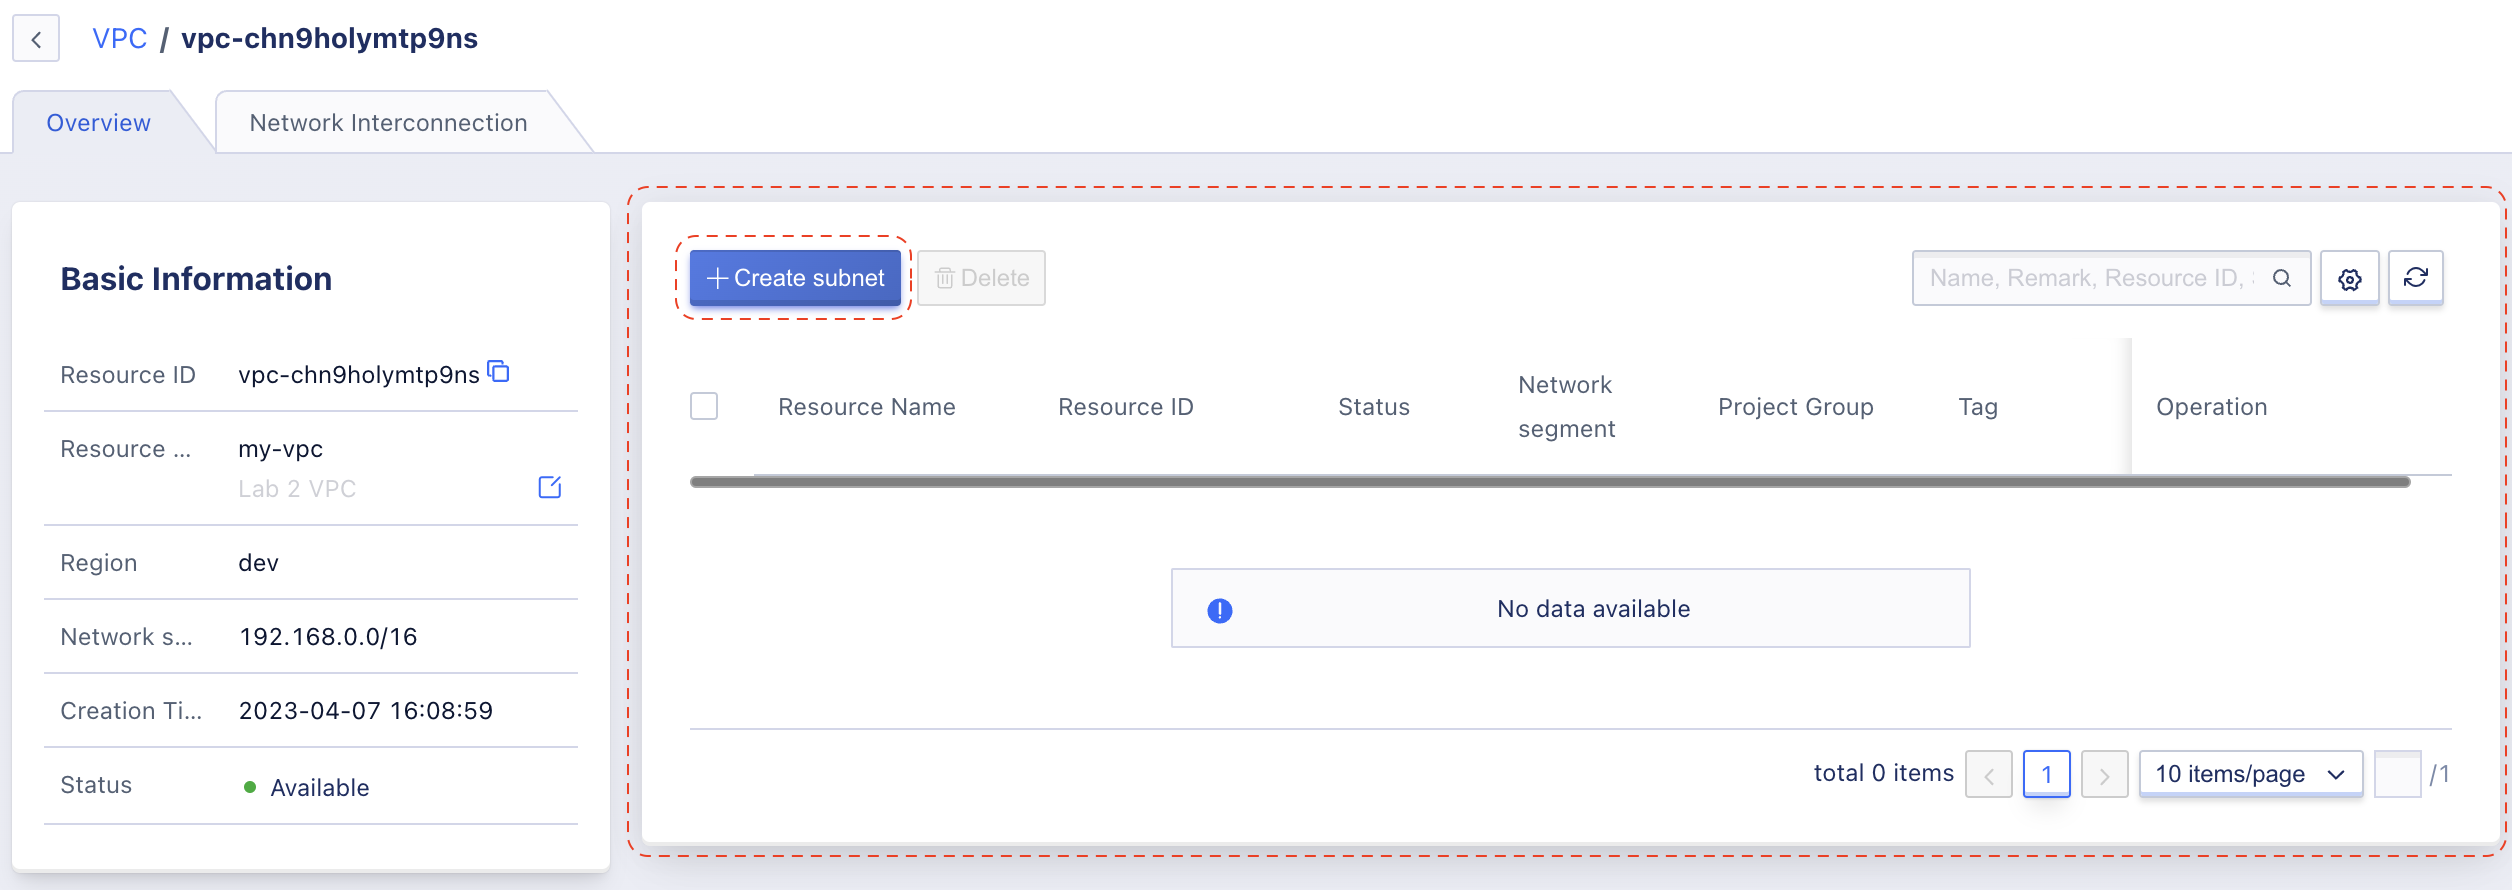
In the VPC detail page, the panel on the right-hand side is the Subnet management area. Click in the Create button to open Subnet creation form of current VPC.
Step 2: Enter Subnet information as below image:
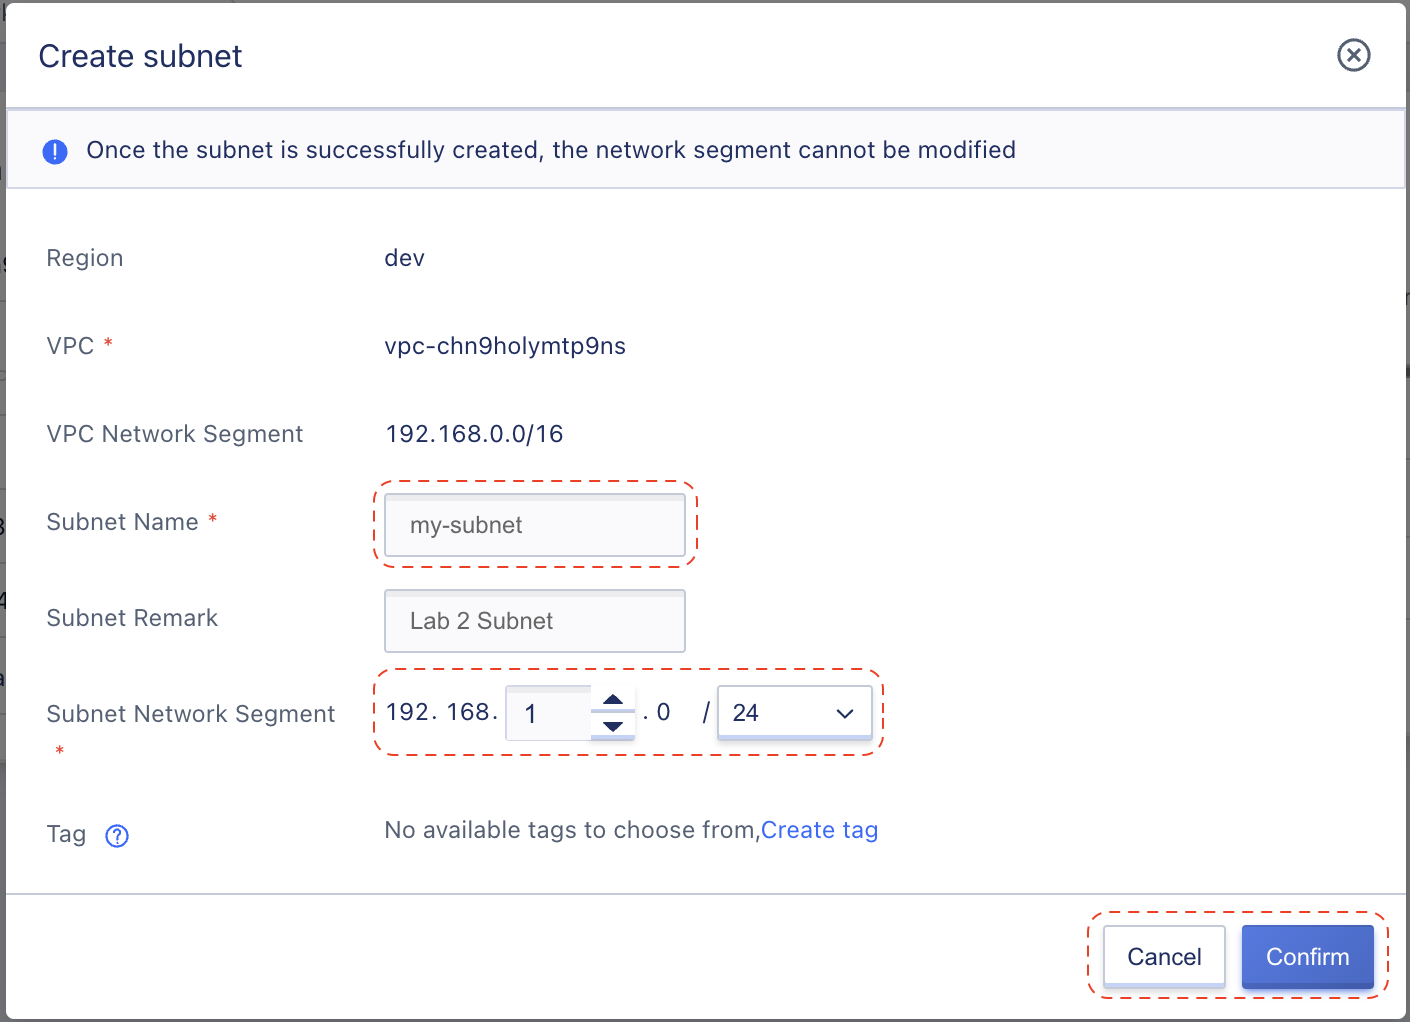
- Subnet Name: subnet-1
- Subnet Network Segment:
192.168.1.0/24
Leave other fields as default value and click Confirm to create Subnet.
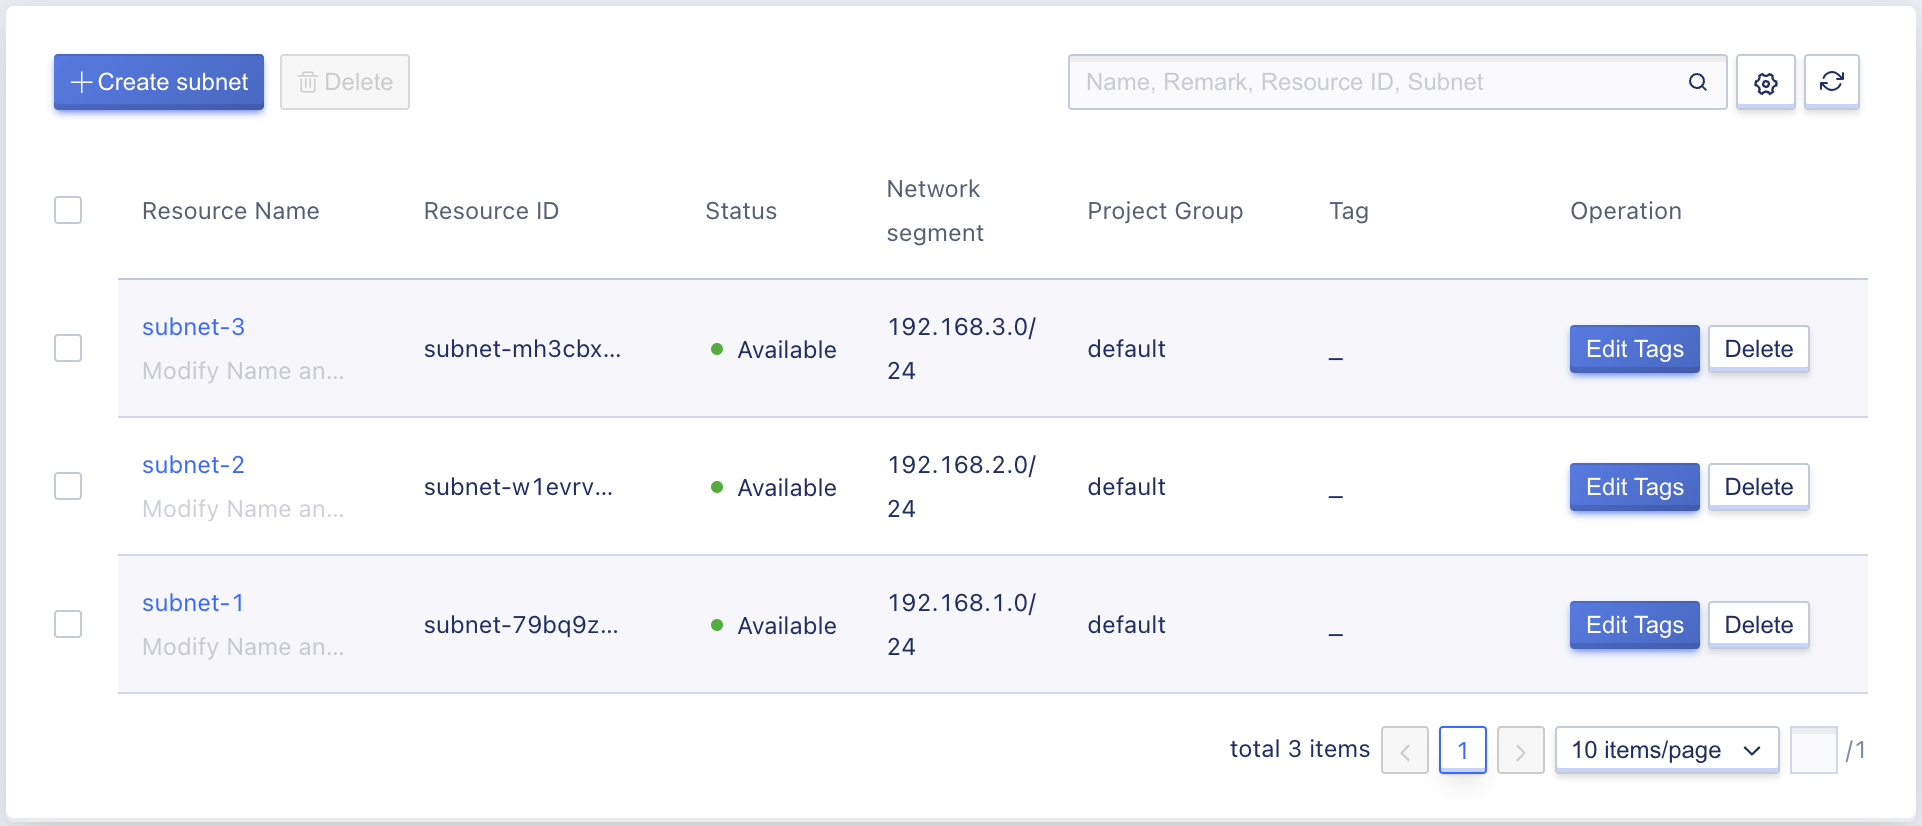
Step 3: Repeat above steps to create 2 remaining subnet
- subnet-2
- Subnet Name: subnet-2
- Subnet Network Segment:
192.168.2.0/24
- subnet-3
- Subnet Name: subnet-3
- Subnet Network Segment:
192.168.3.0/24
Step 4: Ensure that 3 subnets available in the Subnet list.
3. Create your VM
Step 1: Go to side-bar menu, click in VM item under Compute group.
Step 2: In the VM creation page, enter information as the following images:
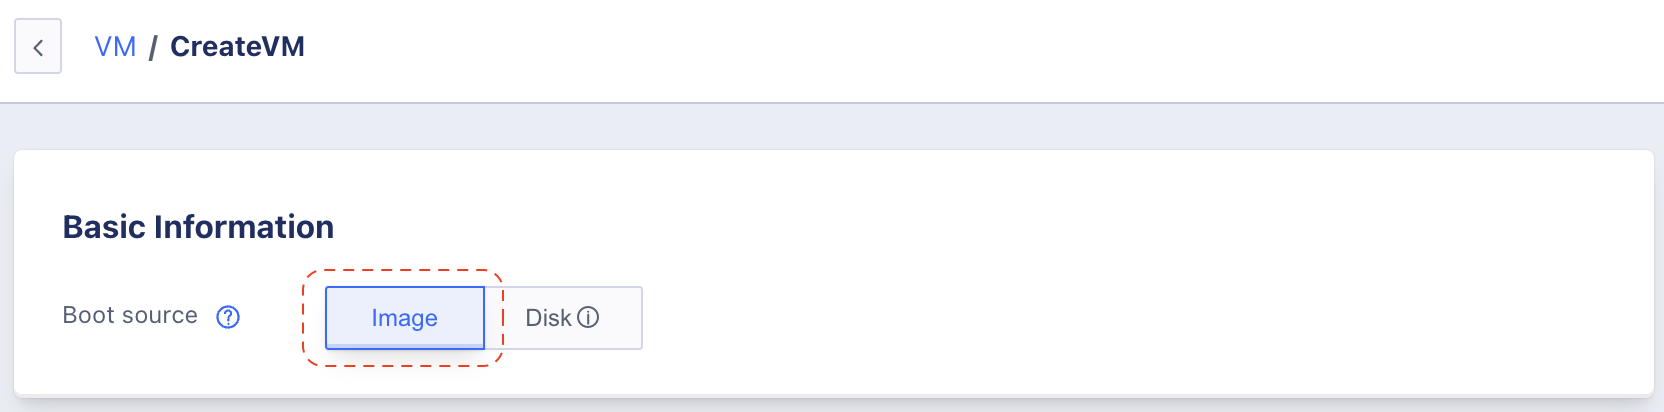
Basic Information:
- Boot source: Image

Basic Settings:
- Cluster: leave as default value.
- Image: select Debian 10.12 as OS image.
- Specifications: 1C2G (1 vCore CPU, 2GB Ram).
- Disk: leave as default value (1 40GB system disk, 1 10GB data disk).
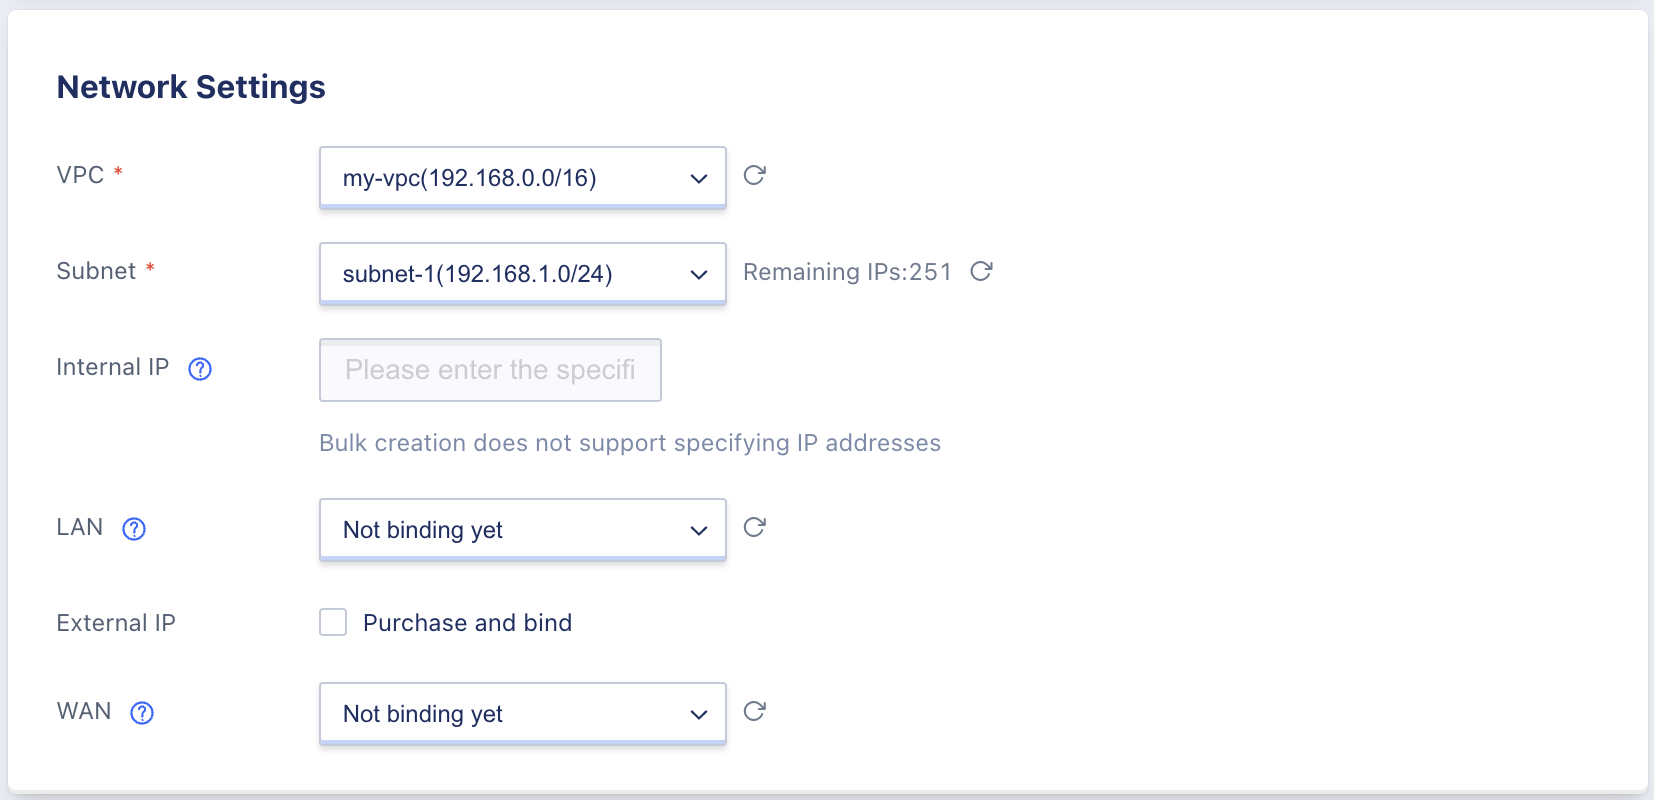
Network Settings:
- VPC: my-vpc.
- Subnet: subnet-1
- Leave other fields as default value.
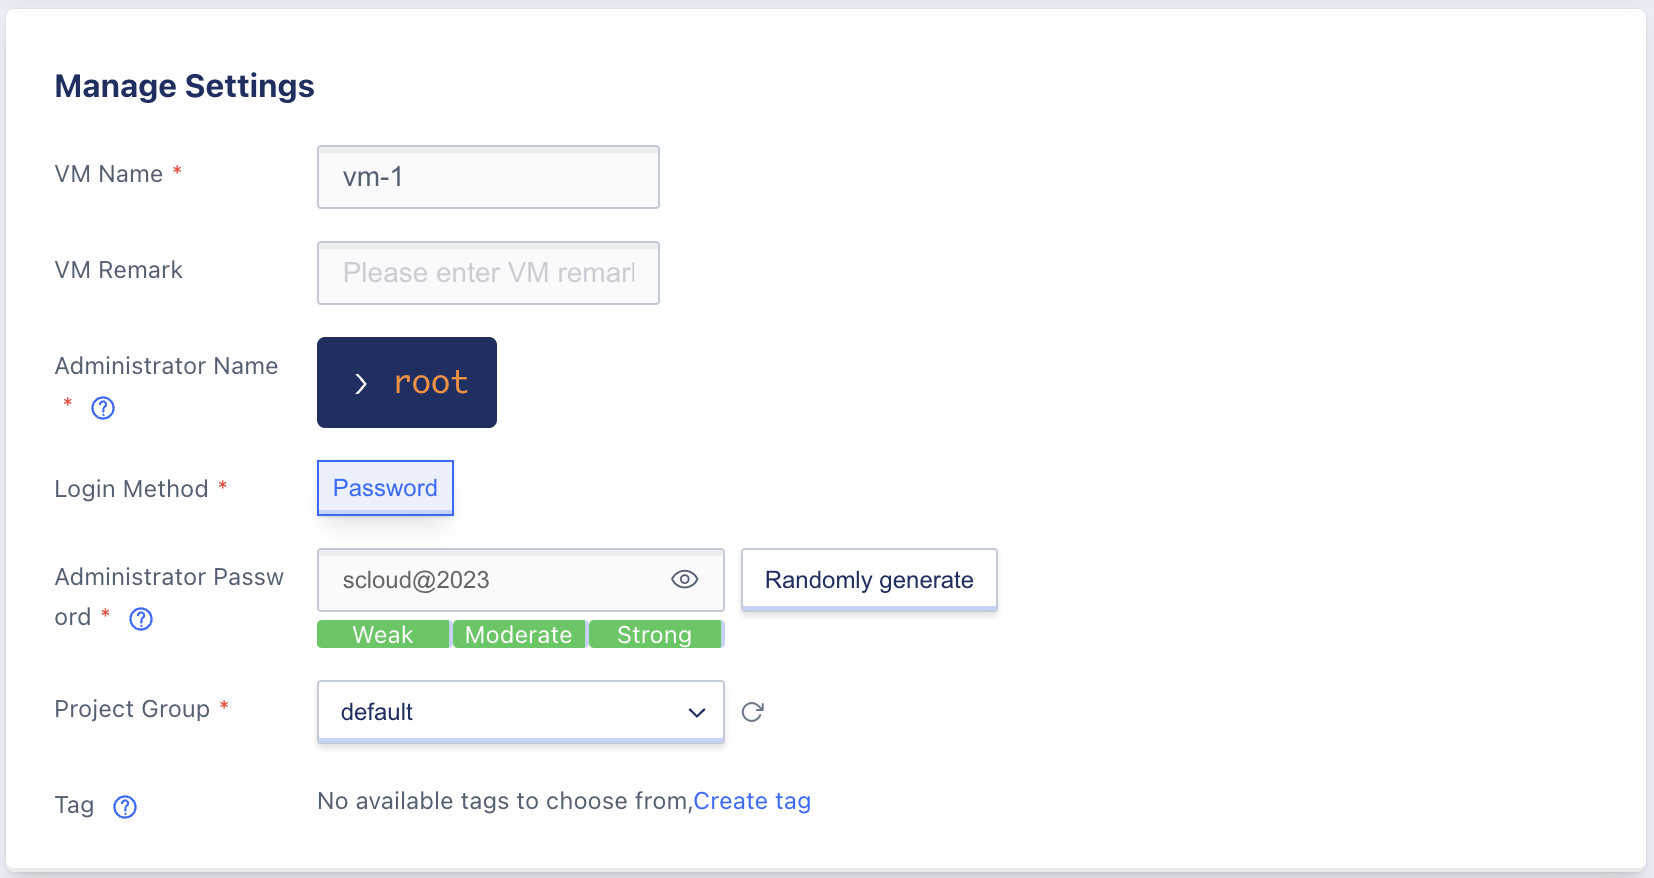
Manage Settings:
- VM Name: vm-1
- Login Method: Password
- Administrator Password: click Randomly Generate to get a random password or set your own desired password (note the password somewhere, we will need it in the next step).
Step 3: Click Buy Now in the top-right panel to create your VM.
Step 4: Repeat above steps to create vm-2 in subnet 2 and vm-3 in subnet-3, all configurations should be the same, except the subnet selection under Network Settings section & VM Name under Manage Settings section.
VM-2
- VM Name: vm-2
- Subnet: subnet-2
VM-3
- VM Name: vm-3
- Subnet: subnet-3
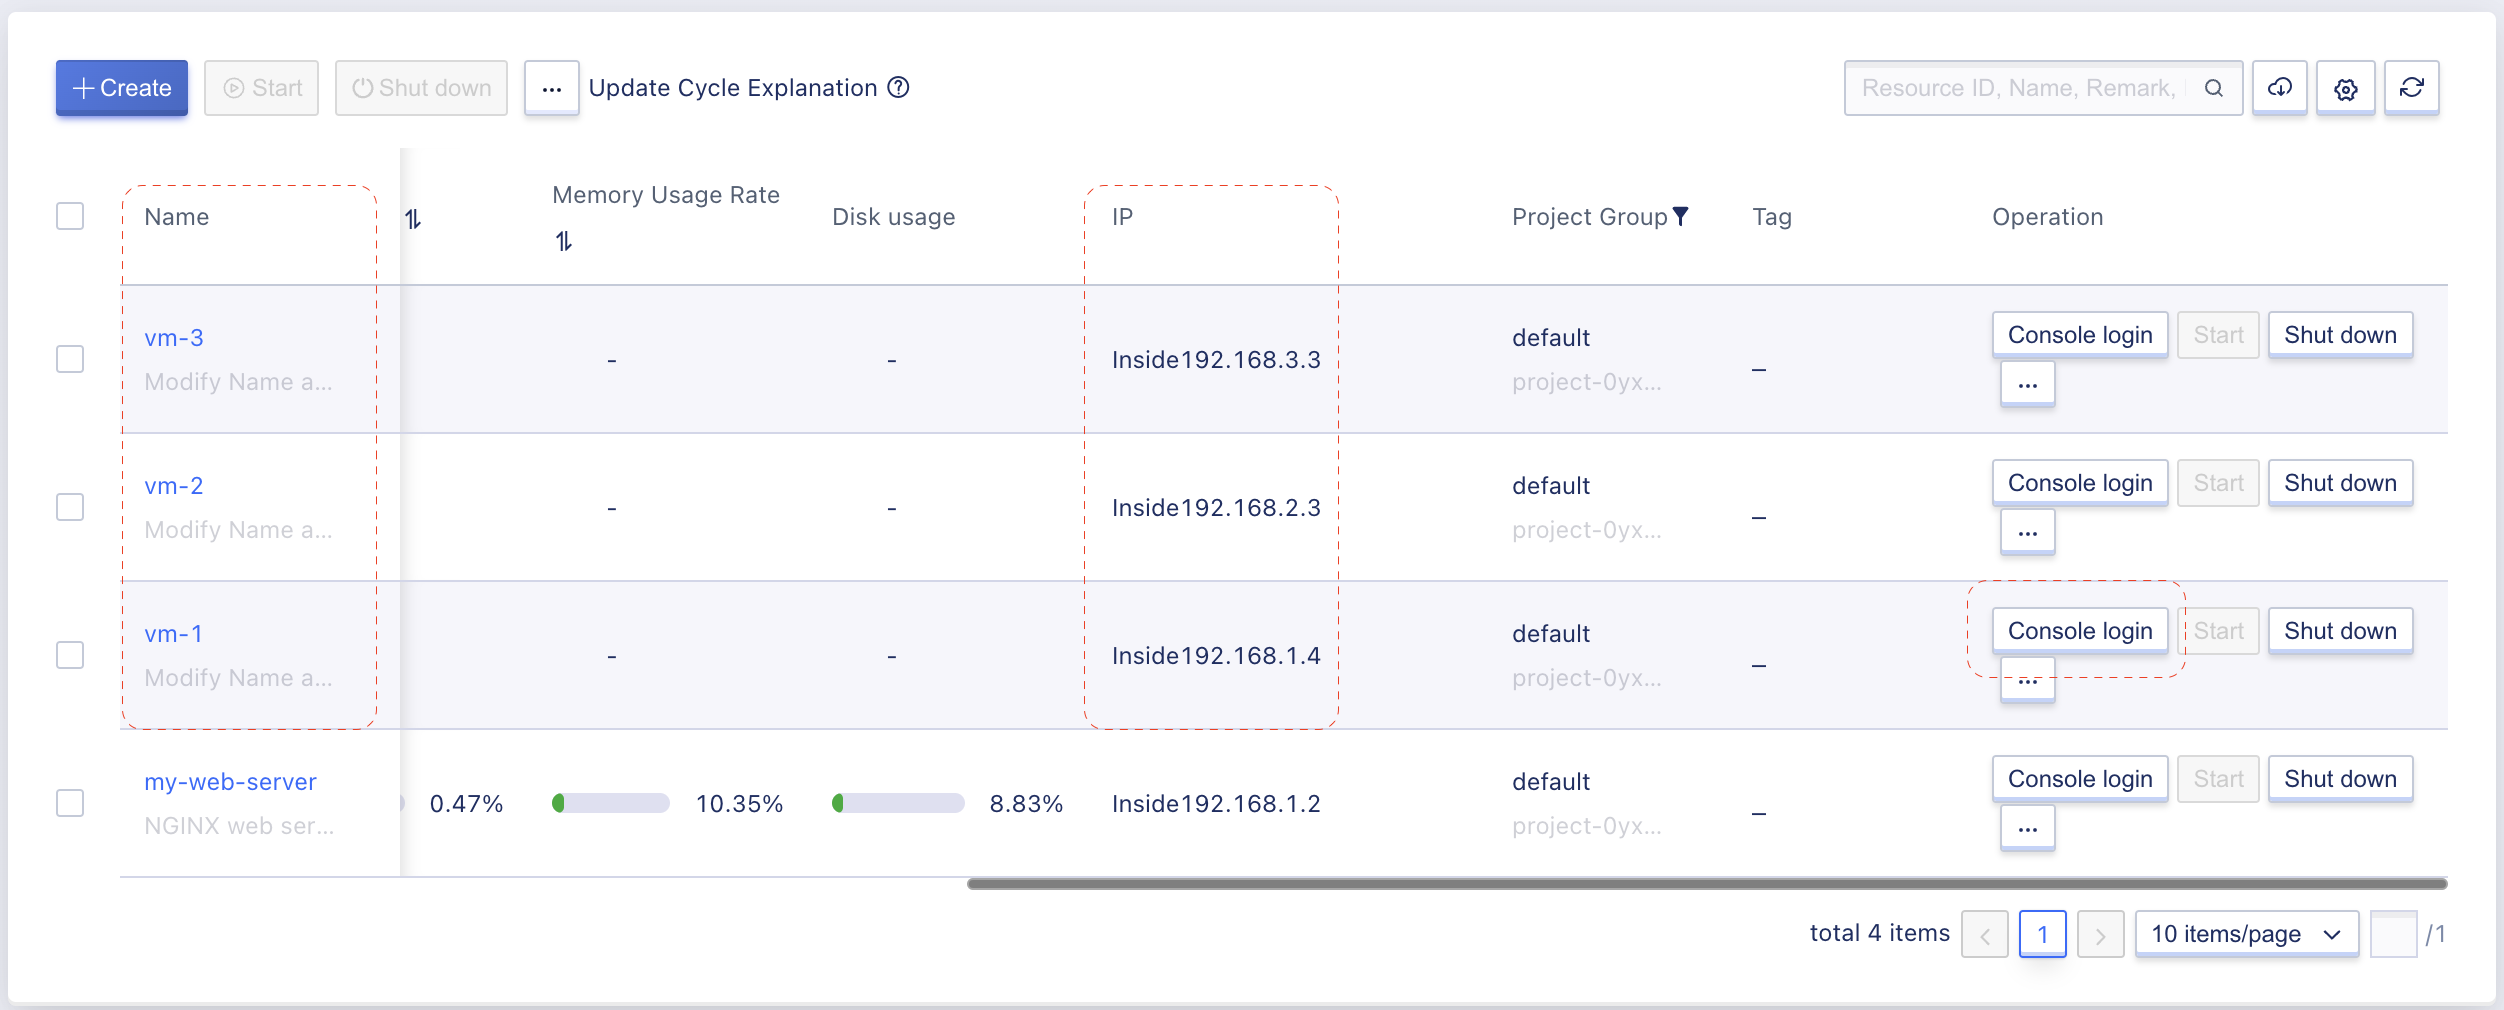
Step 5: Ensure all 3 VM are available in the VM list.
4. Test the connection between VM in 3 subnets.
From the VM list above, we can grab the IP address of each VM as below (noted that IP address allocated randomly from the subnet IP range, your IP supposed to be different):
- vm-1:
192.168.1.4 - vm-2:
192.168.2.3 - vm-3:
192.168.3.3
Subnets in the same VPC are connected through public gateways, and resources can communicate with each other on the private network by default. So without any constraints, vm-1 can talk freely with vm-2 and vm-3 as they’re in created in different subnet but the same VPC.
Use the console login to access vm-1 (click Console login button in the VM listing page), new browser tab will be opened and you will need to enter credential to access the VM (username will be root and the password is defined at VM creation step).
After successfully access to vm-1 via console login, ping vm-2 and vm-3 as below image.
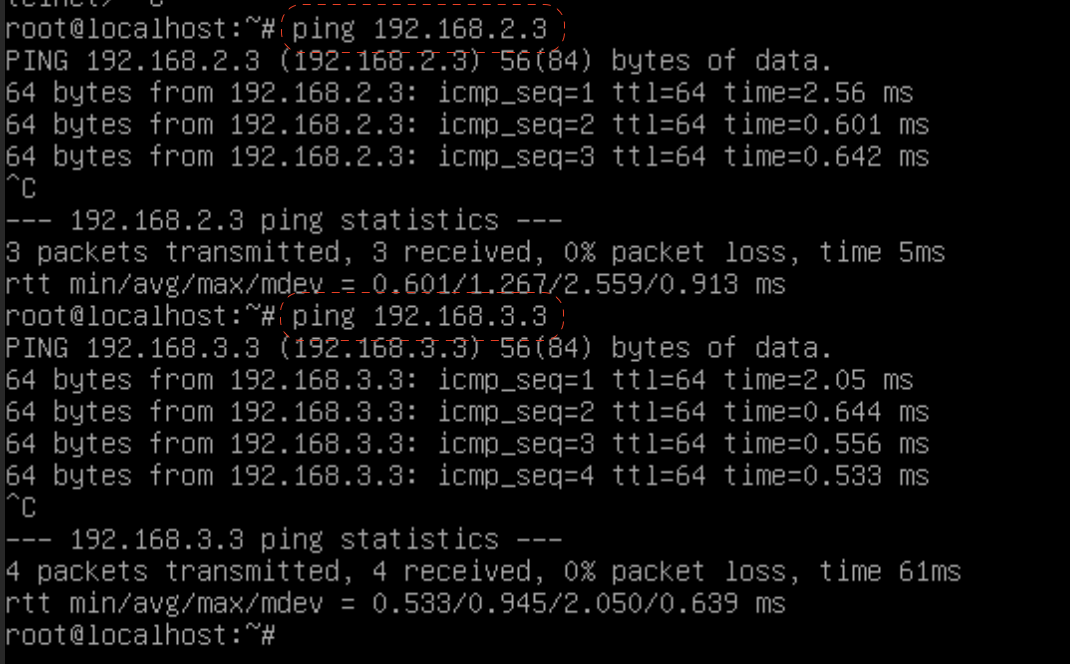
We can confirmed that resources can communicate with each other on the private network by default.
5. Secure the network connection.
In this step, we will create some Security Group and apply them to control the network traffic.
Step 1: Go to side-bar menu, click in Security Group item under Network group.
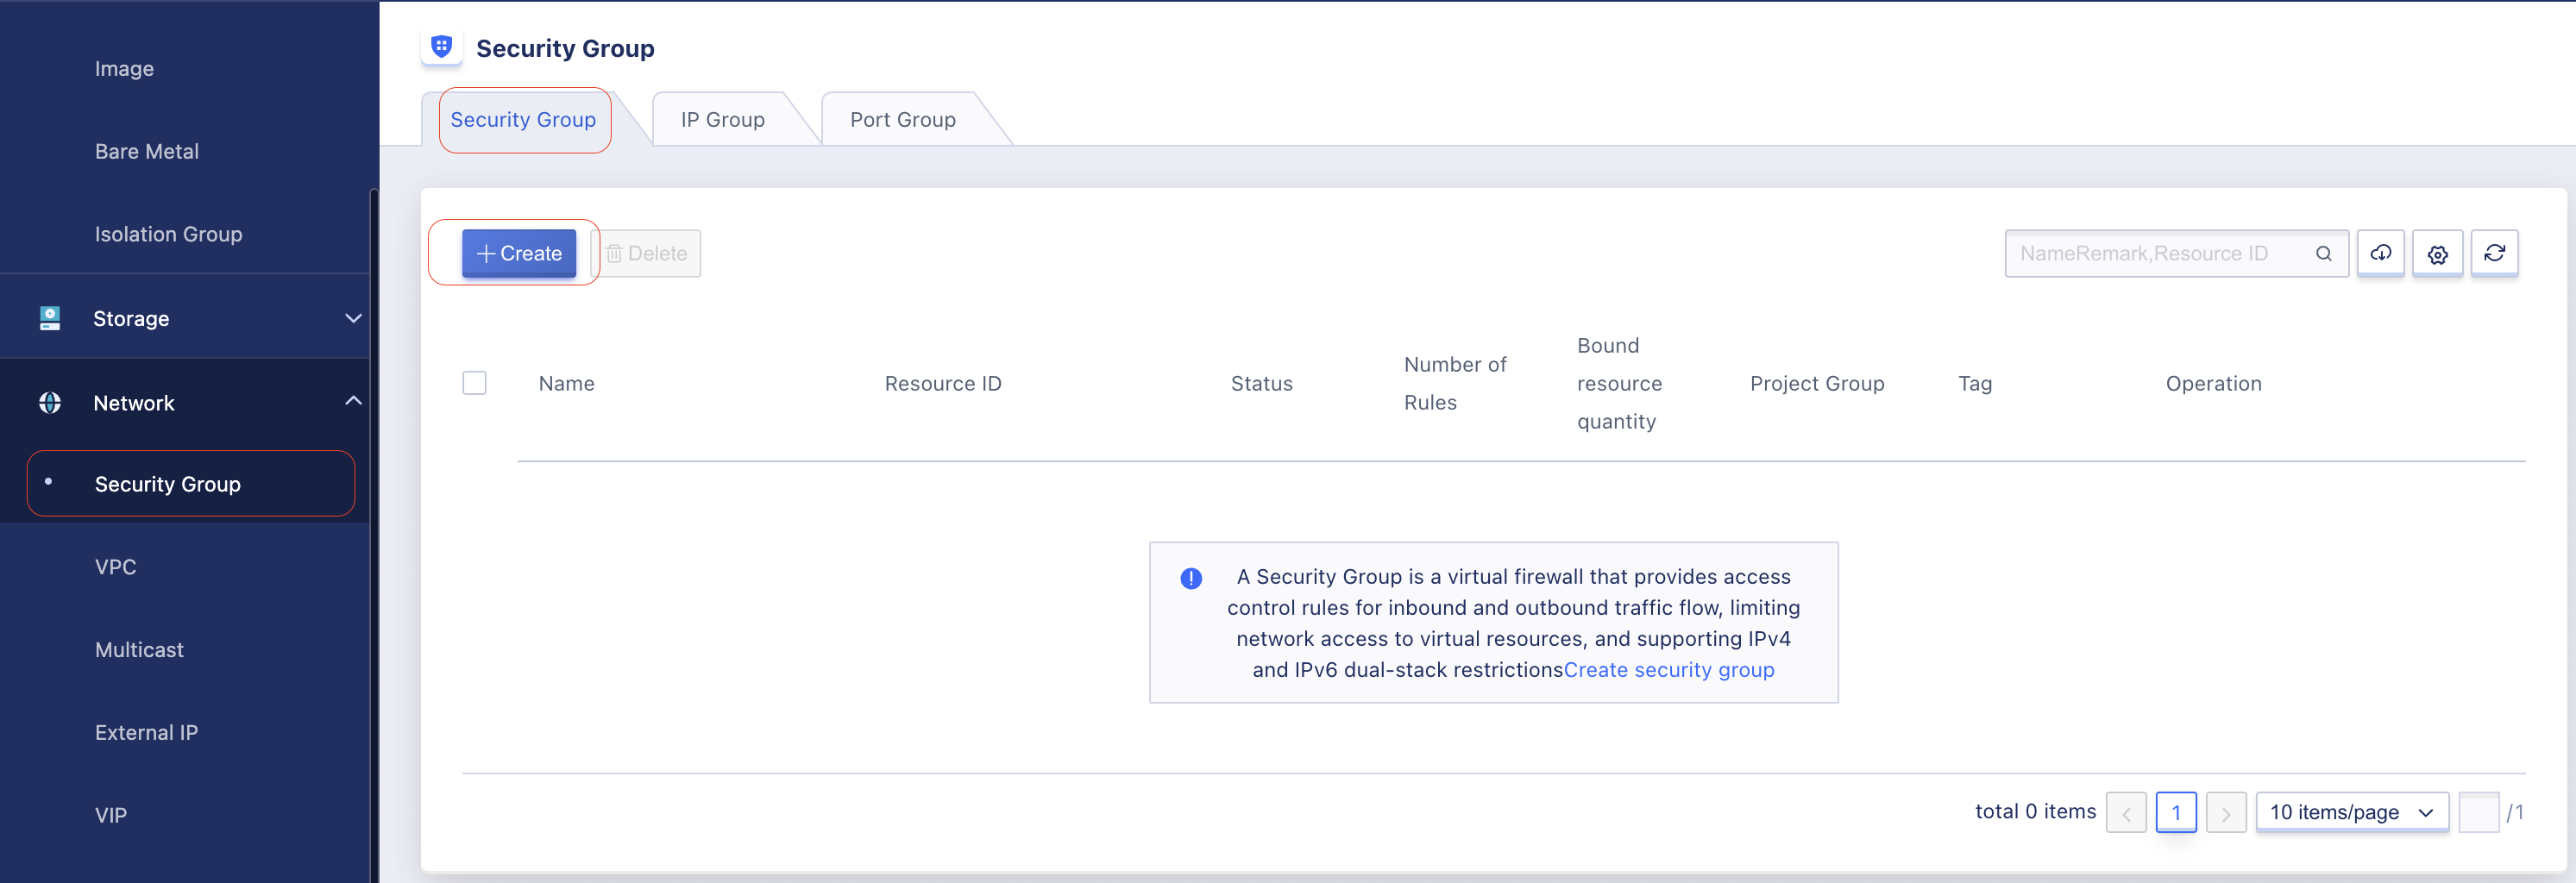
Select Security Group tab and click Create.
Step 2: Enter SG information as below image.
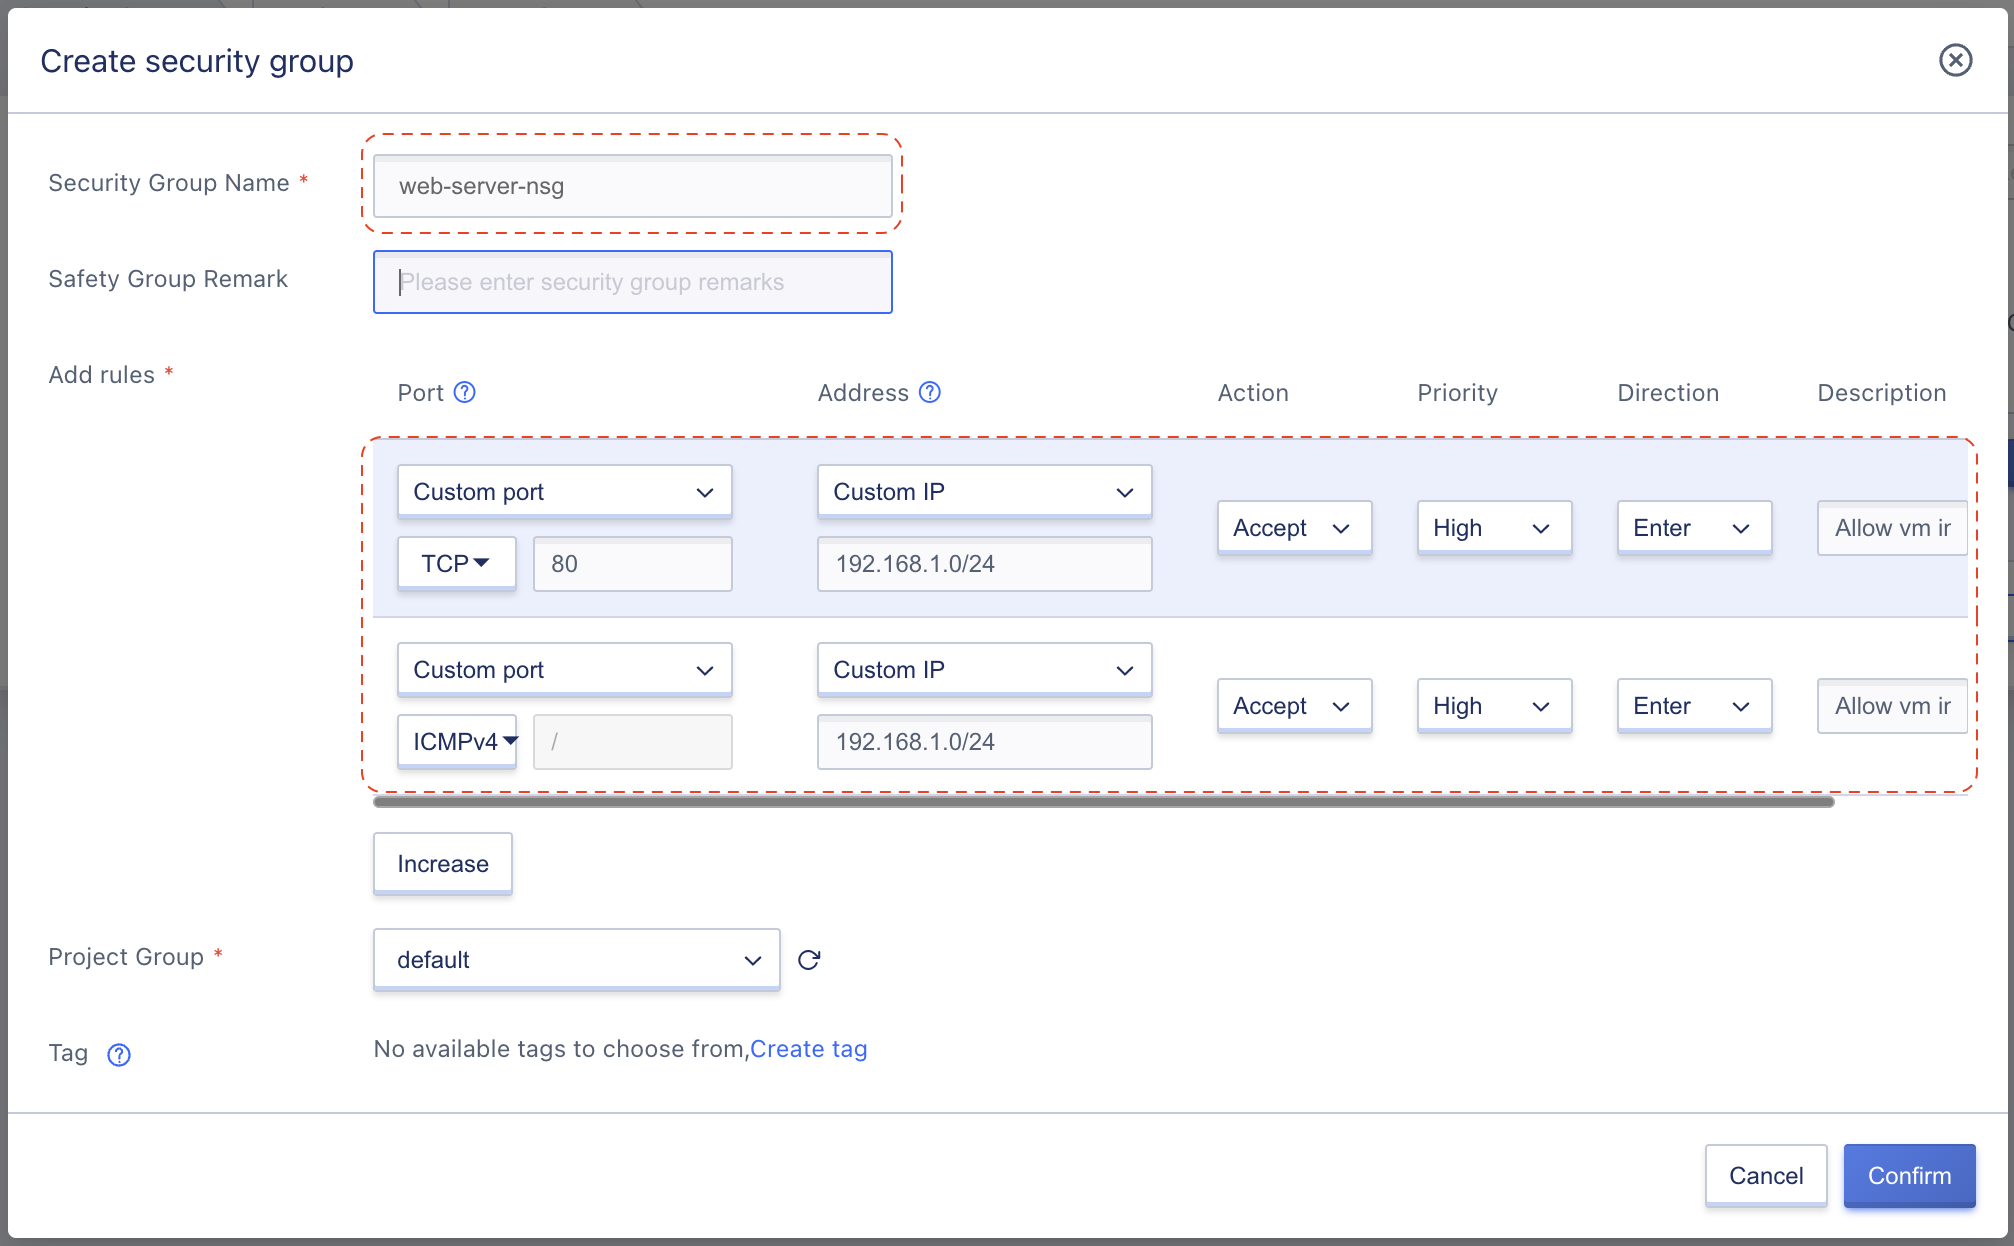
- Security Group name: web-server-nsg
- Rules:
| Port | Address | Action | Priority | Direction | Description |
|---|---|---|---|---|---|
| TCP 80 | 192.168.1.0/24 | Accept | High | Enter | Allow HTTP traffic from subnet 1 |
| ICMPv4 / | 192.168.1.0/24 | Accept | High | Enter | Allow ping from subnet 1 |
Leave other fields as default value and click Confirm to create the Security Group.
Repeat the above step again with different configurations to create database-server-nsg:
- Security Group name: database-server-nsg
- Rules:
| Port | Address | Action | Priority | Direction | Description |
|---|---|---|---|---|---|
| TCP 80 | 192.168.2.0/24 | Accept | High | Enter | Allow HTTP traffic from subnet 2 |
| ICMPv4 / | 192.168.2.0/24 | Accept | High | Enter | Allow ping from subnet 2 |
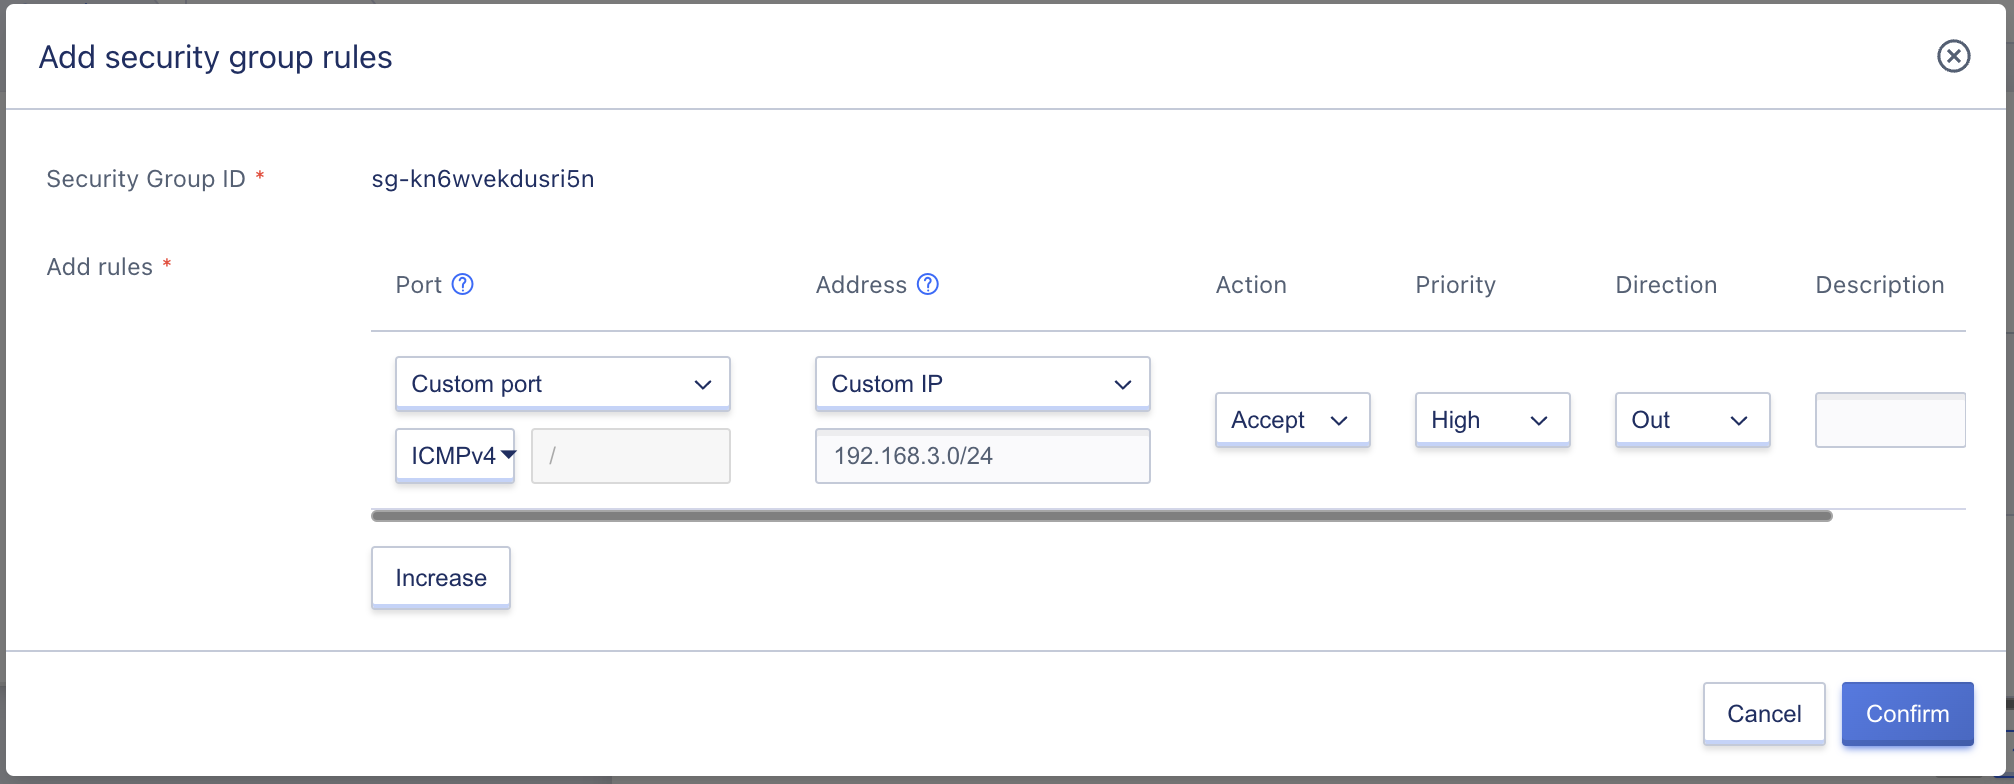
Step 3: Ensure 2 network security group are available as below:
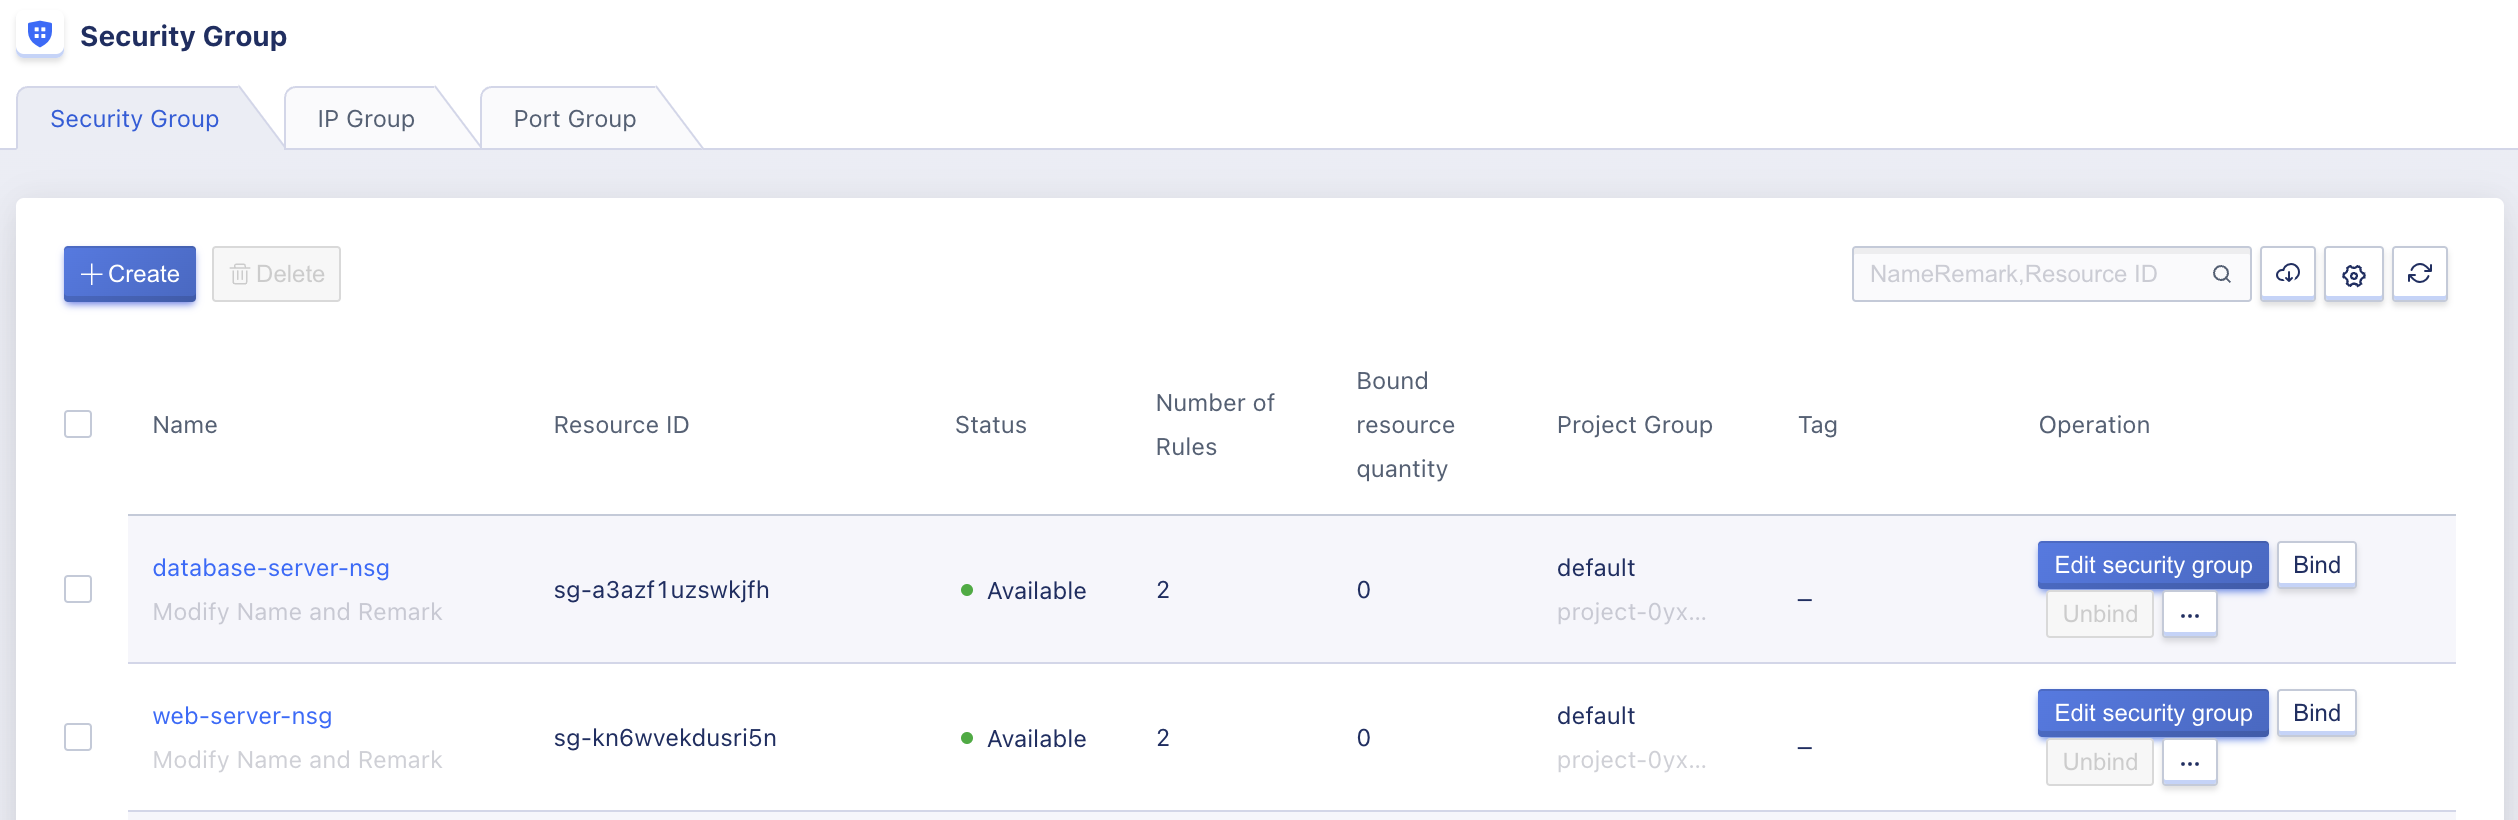
Step 4: Bind the Security group to VM instance (click Bind button in the Security Group listing page):
- Bind the
web-server-nsgtovm-2LAN insubnet-2.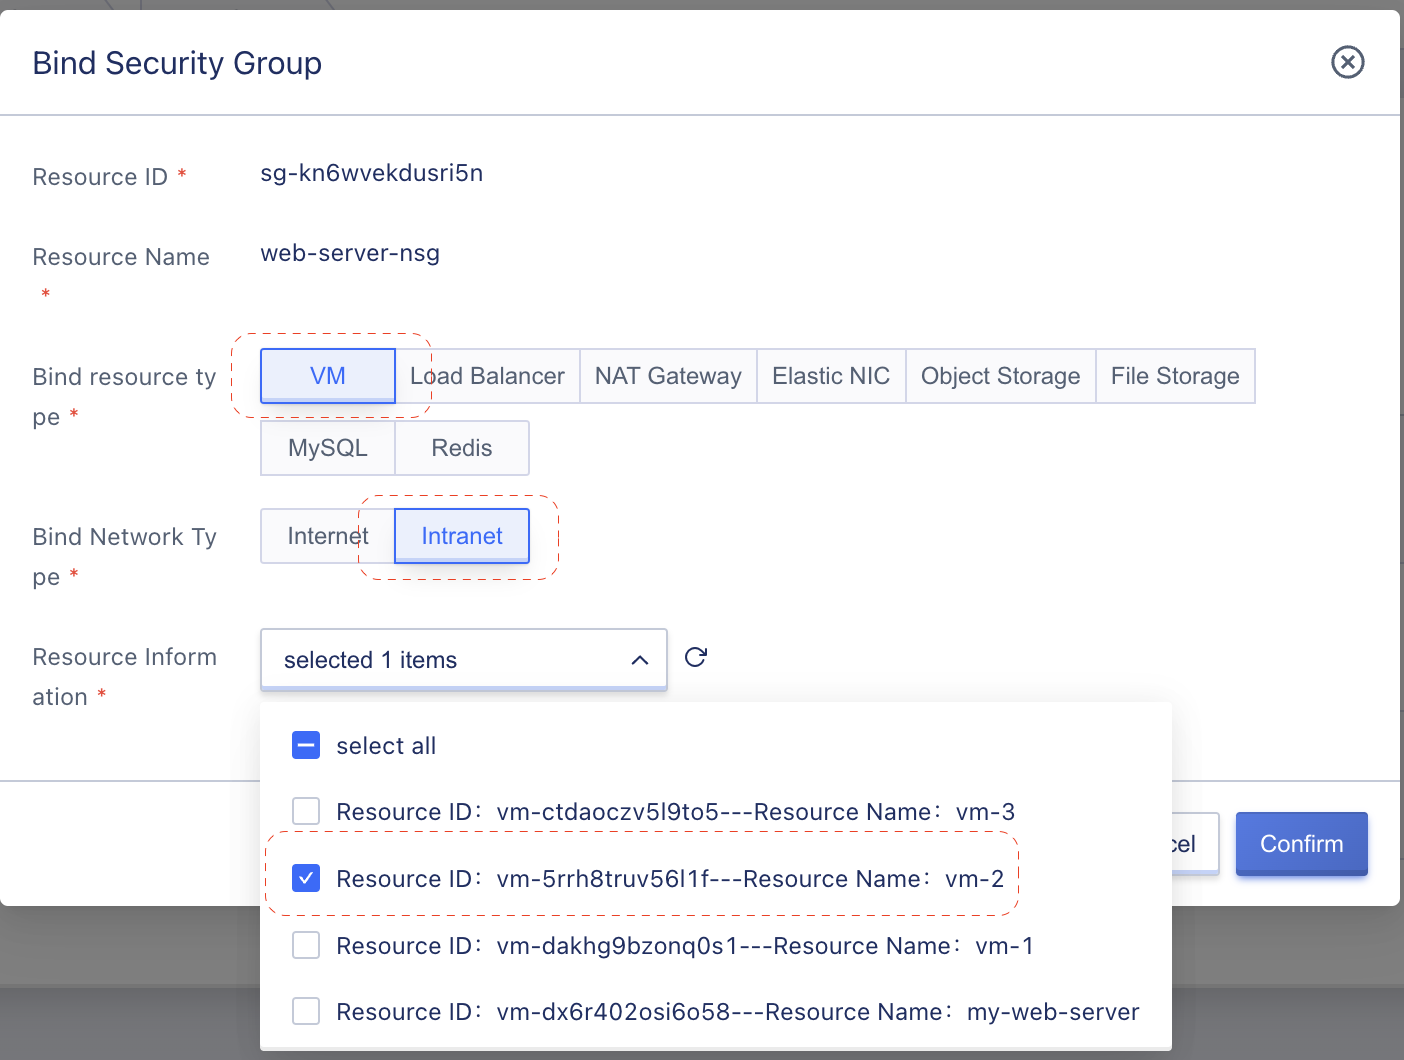
- Bind the
database-server-nsgtovm-3LAN insubnet-3.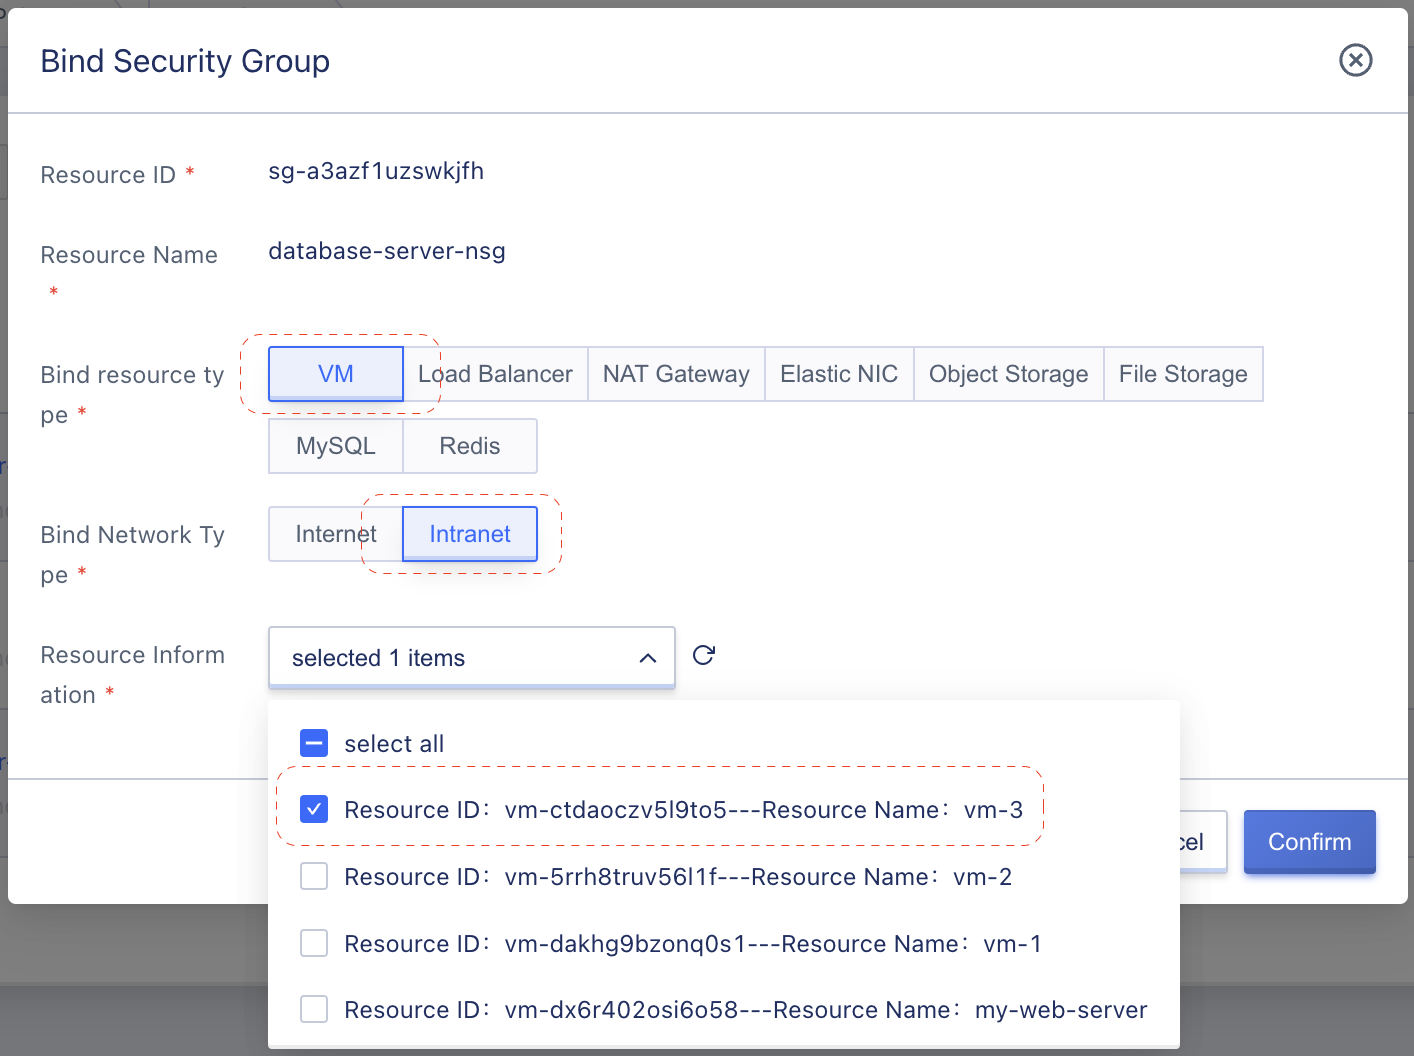
Access to vm-1 via console login again and try to ping to vm-2, vm-3, you will see that now vm-1 can only communicate to vm-2 (web-server) but NOT vm-3 (database-server) as below image:
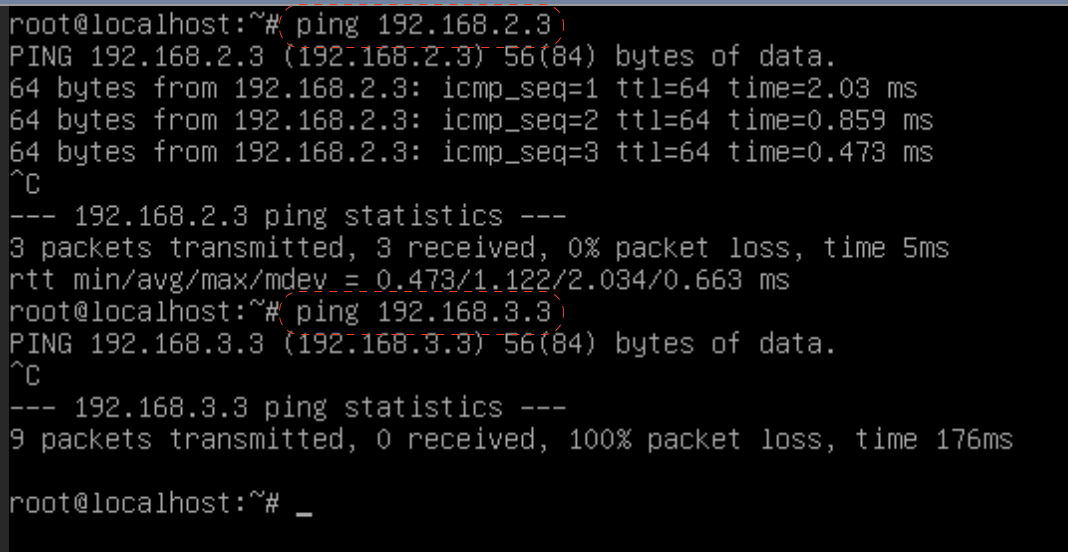
Step 5: Access to vm-2 via console login and try to ping vm-3, the result look like below:
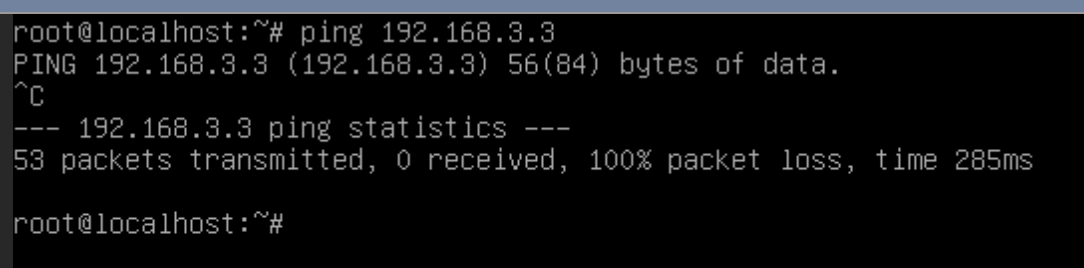
As you can see, even we already apply the security group to allow ping from resources in subnet-2 to vm-3, but the command still fail, does it a bug? No, it because in the vm-2 security group, we only allow inbound traffic from subnet-1 but didn’t create any rules for outbound traffics, hence all outbound traffics are denied.
Lets edit the web-server-nsg, add 1 more rule as below and try again.
From the Security Group listing page, click in security group name to access detail page:
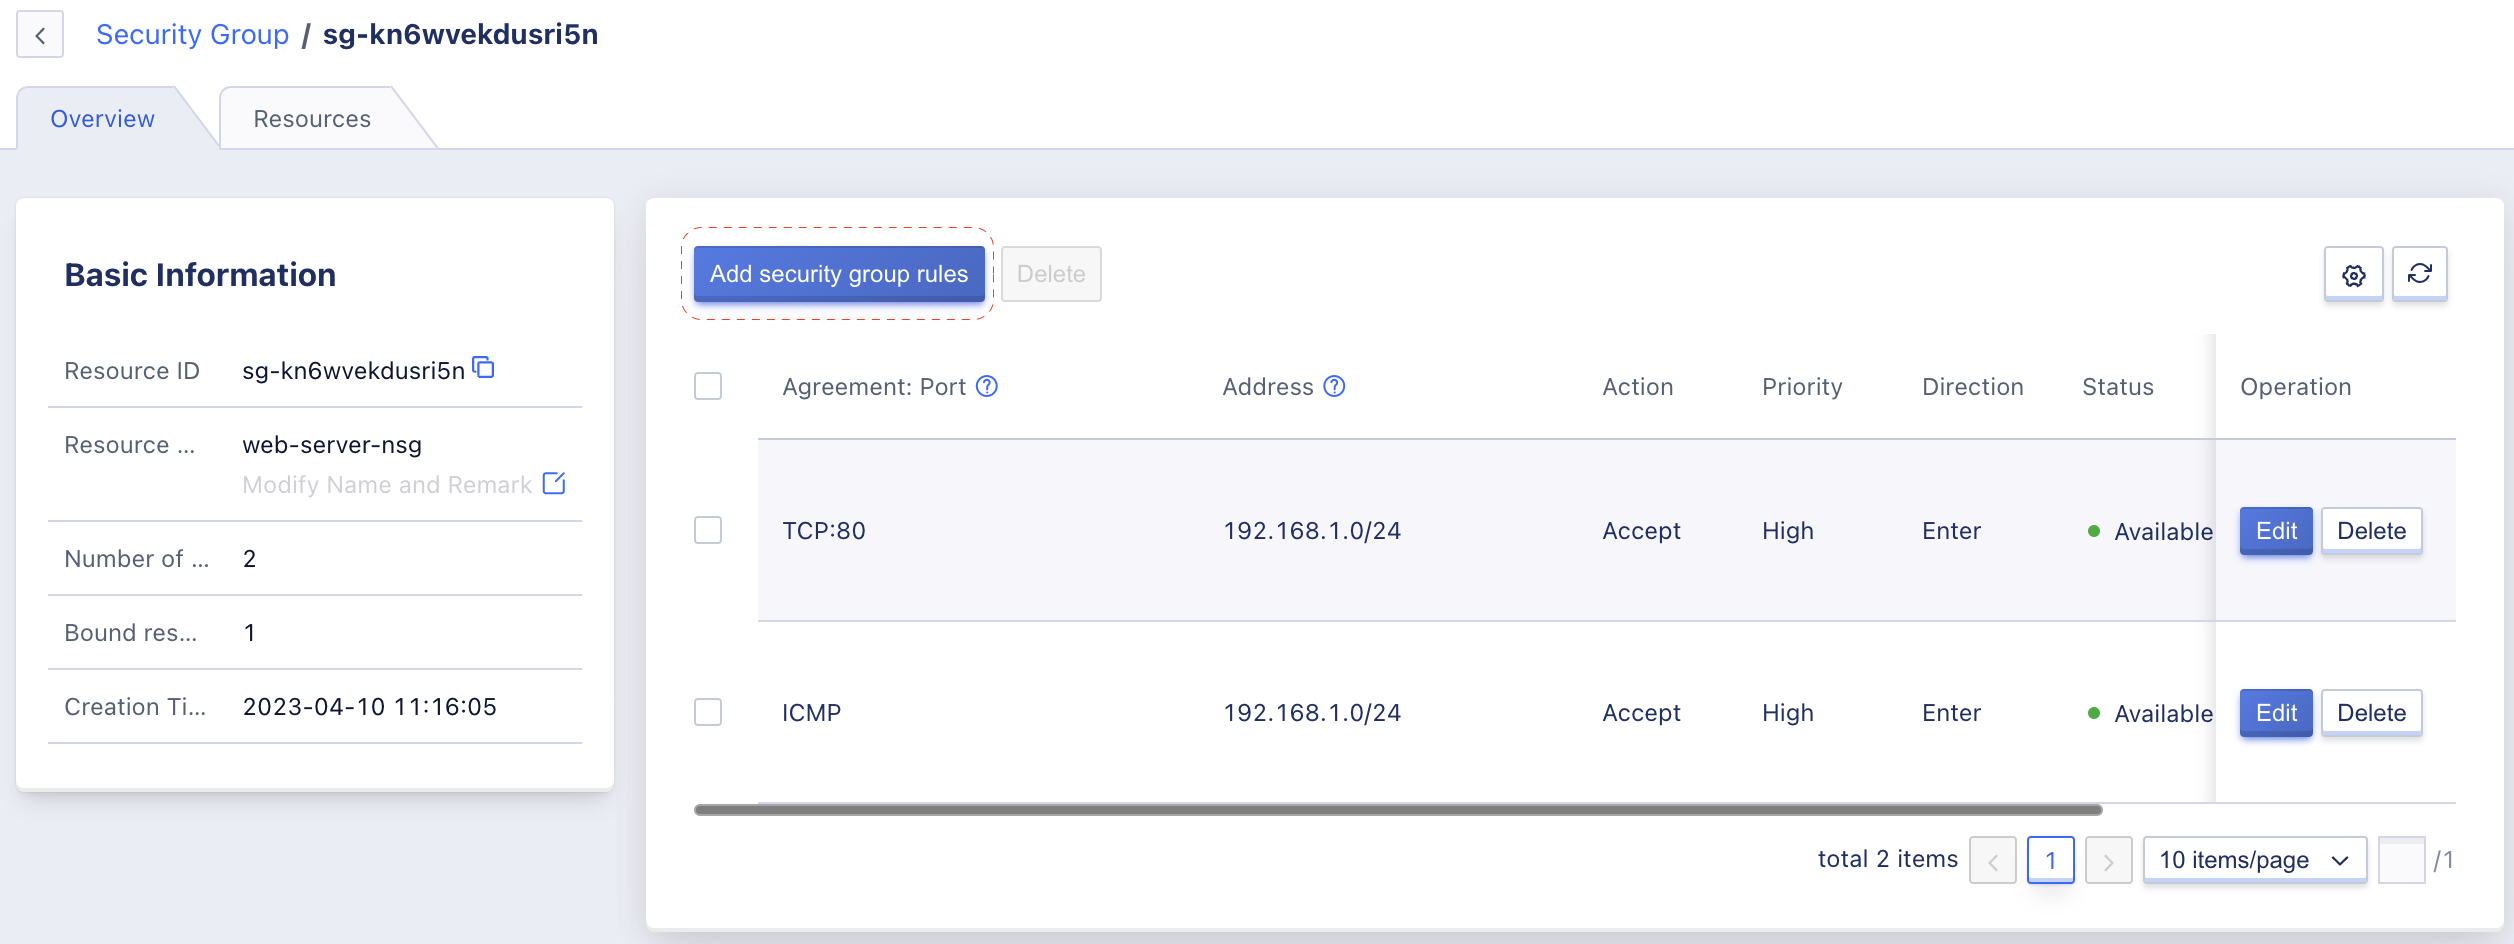
Then click Add security group rules and fill in information as below and click Confirm to apply:
| Port | Address | Action | Priority | Direction | Description |
|---|---|---|---|---|---|
| ICMPv4 / | 192.168.3.0/24 | Accept | High | Out |
Noted that the Direction is Out instead of Enter.
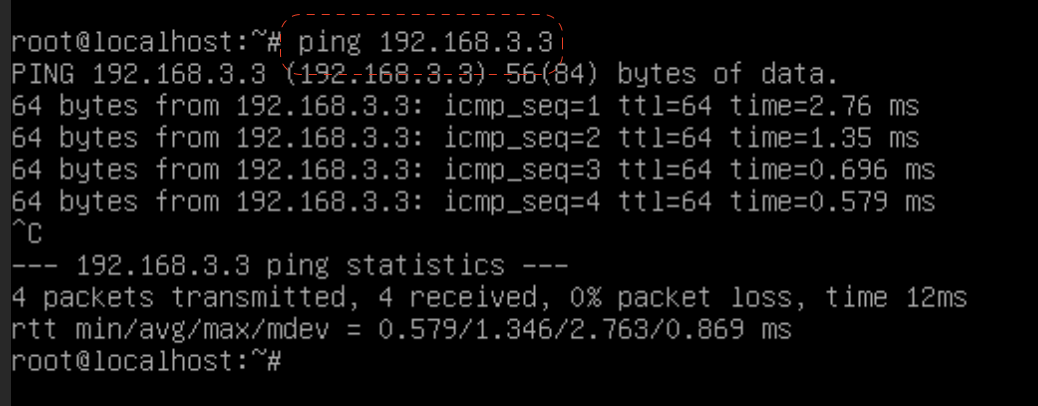
After the new rule successfully created, get back to thevm-2 console login and try ping vm-3 again, it should work now.
Conclusion
Congrats, by far we already learn how to create VPC with multiple subnets and apply security group to control the inbound and outbound traffics. Hope this lab give you better understanding of SCloudStack network topology. If you want to learn more on these topics, check out below documents: