Lab 5 - Using NAT Gateway
Introduction
In this lab, we will create a NAT Gateway and configure it in the way that all VM in the subnet can access the Internet through the NAT Gateway without the need of assigning external IP to each individual VM.

Following services will be used in this labs:
- Network: VPC, Subnet, Security Group, NAT Gateway, External IP
- Compute: VM
- Storage: Cloud Disk
Prerequisite
- An account with Tenant Administrator role.
- Your tenant need to be in Active status.
Please contact your System Administrator to get your credential.
Guidelines
Before start, you need to access the SCloudStack console dashboard, if you don’t know how to do that, visit Lab 1: Getting Started with SCloudStack Console.
1. Create your VPC
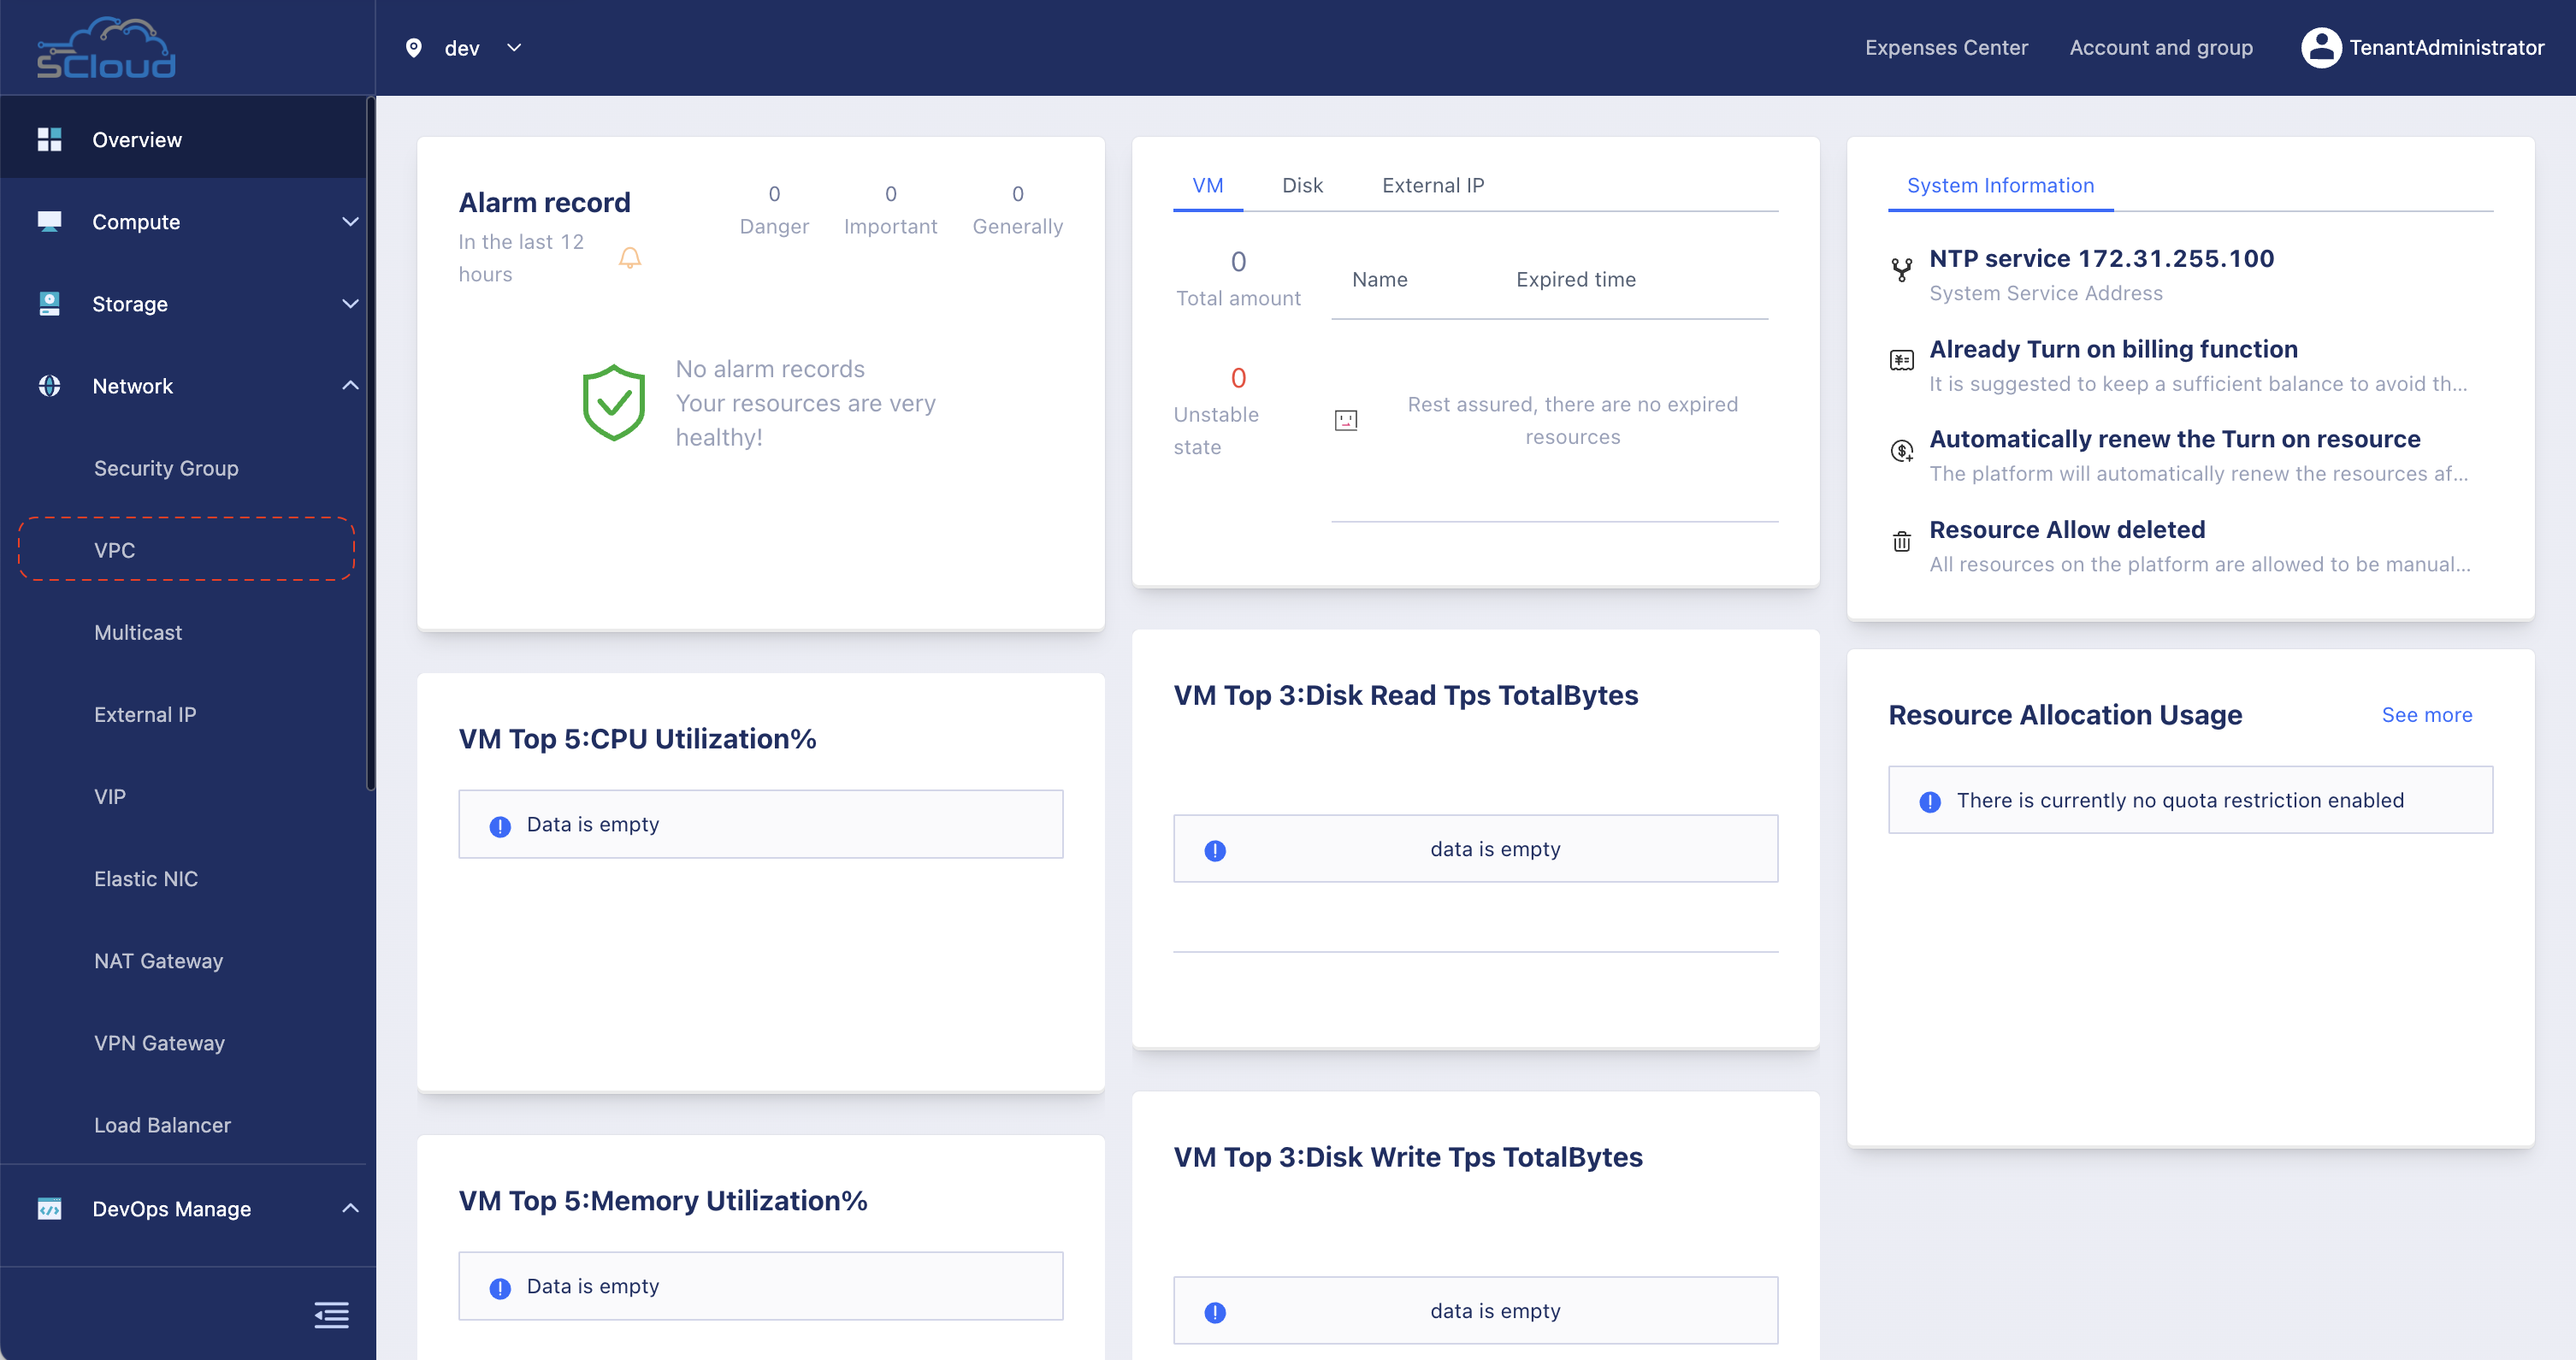
Step 1: From the Tenant Admin dashboard, open the left-side bar and click in VPC menu under Network group.
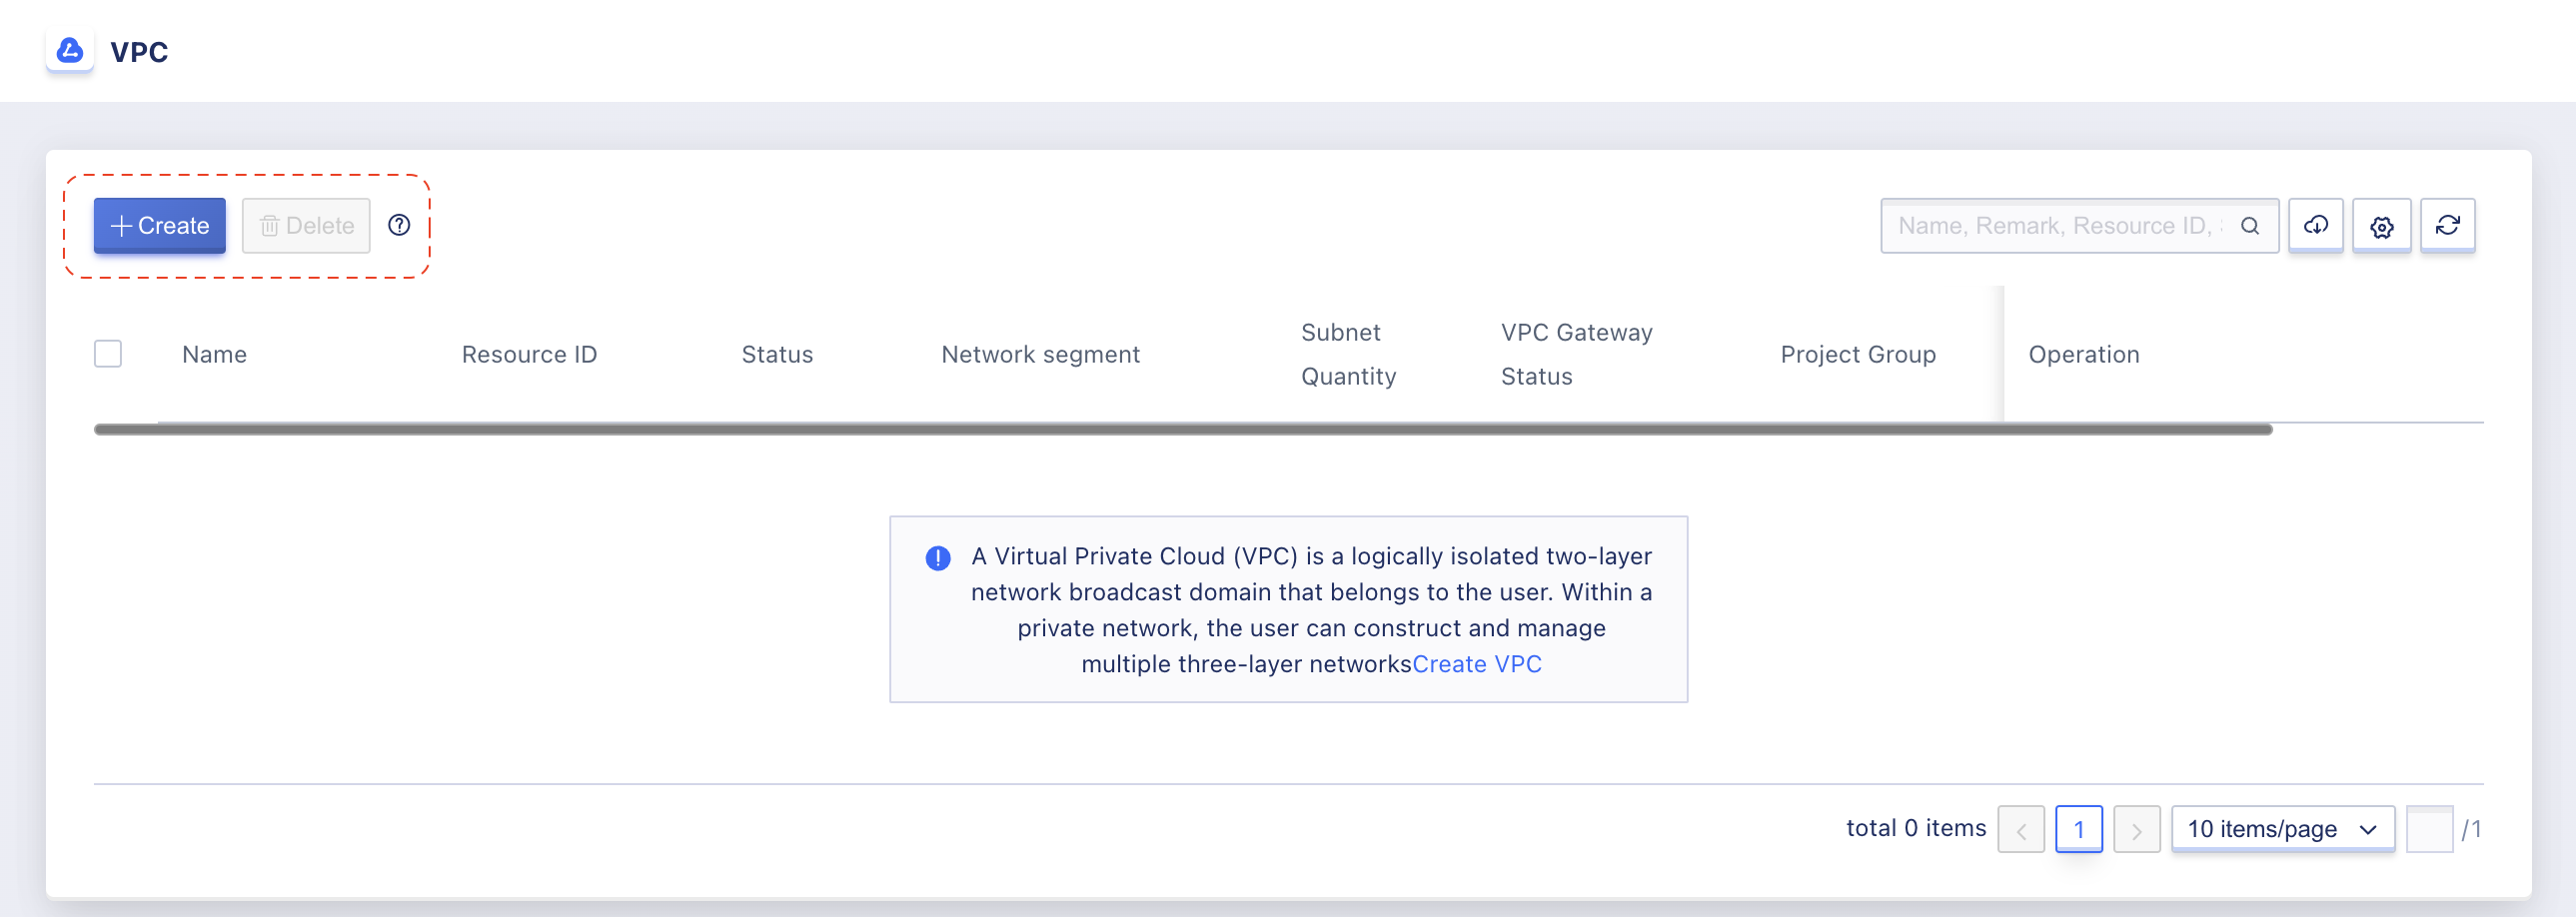
Step 2: Click Create to open the creation form.
Step 3: Enter VPC information as below image:
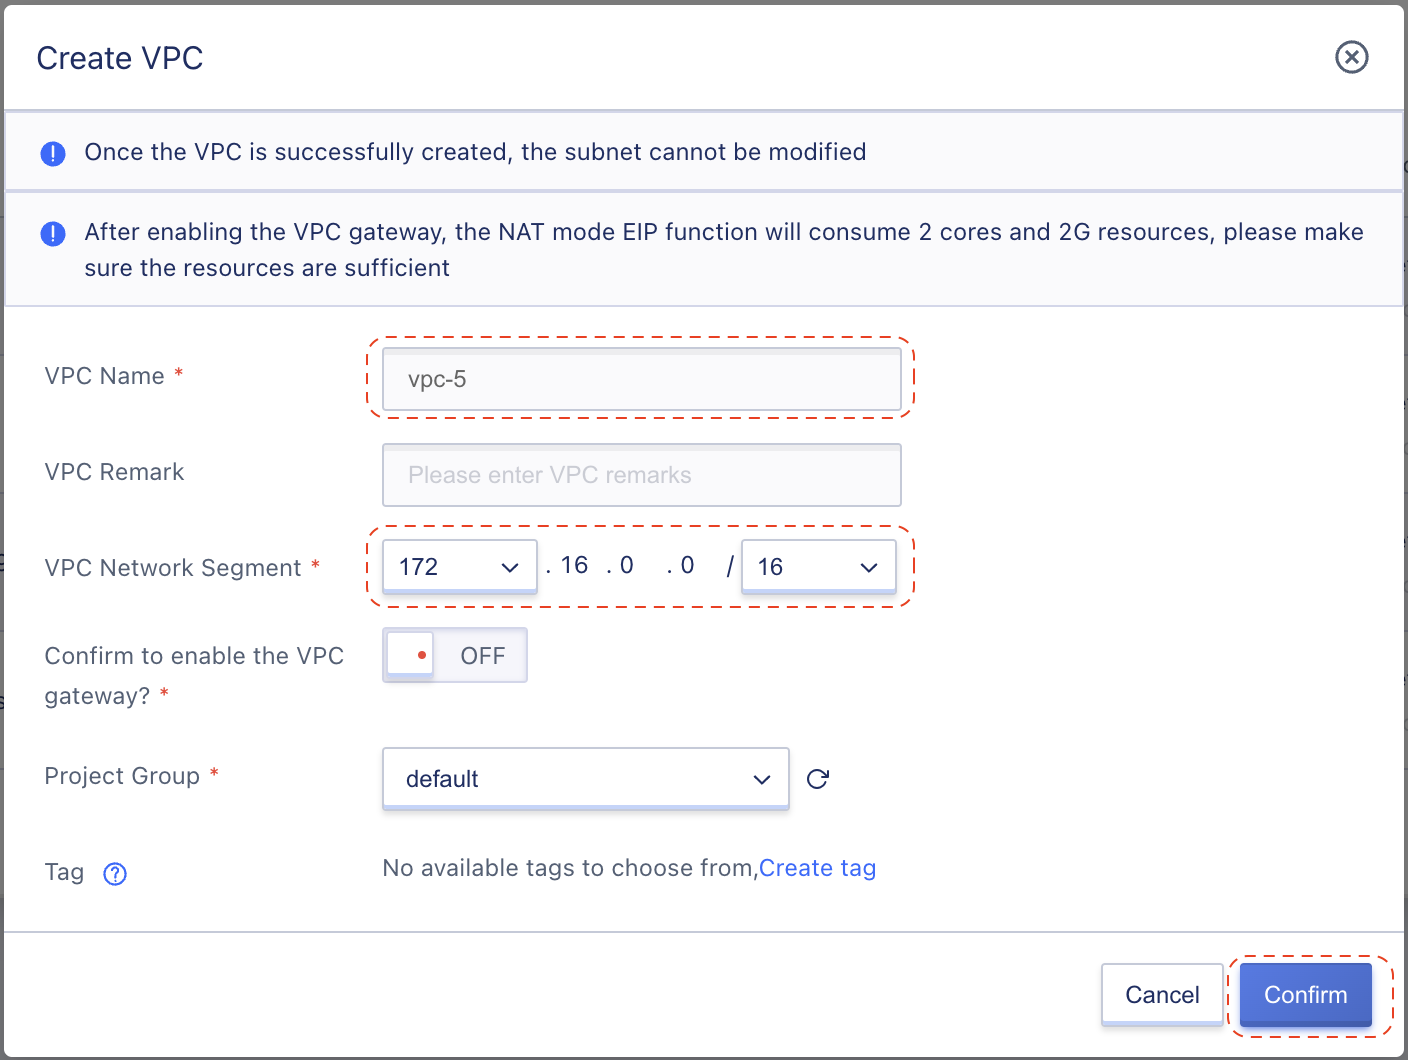
- VPC Name: vpc-5
- VPC Network Segment:
172.16.0.0/16
Leave other fields as default value and click Confirm to create VPC.
Step 4: Ensure that VPC created in the VPC list.
2. Create your Subnet
Step 1: From VPC list screen in above screen (step 4), click in VPC name to navigate to VPC detail page.
In the VPC detail page, the panel on the right-hand side is the Subnet management area. Click in the Create button to open Subnet creation form of current VPC.
Step 2: Enter Subnet information as below image:
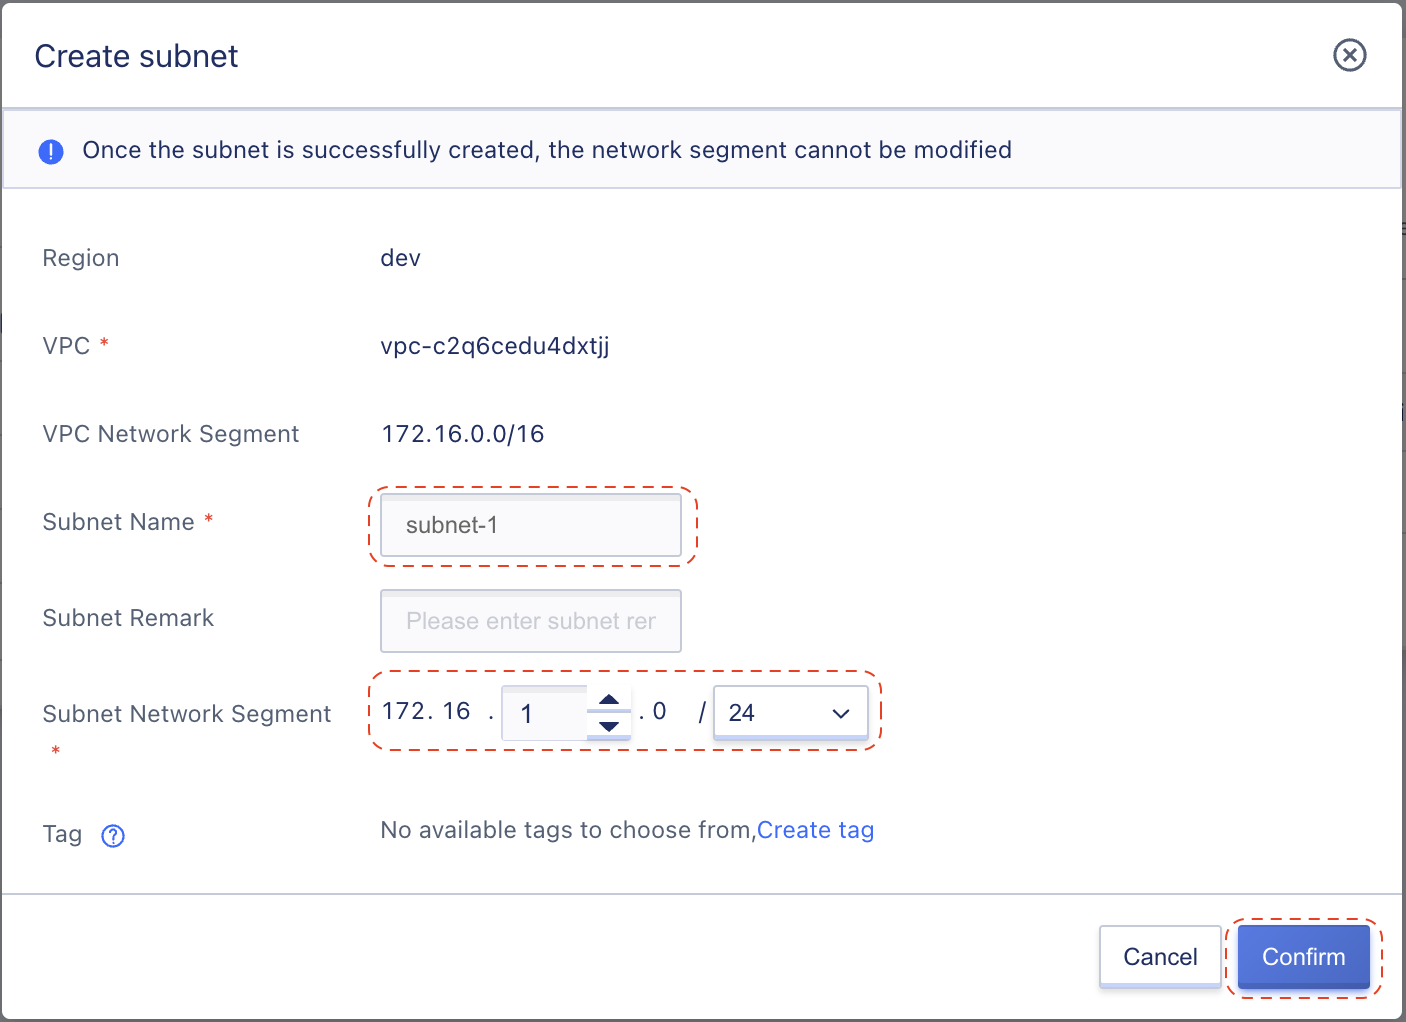
- Subnet Name: subnet-1
- Subnet Network Segment:
172.16.1.0/24
Leave other fields as default value and click Confirm to create Subnet.
Step 4: Ensure that subnet available in the Subnet list.
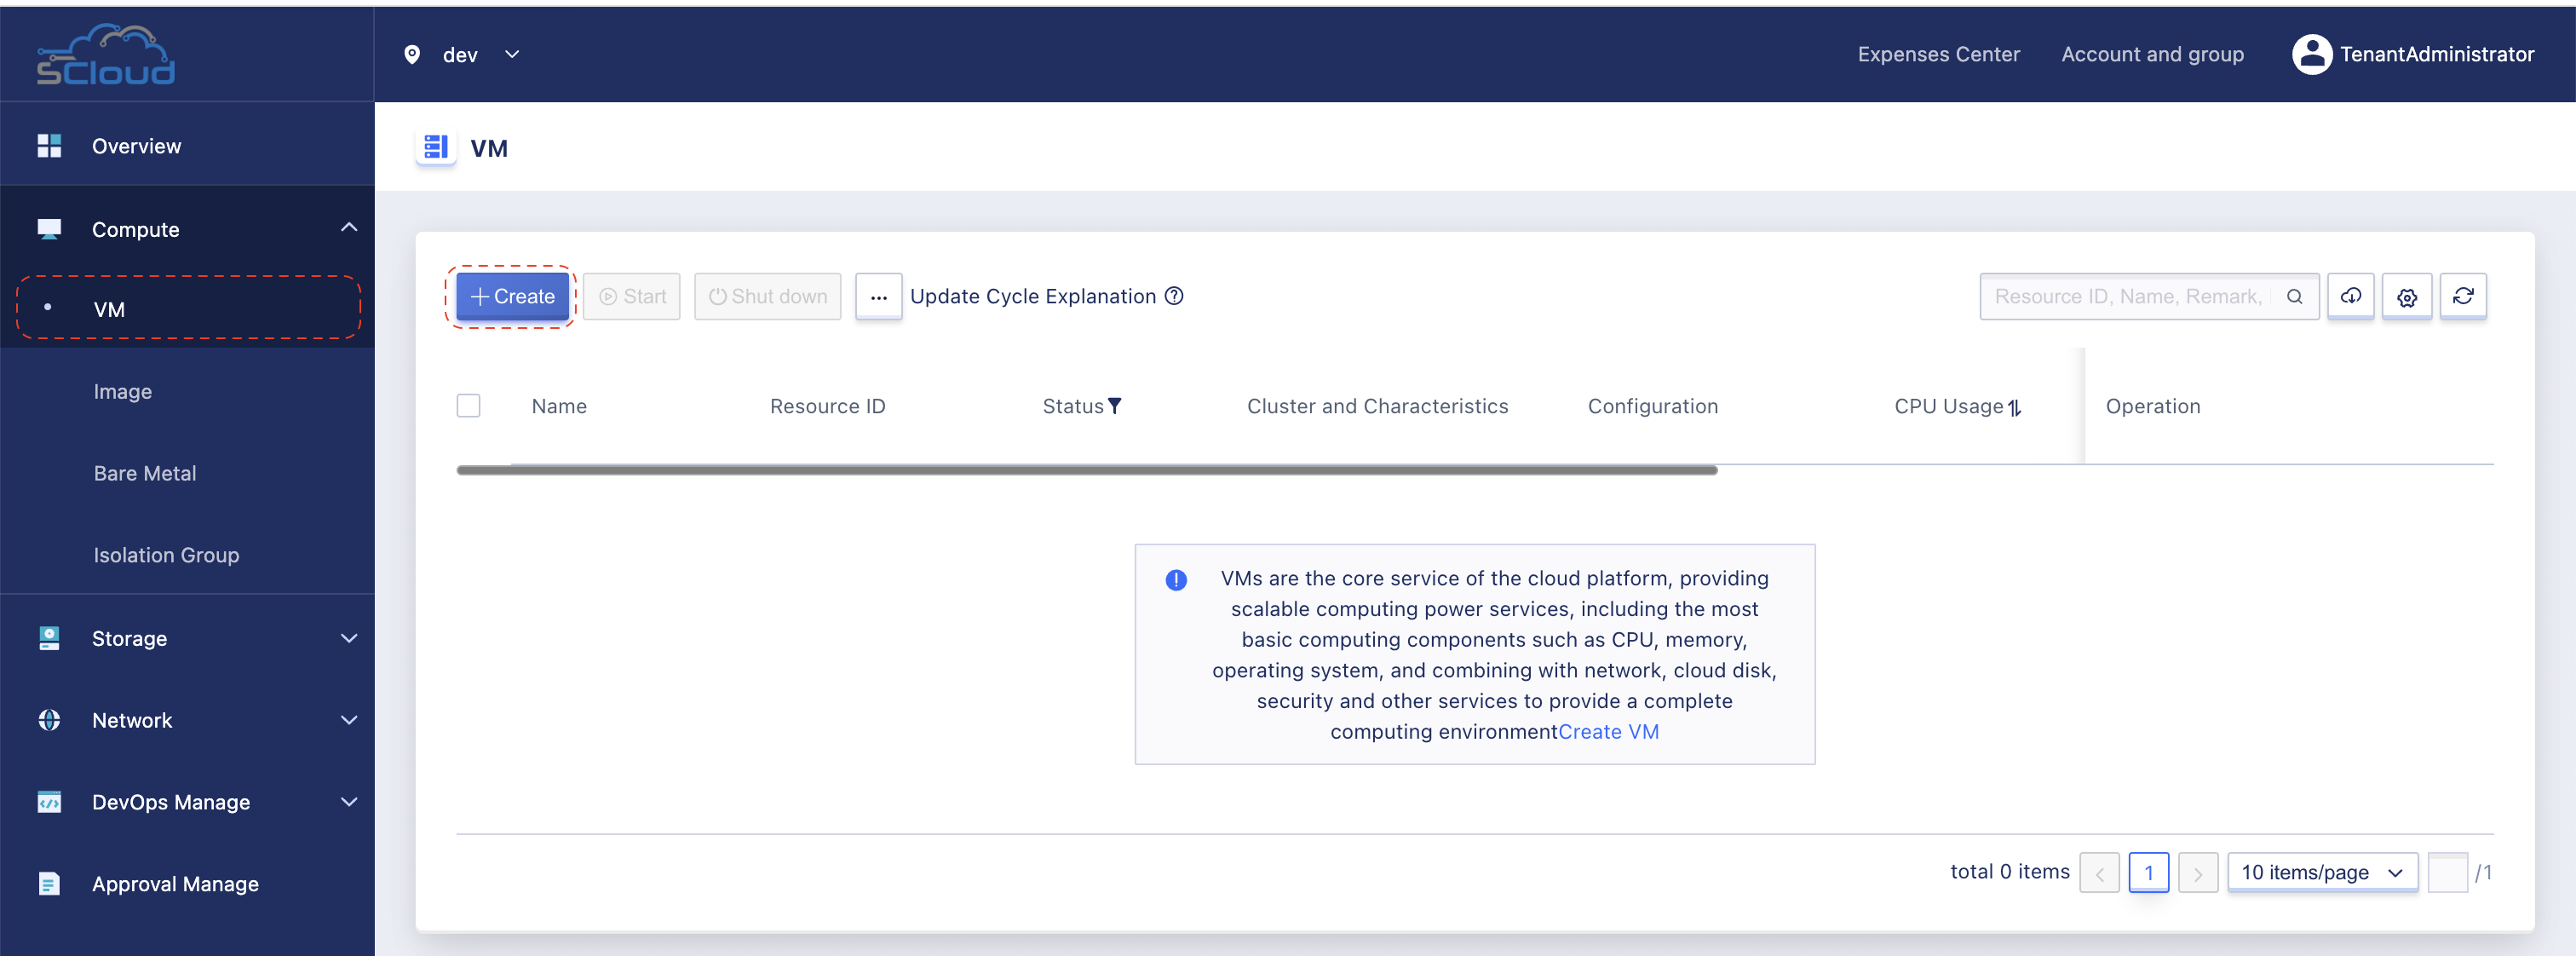
3. Create your VM
Step 1: Go to side-bar menu, click in VM item under Compute group.
Step 2: In the VM creation page, enter information as the following images:
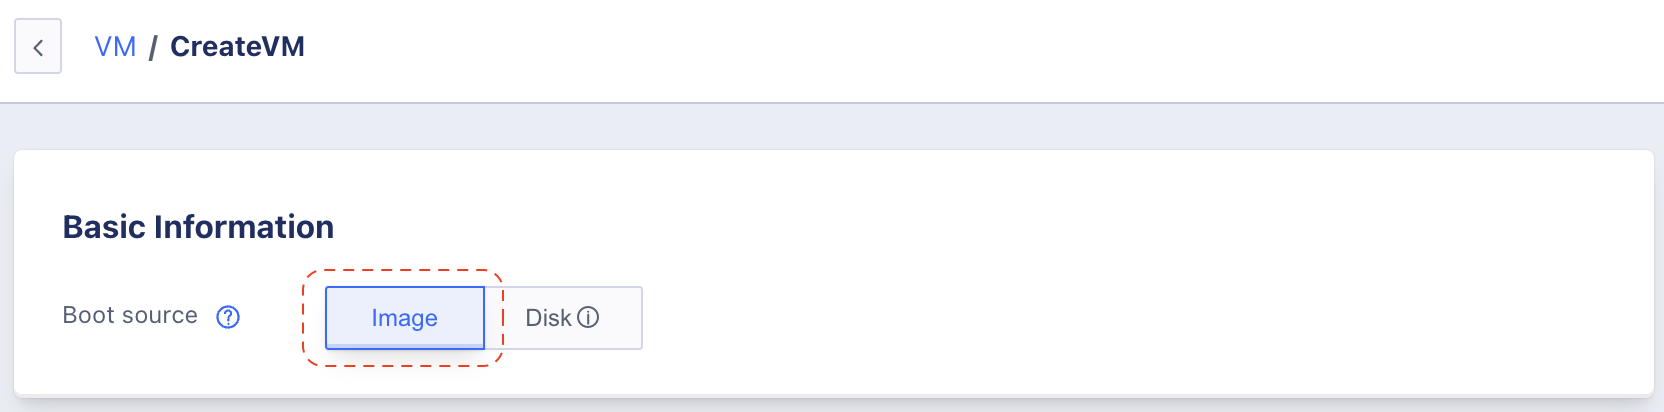
Basic Information:
- Boot source: Image

Basic Settings:
- Cluster: leave as default value.
- Image: select Debian 10.12 as OS image.
- Specifications: 1C2G (1 vCore CPU, 2GB Ram).
- Disk: leave as default value (1 40GB system disk, 1 10GB data disk).
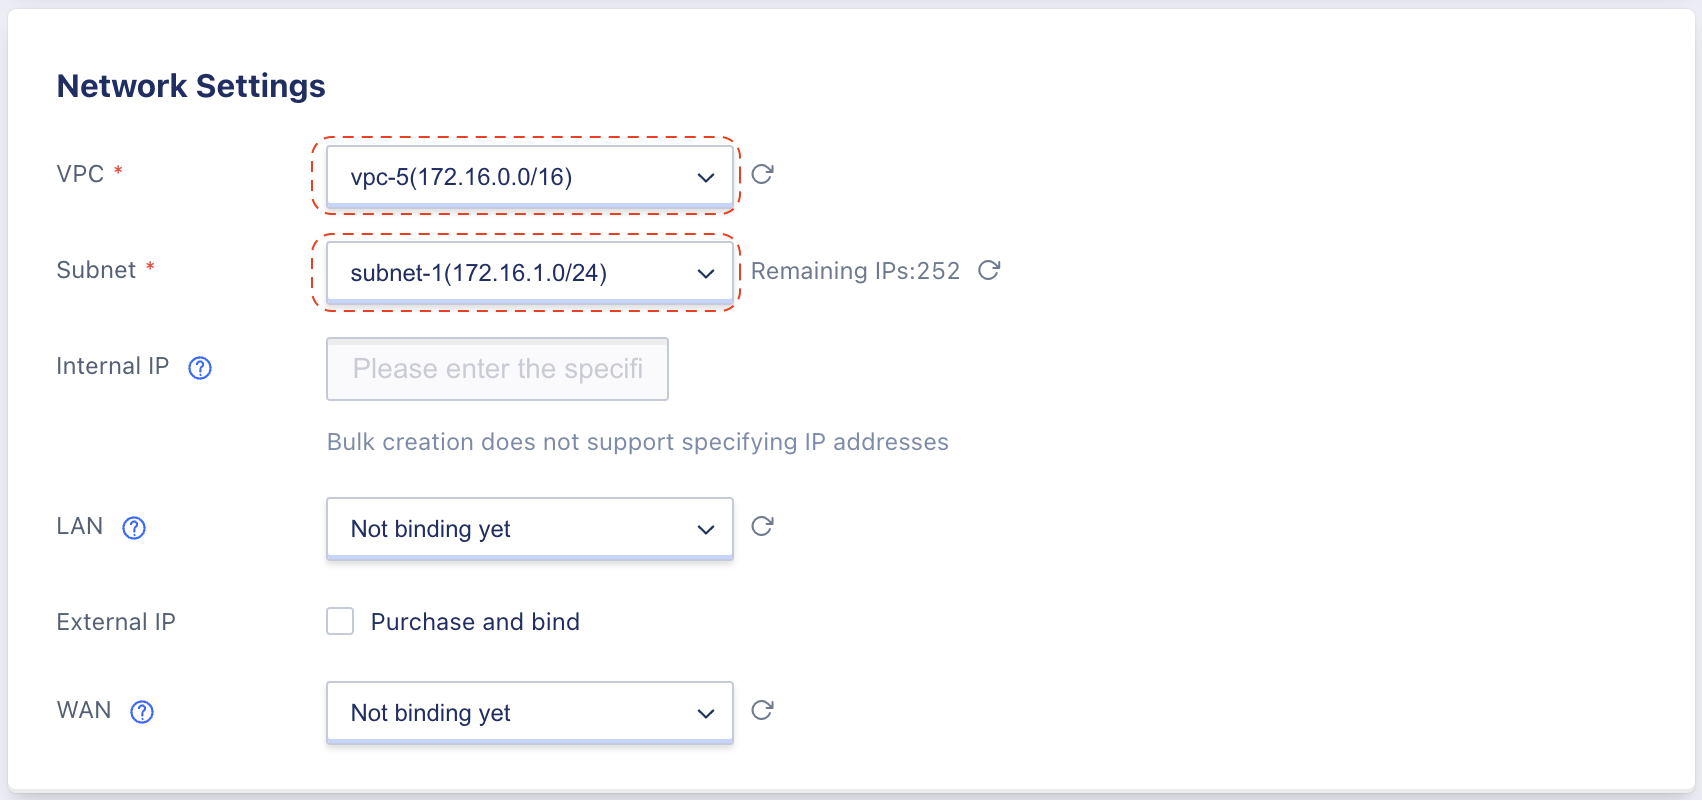
Network Settings:
- VPC: my-vpc.
- Subnet: subnet-1
- Leave other fields as default value.
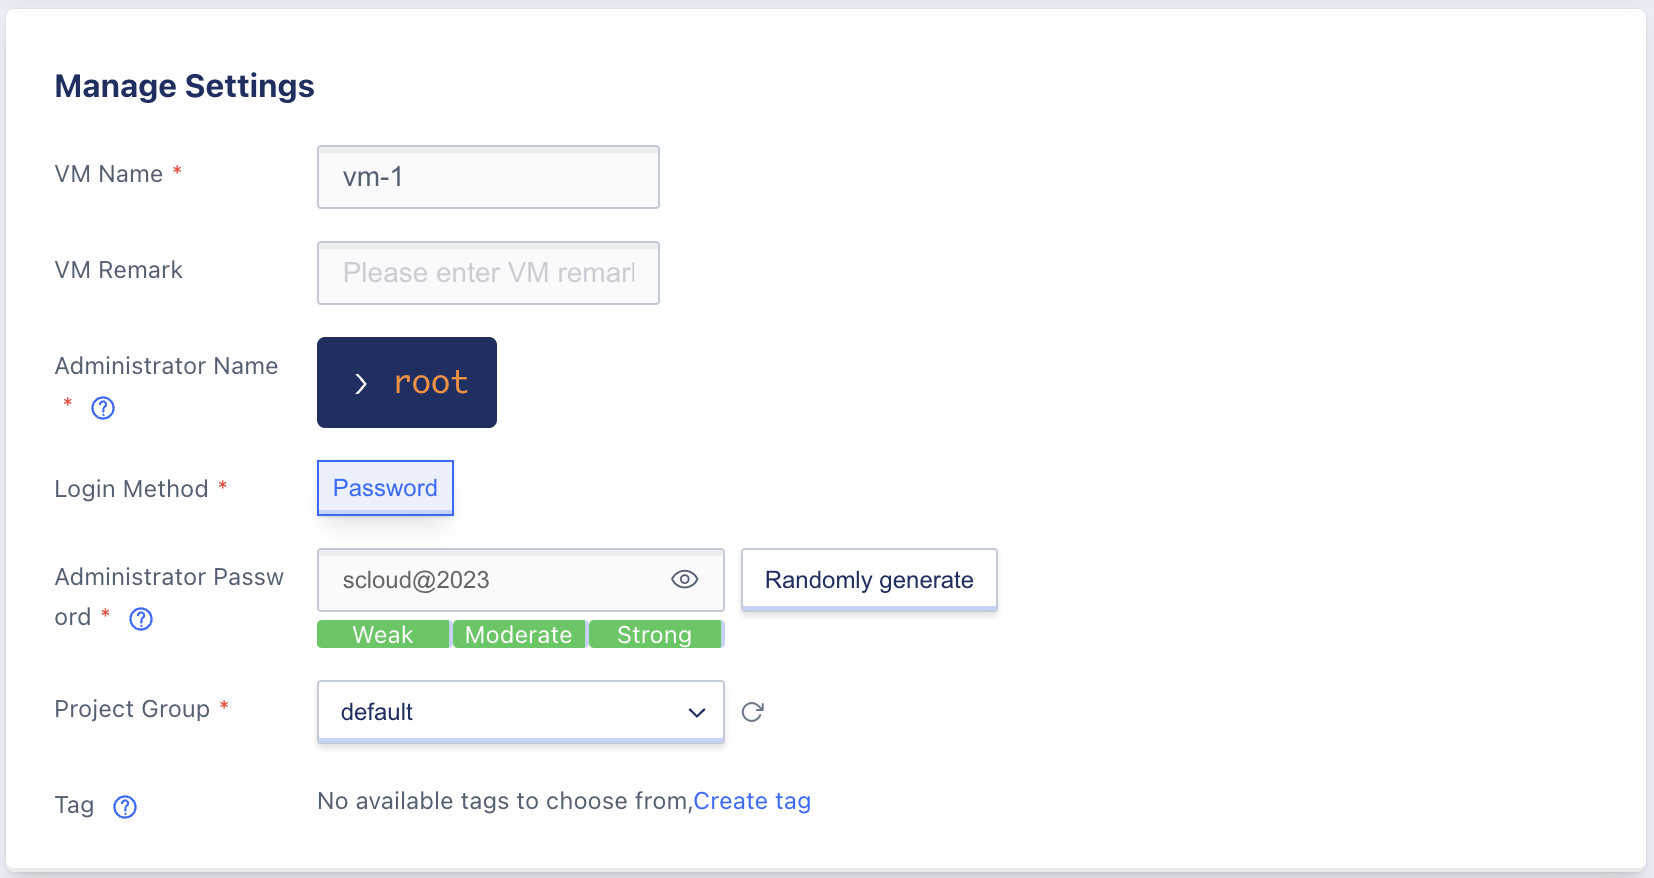
Manage Settings:
- VM Name: vm-1
- Login Method: Password
- Administrator Password: click Randomly Generate to get a random password or set your own desired password (note the password somewhere, we will need it in the next step).
Step 3: Click Buy Now in the top-right panel to create your VM.
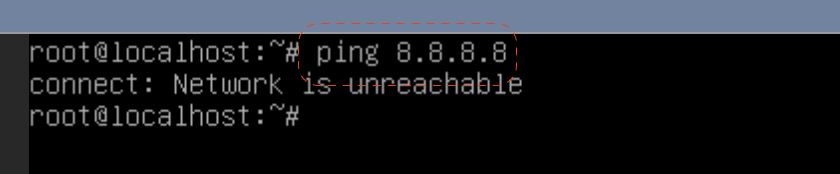
Step 4: Access your VM via console login

From the VM listing page, access to the vm-1 created above via console login. Then try to ping 8.8.8.8 to see if the VM has access to public internet or not?
4. Create your NAT Gateway
Step 1: From the Tenant Admin dashboard, open the left-side bar and click in NAT Gateway menu under Network group.
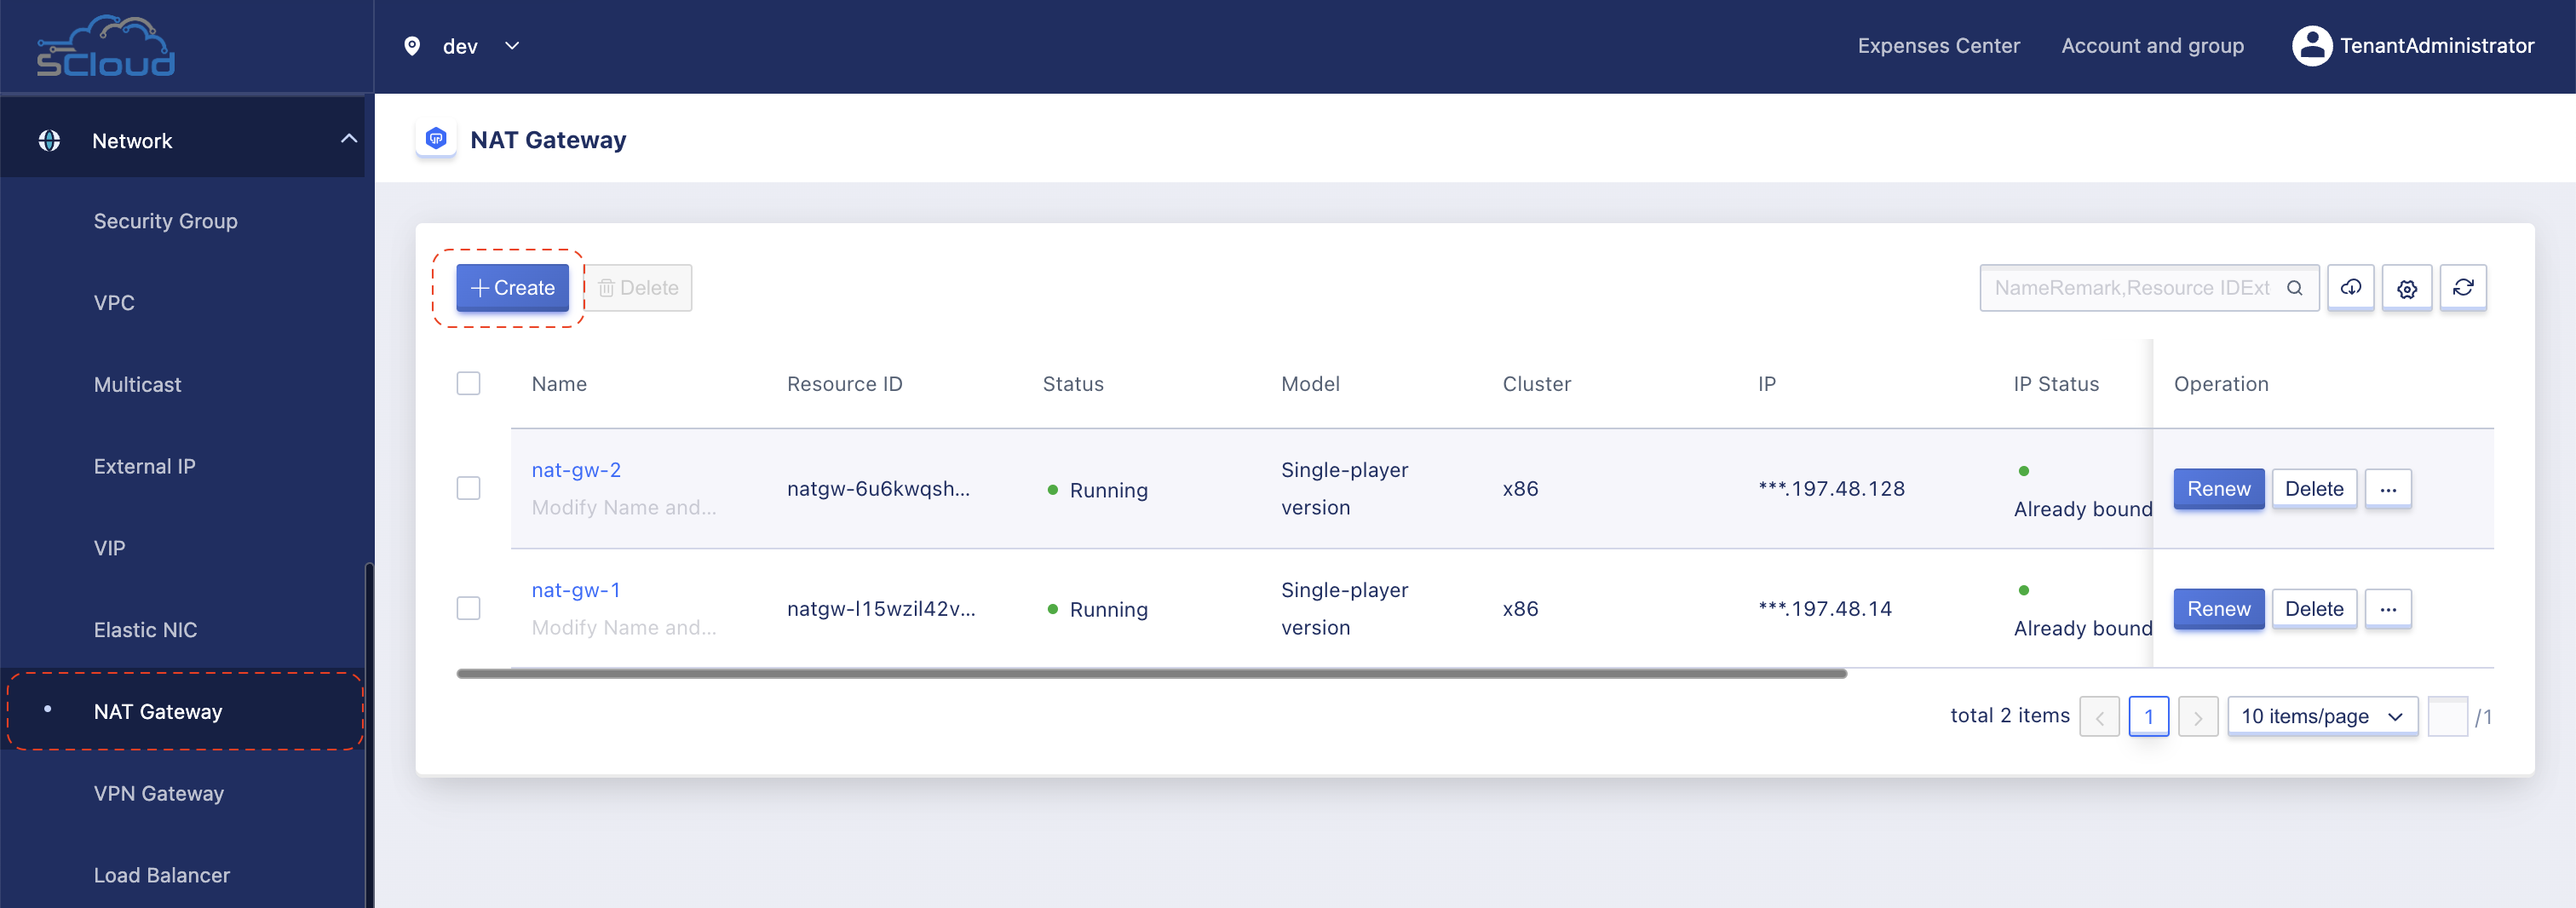
Step 2: Click Create to create new NAT Gateway and enter information as below image
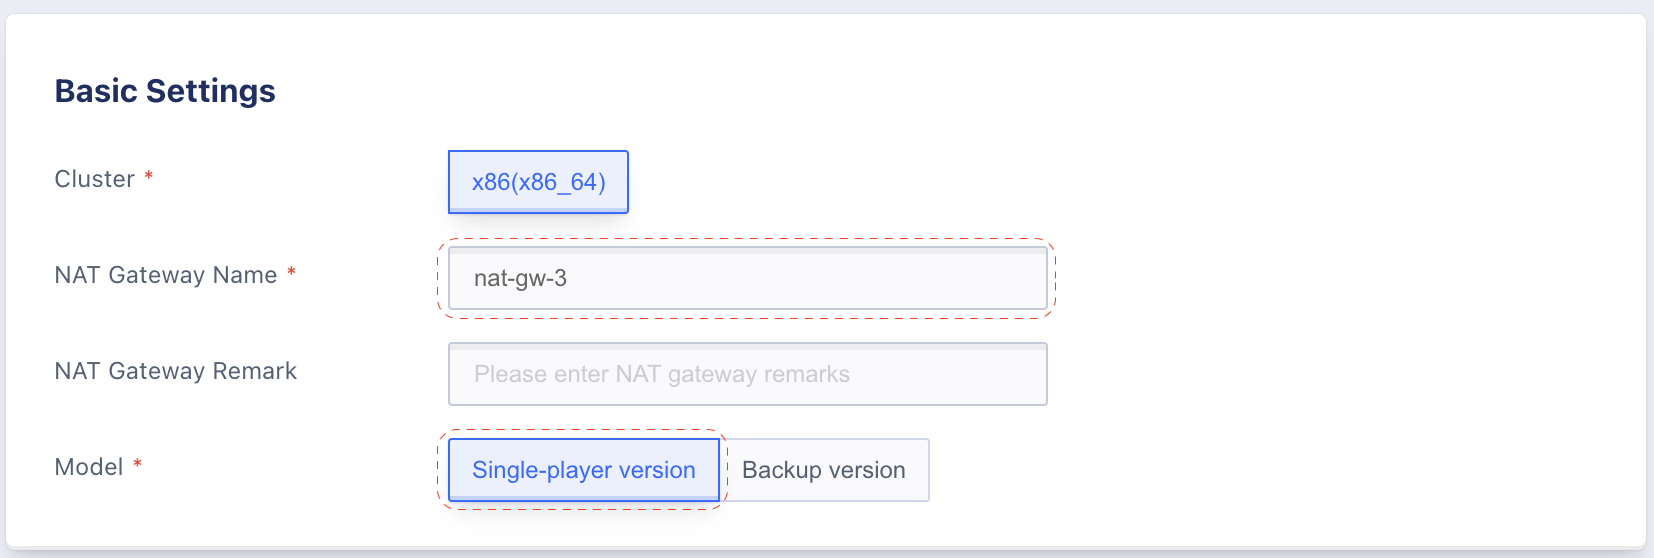
Basic Settings
- NAT Gateway Name: nat-gw-3
- Model: Single-player version
For External IP, click in the dropdown list and then click Create EIP to request for a new public IP address. Enter EIP information as below image.
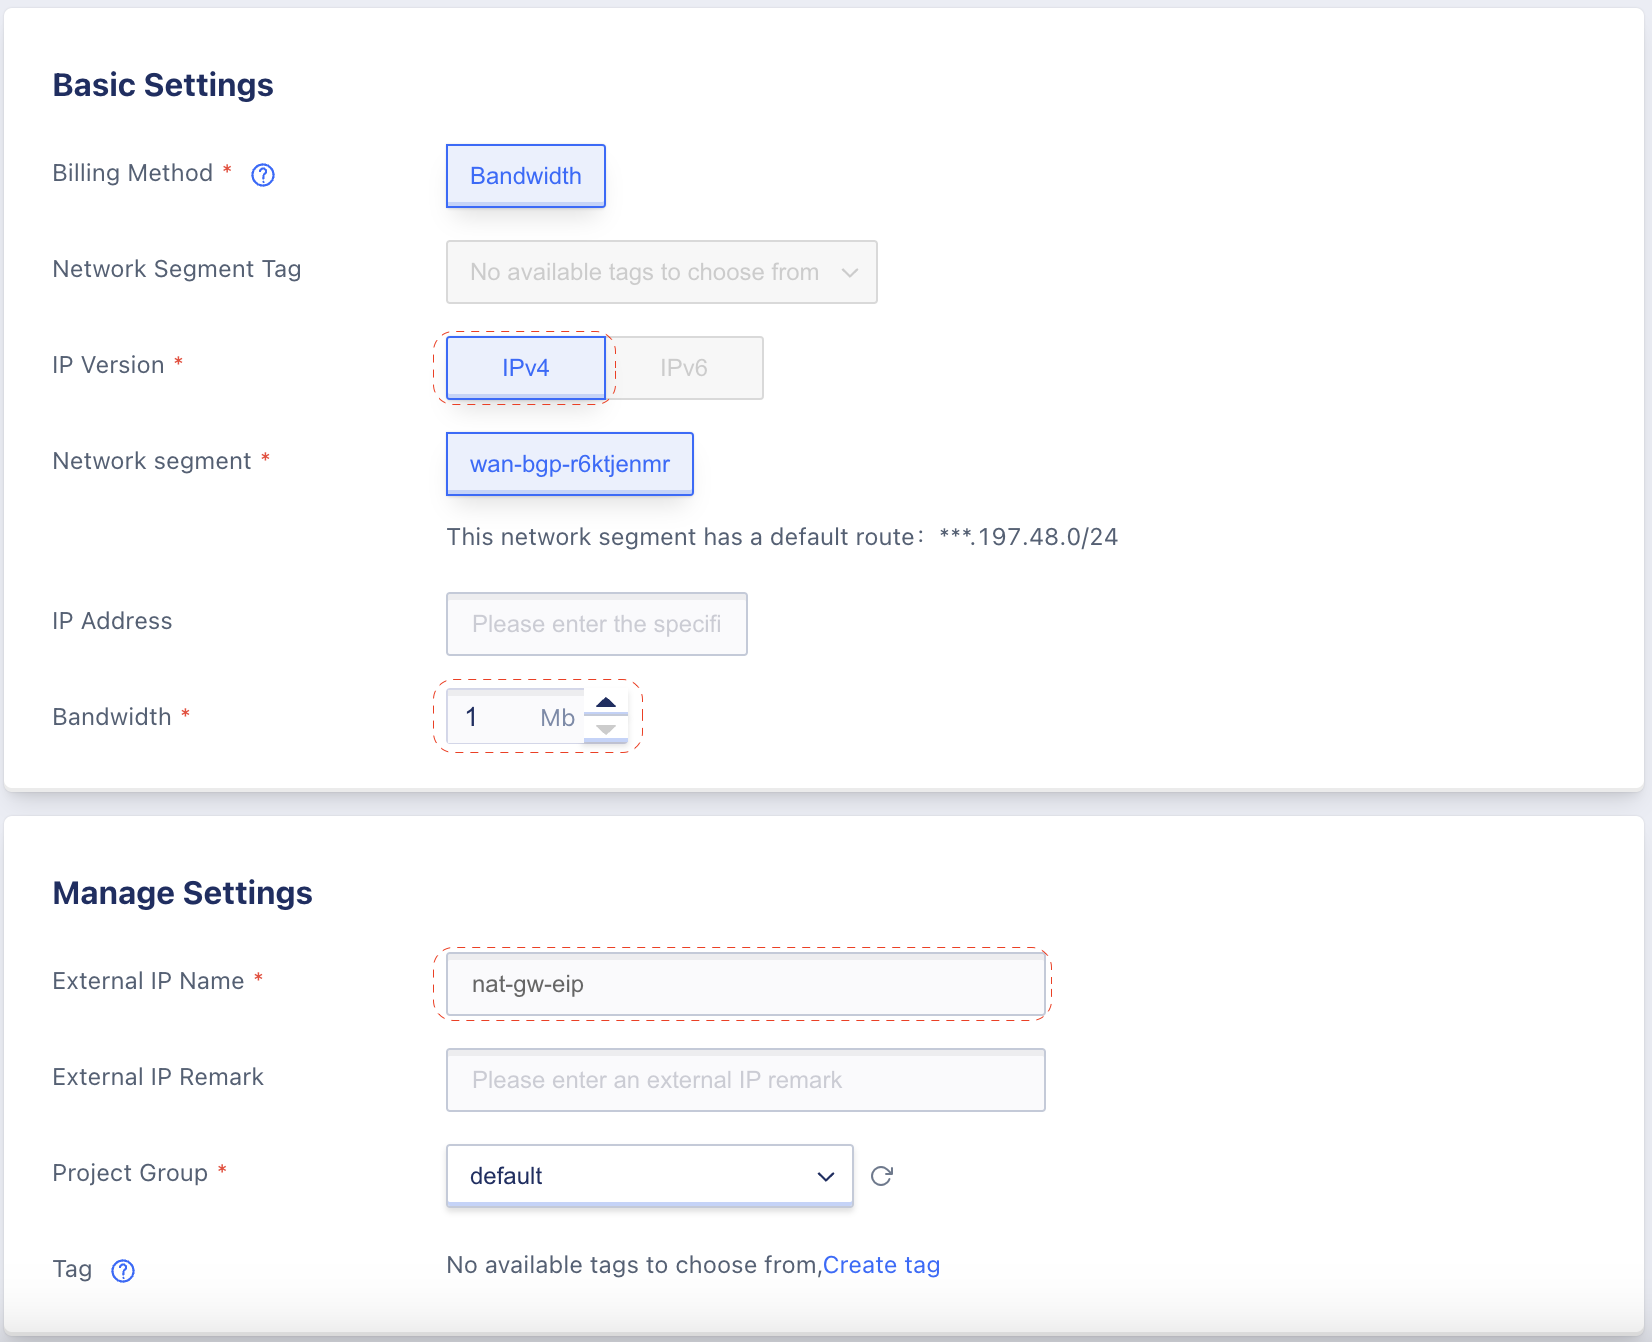
- IP Version: IPv4
- Bandwidth: 1Mb
- External IP Name: nat-gw-eip
For the WAN (public network security group), click in the dropdown lost and then click create security group. Enter security group information as below image.
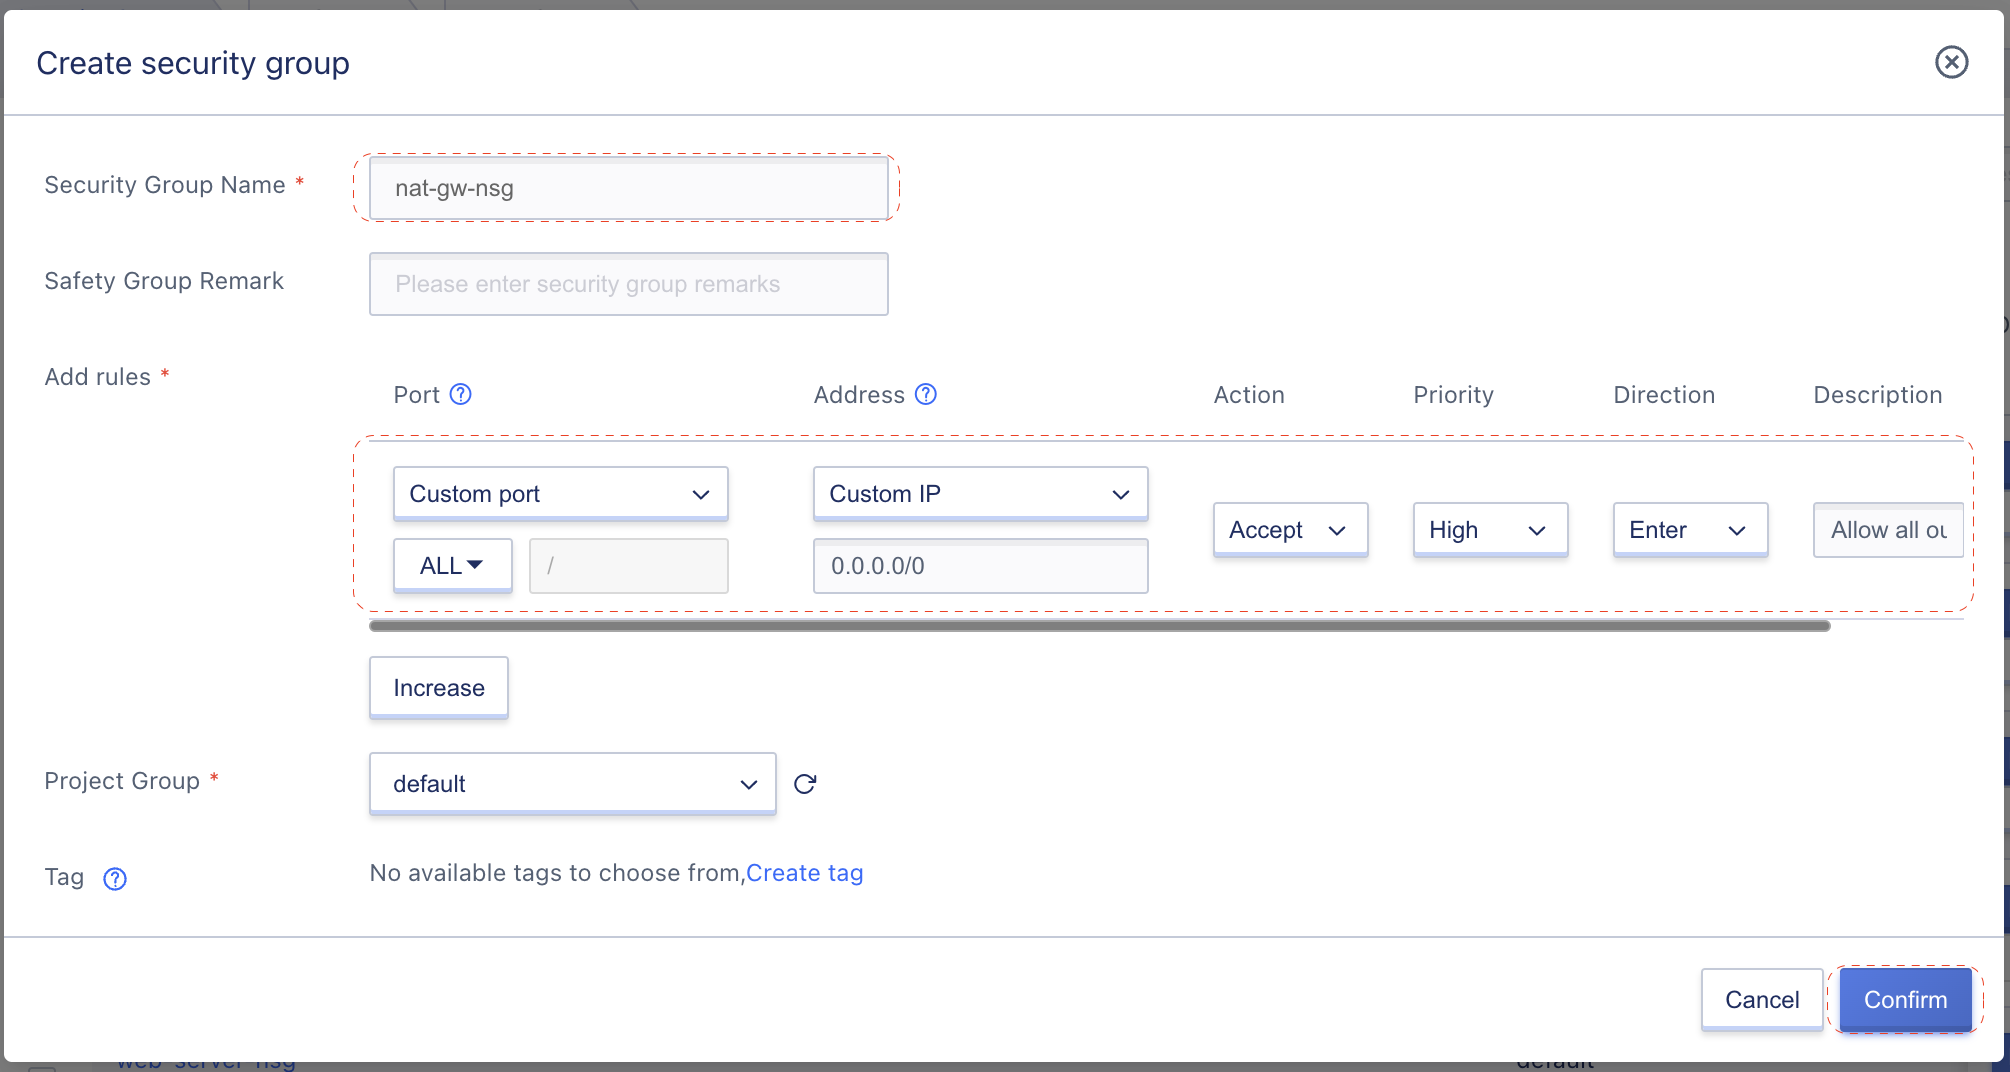
- Security Group Name: nat-gw-nsg
- Rule: see below table
| Port | Address | Action | Priority | Direction | Description |
|---|---|---|---|---|---|
ALL | 0.0.0.0/0 | Accept | High | Out | Allow all outbound traffics |
After created the External IP and Security Group, the NAT Gateway Network Settings should look like below:

- VPC:
vpc-5 - Subnet:
subnet-1 - External IP:
nat-gw-eip - WAN:
nat-gw-nsg
Step 3: Click Buy Now in the top-right panel to create your NAT Gateway.
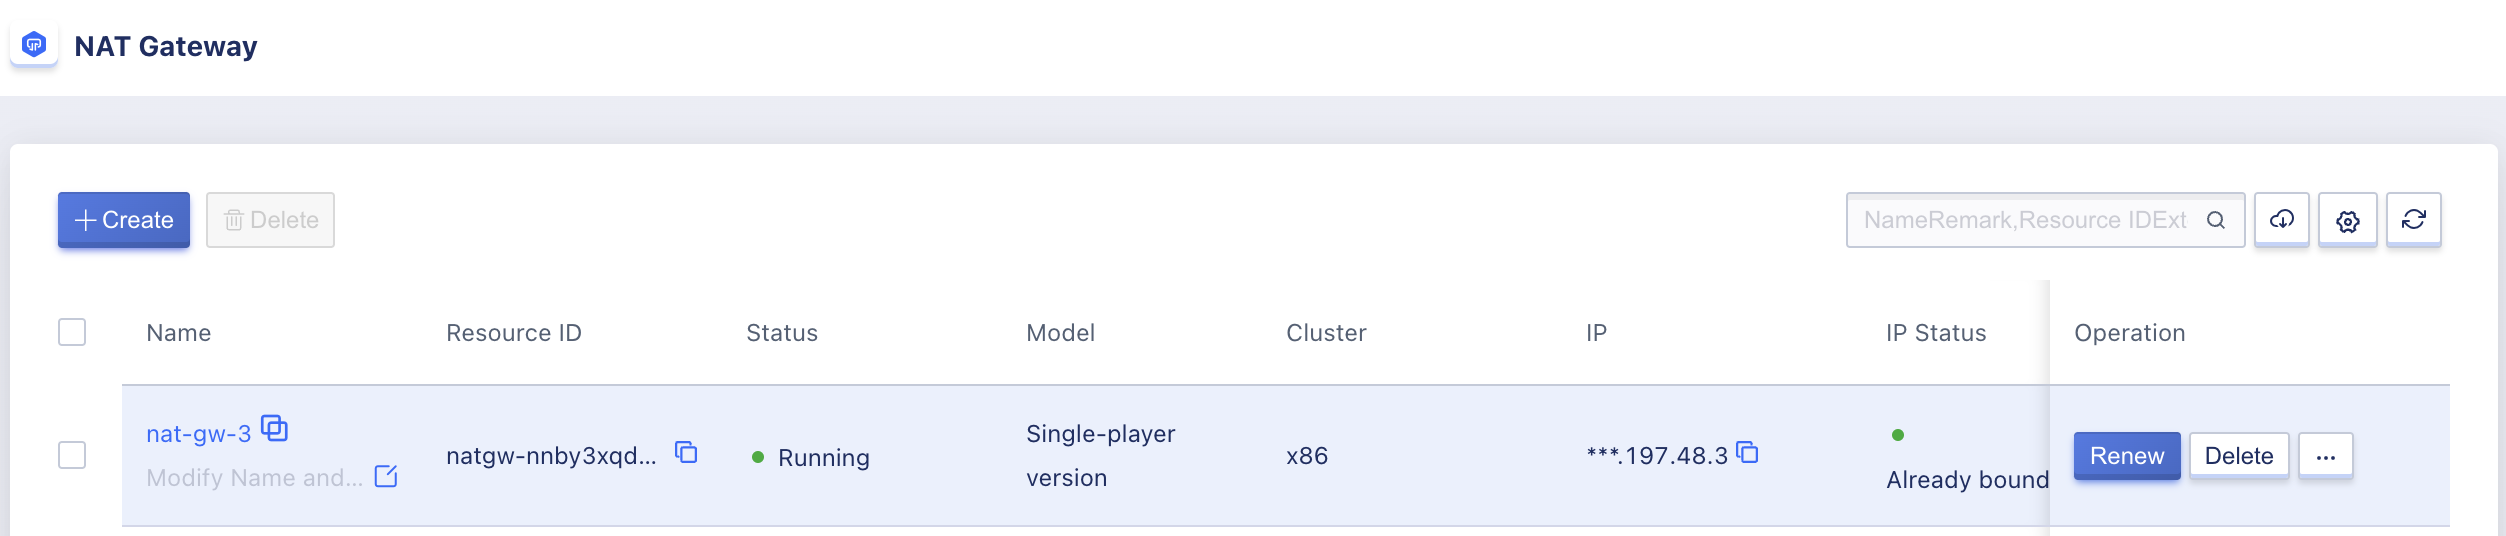
Step 4: Ensure NAT Gateway created and running in the NAT Gateway list.
4. Configure your NAT Gateway SNAT Rules
Step 1: From the NAT Gateway listing page, click in the NAT Gateway name to access detail page, then switch to SNAT Rules tab.
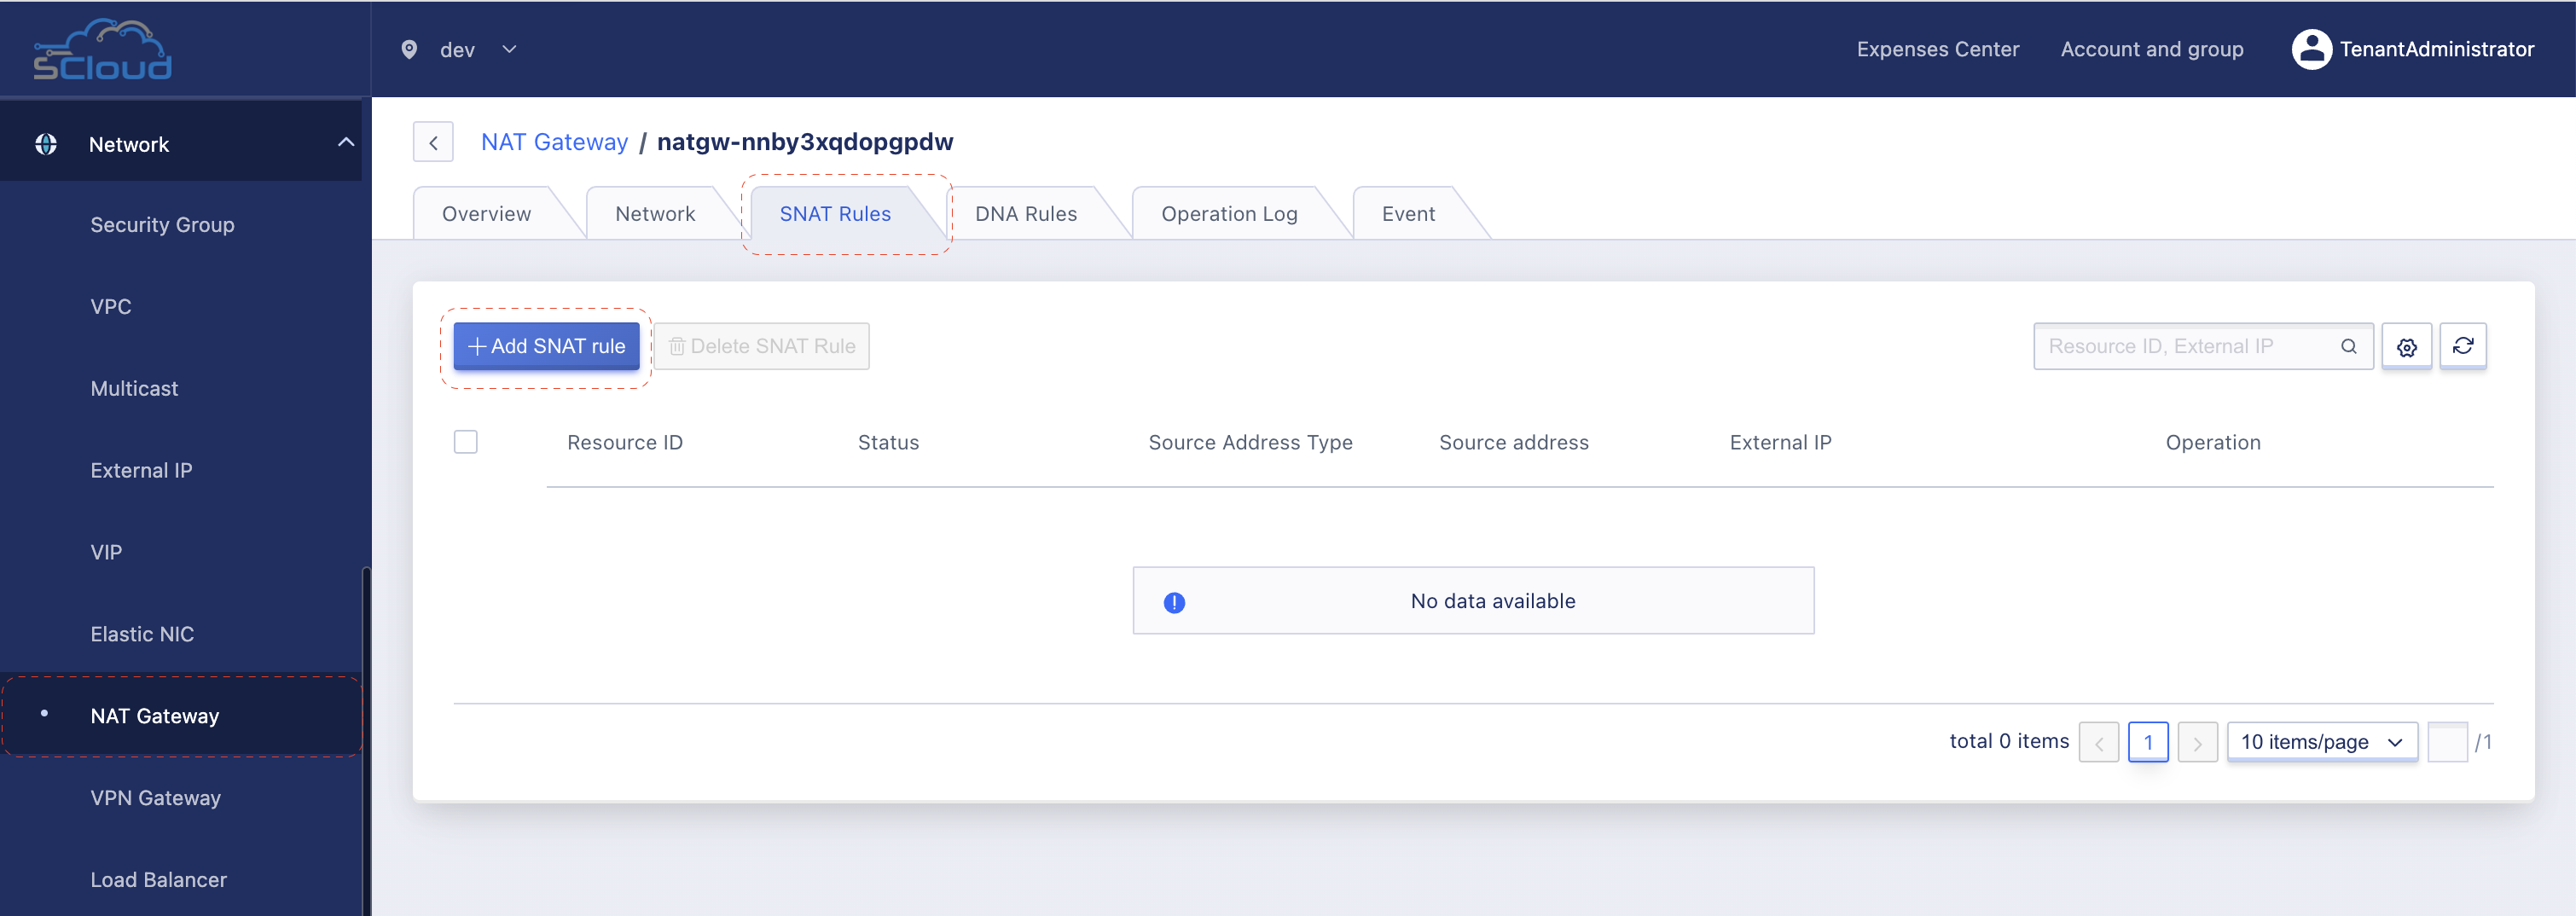
Step 2: Click Add SNAT rule and enter information as the below image, then click Confirm to create SNAT rule:
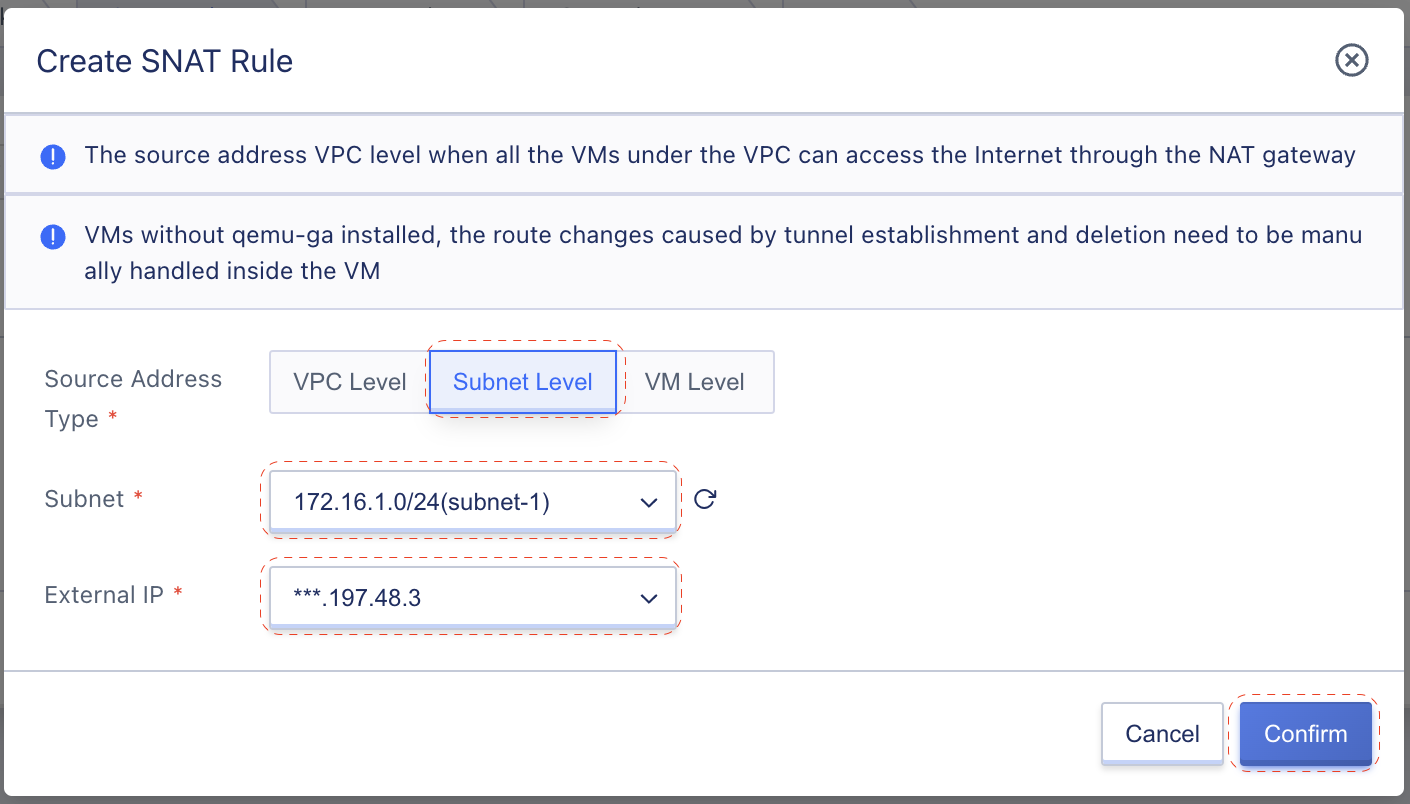
- Source Address Type: Subnet Level
- VPC level: All virtual machines under the VPC to which the current NAT gateway belongs can access the Internet through the NAT gateway, and all NAT gateways in a VPC can only specify one VPC-level SNAT (Source Network Address Translation) rule.
- Subnet level: All virtual machines in the specified subnet can access the Internet through the NAT gateway, and the SNAT (Source Network Address Translation) rule of the subnet has a higher priority than the rule that the source address type is VPC.
- VM Level: This means that the specified virtual machine can access the Internet through a NAT gateway, and the SNAT (Source Network Address Translation) rules of the VM type have a higher priority than SNAT (Source Network Address Translation) rules of the VPC and subnet type.
- Subnet: subnet-1
- External IP: leave it as default value
For more information about NAT Gateway, check out this document: NAT Gateway.
Step 3: Ensure SNAT rule available in the listing page.

5. Verify VM’s network connection
Now lets get back to our VM and check if it can use NAT Gateway to connect to the internet?
Access to the vm-1 console login and run some commands as below:
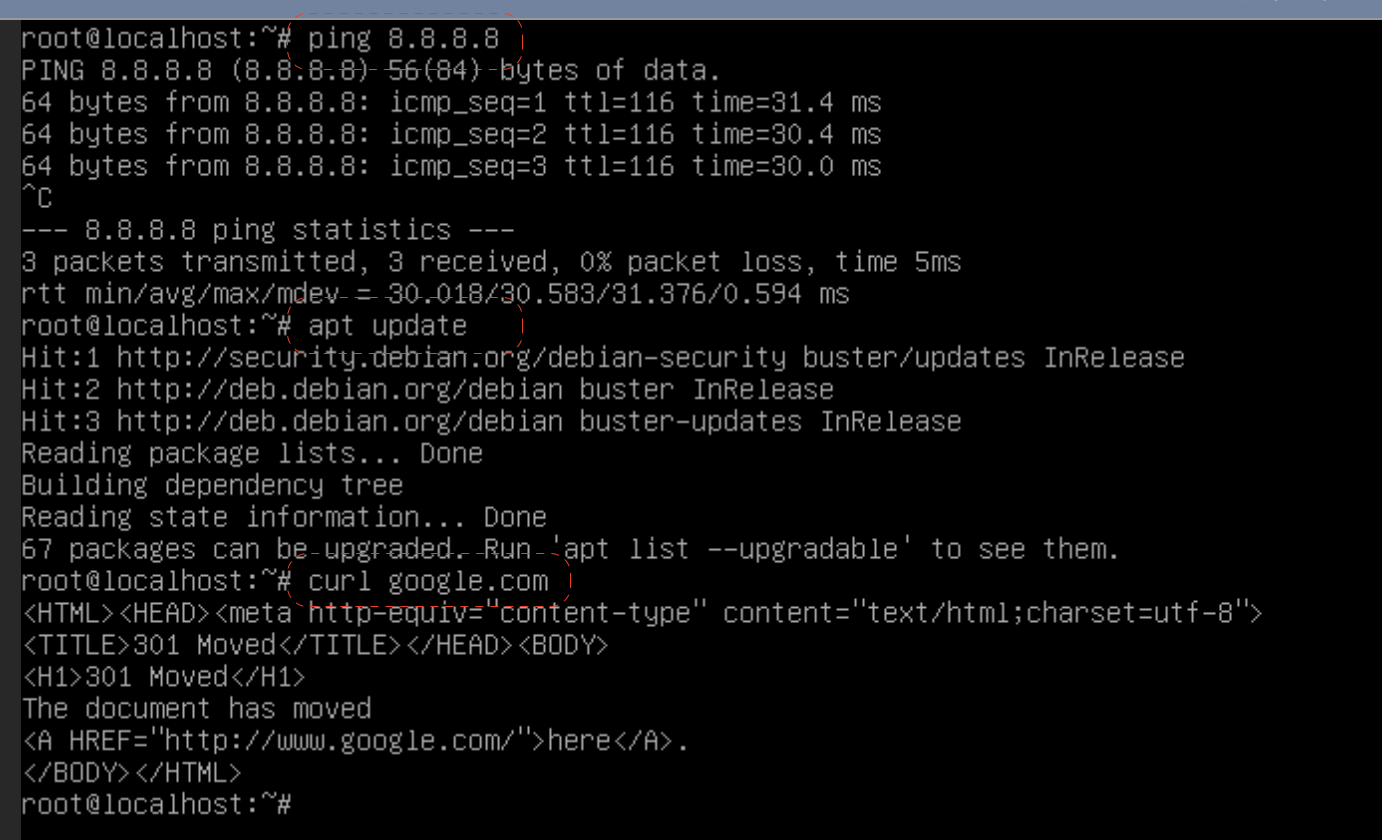
You can see that, even without public IP address assigned, the VM still able to connect to the internet via NAT Gateway. And as we select Subnet Level while creating the SNAT rule, all VMs in the selected subnet 172.16.1.0/24 can use NAT Gateway to access public internet.
Conclusion
Congrats, so far we already learned how to use NAT Gateway to provide public internet access to all VM in a specific Subnet without the need of assigning public IP to each individual VM. If you want to learn more on these topics, check out below documents: