22. Organization and Account Management
Organization and account management mainly provides organization structure management for enterprise users, supporting multi-tenant mode, with each tenant representing an organization/company/subsidiary/department.
Concept Explanation
-
Tenant
The platform supports multi-tenant mode, which is suitable for enterprises with multi-level organizational structure. It can operate tenants as separate companies/subsidiaries/departments, effectively manage permissions, reduce the risk of resources being mixed up by the parent company, subsidiaries and different departments, and realize resource auditing.
A tenant is a collection of resources in the platform, providing the ability to isolate resources, sub-accounts, control permissions, quotas, and price configurations. Resources between different tenants are strongly isolated by VPC networks and permissions; all resources, costs, quotas, and approvals of the main account and sub-accounts within the tenant belong to the tenant.
- Account
- The main account: A tenant has a default main account, which is the initial administrator of the tenant. It has the management permission of all resources and organization management permission under the tenant. The main account can create sub-accounts and manage the permissions of sub-accounts.
- Sub-accounts: Sub-accounts are users created by the main account, and the permissions of sub-accounts under the tenant are controlled by the main account. A tenant can have multiple sub-accounts, and supports permission control for resource management of sub-accounts.
- Personnel: Personnel in the enterprise, personnel need to use account to log in to the cloud platform to use resources.
- Role: A collection of permissions that grants users and member groups the ability to call related APIs to operate resources.
- Project Group: Resource planning is done at the project group level, allowing for the establishment of separate resource pools for a specific project or business, enabling more granular resource management. Authorization for sub-accounts is also based on the project group dimension. The project group is just a logical grouping and does not have the role of resource isolation. All resources of the tenant must belong to a project group.
- Process Approval: A cloud resource order approval process introduced to meet the control requirements of enterprises for core cloud resources such as virtual machines, cloud disks, external IPs, etc.
- Approval Management: Approval management can only be operated by platform administrator admin.
22.1 My account
You can view account basic information and set account security on the account and organization/my account page.
The basic account information includes account ID, role ID, account name, account email, external recharge balance, platform recharge balance, and creation time.
- Account ID: Unique ID of the currently logged in platform account.
- Account Name: The account name or nickname of the current login platform account, which can be modified directly through the edit button, supporting Chinese, English or characters.
- Account Email: The email address of the current login platform account.
- External recharge balance: refers to the amount recharged through Alipay, WeChat, bank and Sina payment.
- Platform recharge balance: Platform’s additional funds, usually recharged by the platform administrator.
- Creation time: refers to the registration time or creation time of the current account.
Account security is a security protection function provided by the platform for user accounts, which can ensure the security of the login account by regularly modifying the login password, enabling two-factor authentication protection, and setting access restrictions. For API users, the cloud platform can provide API public key and private key information, which can be used to operate API instructions by copying the key information. Specific operation methods can refer to the API developer manual.
22.1.1 Modify Login Password
The platform supports users to modify their login password, which can be modified on the “My Account” page.
Changing the password requires verifying the old password. If you forget the old password, you can contact the administrator to help you change the password in the background.
22.1.2 Enable Login Protection
The platform provides free login two-factor authentication services based on TOTP (Time-Based One-Time Password Algorithm). After this service is opened, the account login console needs to be authorized and authenticated, and supports the national secret hardware version and ordinary software version. Users can configure according to their needs through deployment. The prerequisites for opening login protection are as follows:
(1)The opening object is an independent main account or sub-account.
(2)Install a FortiToken or other token tool based on TOTP technology on mobile devices.
(3)Recommend using FortiToken.
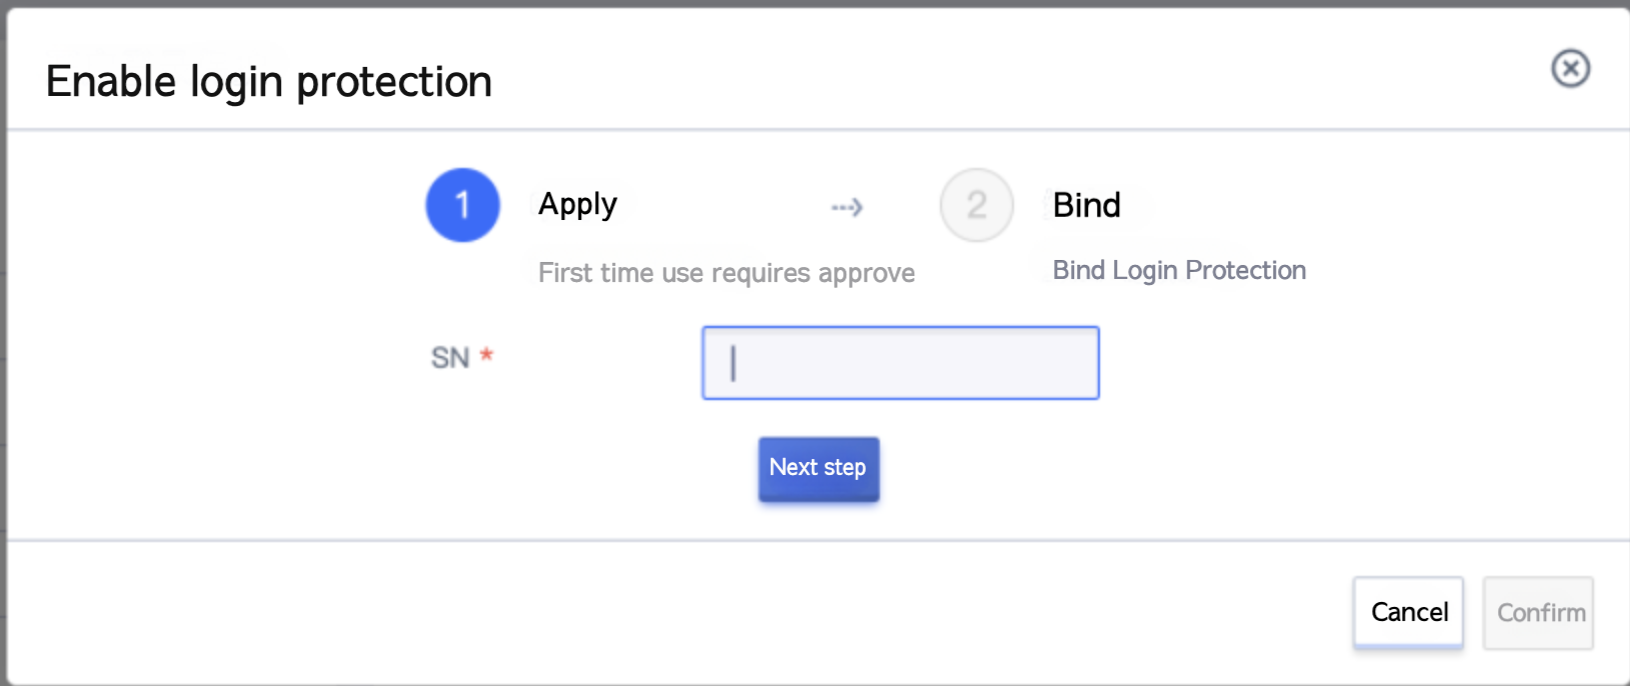
Click Next, the National Secret Hardware Version needs to enter SN information, which cannot be empty:
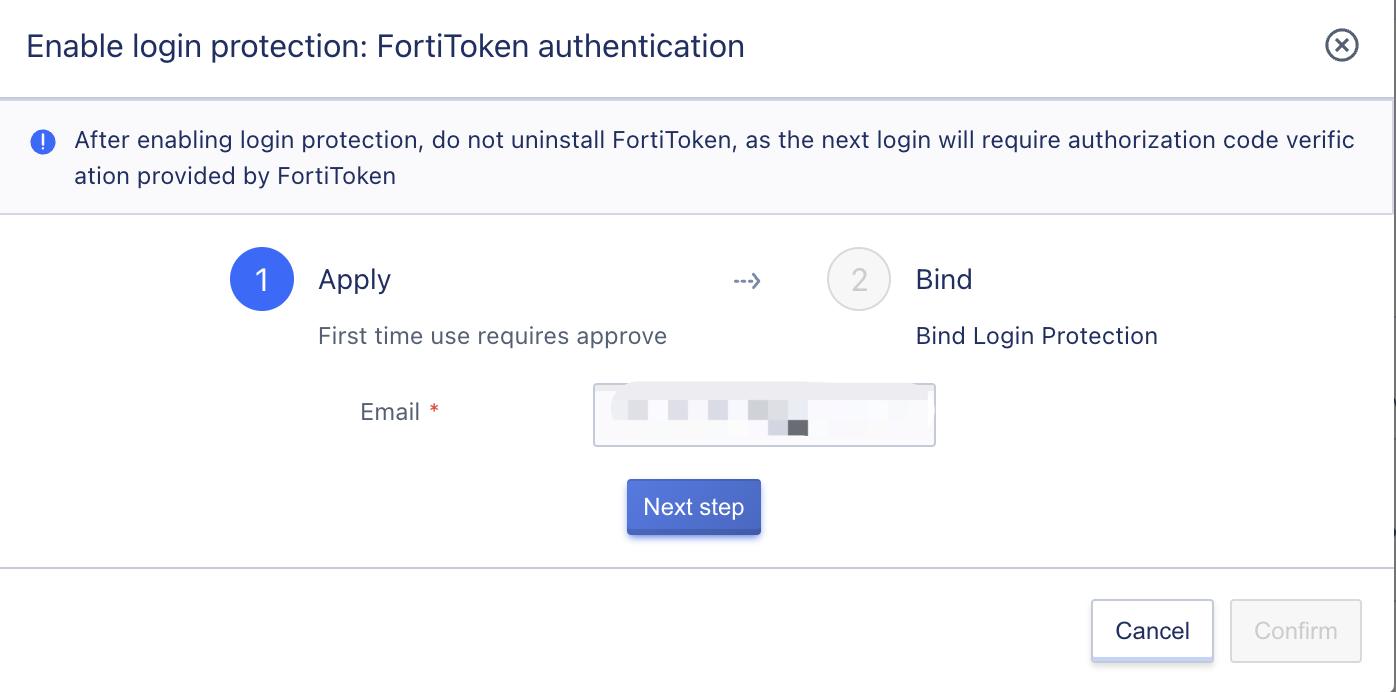
The standard software version is displayed as follows:
In order to reduce the risk of user account password leakage, it is recommended that you open account login two-factor authentication.
22.1.2.1 Opening Steps
-
Log in to the console and enter the account and organization management page. On the My Account page, you can view the current login protection settings. If not set, you can click the “Set” button to turn on login protection.
-
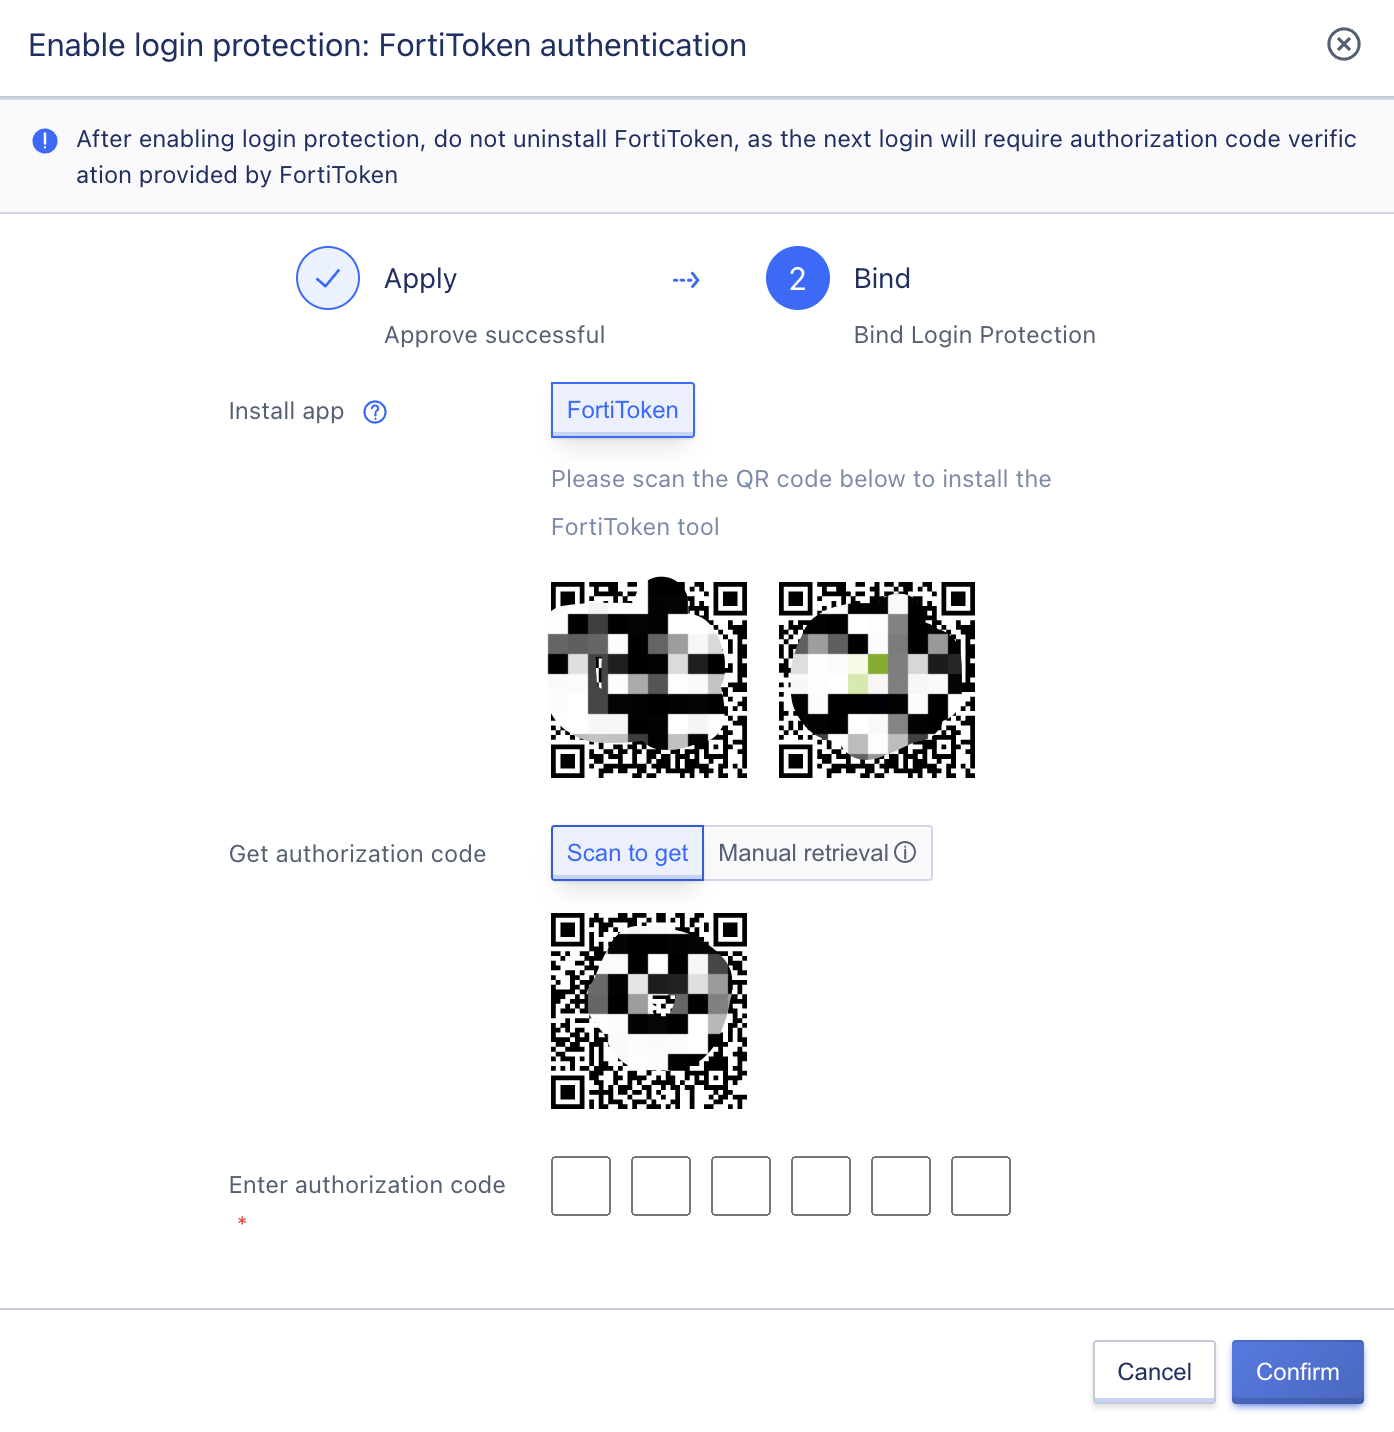
Check if FortiToken is installed on the mobile device:
- This page provides download links for IOS and Android users. If you have not installed FortiToken, you can download it by scanning the code.
- Android phone users can also search and download FortiToken through the app store provided by the phone brand.
-
Open the FortiToken tool, scan the code to get the authorization code, or manually enter the key to get the authorization code.
-
Enter the authorization code obtained in the page box to complete the binding.
22.1.2.2 Disable login protection
Log in to the console and enter the account and organization management page. On the My Account page, you can view the current login protection settings. If you need to turn off the login protection settings when it is set, click the “Settings” button. Follow the page prompts to get and enter the authorization code to turn off the two-factor authentication function.
22.1.2.3 Function Application
After the two-factor authentication service is opened, when logging in to the platform with the account password, it will require entering the authentication code. After the system determines the authentication code is valid, it can successfully log in to the platform.
22.1.2.4 Login Protection FAQ
Q:How to download FortiToken?
A:The account binding page provides download links for ISO and Android tools, and you can choose to download by scanning the code on your mobile device. If you are using a mobile device based on the Android system, you can search and download the FortiToken authenticator through the application download market provided by the mobile device itself.
Q:What should I do if FortiToken cannot scan to obtain the authorization code?
A:Switch to manual acquisition, manually enter account key to bind and get authorization code.
Q:Is it possible to bind the account with other tools?
A: If you use FortiToken authentication, you can bind your account with other dynamic token tools based on TOTP algorithm, such as WeChat mini program “Second Verification Code”, etc. For security reasons, it is recommended to use the official Google “FortiToken”.
22.1.3 Login Access Restrictions
To further protect account security, the platform provides login access restriction capabilities, allowing tenants to set client API addresses for logging into the console and accessing the platform API. After configuration, all accounts under the tenant can only log in or initiate API access from the specified IP, effectively ensuring the security of account login and resources.
- Support configuration of multiple IP addresses or IP address segments, separated by commas.
- The IP address or IP address range configured is in whitelist mode, meaning that only clients with the configured IP address/range can log in to the console or access the API normally.
- If no IP is specified by default, it means that the client IP address is not restricted for logging in to the console and accessing the API, that is, the login console is accessible from the whole network by default.
If the login IP address is set incorrectly, resulting in all accounts under the tenant being unable to log in, the platform administrator can contact the platform administrator to modify the tenant’s login access restriction policy through the management console.
You can configure the login policy through the “Login Access Restriction” function in “Account Security”, as shown in the figure below. The default is empty, which means unrestricted access to the entire network.
You can enter the IP address or IP address range of the login platform within the login access range, and click Confirm to take effect. After successful configuration, users cannot log in to the console normally with their account in the unspecified IP network, and prompt the current IP address, as shown in the following figure:
The platform can only restrict the IP address of the access console, that is, the client IP address directly requesting the console URL address. If the client address of the user accessing the platform is in the NAT router, when configuring the login policy on the platform, the IP address after NAT needs to be released, that is, the exit address after NAT needs to be configured in the whitelist of the login access policy to ensure that the clients in the NAT router can normally access the console.
22.1.4 API Key
Through the account security tenant, you can view the API keys belonging to the current account, which are used to manage and use the API interface. You can copy the information of the public and private keys by clicking the copy button, which is convenient for calling API commands.
22.2 View Tenant Quotas
You can view the quota limits and current usage of quotas under the tenant on the account and organization/quota information page.
A quota is the limit of cloud resources that can be created in a single region for a tenant. By limiting the resources quota of each account, cloud platform resources can be reasonably allocated, and the resource utilization rate can be improved while meeting the resource needs of each account on the cloud platform. When the tenant is initialized, it has a default quota in each data center. At the same time, the cloud platform administrator can customize the resource quota for each tenant.。
For virtual machines, cloud disks, and external IPs that are deleted or not renewed and enter the recycle bin, they do not occupy the tenant resource configuration, and the resource quota will be checked when the resources are restored.
Each person under the tenant cannot exceed the quota limit of the tenant when creating resources with their account. For example, if the quota of cloud disks in the tenant is 10, the maximum number of cloud disks that the main account and sub-accounts can create cannot exceed 10. You can view the quota information in each region, and the fields in the quota list are as follows:
-
Product Types and Resource Types:
Virtual Machine: Virtual Machine (Resource Quantity)
Virtual Machine: Virtual Machine (Number of CPUs)
Virtual Machine: Virtual Machine (Memory Size)
VPC: Virtual Private Cloud (Resource Quantity)
VPC: Subnets (number of resources)
Mirror: Mirror (Resource Quantity)
Cloud Hard Drive: Cloud Hard Drive (Resource Quantity)
Cloud disk: Cloud disk (disk space)
Network Card: Elastic Network Card (Resource Quantity)
External IP: Elastic IP (Resource Quantity)
Load balancing: Load balancing (quantity of resources).
Load balancing: SSL Certificate (Resource Quantity)
Virtual Machine Template: Virtual Machine Template (Number of Resources)
Number of NAT Gateways: Number of NAT Gateway Resources
Security Group: Security Group (Number of Resources)
Object Storage: Object Storage (Resource Quantity)
File Storage: File Storage (Quantity of Resources)
VPN Gateway: VPN Gateway (Number of Resources)
VPN Gateway: Remote Gateway (Number of Resources)
VPN Gateway: Tunnel (Resource Quantity)
Elastic scaling: Scaling group (number of resources)
Elastic scaling: Scaling strategy (number of resources)
VIP: VIP (Number of Resources)
-
Quota: The number or capacity of resources that can be created under the specified region for the current quota item.
-
Update time: modification update time of the current quota item.
22.3 Project Team Management
On the Account and Organization Management/Project Group Management page, you can view and manage project groups. Project groups can help with resource grouping management, helping to solve the complexity of resource fine-grained management and authorization management.
All resources of the tenant must belong to a project group, and the resources in the group are authorized to determine whether the user has permission to the resources in the group according to the user’s role.
22.3.2 Create Project Team
The project team can help you with resource grouping and management, and can cooperate with the project team to manage personnel under the tenant in a fine-grained manner. It is recommended that you plan the project team for the tenant after the tenant is opened. The platform comes with a default project team, and all resources created without customizing the project team belong to the default project team.
When creating a project group, input parameters: name and remarks. After creation, resources can be managed within the project group by transferring in/out resources.
When there is a project group under the tenant, the master account can specify the project group or choose not to group when creating resources. Resources that are not grouped can only be viewed and managed by the master account. When the sub-account creates resources, it must select the project group.
22.3.3 Project Team Management
Support resource management for project groups, manage resources under the project group by transferring in and out resources. When transferring resources into the project group, you can select all resources not in the current project group, and you can view the project group to which the resource belongs in the resource list.
When transferring resources to other project groups, only resources in the current project group can be specified, and the project group to which the resources are transferred can only be other project groups. After the resources are transferred to other project groups, users authorized by that project group will no longer be able to view and manage the resources. 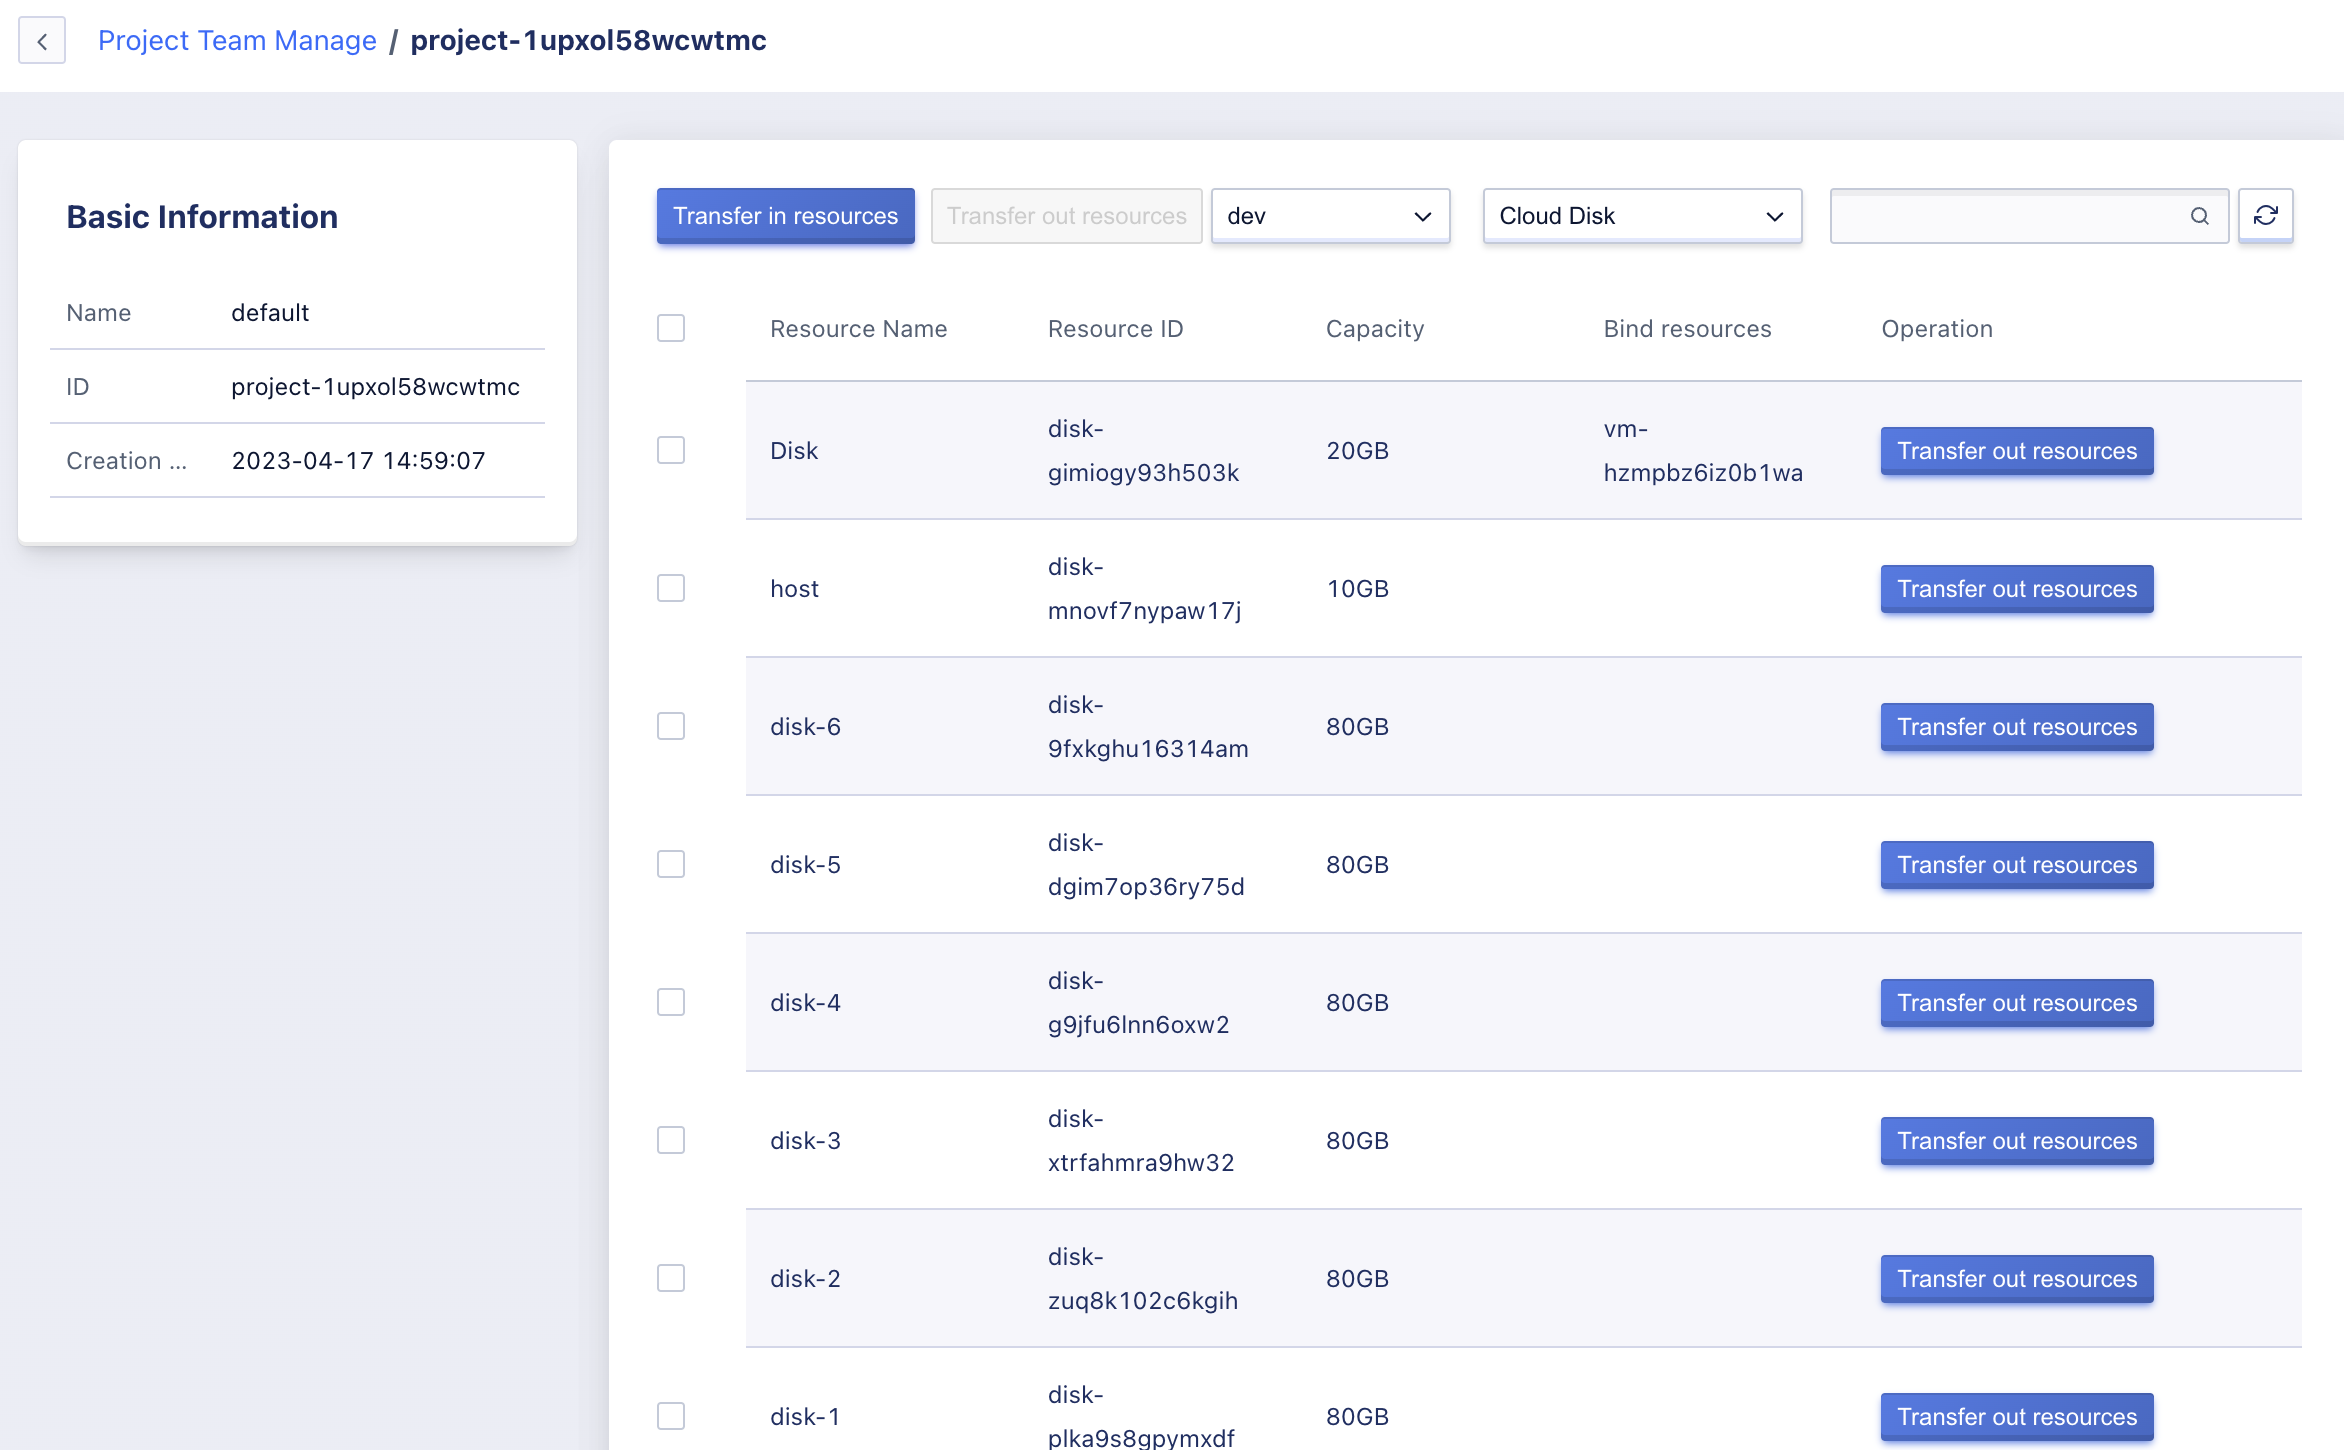
When transferring resources in/out, the product type should be taken as the dimension. Multiple resources under the same product type can be transferred in/out at one time. There are multiple dimensions of resources in VPN Gateway, Load Balancer, and Scaling Group. Please pay attention to assign the associated resources to the same group when transferring in/out.
Support modification of project group name and remarks.
Support deleting project groups, when there are resources in the project group, it cannot be deleted, and the resources need to be transferred to other project groups.
When there are role authorizations in the project group, the role authorizations must be removed first before the project group can be deleted.
22.4 Role Management
On the Account and Organization Management/Role Management page, you can view and manage all roles under the tenant. Roles are divided into two types, system-built roles and custom roles. Among them, system-built roles are provided by the platform to users to quickly authorize roles to sub-accounts, which cannot be edited or deleted. Currently, the built-in roles include two: Administrator and Read-only User.
- Administrator This role contains authorization for all cloud resource operations and organizational management operations under the tenant. If you don’t need to manage permissions for sub-accounts in detail, you can directly use the system administrator to authorize roles for sub-accounts for faster operation.
- Read-only user This role only includes view permissions for all resource and organizational management functions.
22.4.1 Create a Role
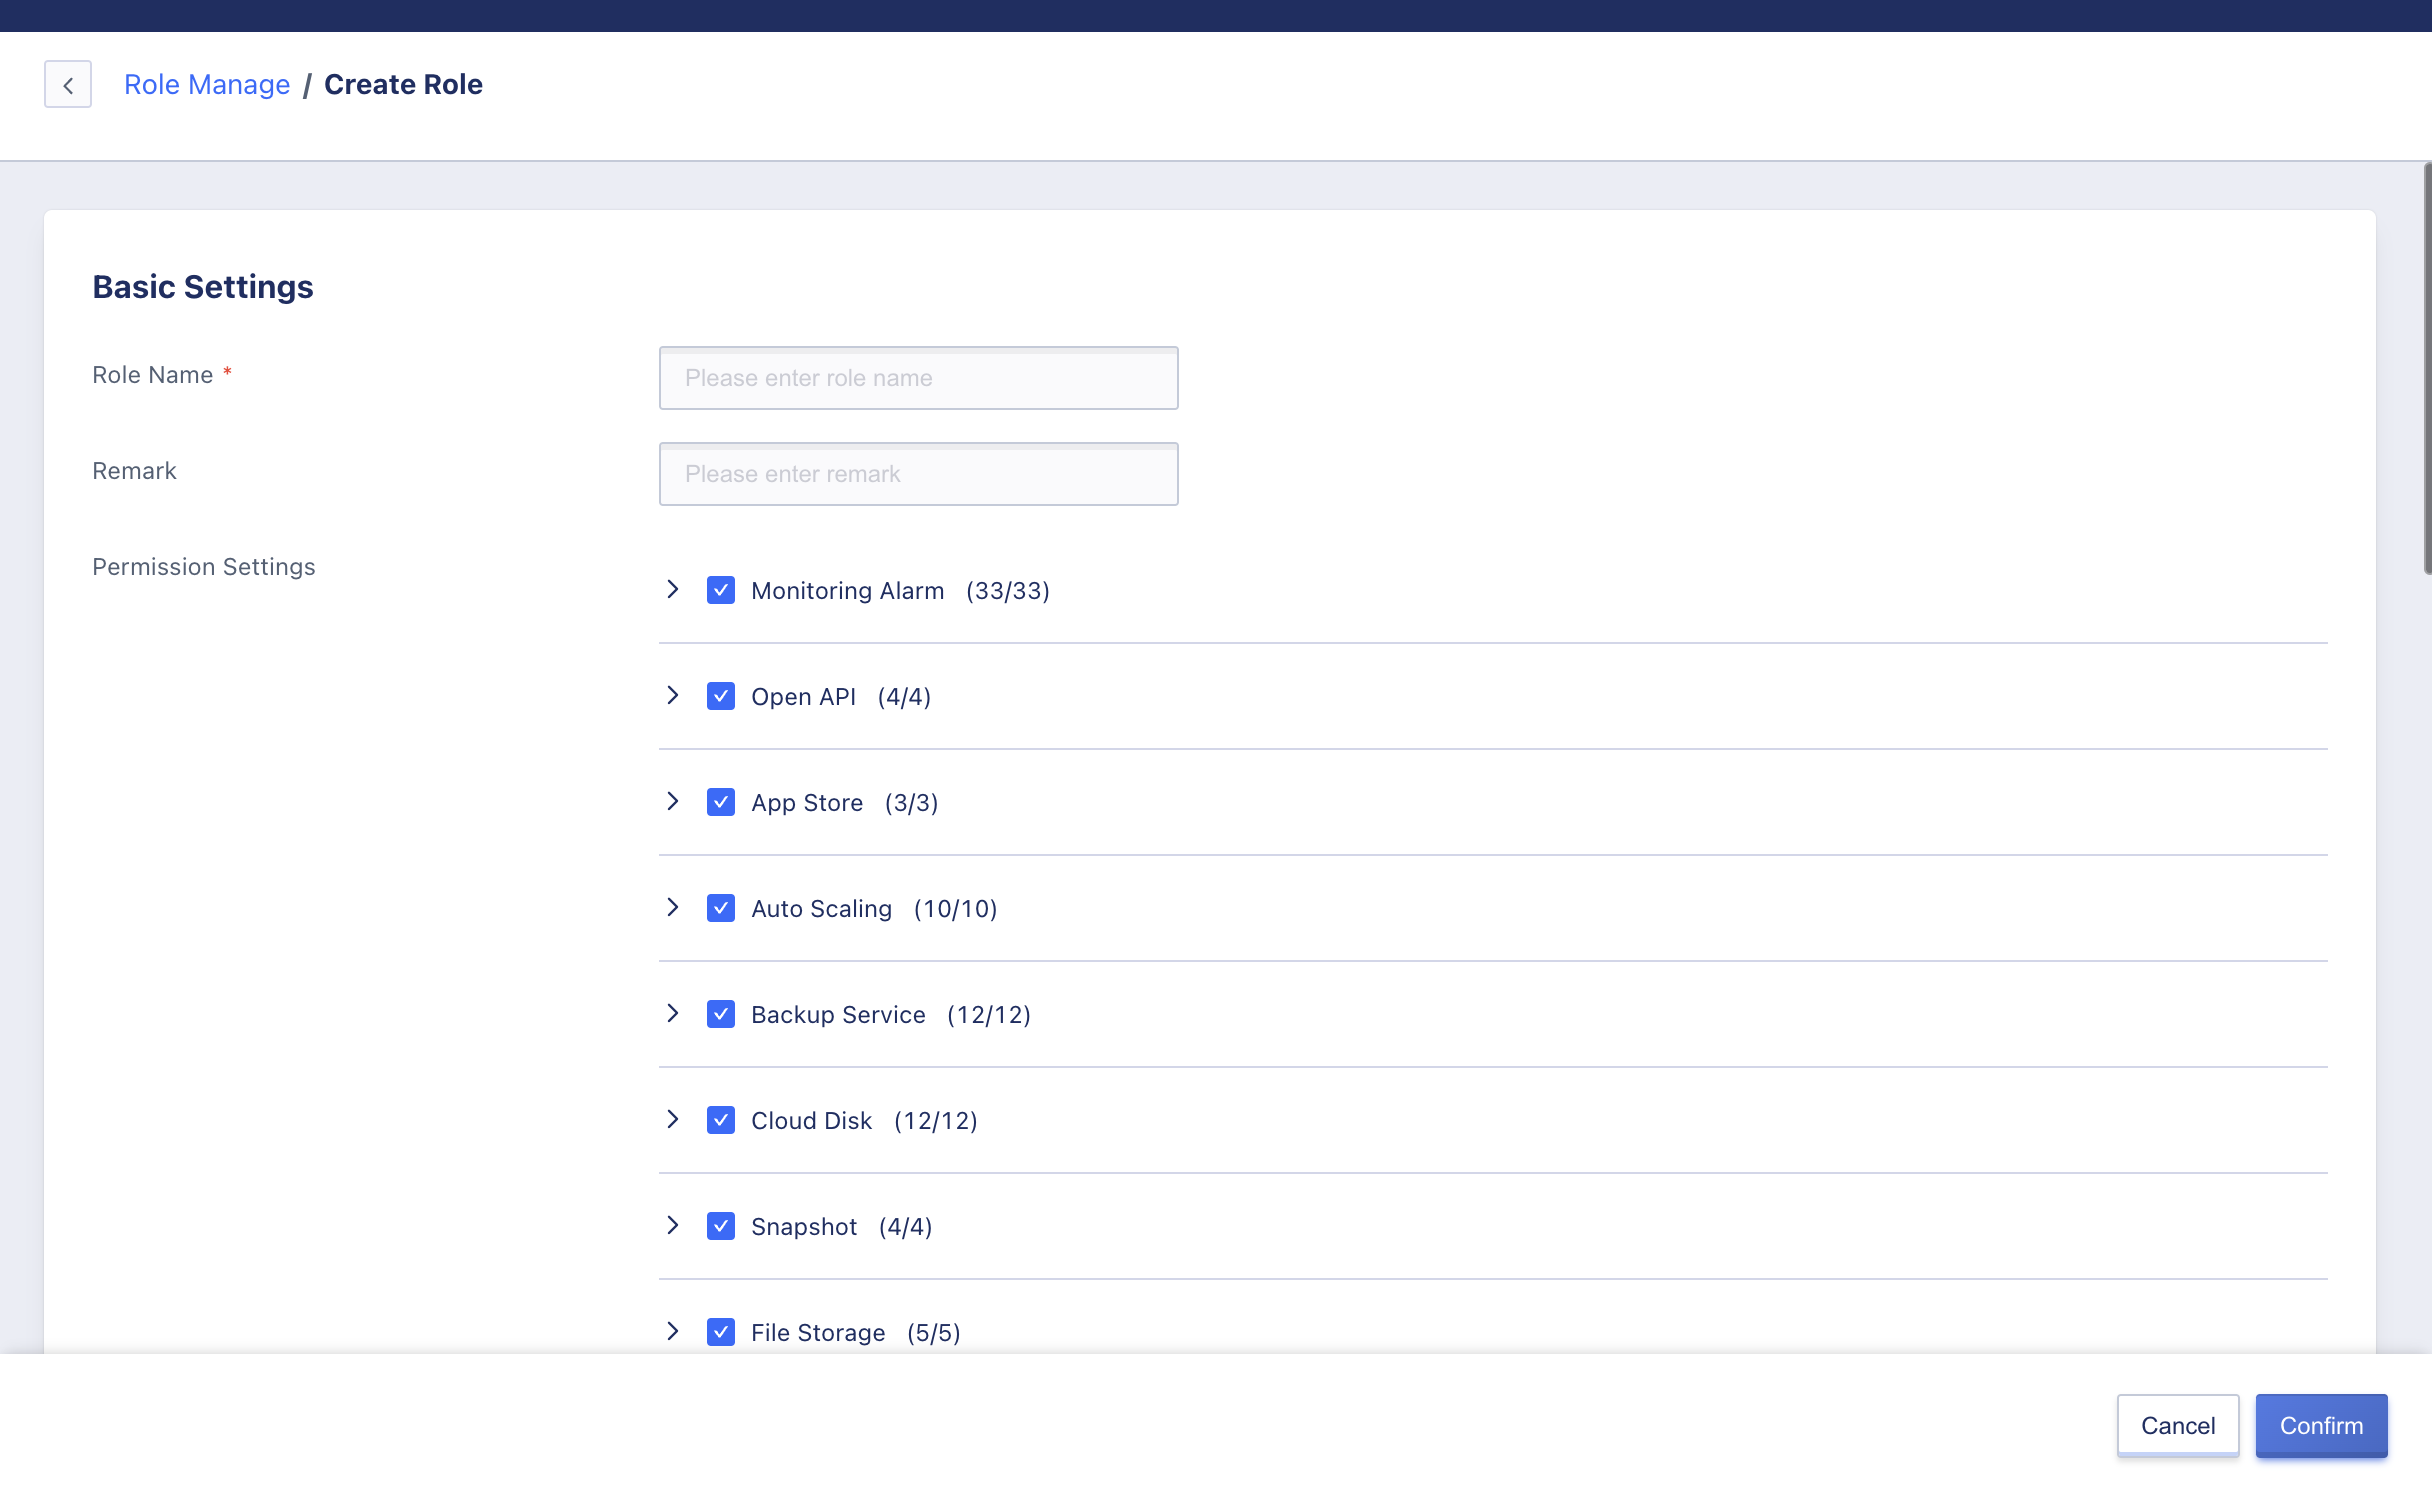
You can create a custom role by creating a role, and when creating a role you need to enter the following information:可通过创建角色创建出一个自定义角色,创建角色时需要输入以下信息: Name: Set a suitable name for the role. Note: Optional Permission settings: Product types can be divided, and the operation permissions of each product can be authorized according to the four dimensions of view, add, edit and delete. You can also select only a few permissions according to actual usage requirements.
When creating a role, the operations that are checked by default are the operations that must be authorized for each module. It is recommended not to cancel them to avoid affecting the integrity of the authorization. If you do not need to authorize a module’s permission for the user, you can cancel the operations checked by default.
22.4.2 Management Role
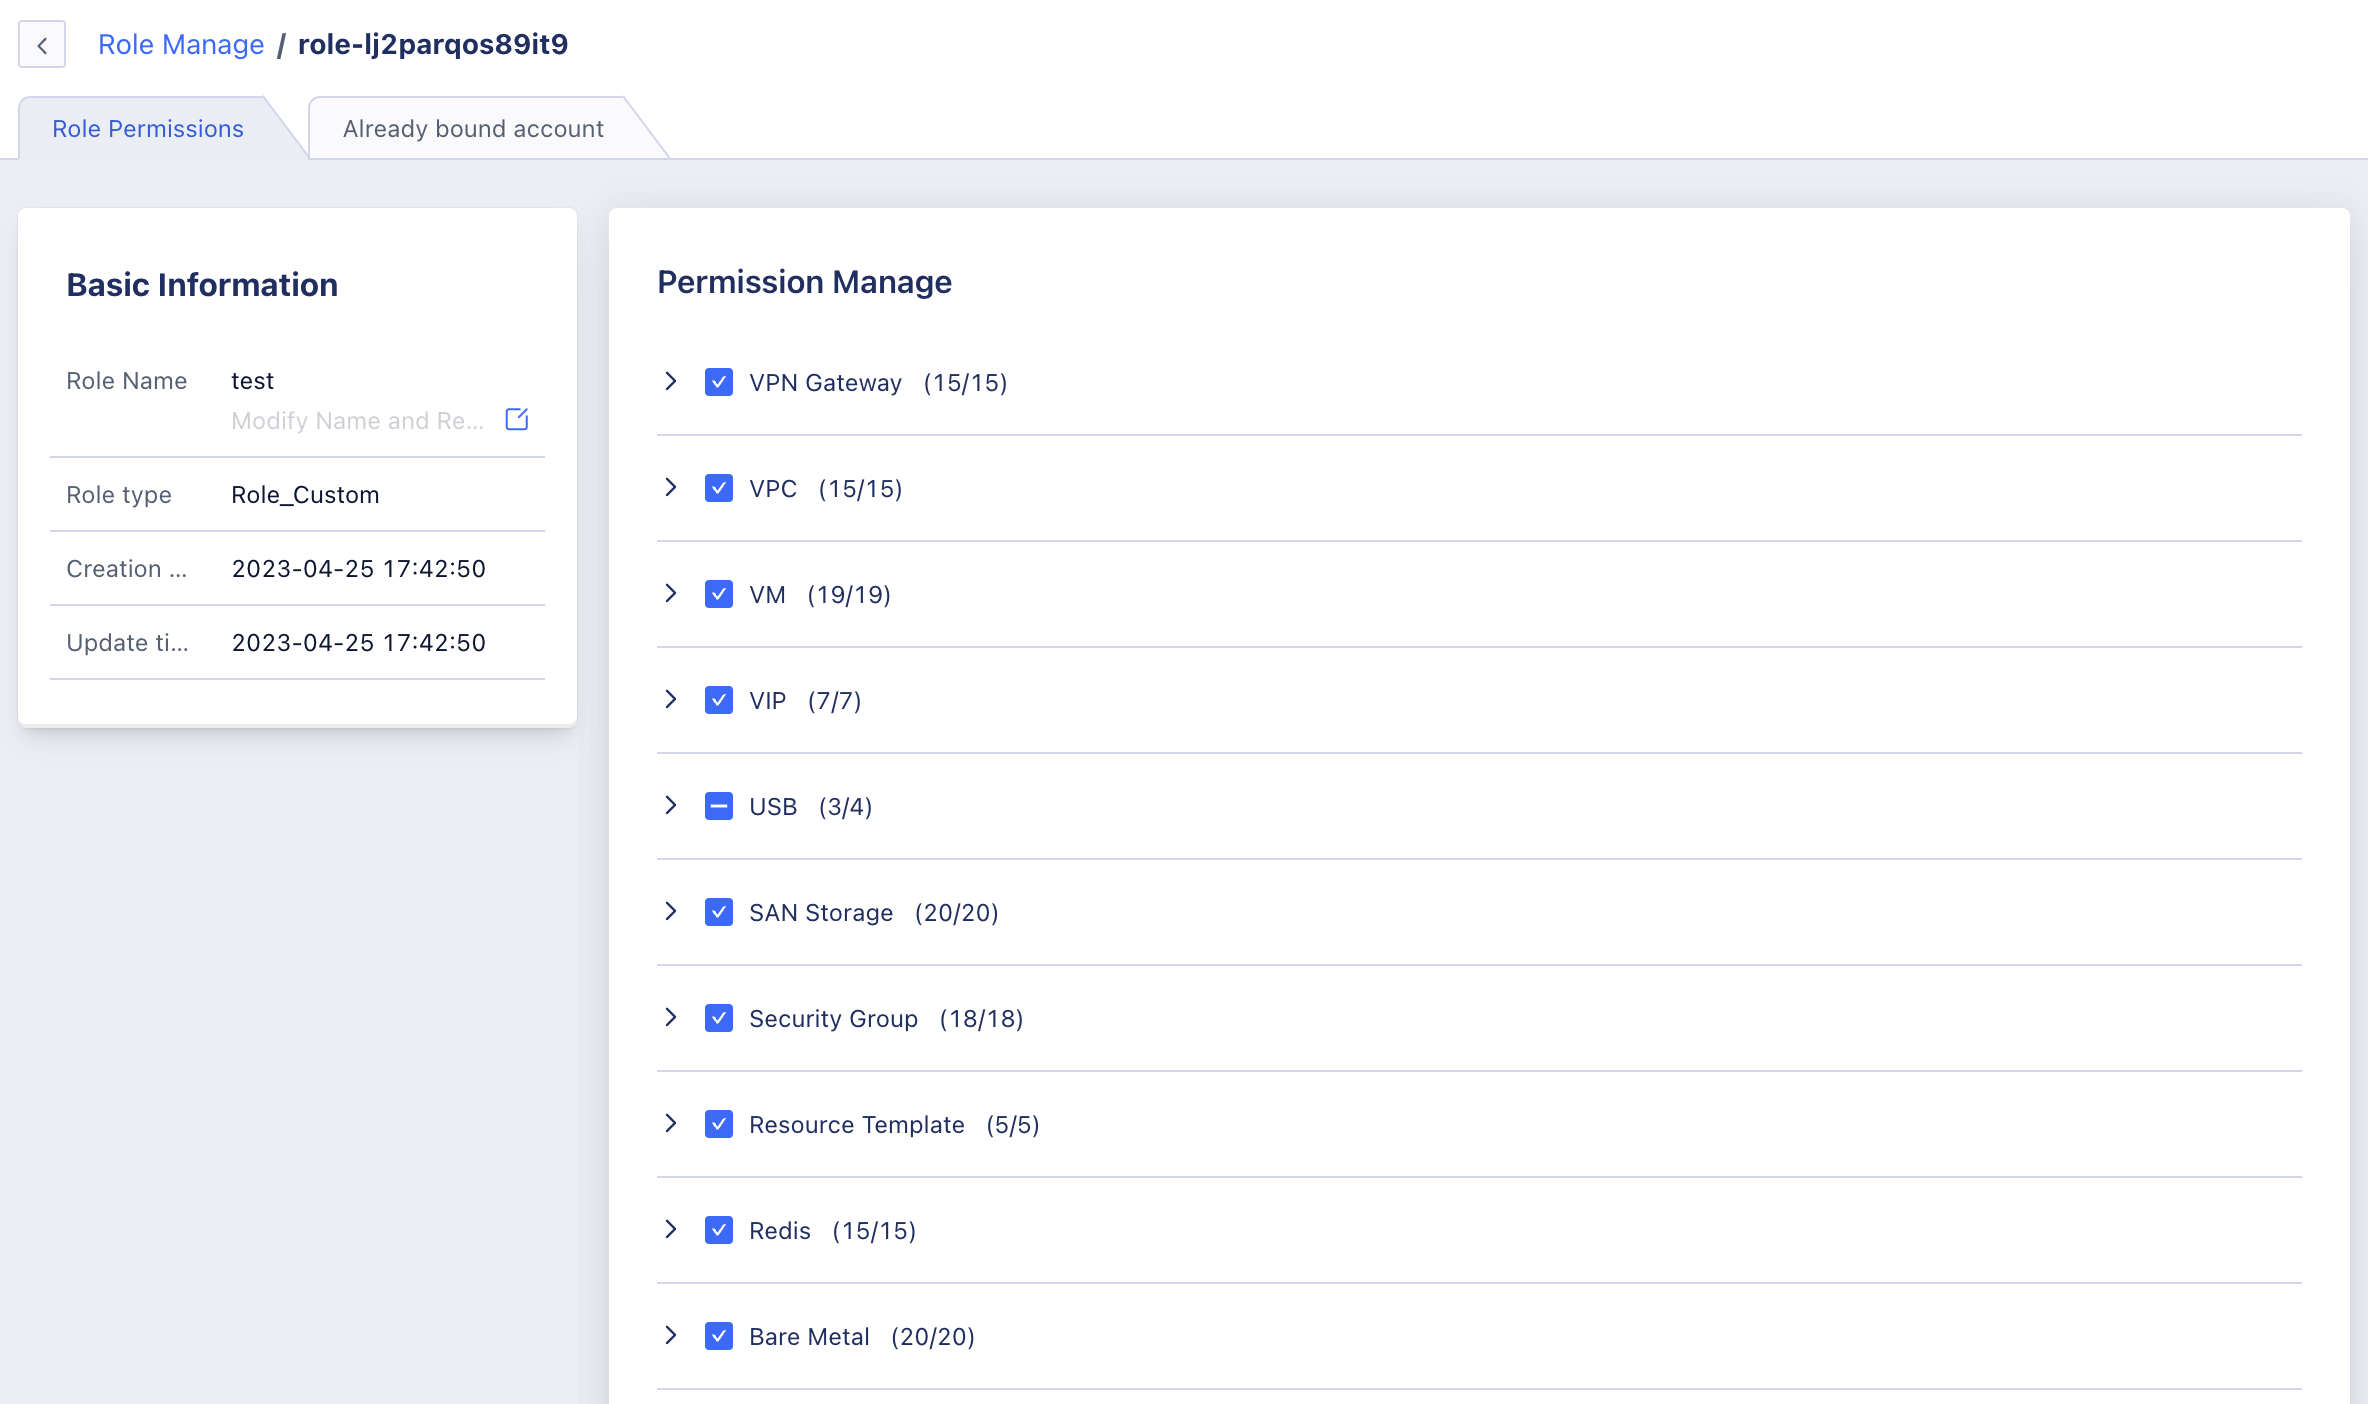
You can edit, modify the name and remark, delete, view the role details, and view the authorization record of the role.
Click to enter the details page to view and update the set of permissions for the role, and update the authorization of any permission under each product category.
After updating the set of permissions for the role authorization, the users authorized with this role will also have their permissions updated within the scope of authorization.
21.5 Personnel Management
It is suggested to create and manage accounts under the organization cautiously, and add proper role authorization to the accounts to prevent the expansion of permissions, resulting in chaos in resource management and affecting the security of enterprise IT resource usage. It is also supported to manage all accounts under the tenant through personnel management.
22.3.1 Create Sub-Accounts
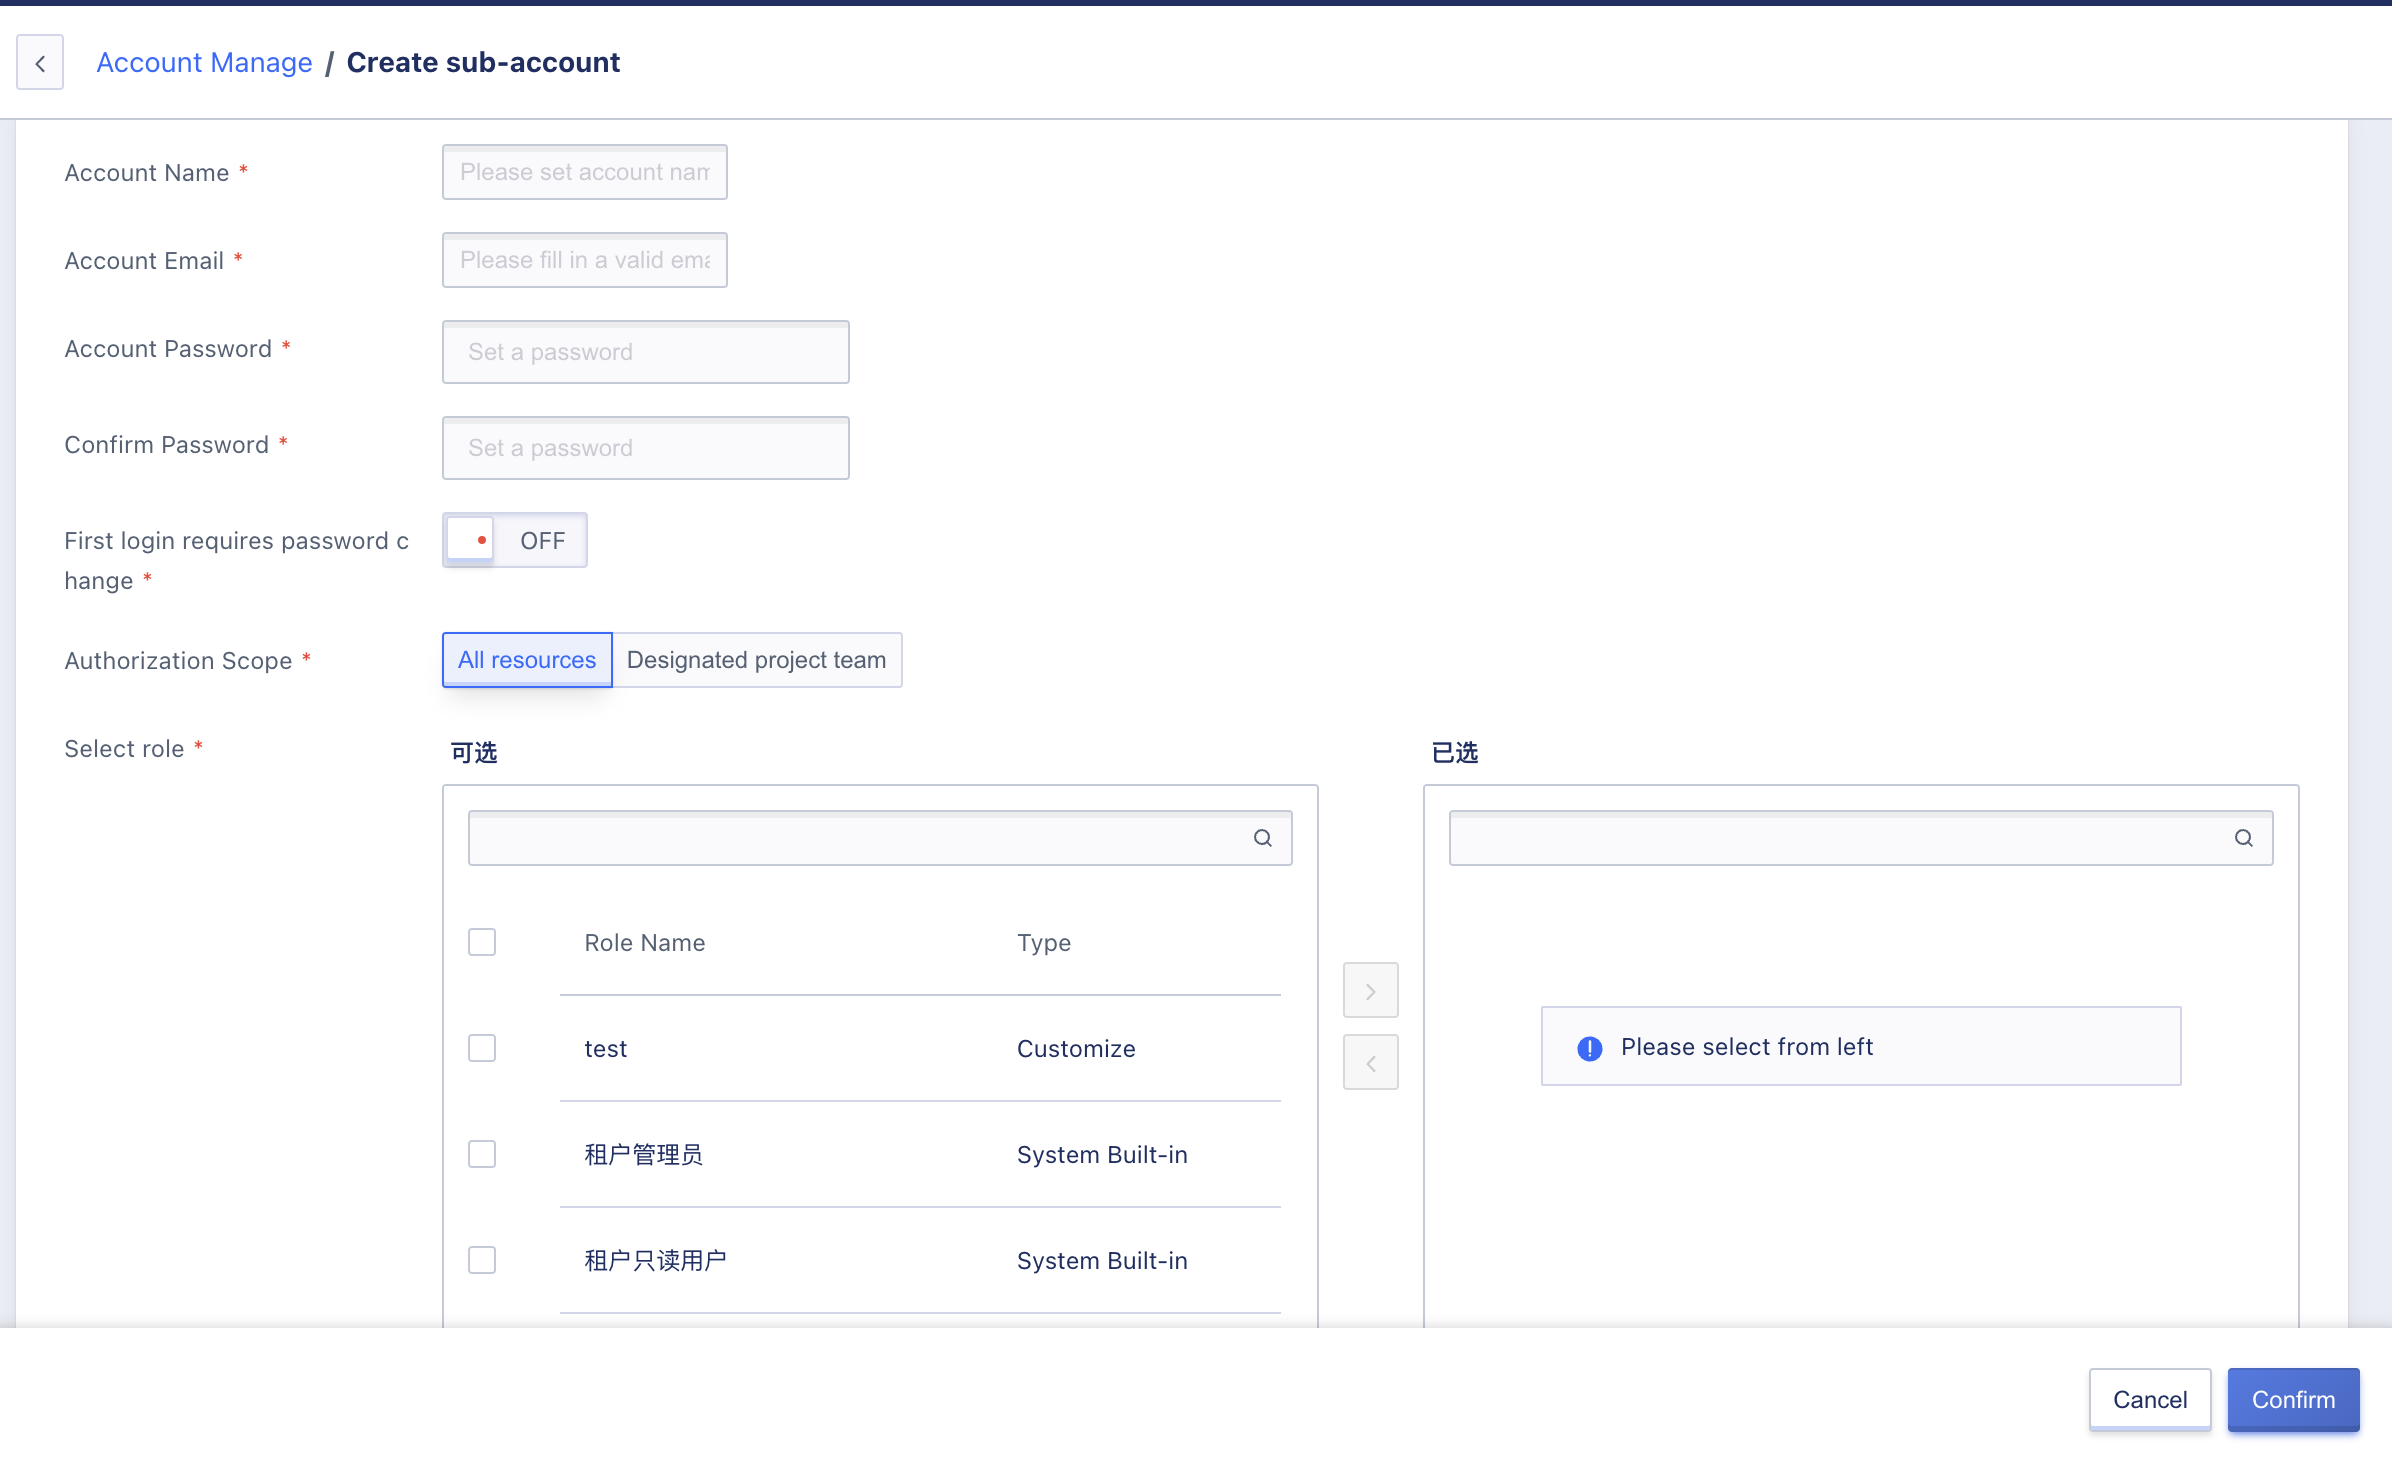
Accounts with the permission to create sub-accounts can create sub-accounts on the Account and Organization Management/Personnel Management page. To create a sub-account, the following parameters need to be entered:
- Account Name: Assign a distinctive name to the account
- Email: The electronic email address of the account, must be a valid email address.
- Password/Confirm Password: The login password for the new sub-account, the password must contain two types of uppercase and lowercase letters, numbers, and symbols, and the password length is 6-64 characters.
- Force change password on first login: Set whether the account requires a forced password change on the first login.
- Authorization scope: You can choose to authorize all project group resources/specified project group resources for sub-accounts. When the resources have no project group
- Roles: Grant appropriate roles to sub-accounts within the authorization scope, supporting the simultaneous authorization of multiple roles, and the effective permissions are the set of operations allowed by multiple roles.
It is suggested to group resources and configure the roles that need to be authorized for the sub-account before creating the sub-account. If custom roles do not need to be authorized, the built-in roles can be used directly.
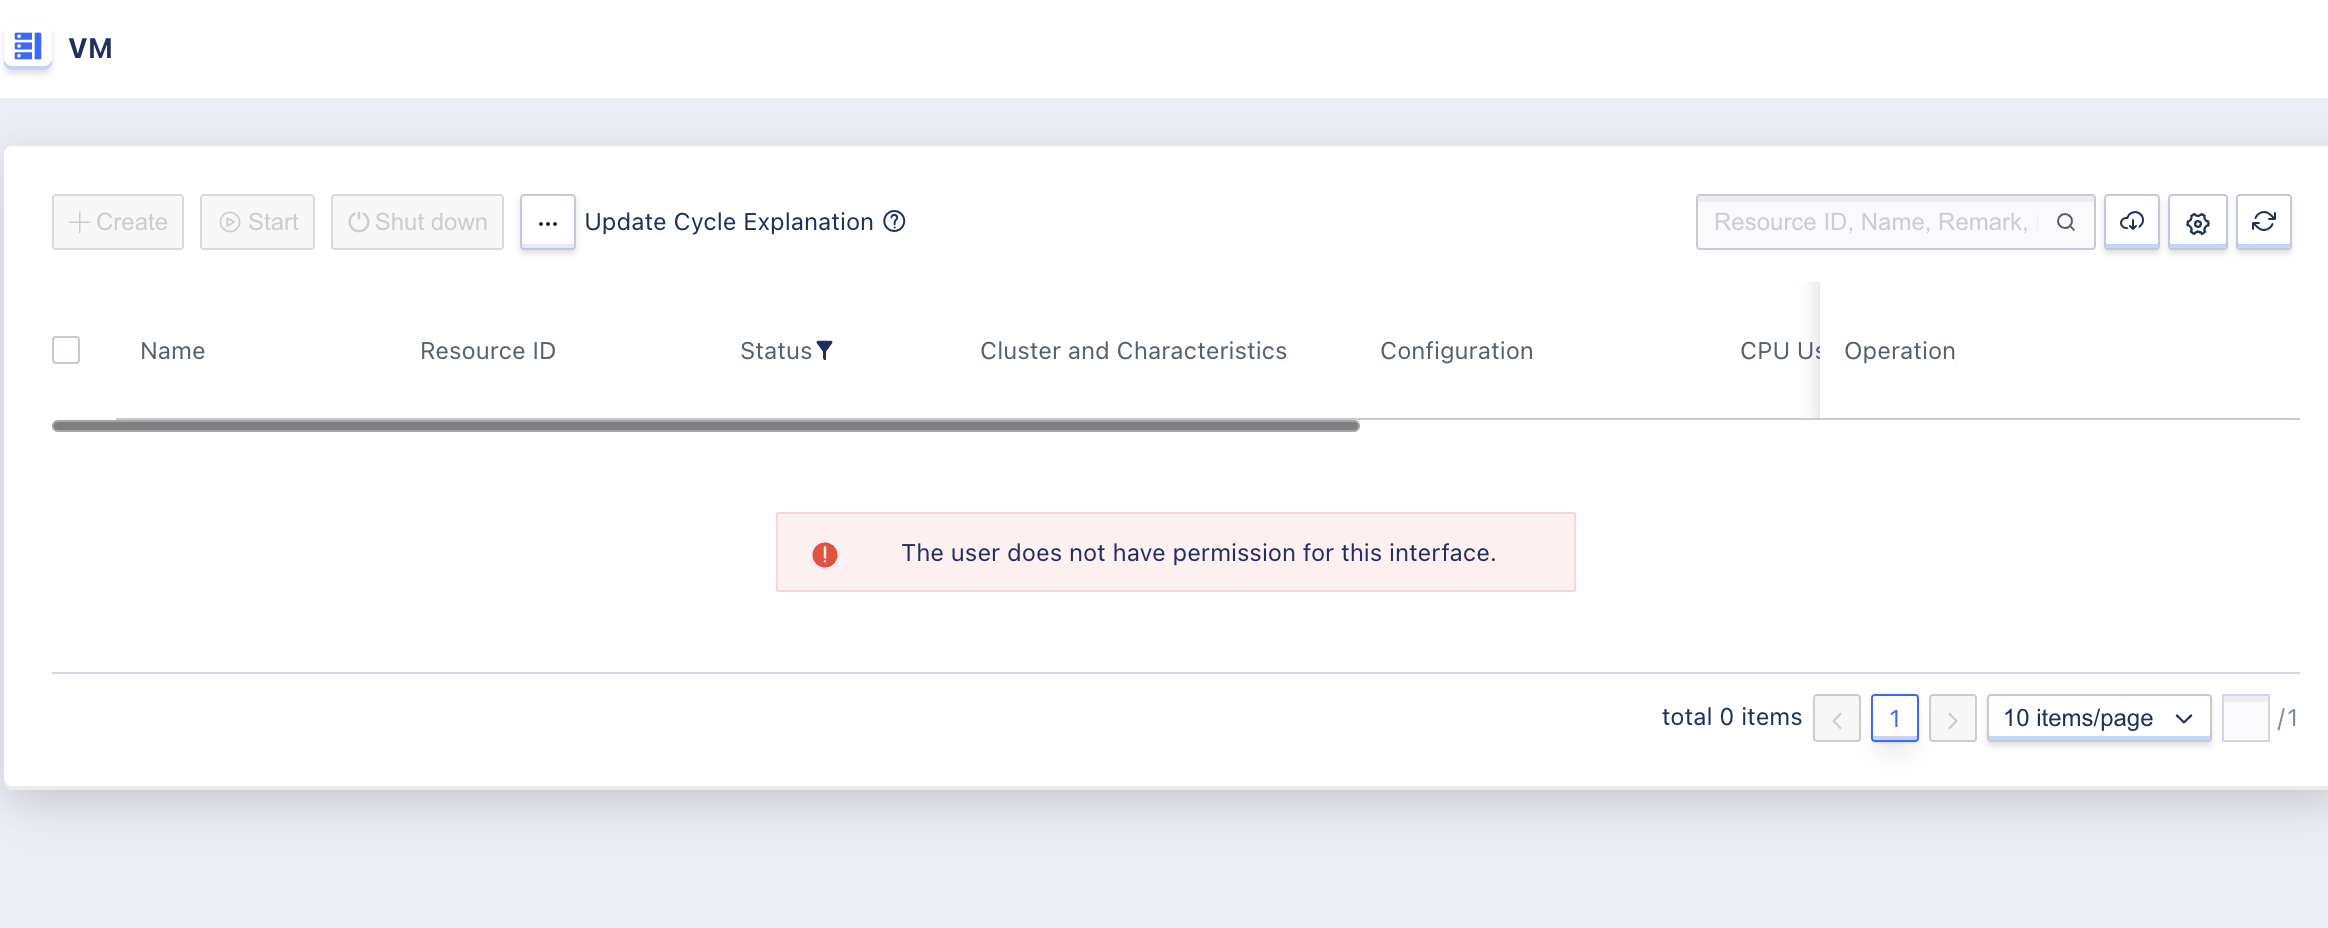
After a user logs in with a sub-account, they can view all operations normally. When performing related operations, a prompt of “Insufficient Permissions” will appear. For example, if a user is not authorized to view the virtual machine’s permissions, they will see the following prompt in the virtual machine list.
22.3.2 View account list
You can view the list and details of all accounts under the tenant in the personnel management interface. There is a default main account under the tenant, and there can be multiple sub-accounts. The list parameters are as follows:
- Account ID: The unique identifier of the current account on the cloud platform globally.
- Account Name: Name of the current account.
- Email: The login email address of the current account.
- Type: Identify if the account is the main account or a sub-account.
- Status: The current status of the account, including in use, frozen, and deleted.
- Logged-in users can access the console and use and manage resources.
- Users who are frozen cannot log in to the console and are prohibited from using and managing resources.
- Operation items: Operation items for individual accounts, including viewing details, freezing and unfreezing, adding role authorization, and deleting.
22.3.2.2 Subaccount Details
The sub-account detail page can view basic information and role authorization records, and manage the role authorization of the sub-account.
- Basic information: The basic information of the current sub-account, including ID, role, account email and creation time, update time;
- Role Management: Manage role authorization of sub-accounts, including adding new role authorization and removing existing authorized roles.
22.3.3 Freeze account
Freezing an account refers to locking an account, and after freezing, it will not be allowed to log in to the console. Only accounts with a status of “In Use” can be frozen, and users can click “Freeze” in the operation item of the account list to freeze the account.
Platform administrators can freeze tenants, after which the main account and all sub-accounts are frozen.
22.3.4 Unfreeze account
Unfreezing an account refers to unfreezing an already frozen account, and users who have been successfully unfrozen can log in to the management console. Only accounts with a status of “Frozen” can be unfrozen, and users can click “Unfreeze” in the sub-account list operation item to unfreeze the sub-account.
22.3.4 Delete Account
You can delete the account, and after deletion, the user will not be able to log in to the platform with this account and password. After deletion, you can register on the platform with the account email or create a new account.