15. Highly Available VIP
15.1 Introduction to Highly Available VIP
15.1.1 Overview
Highly Available Virtual IP Address (HAVIP) is a floating private IP address belonging to a subnet within a VPC. Users can combine HAVIP with high availability services to achieve service high availability by drifting the service entrance when a service fails.
15.1.2 Working Principle
As a floating IP that is not bound to a specific device, HAVIP is usually used in conjunction with high availability software (keepalived, heartbeat, Failover Cluster) to build a high availability active-standby cluster, such as HA load balancing and primary-secondary database. Here we take keepalived as an example to introduce the working principle of HAVIP.
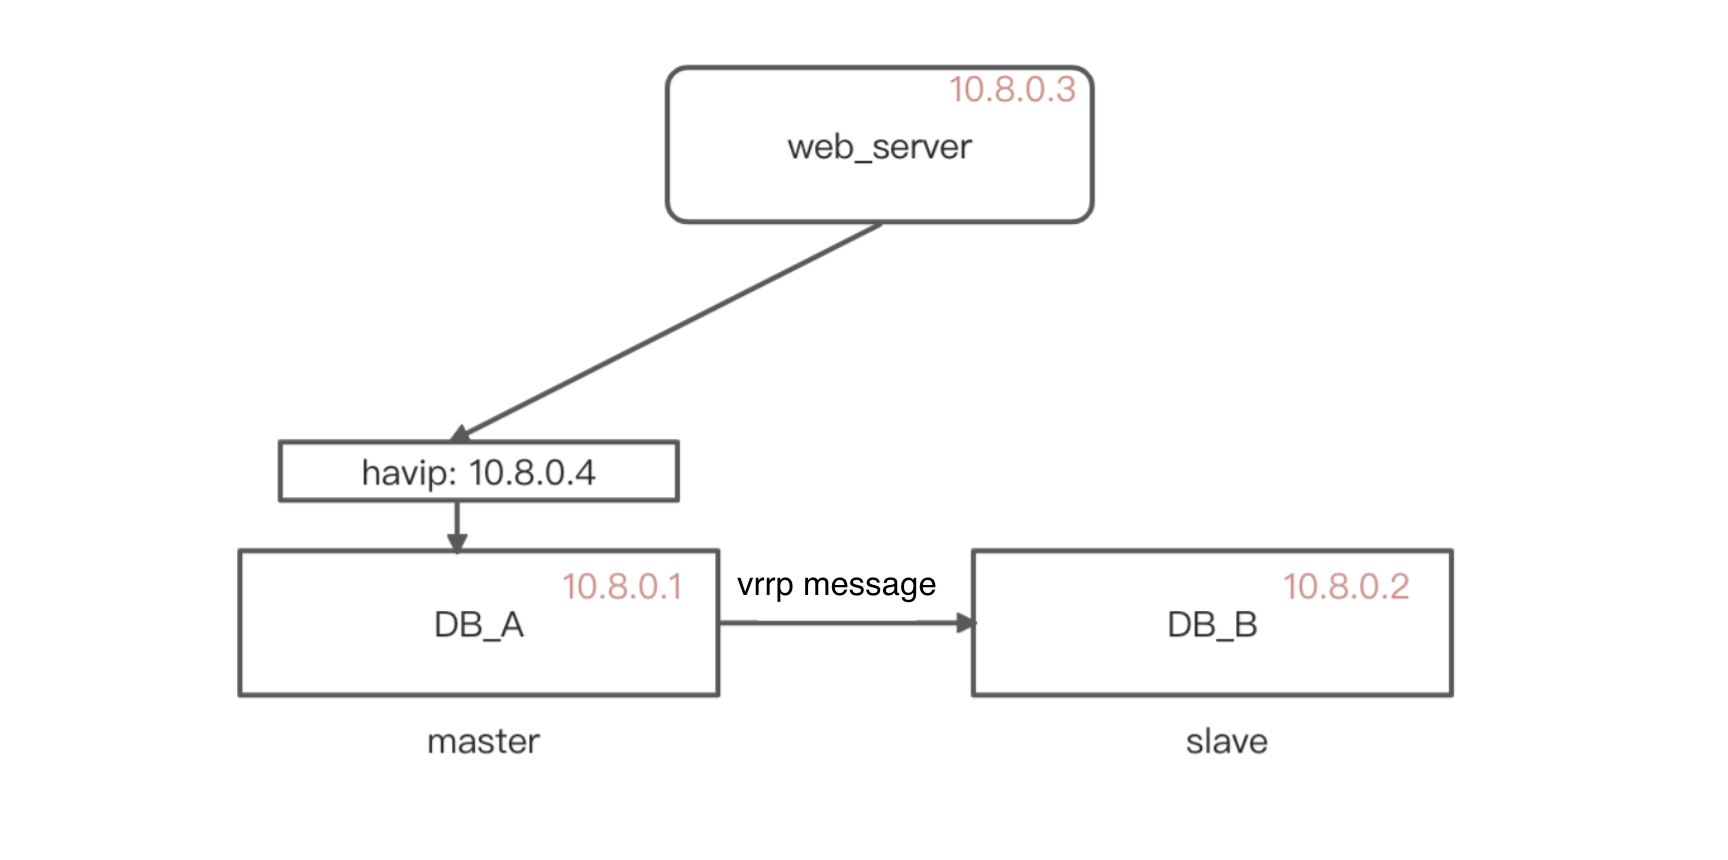
- Both master and slave install keepalived and configure the HAVIP obtained from the console as the VRRP VIP, setting priority values respectively.
- The VRRP protocol in Keepalived compares the initial priority sizes of the two virtual machines to elect the master server.
- The master server sends an ARP packet to declare the VIP and update the mapping of VIP and MAC address (arp cache).
- At this time, the server that actually provides services to the outside world is the master server, and the internal network IP that communicates is HAVIP.
- The master server periodically sends VRRP packets to the slave server. If the master server is abnormal and the backup server does not receive the VRRP packet within a certain period of time, it will set itself as the master and update the ARP (GARP) to the outside with its MAC address.
- At this time, the slave server will provide communication services to the outside world as the master server, and the packets accessed from the outside will be forwarded to the slave for processing until the real server is switched.
15.2 Applying for Highly Available VIP
Cloud platform users can create HAVIP for high availability services through the API interface or console. Before creating HAVIP, users need to ensure that their accounts have at least one VPC network and subnet. Navigate to the virtual machine console through the navigation bar, switch to the “VIP” management page, and click the “Create” button to enter the HAVIP creation wizard popup window. The following is a diagram of creating HAVIP:

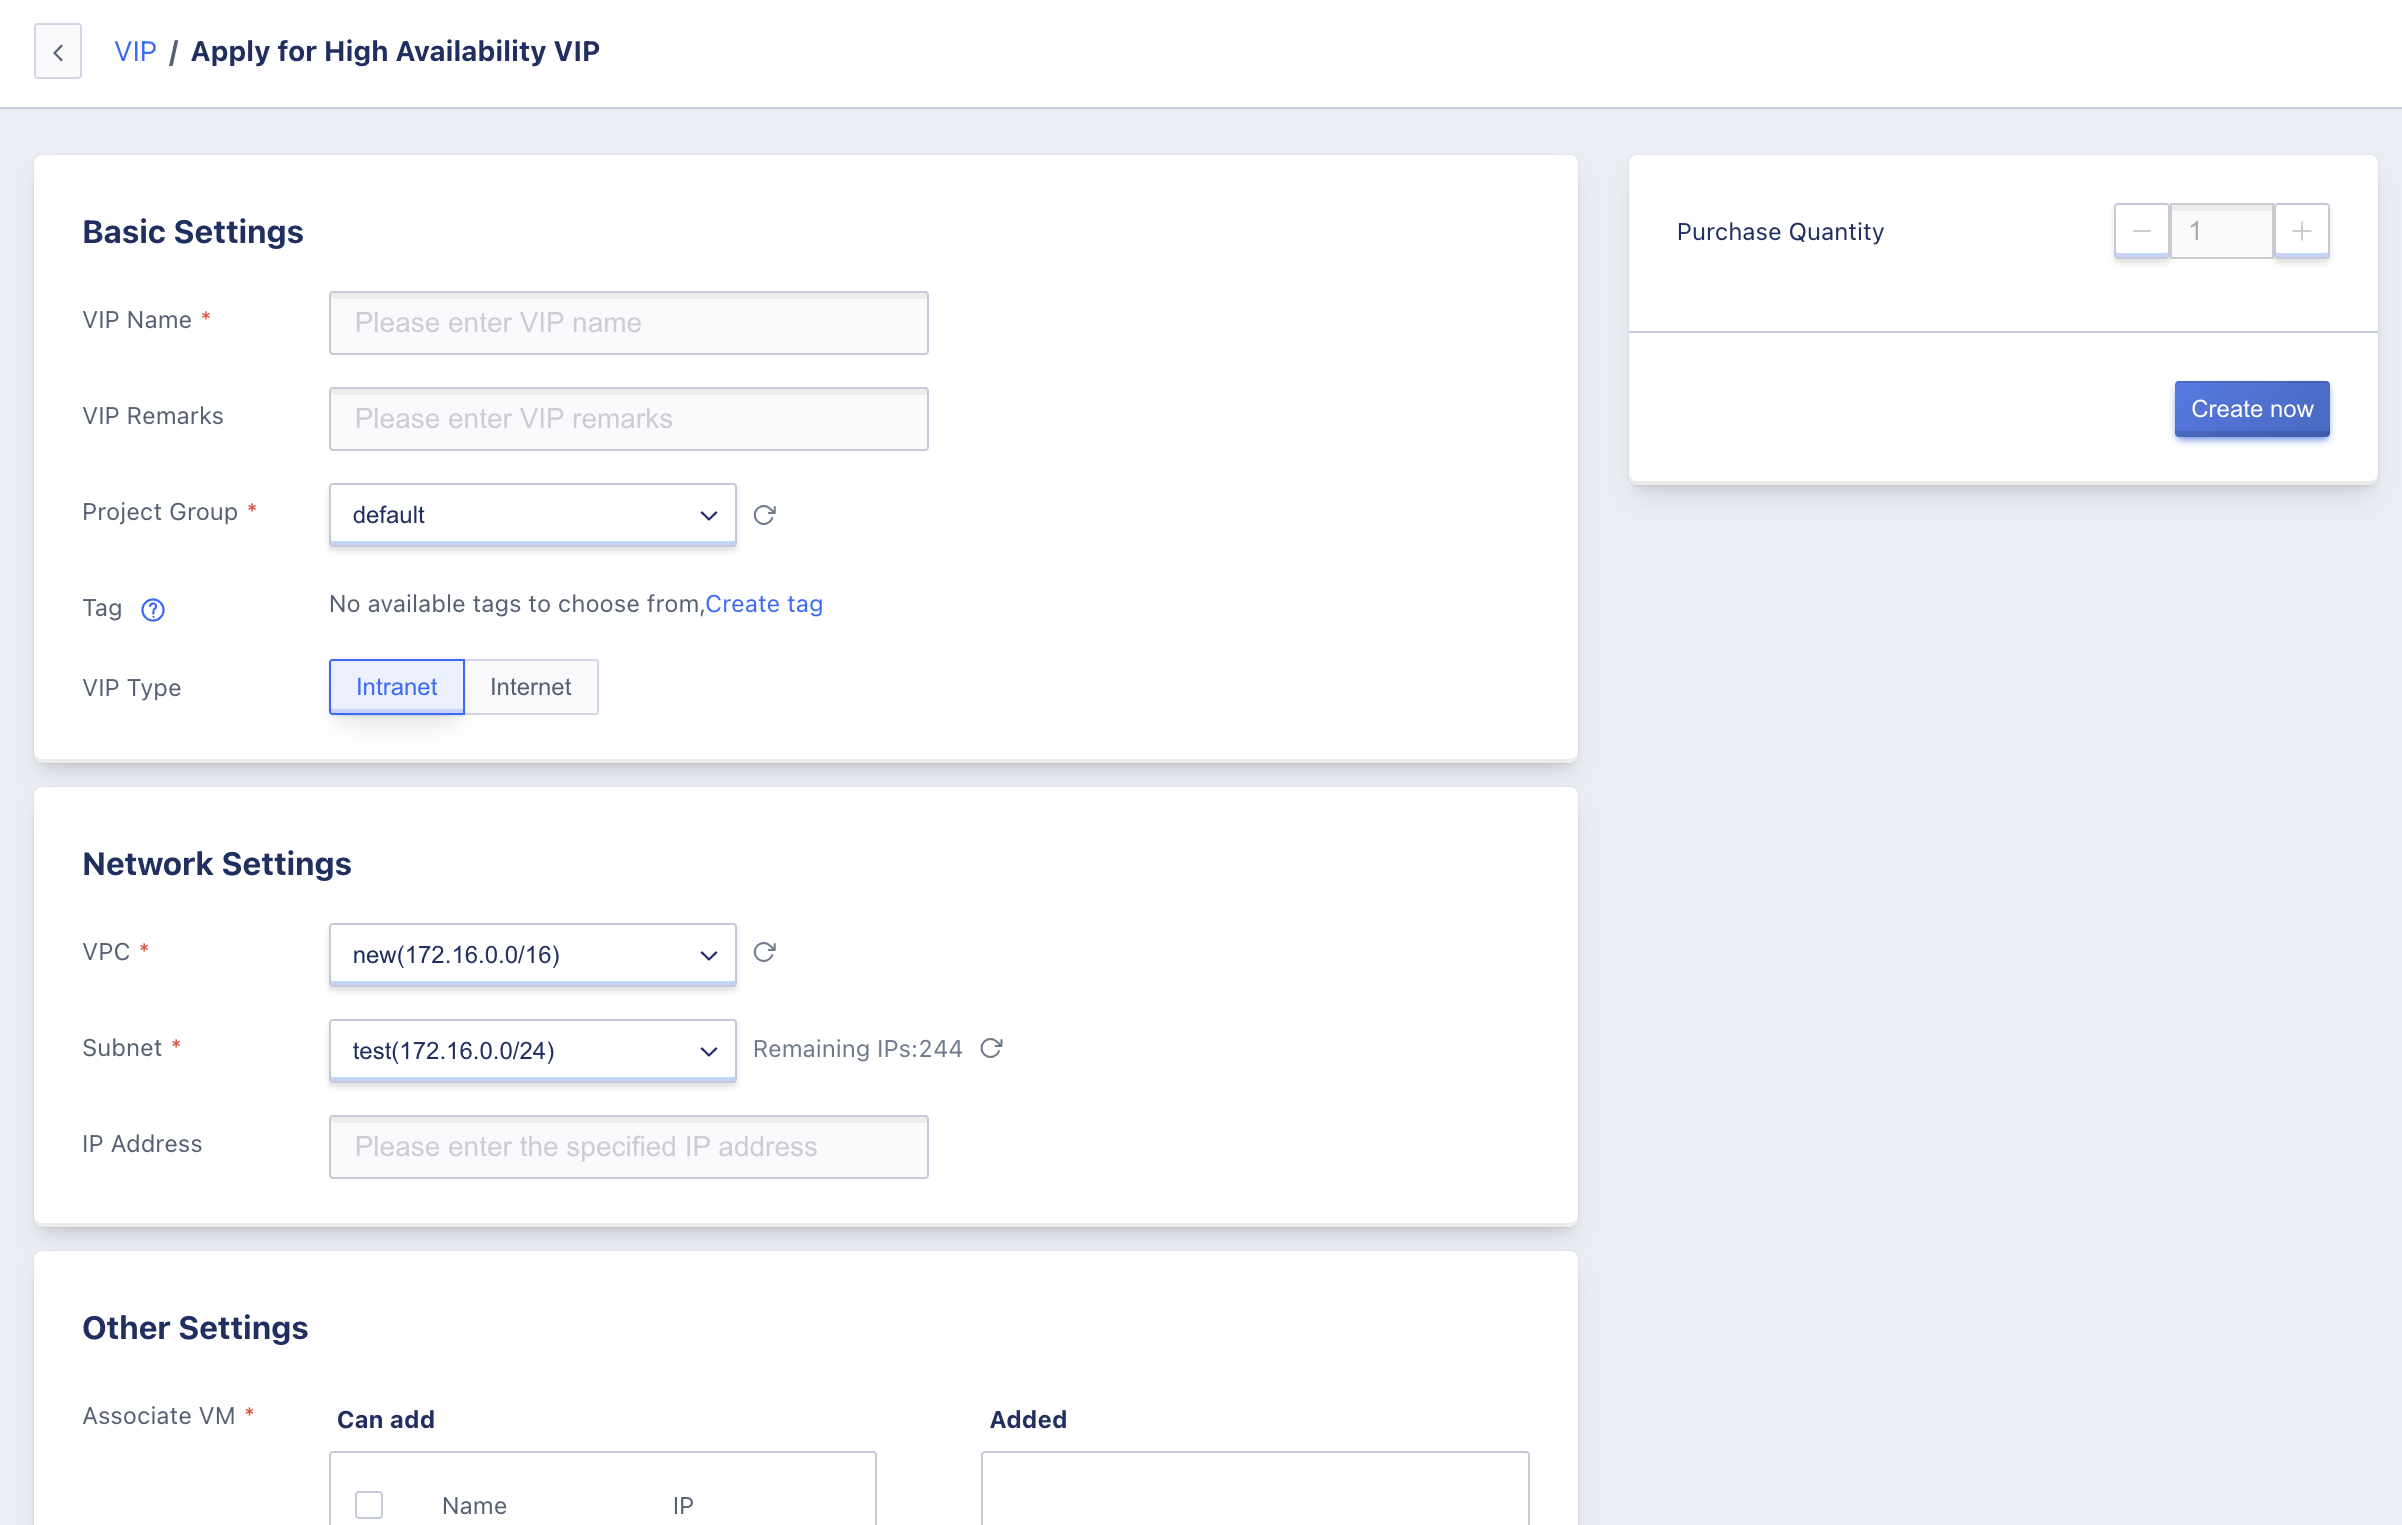
- Name/Remark: the name and description of the HAVIP to be applied for, and the name must be specified during application.
- VIP type: internal and external network
- Network setting: the network to which HAVIP belongs must be specified when creating.
- IP address: the user manually specifies the IP address to apply for HAVIP, and the specified IP address must be within the IP range of the selected subnet.
- Associated virtual machine: users can choose the virtual machines under the VPC and bind HAVIP.
- Only up to 3 virtual machines can be bound to a single VIP.
- A virtual machine can only bind up to five VIPs.
- Confirm creation: after clicking “Confirm”, the HAVIP resource list page will be returned. On the list page, users can view the resource status of HAVIP, which usually displays the “Available” status after successful creation. If the creation fails due to some reasons, it will display the “Failed” status.
15.3 Viewing Highly Available VIP
Navigate to the virtual machine console through the navigation bar, switch to the VIP management page to view the list of HAVIP
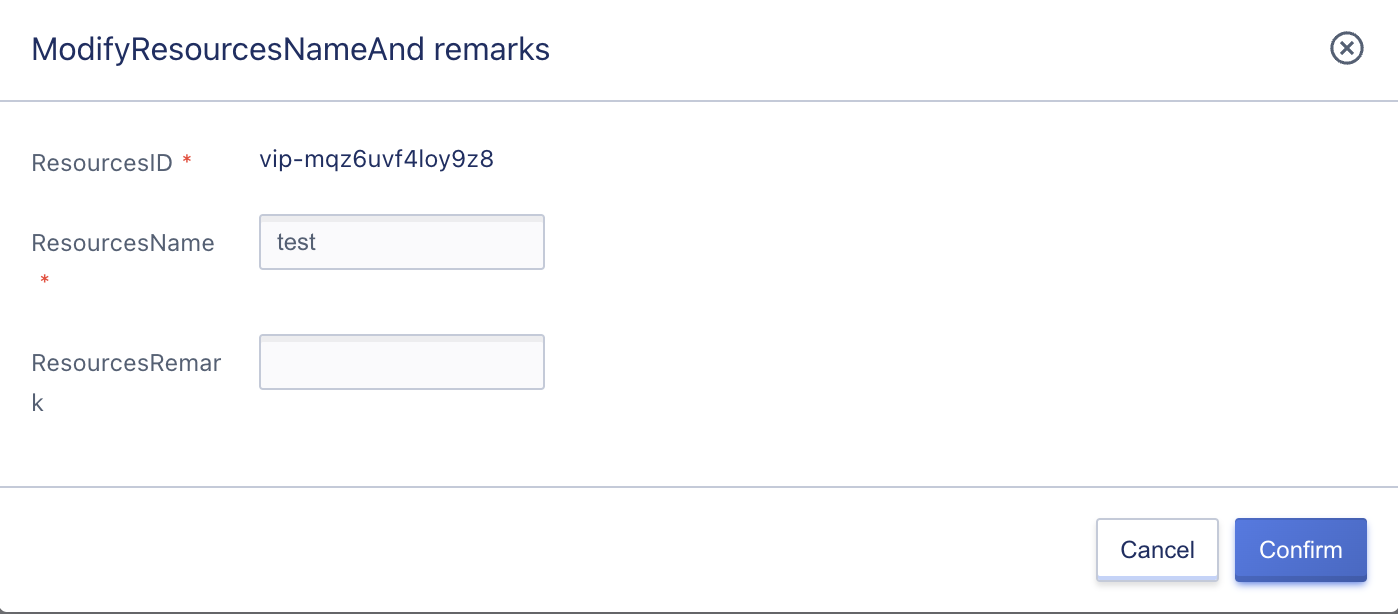
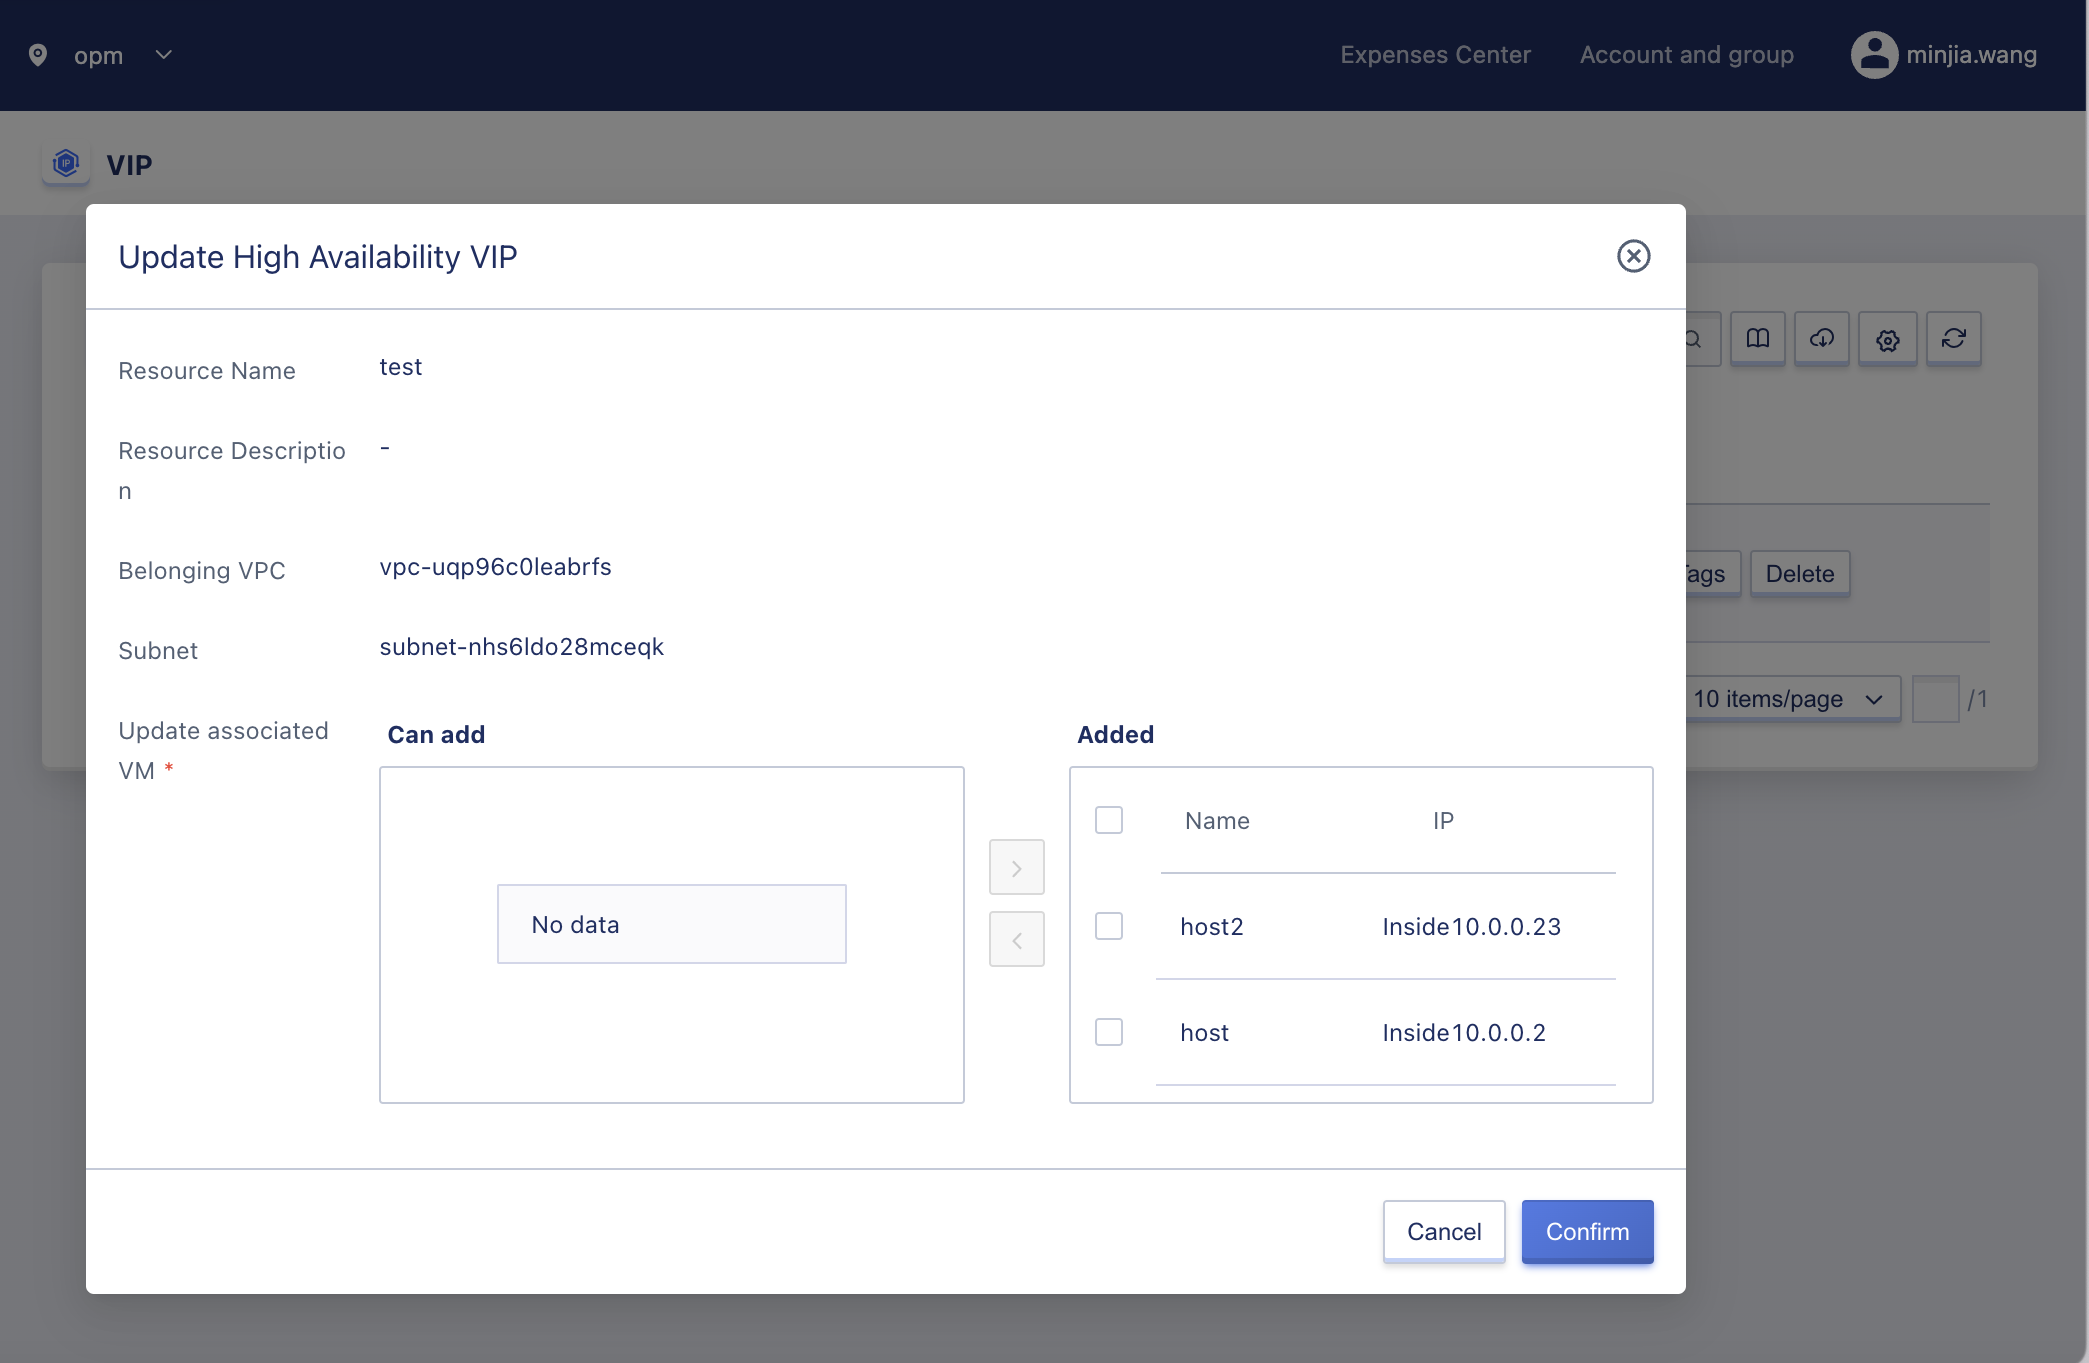
15.4 Update High Availability VIP
Rename and modify the remark of the HAVIP. Operations can be performed in any state. You can modify it by clicking the “Edit” button next to each HAVIP name on the VIP list page. To update the associated virtual machines, you can replace, delete, or add virtual machines. The number of associated virtual machines cannot exceed 3. The following figures show the process:
15.5 Delete High Availability VIP
Users can delete high availability VIP resources, including those in “available” and “failed” states. After deleting the elastic network interface, the associated virtual machines will be automatically unbound. Users can delete high availability VIPs through the VIP list, and batch deletion is supported.

15.6 Use External Network VIP
- Check whether the version number of the
keepalivedsoftware package meets the requirements.
yum list keepalived
- Install the software package using yum.
yum install -y keepalived
- Configure keepalived to bind the high availability VIP to the primary and backup cloud servers. Log in to the primary node cloud server HAVIP-01, execute
vim /etc/keepalived/keepalived.conf, and modify the relevant configuration.
! Configuration File for keepalived
global_defs {
   router_id LVS_DEVEL
   vrrp_skip_check_adv_addr
   vrrp_garp_interval 0
   vrrp_gna_interval 0
}
vrrp_script checkhaproxy
{
    script "/etc/keepalived/do_sth.sh"
     interval 5
}
vrrp_instance VI_1 {
# Note the selection of primary and backup parameters
state BACKUP            # Set the initial state to "backup"
    interface eth0          # Set the NIC for binding VIP, such as eth0
    virtual_router_id 51    # Configure the virtual_router_id value for the cluster
    nopreempt               # Set non-preempt mode
    priority 100            # Two devices are nodes of equal weight with the same value
    advert_int 5
    authentication {
        auth_type PASS
        auth_pass 1111
    }
    unicast_src_ip 10.0.240.14  # Set the local private IP address
    unicast_peer {
        10.0.240.15             # The IP address of the peer device
        10.0.240.16
    }
    virtual_ipaddress {
        192.168.177.204/24 dev eth1    # Set the high availability virtual VIP
    }
    virtual_routes {
        0.0.0.0/0 via 192.168.177.1 dev eth1  Custom routing rule
    }
}
- Exit the editing state and enter
:wq!to save and exit. Restart thekeepalivedprocess to make the configuration effective.
systemctl restart keepalived