UHost - Cloud Host
1. How to create a new VM via SCloud console?
Step 1: Open your web browser and navigate to SCloud public cloud console at: https://passport.scloud.sg/#login
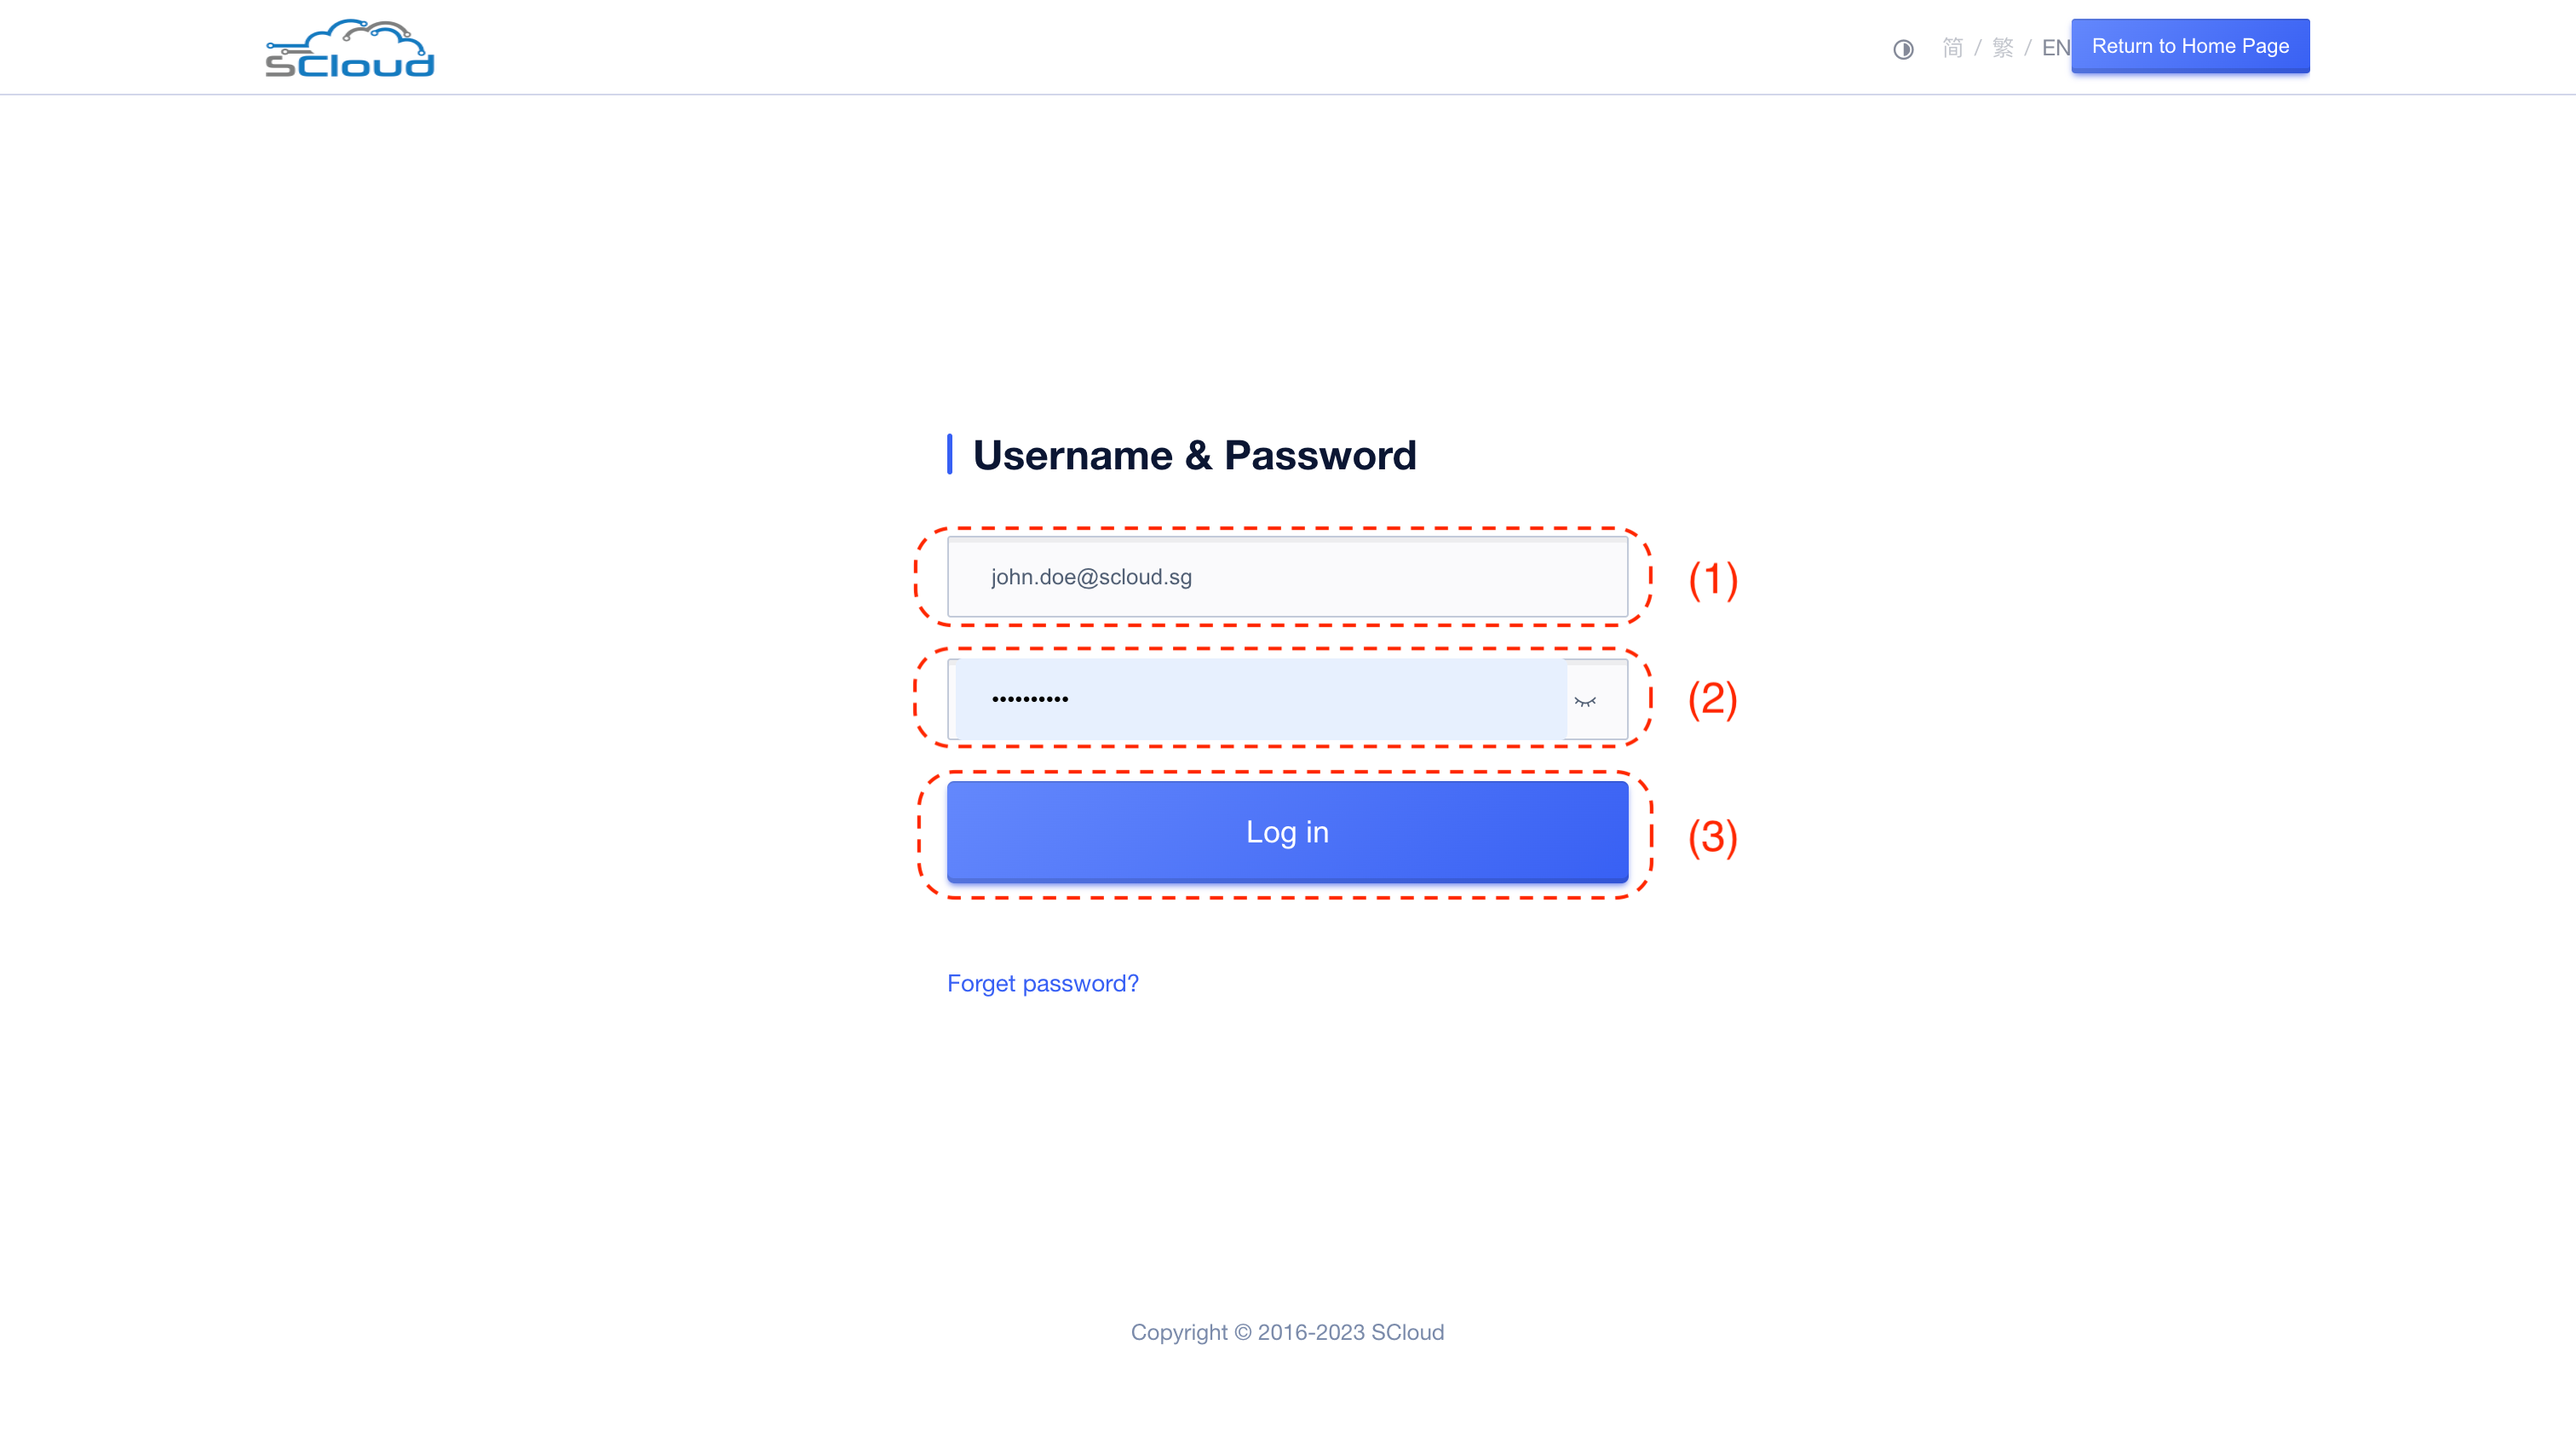
- Enter your username (email)
- Enter your password
Then click login button.
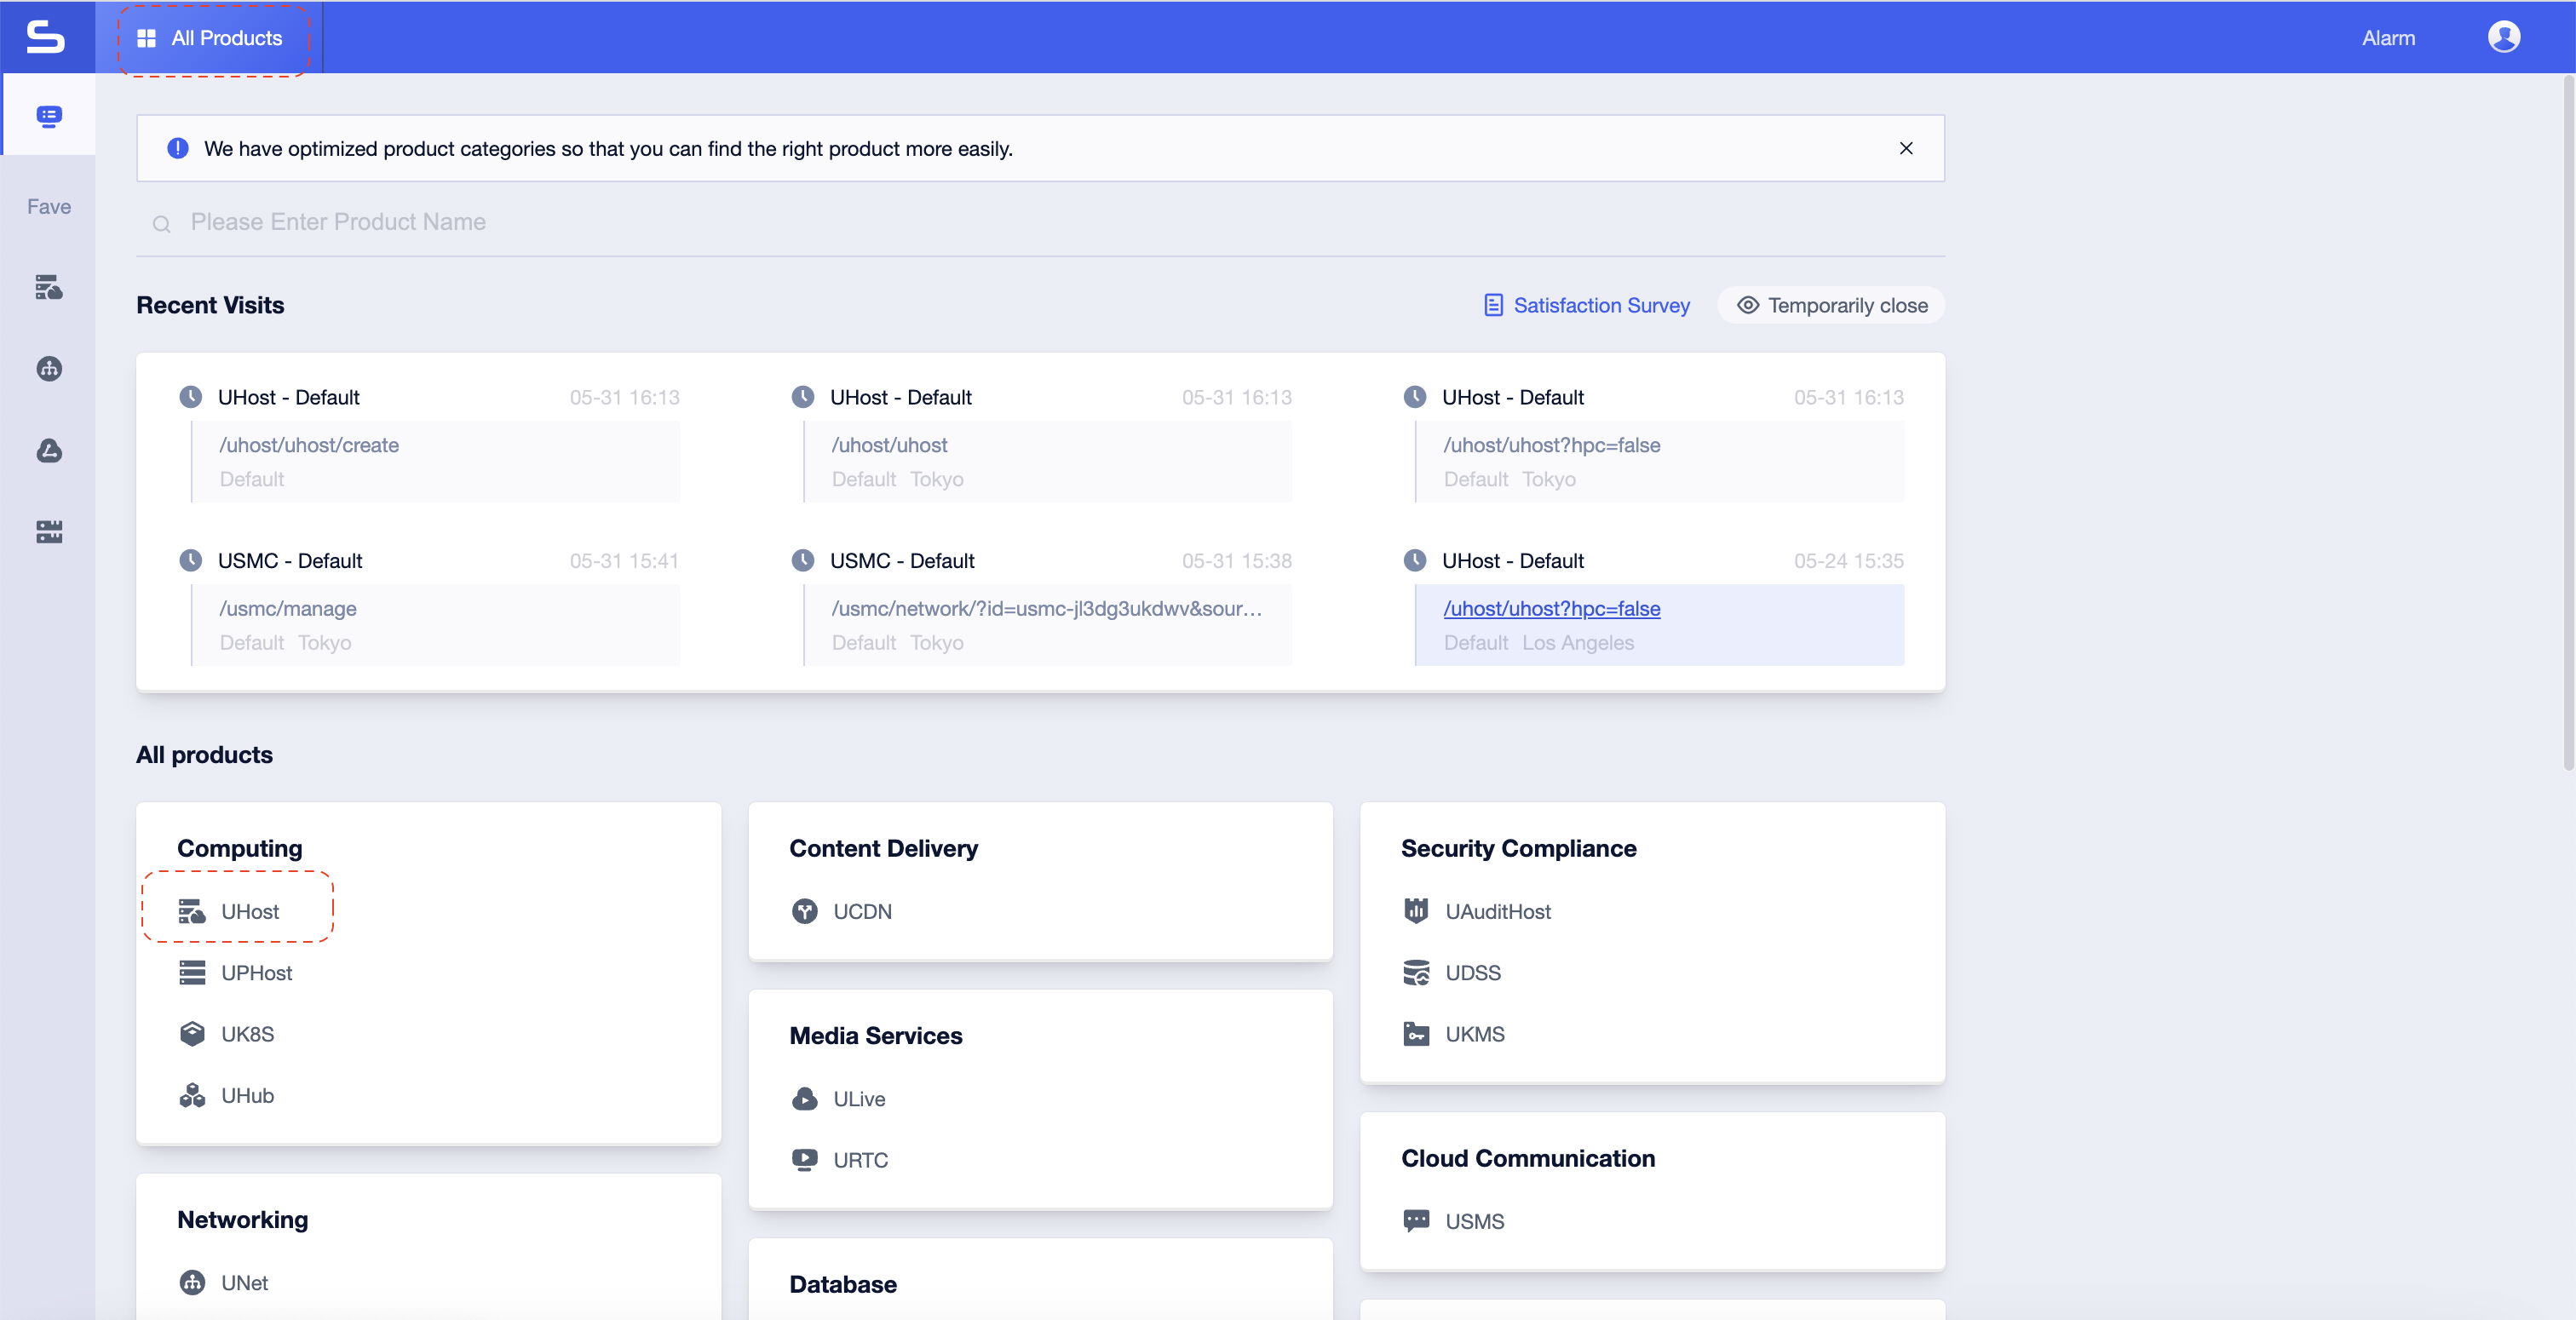
Step 2: In the console dashboard, select All Products menu, then select UHost under computing section.
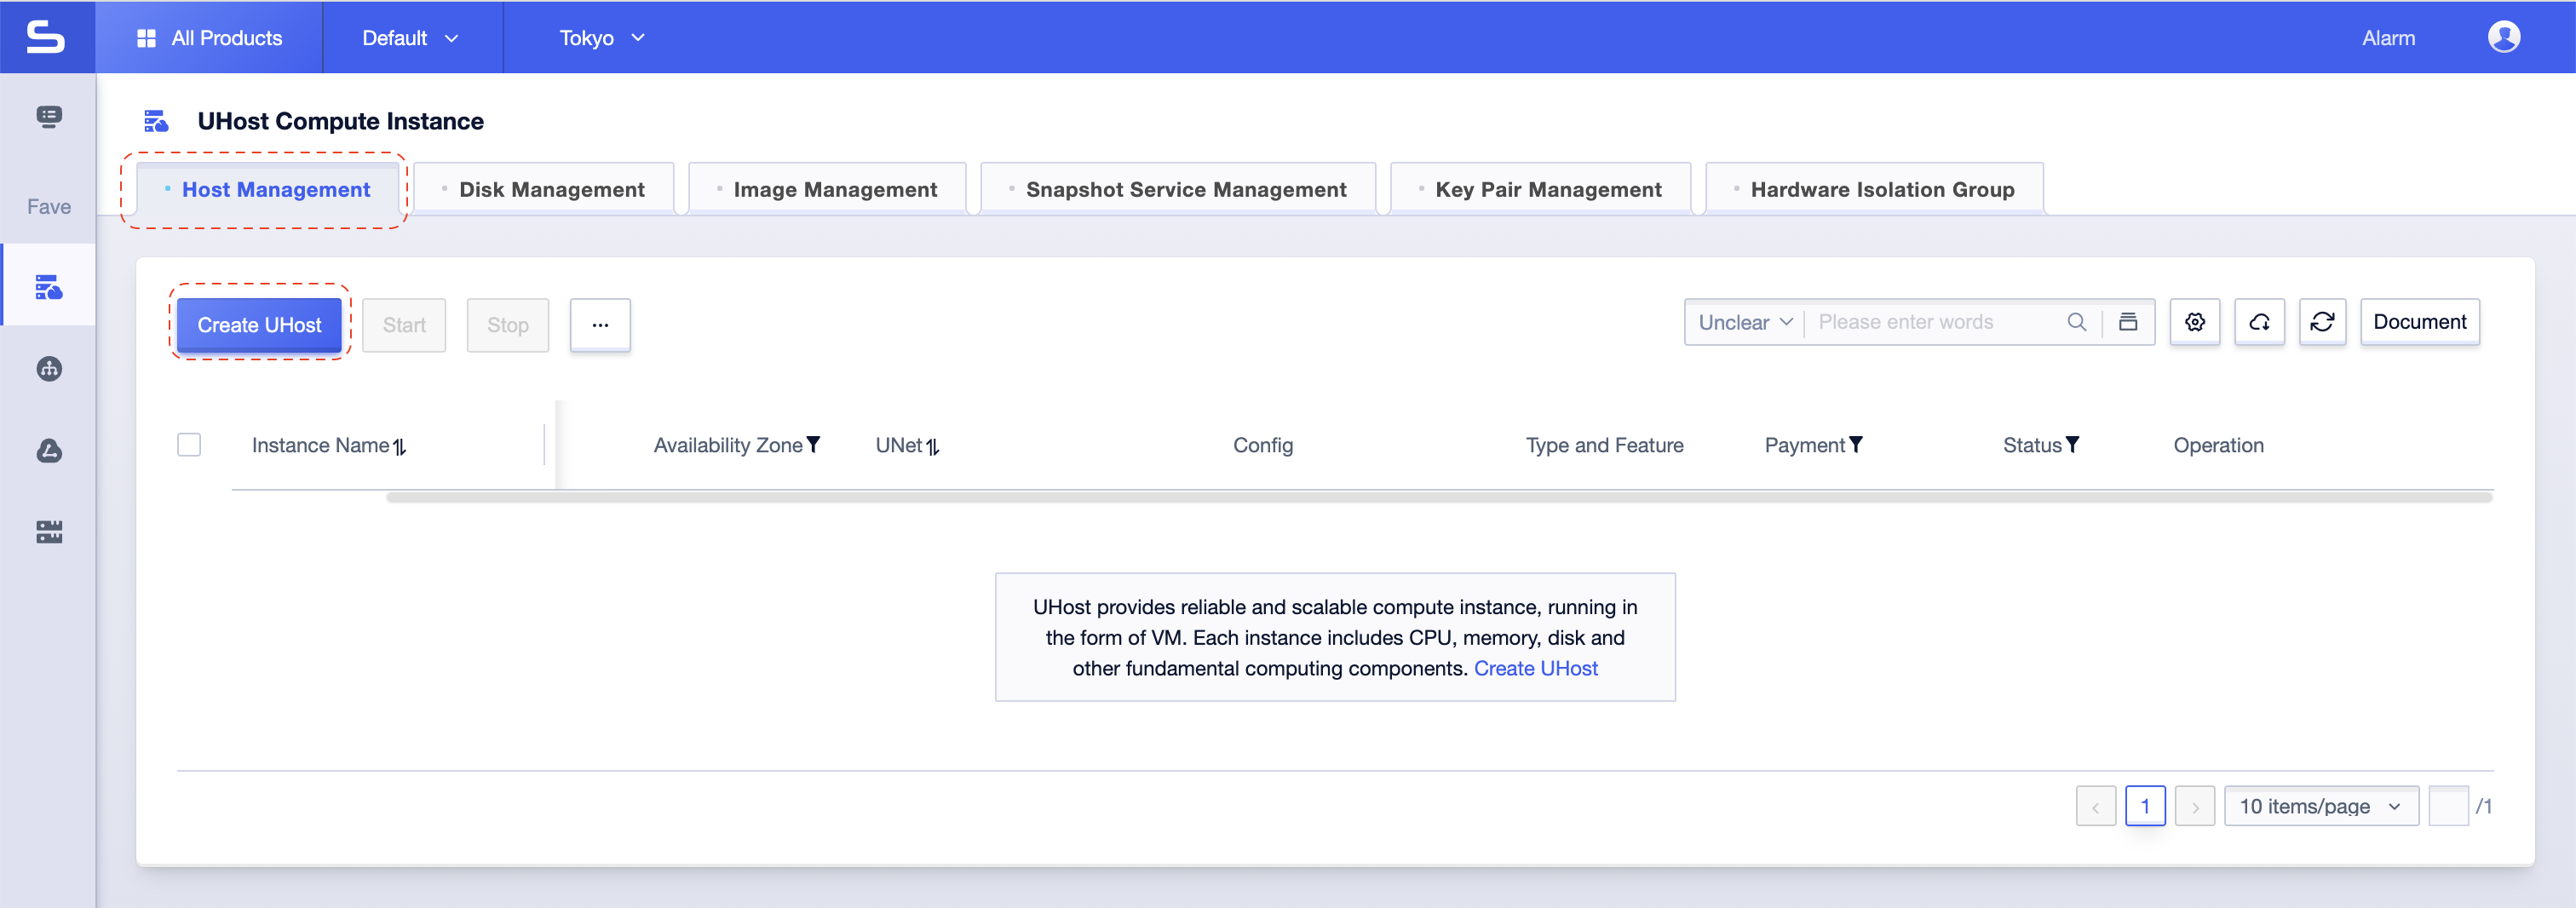
Step 3: In the UHost Compute Instance management console, click Create UHost button.
Step 4: In the UHost creation form, select Recommended Configuration and configure as below image.
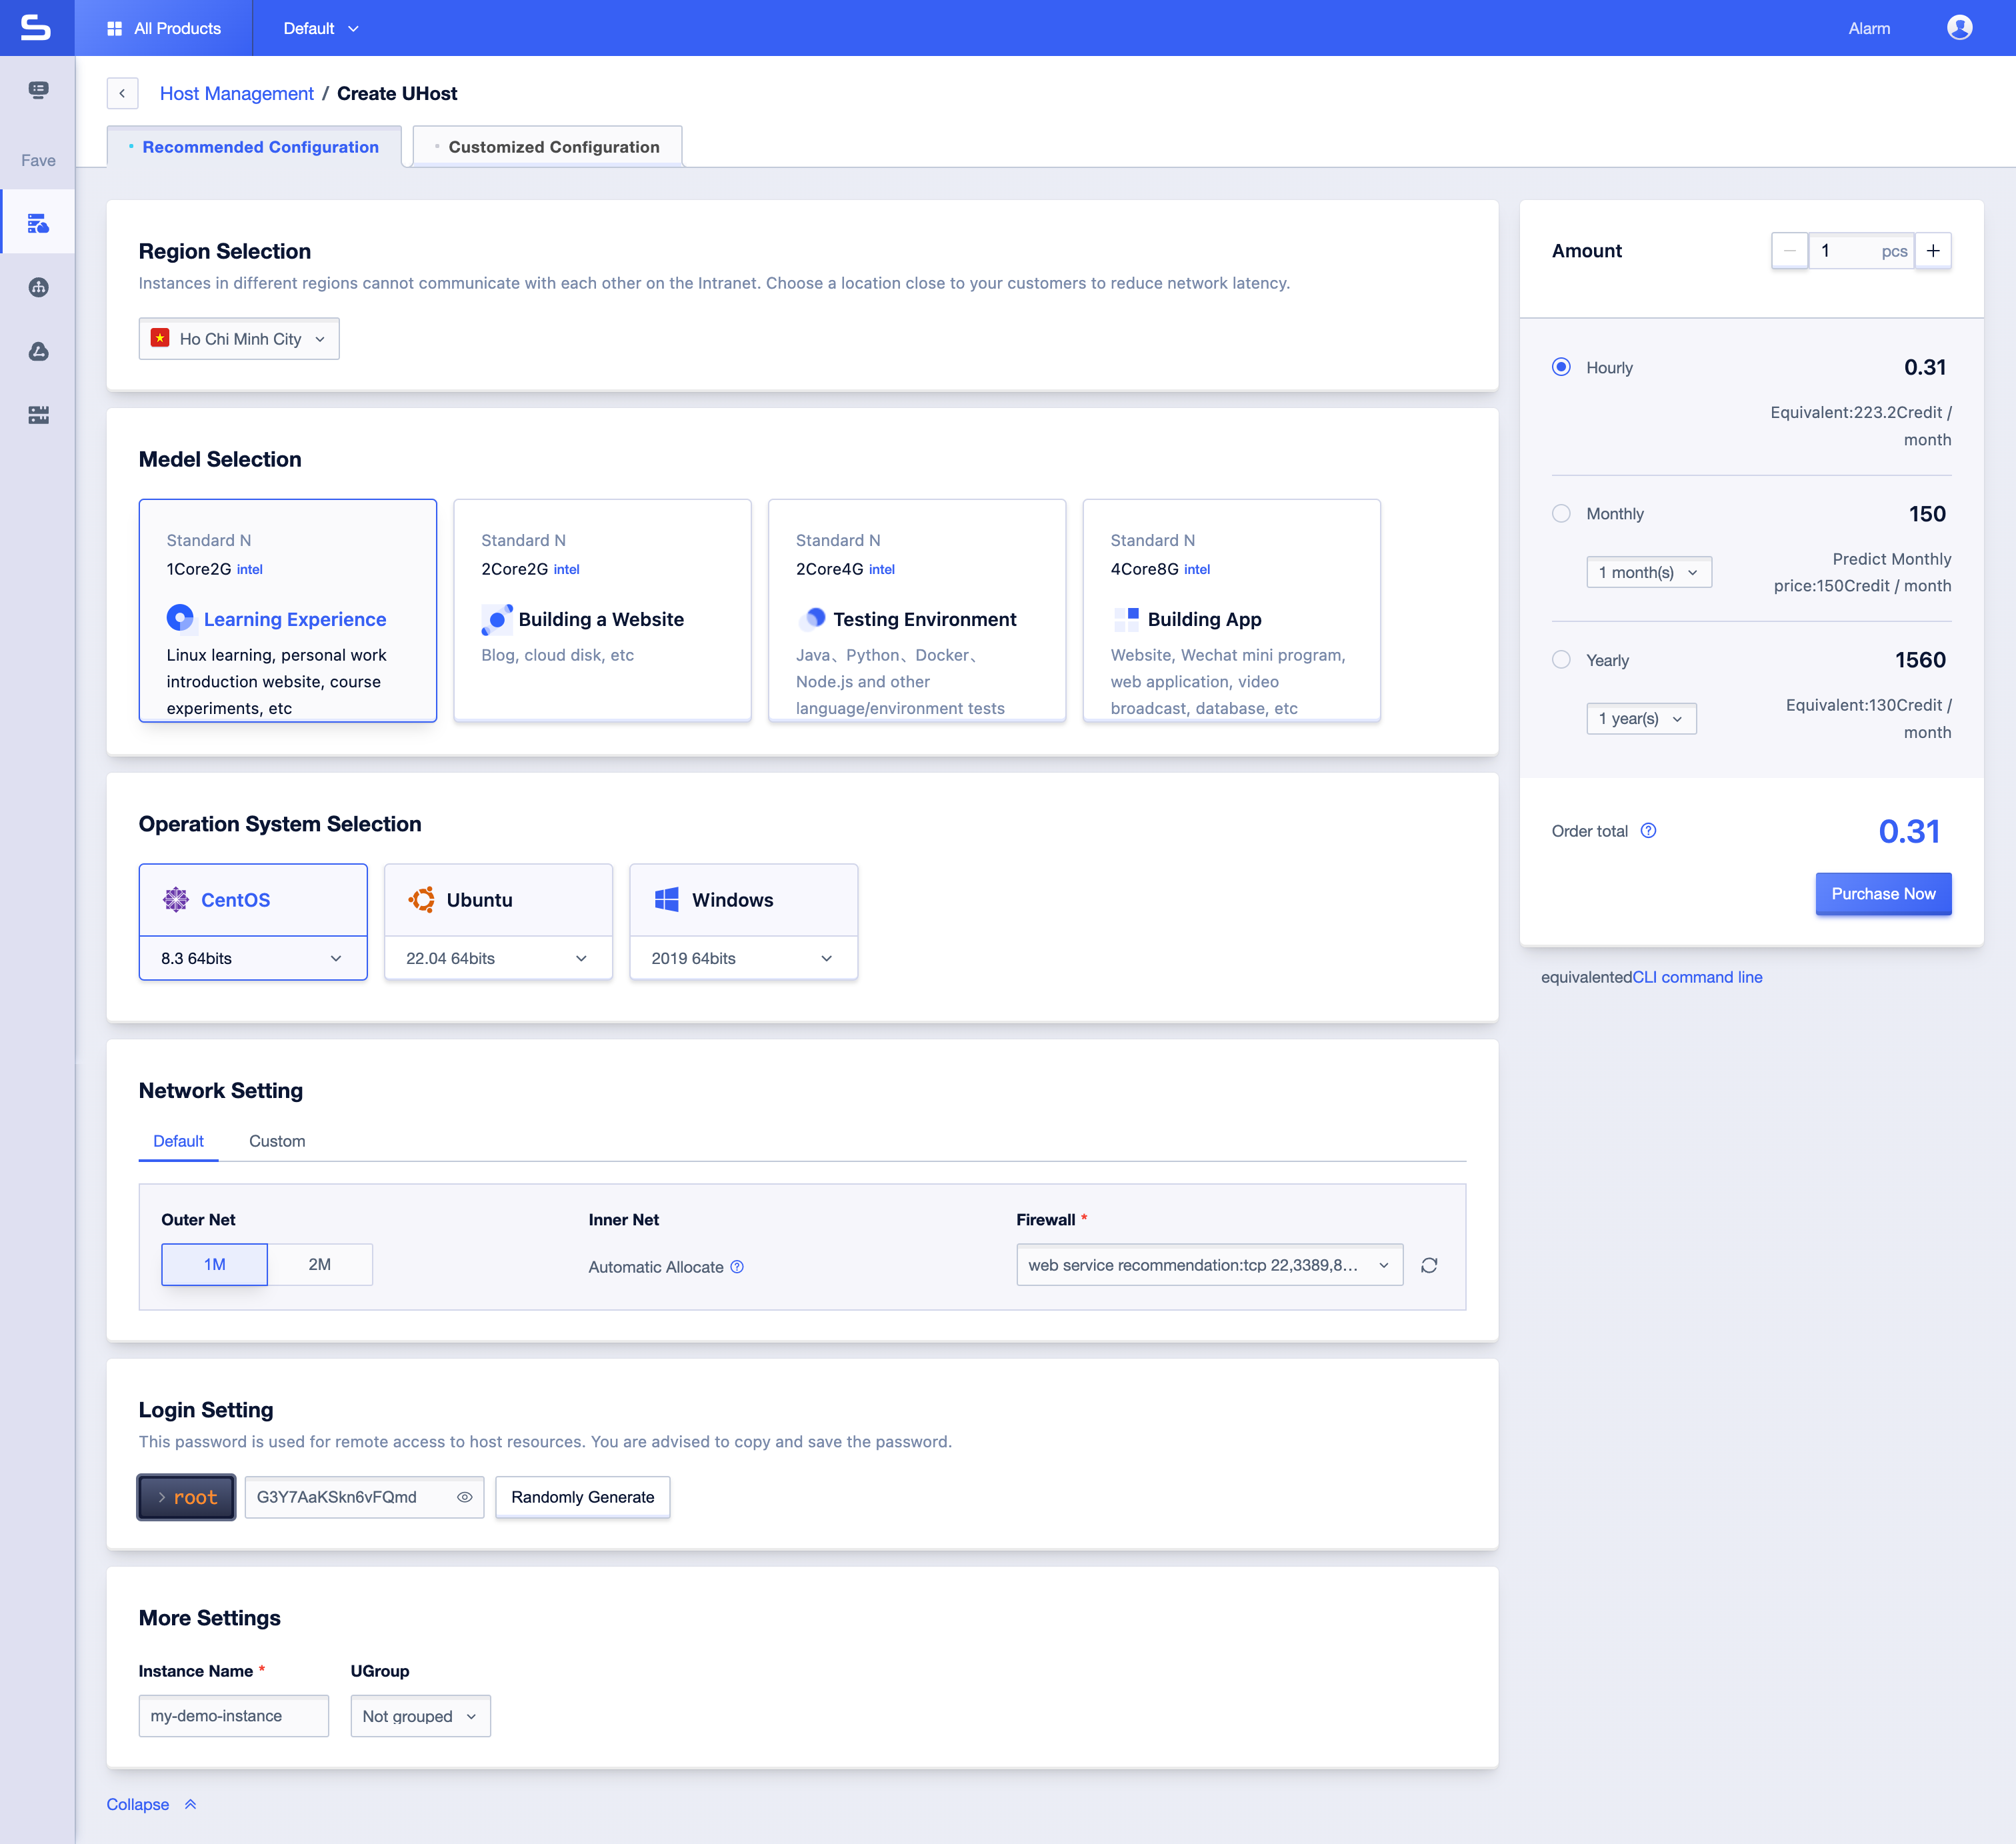
- Region Selection: Ho Chi Minh City
- Model Selection: Select model based on your need (Example: 1Core2Gb).
- Operating System: Select CentOS, Ubuntu or Windows
- Leave it as default value: 1Mb network bandwidth and firewall allowed HTTP, HTTPS, RDP, SSH.
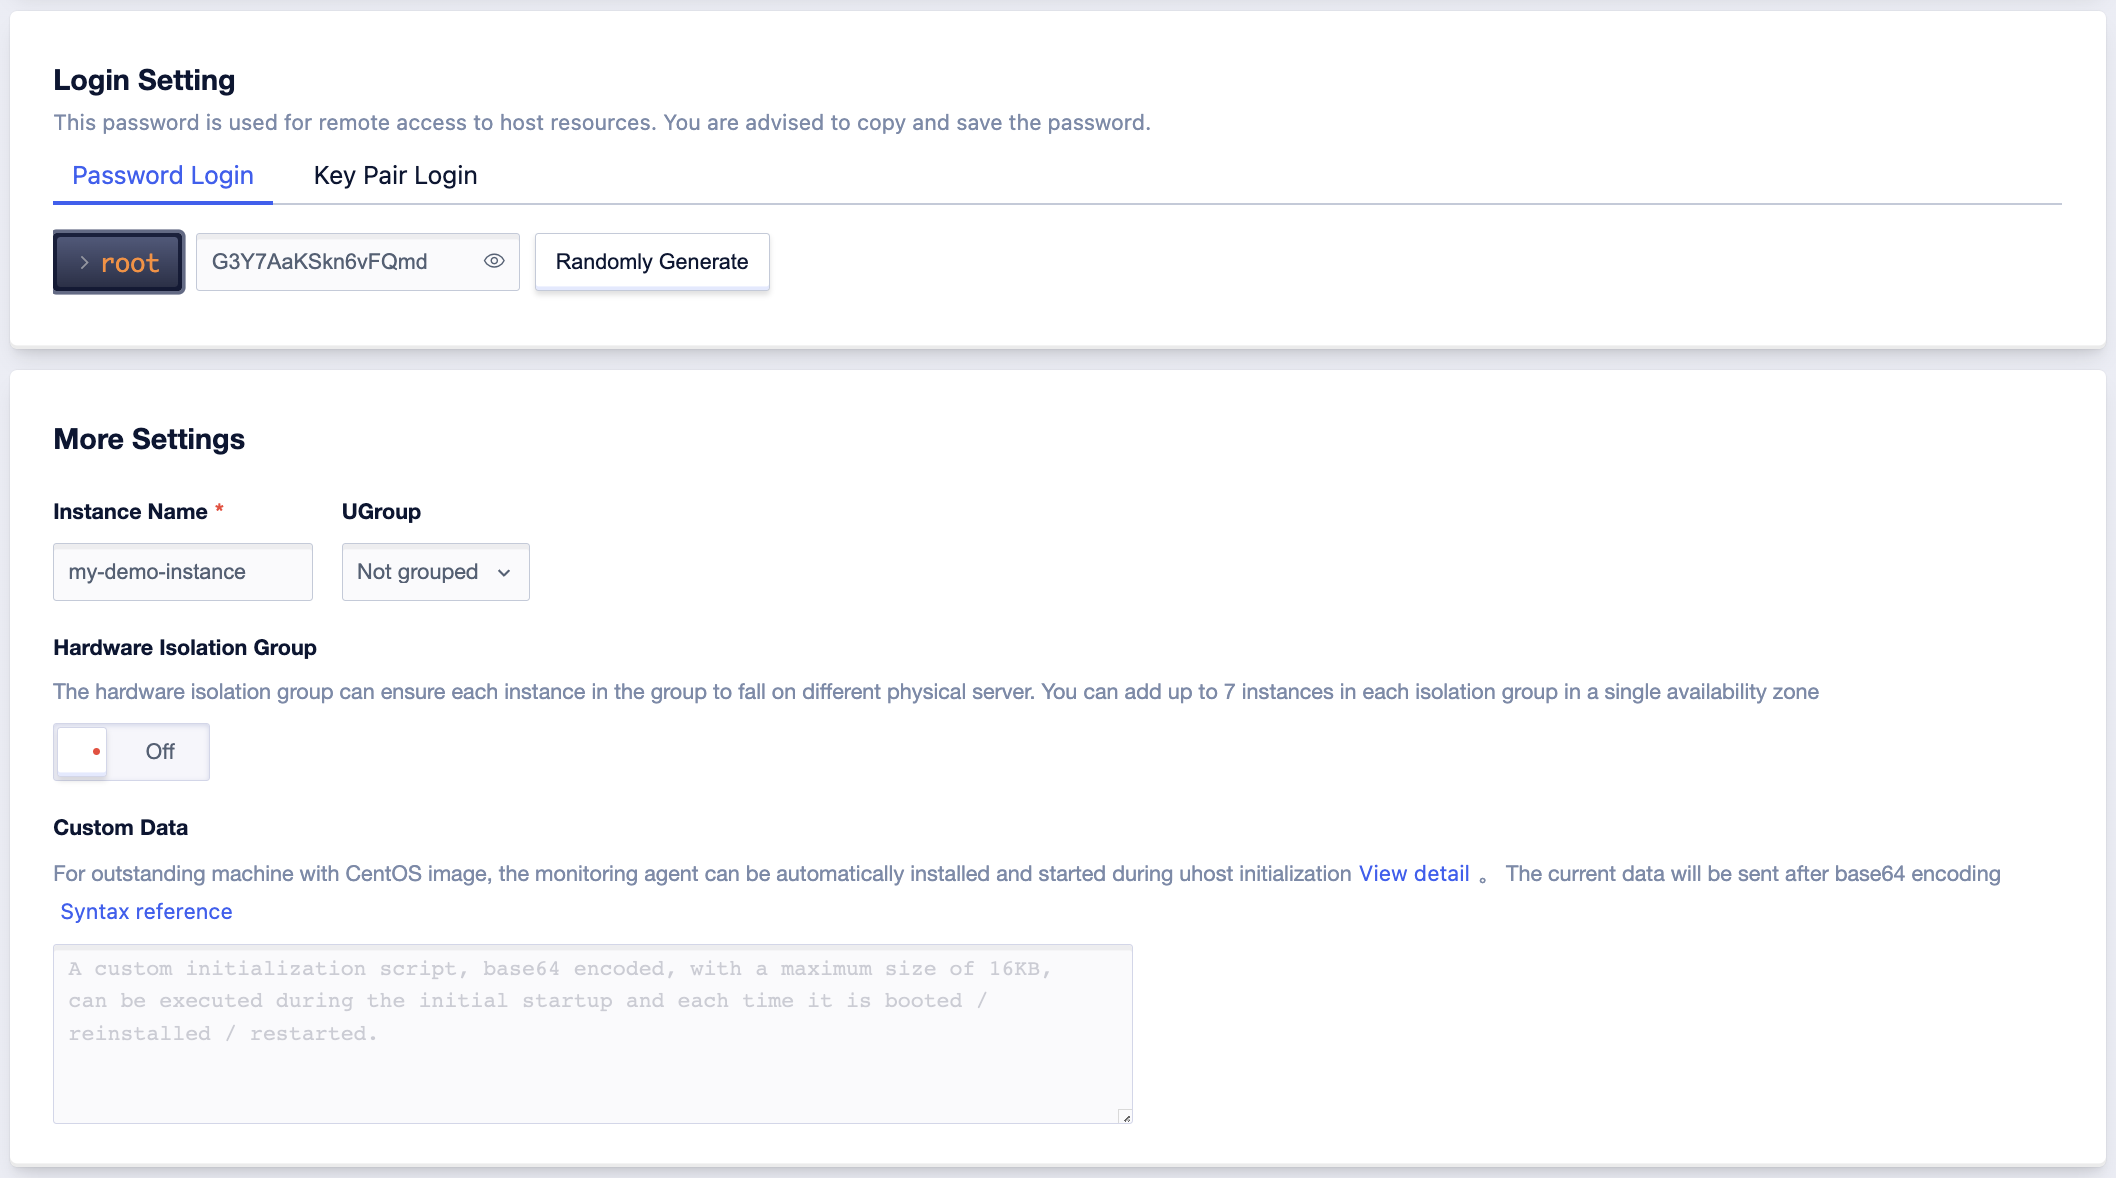
- Login Setting: Set the password to access your VM
- Instance Name:
my-demo-instance
Step 5: If you need to customize your instance in advanced, you can toggle to Customized Configuration

Region selection: select any region that matched your need (Choose a location close to your customers to reduce network latency).
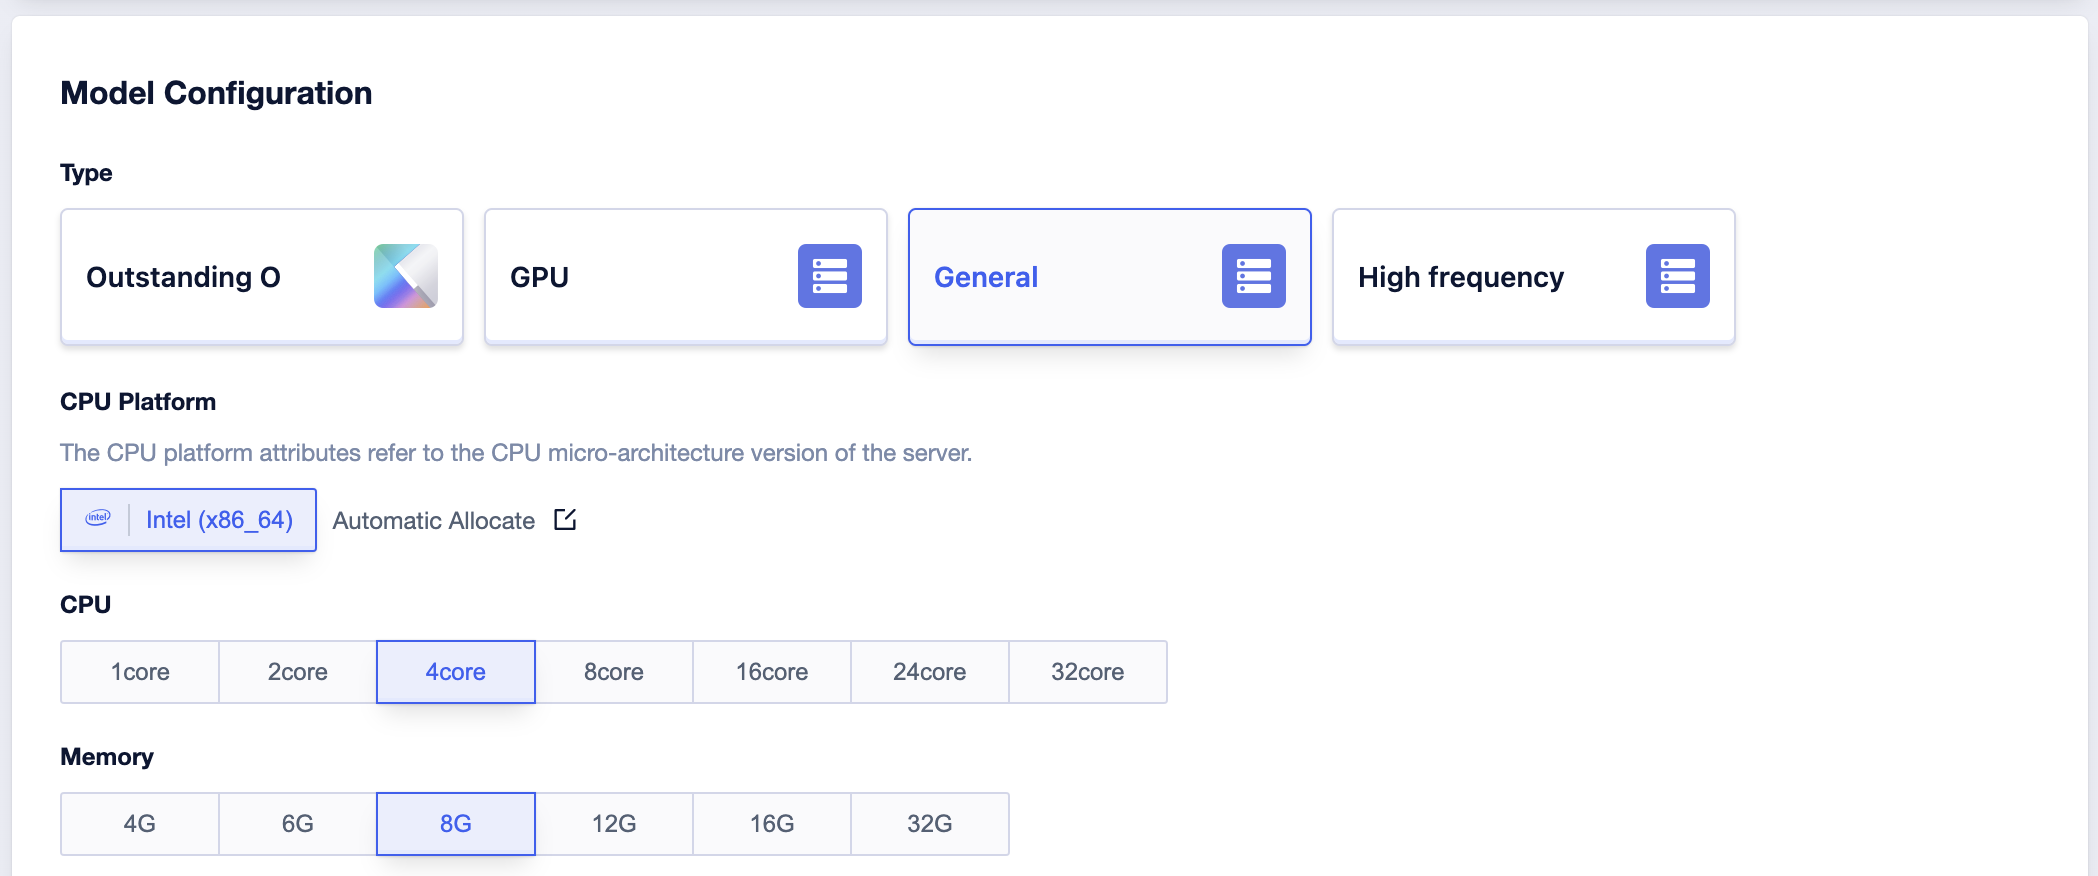
Model Configuration: Select between Outstanding, GPU, General and High frequency model, you can also customize the VM CPU & Memory for different purposes.
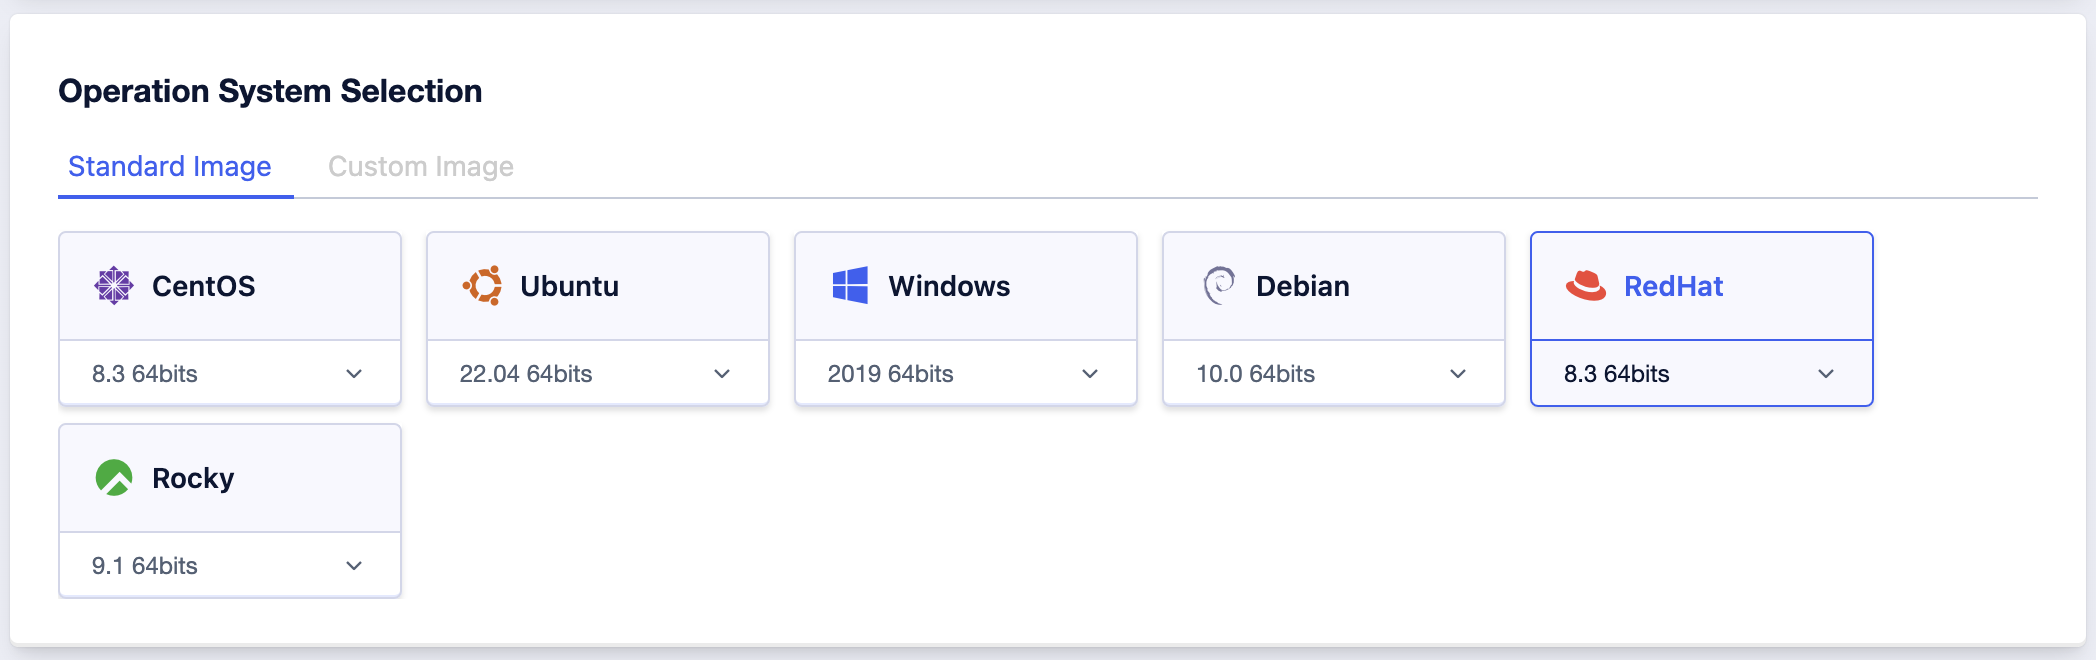 Operating System Selection: Select your desired OS (CentOS, Ubuntu, Windows, Debian, RedHat, Rocky).
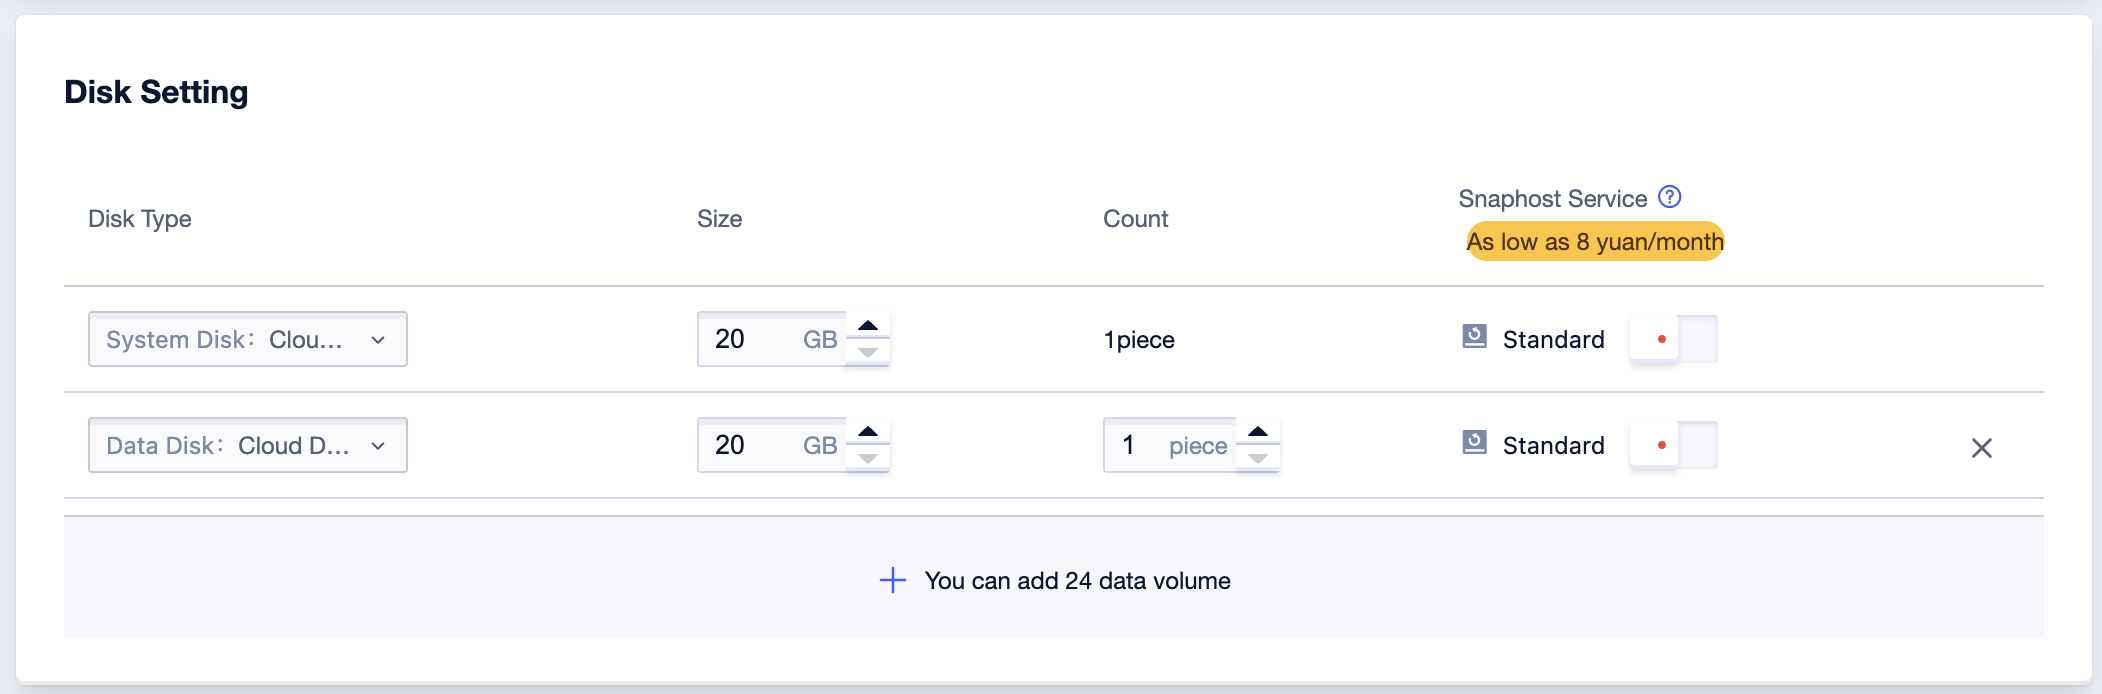 Disk Setting: Leave it as default value or add/remove the data/os disks.
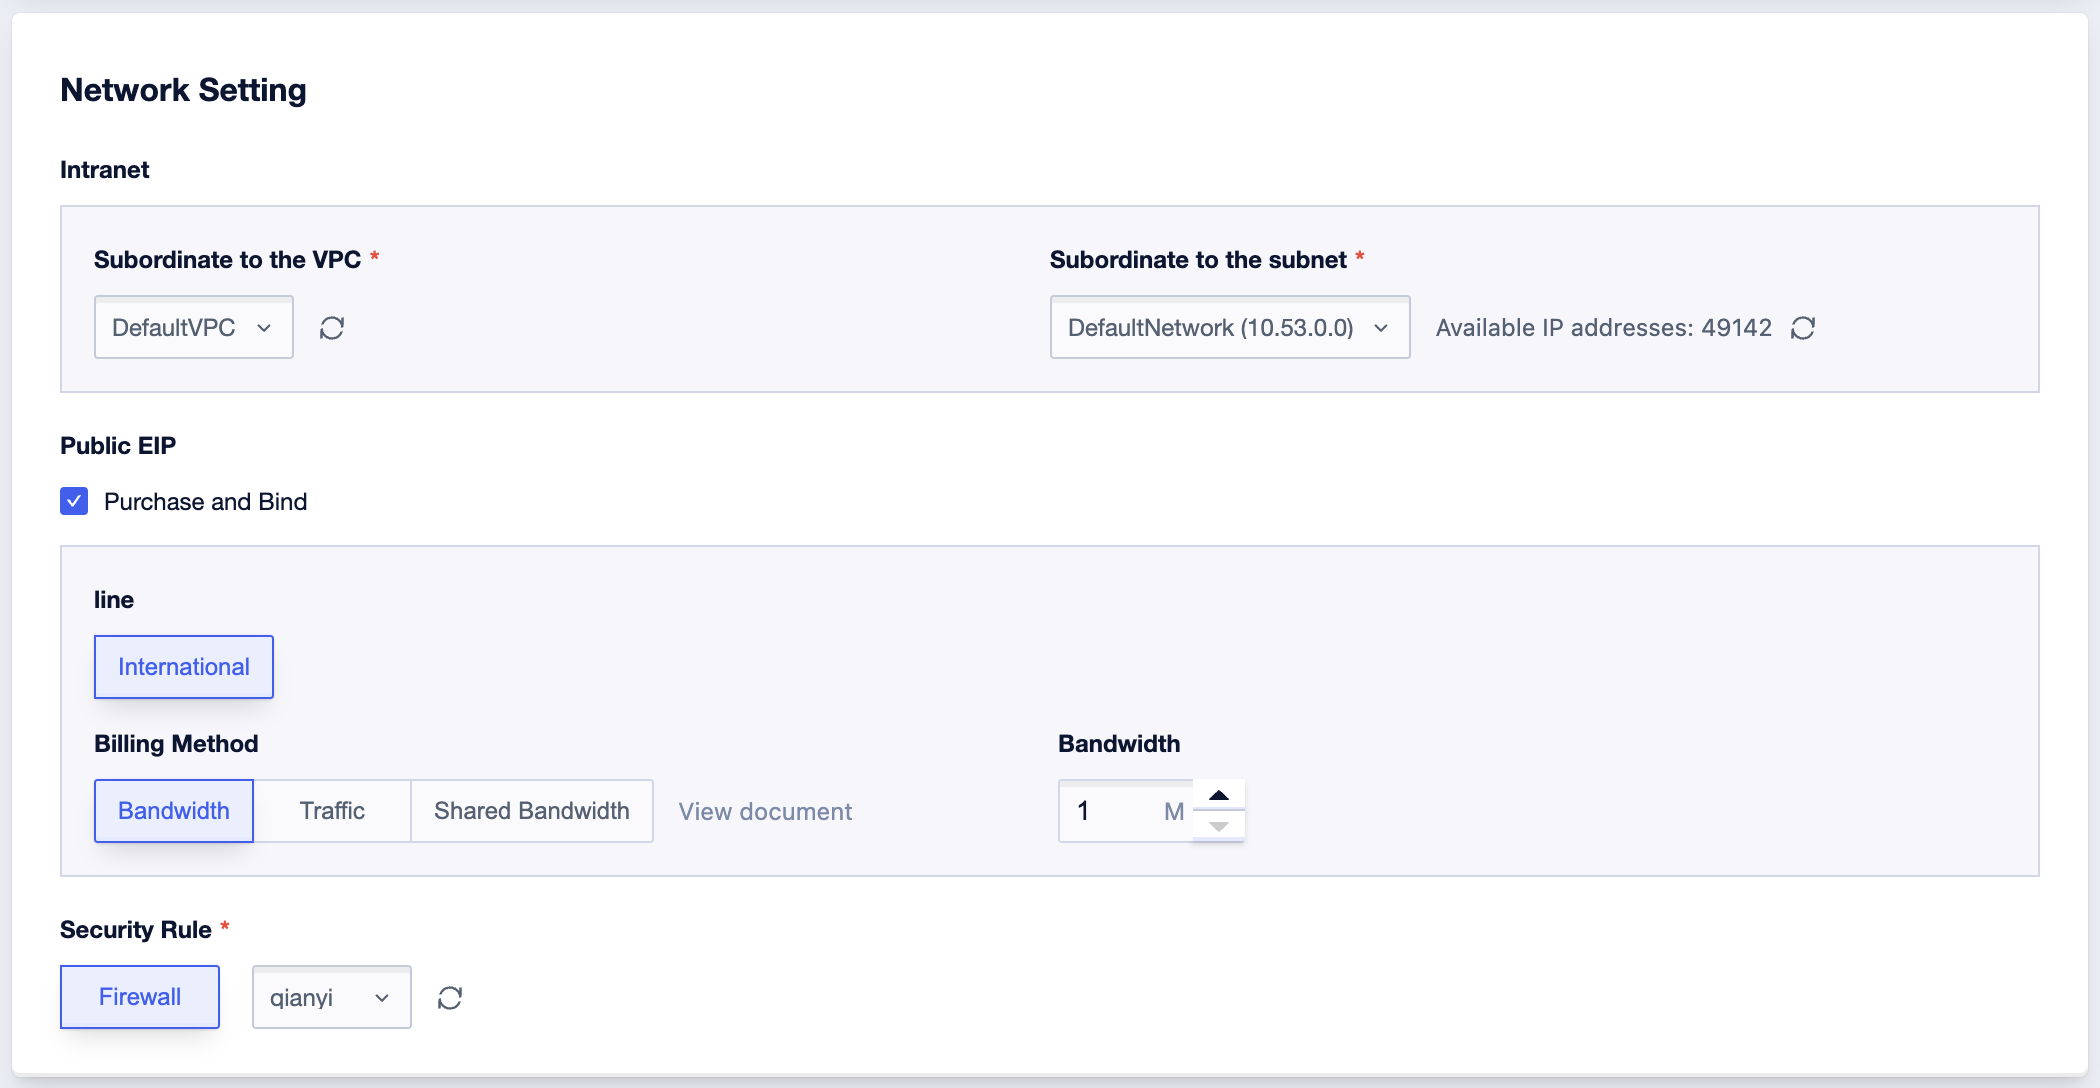 Network Setting: Configure the VPC, Subnet and Public IP Address.
 Login Setting: Set your instance name & password for the root account (you will need it later to access your host).
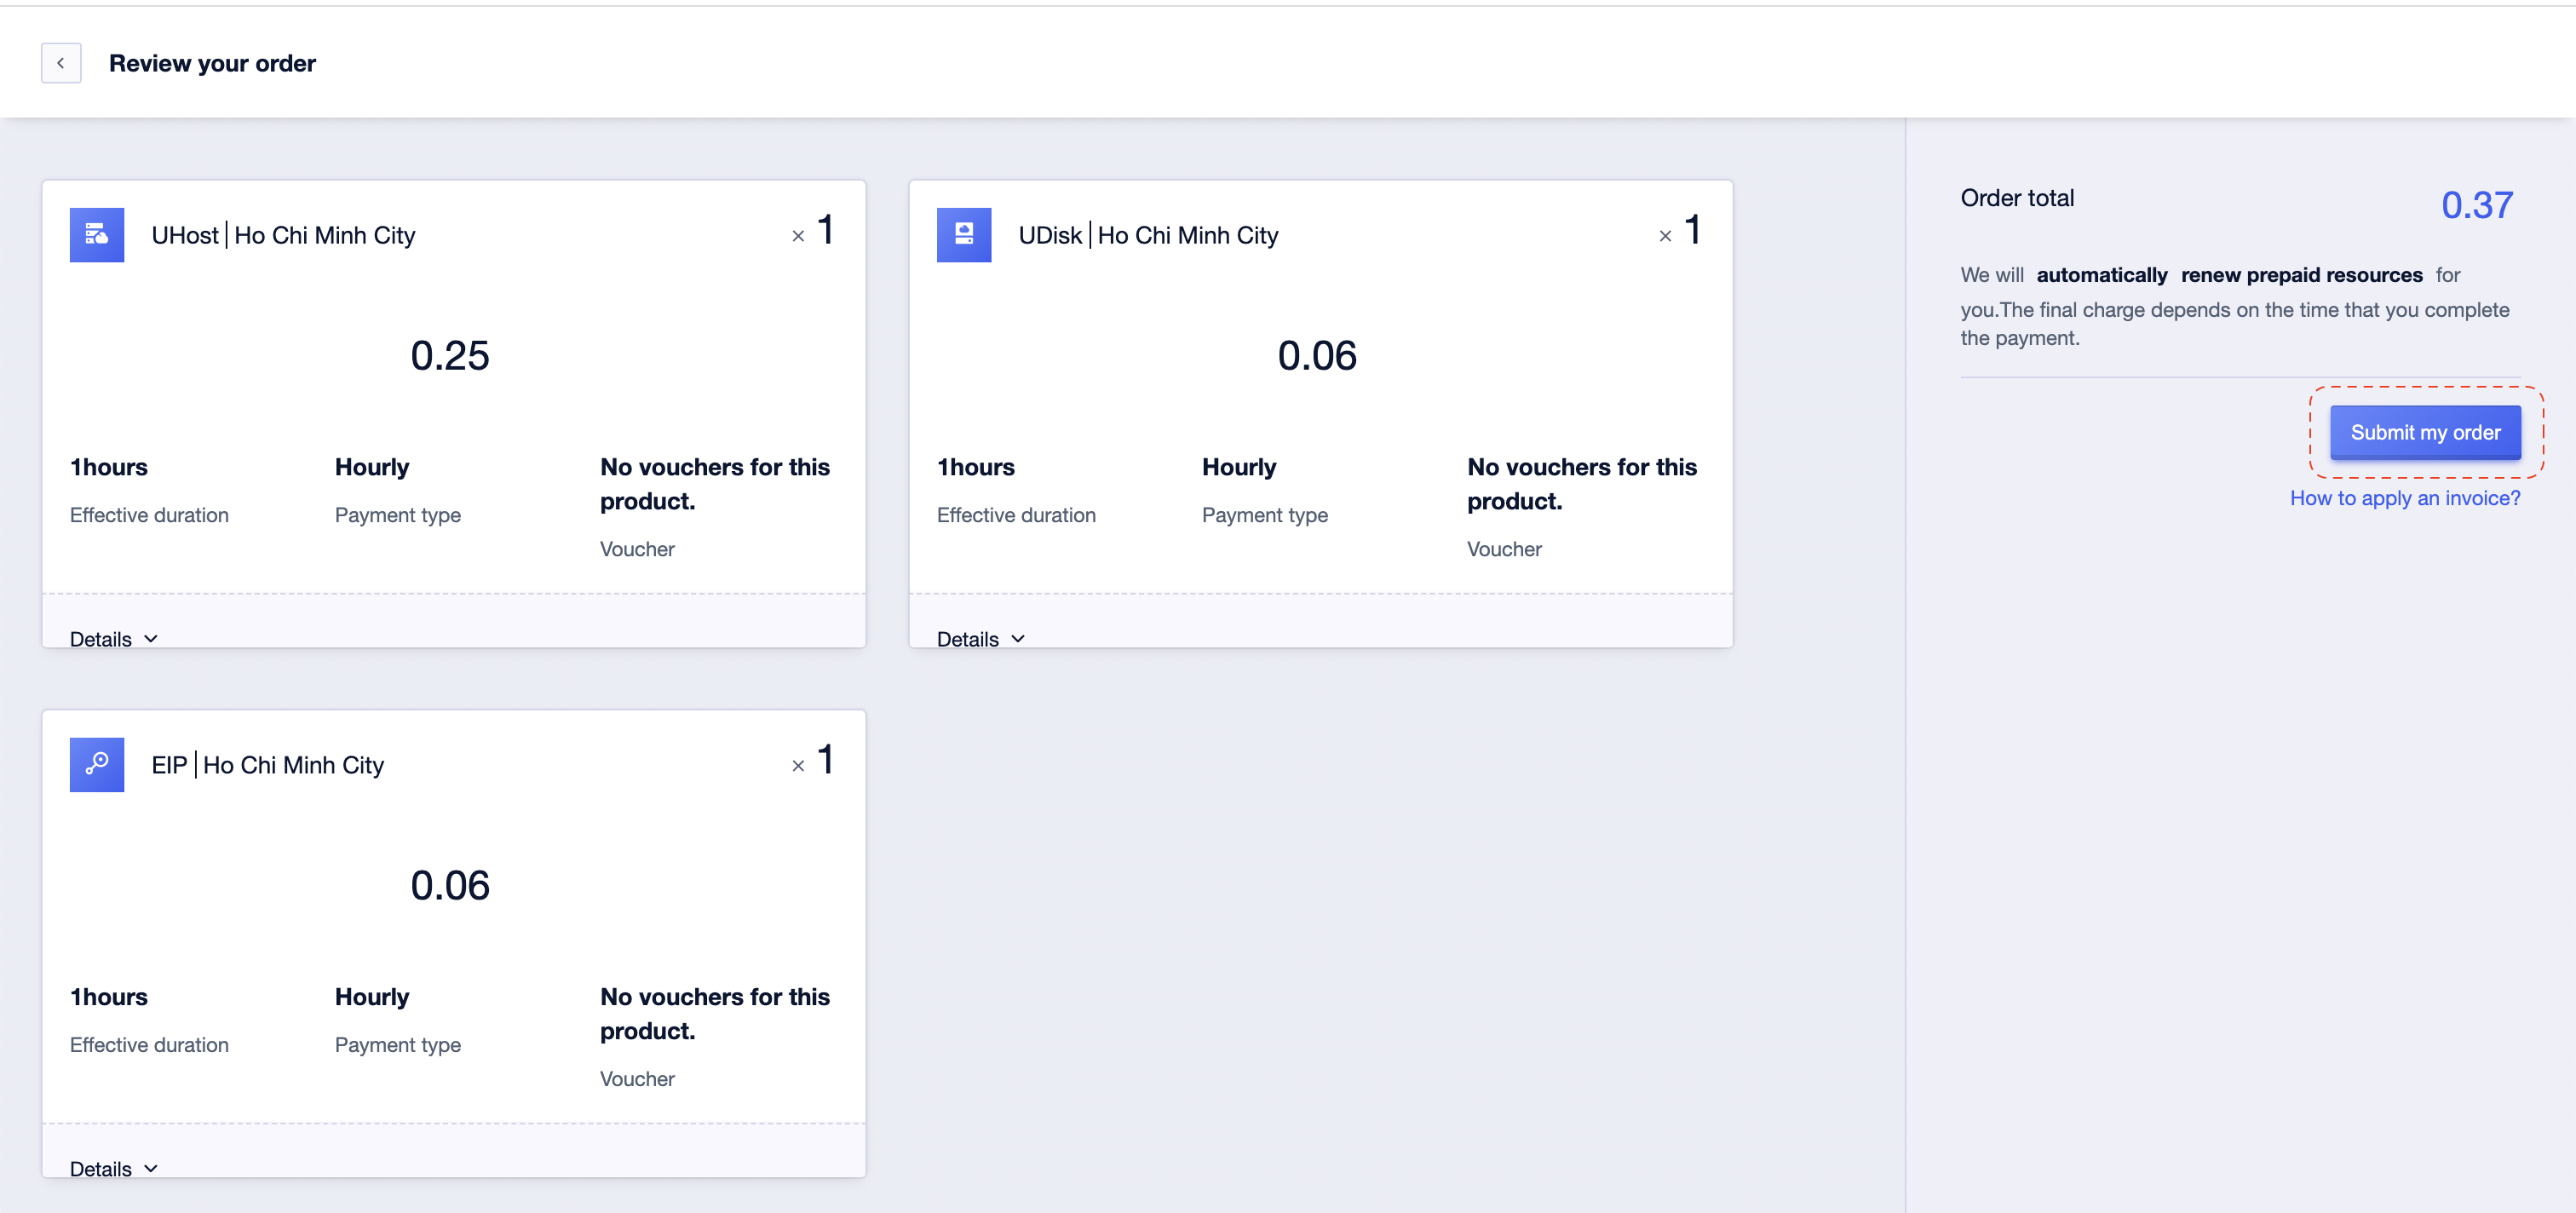
Step 6: Review the pricing and click Purchase Now to buy your VM.

Step 7: Review your order and click Submit my order to finalize the process.
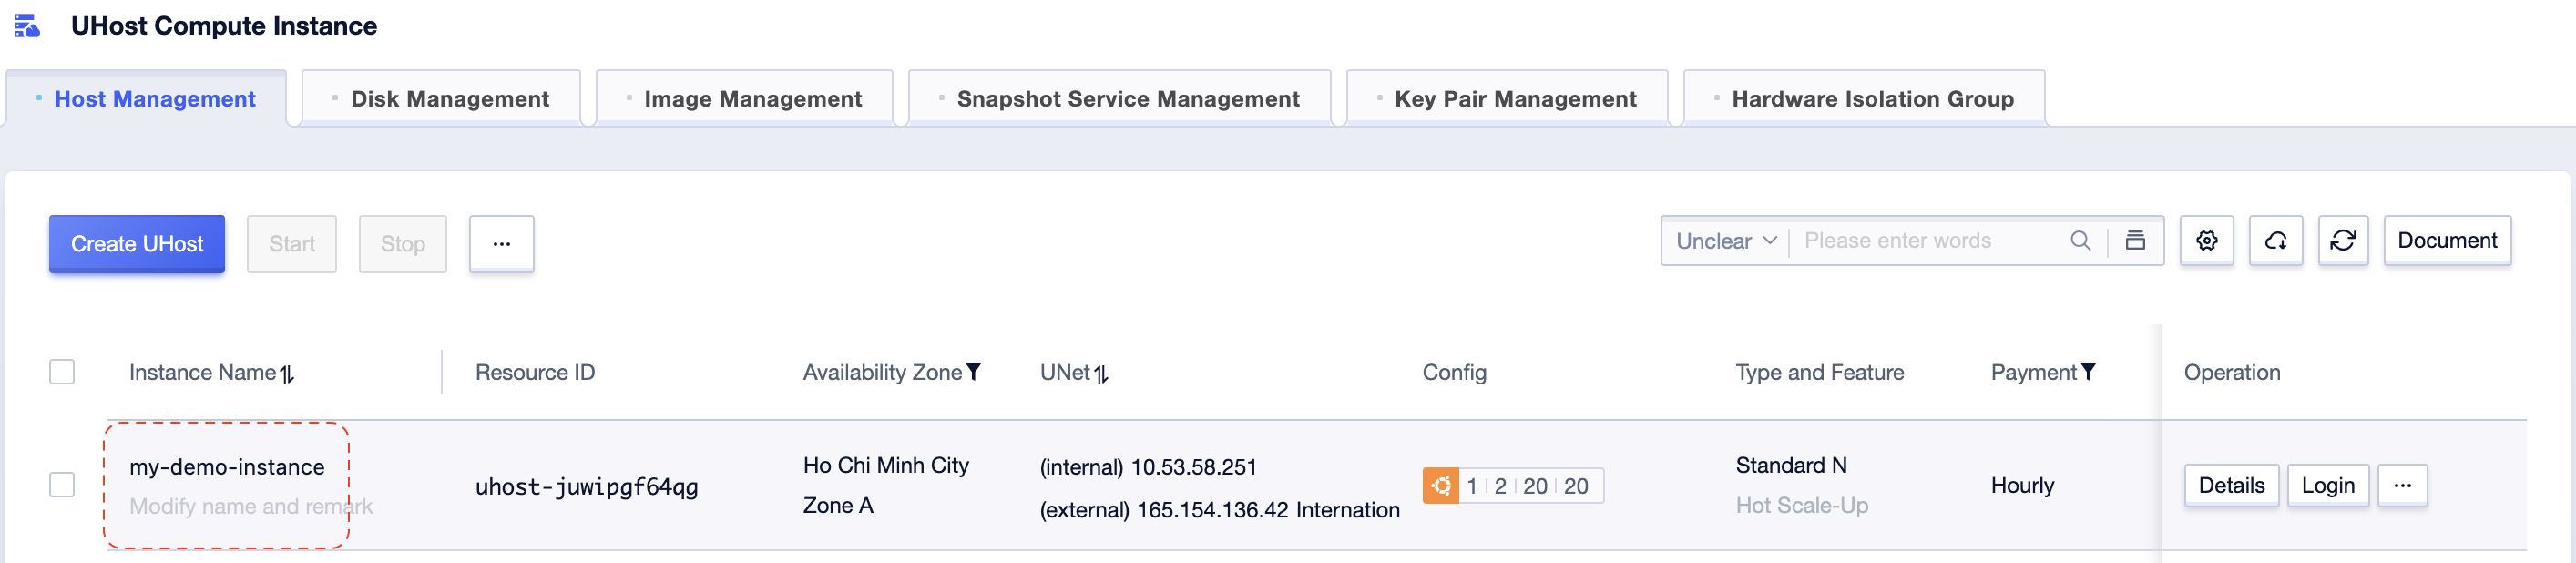
Step 8: Wait for a while and you will be redirected to the UHost Compute Instance, your host (VM) should be listed here.
2. How to SSH to your VM?
Step 1: From the VM listing page, click in the VM’s name (ex: my-demo-instance).
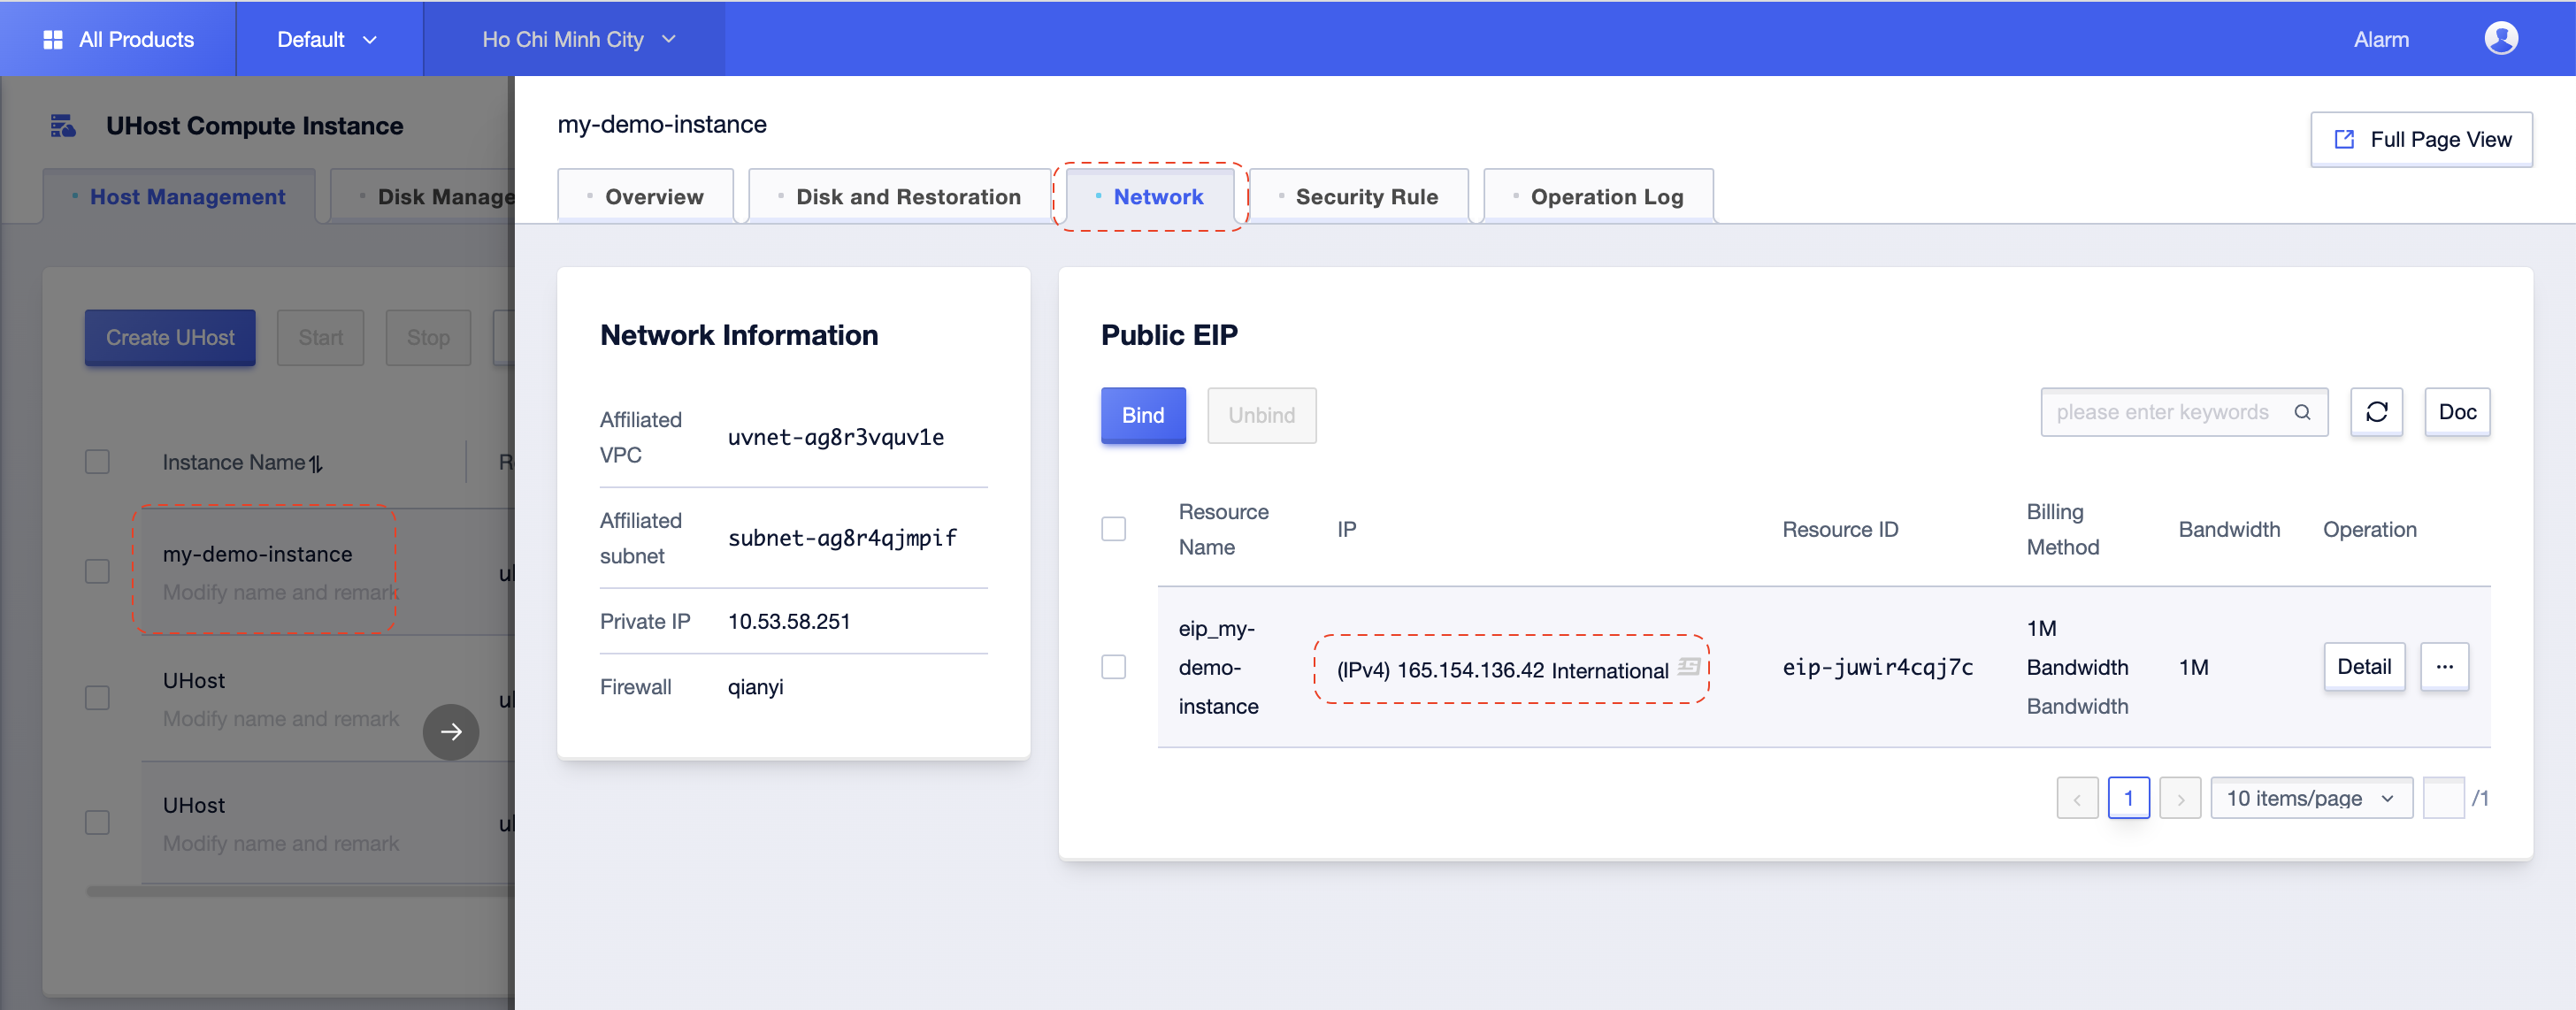
In the VM detail popup, select Network tab and copy the public IP address from here.
Step 2: Open terminal on your PC/Laptop and ssh to VM.
scloud ~ % ssh ubuntu@165.154.136.42
ubuntu@165.154.136.42's password:
Welcome to Ubuntu 22.04.1 LTS (GNU/Linux 5.15.0-43-generic x86_64)

 * Documentation:  https://help.ubuntu.com
 * Management:     https://landscape.canonical.com
 * Support:        https://ubuntu.com/advantage

  System information as of Tue Jun  6 03:59:45 PM +07 2023

  System load:  0.0                Processes:             91
  Usage of /:   32.3% of 19.51GB   Users logged in:       0
  Memory usage: 8%                 IPv4 address for eth0: 10.53.58.251
  Swap usage:   0%


0 updates can be applied immediately.


The list of available updates is more than a week old.
To check for new updates run: sudo apt update

ubuntu@10-53-58-251:~$ pwd
/home/ubuntu
3. Some basic actions with your VM
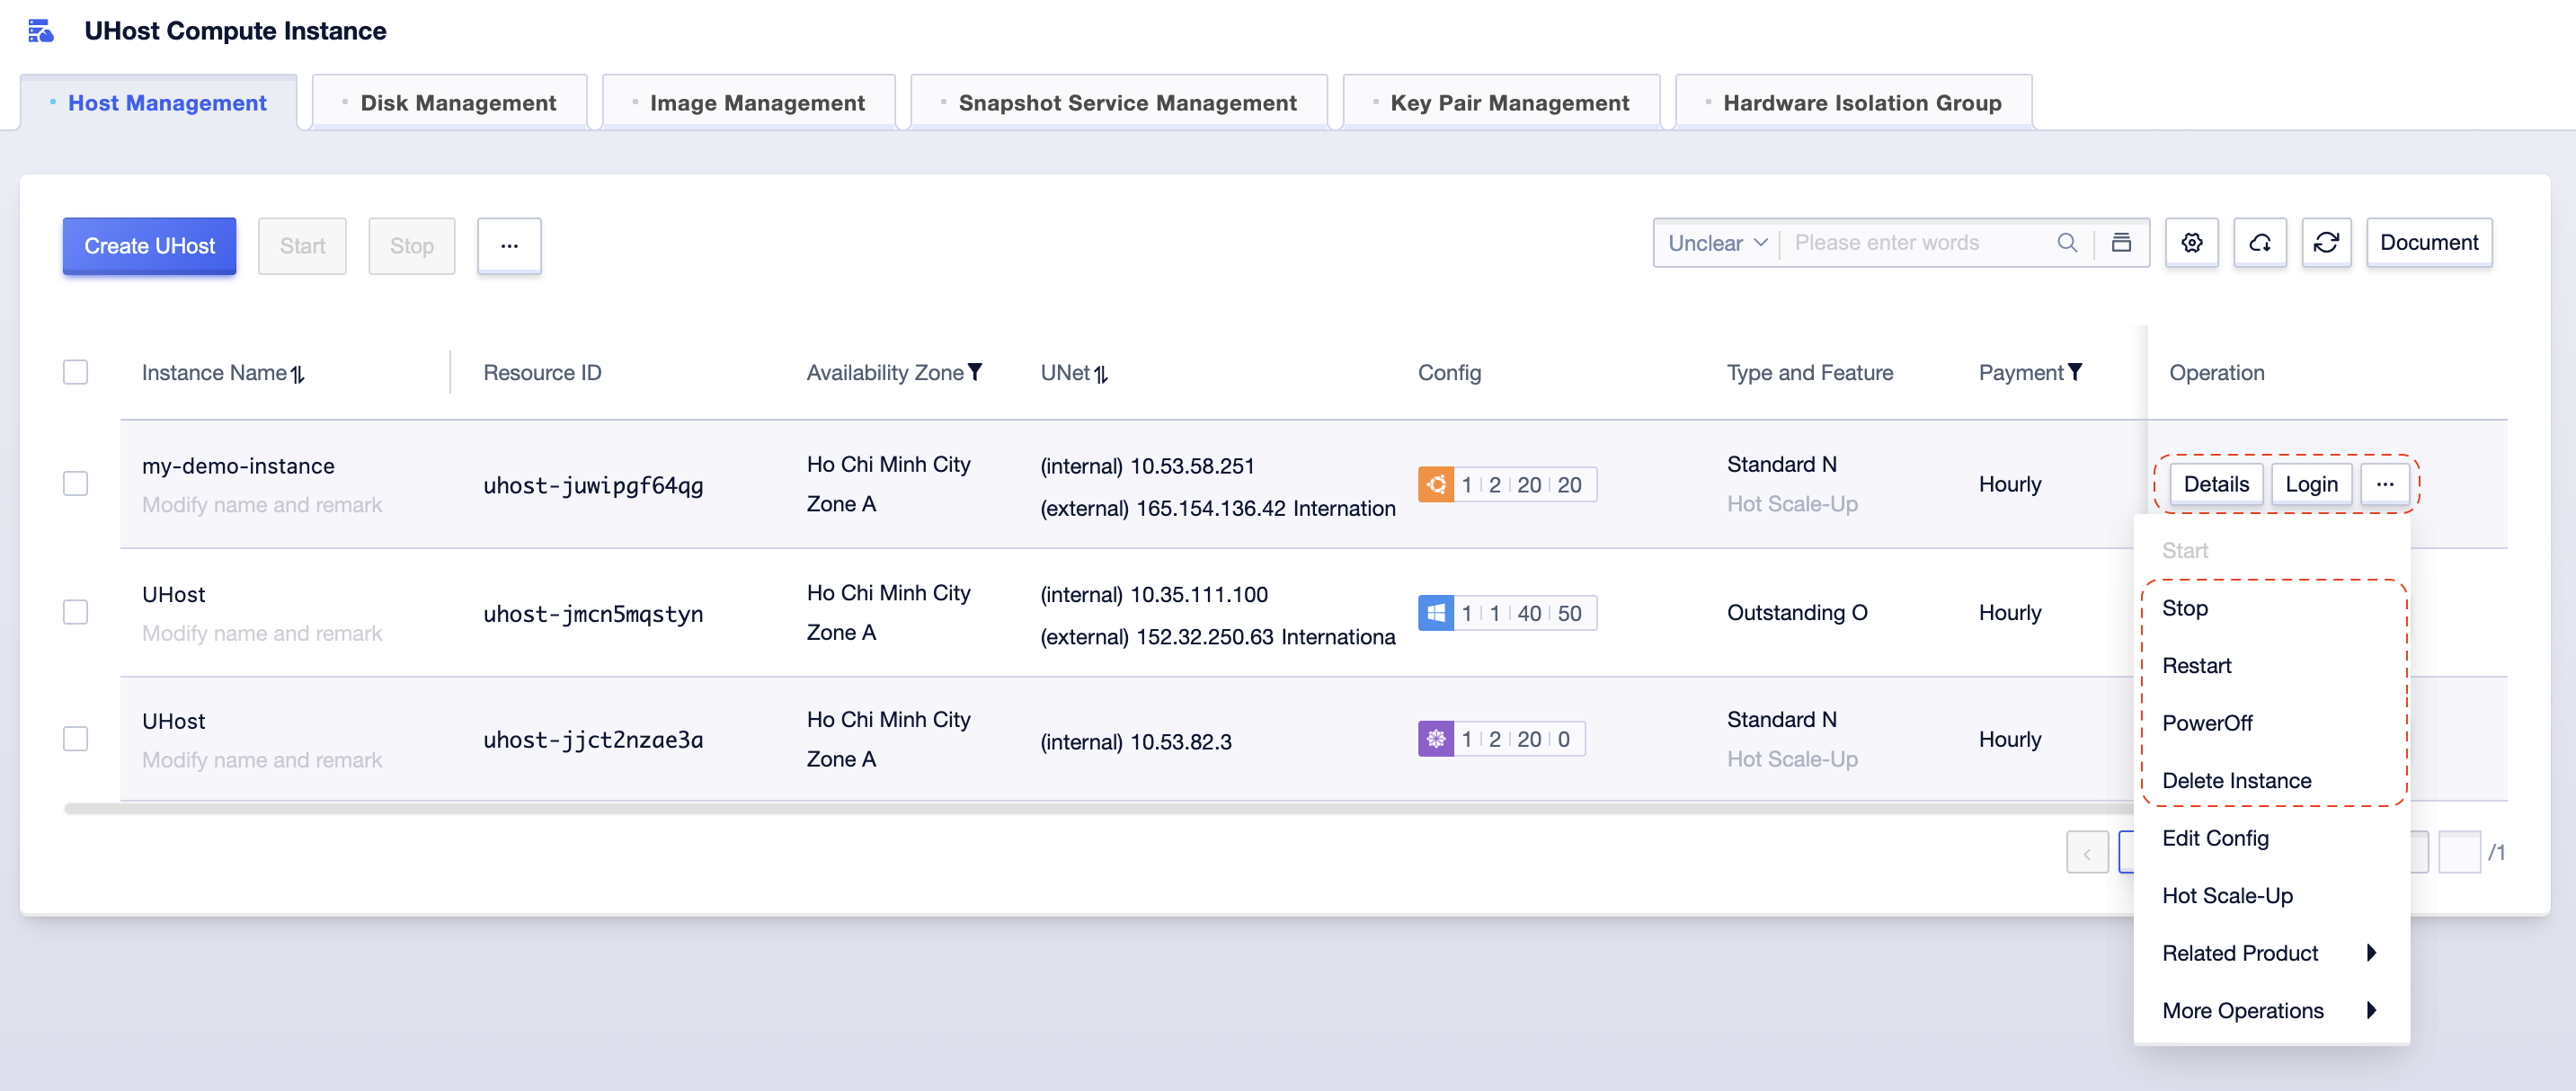
- Open VM detail panel: From the VM listing page, click
Detailsbutton. - SSH to VM in browser: From the VM listing page, click
Loginbutton, then enter username, password to login. - Stop VM: From the VM listing page, click
3-dotsmenu, then clickStop. - Restart VM: From the VM listing page, click
3-dotsmenu, then clickRestart. - Power Off VM: From the VM listing page, click
3-dotsmenu, then clickPowerOff. - Delete VM: From the VM listing page, click
3-dotsmenu, then clickDelete Instance.